
Longtubes and twin 3" for the Burb
 Feb 21, 2010 | 10:57 PM
#1

Thread Starter
TECH Apprentice
Joined: Jul 2005
Posts: 363
Likes: 1
From: Melbourne, Oz
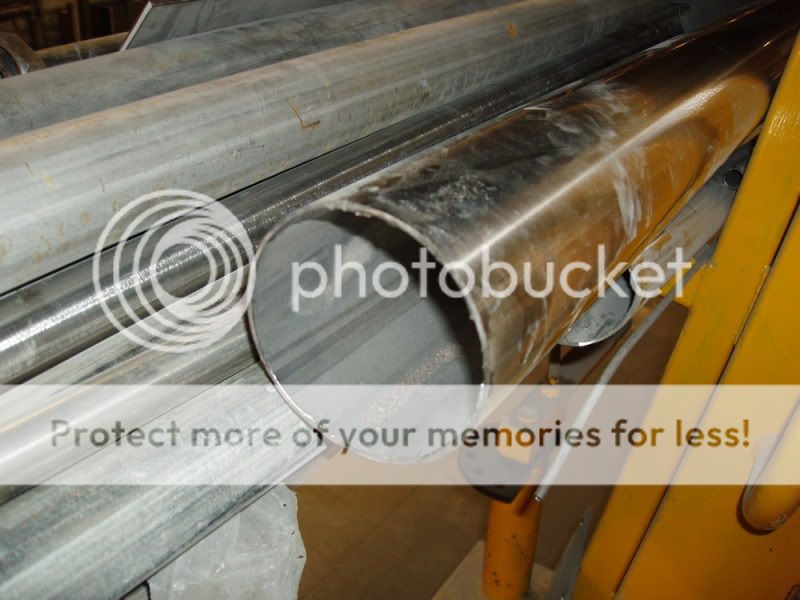
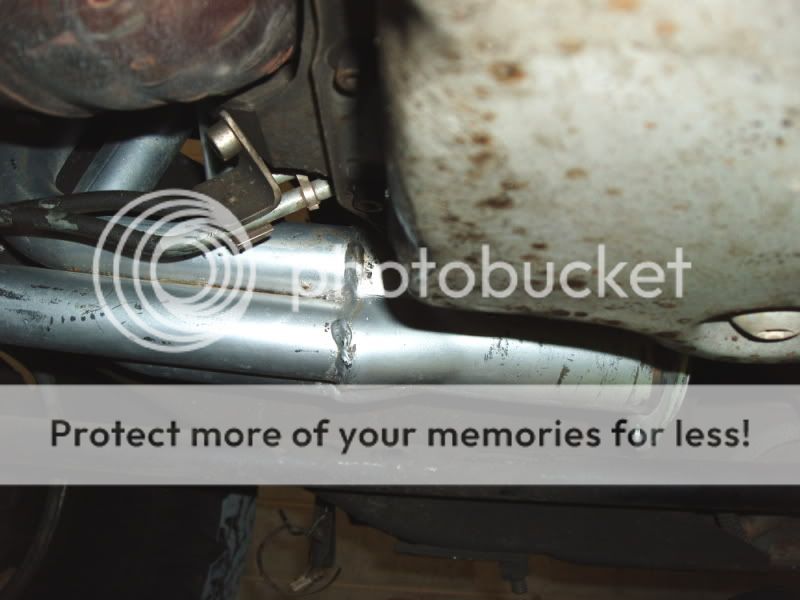
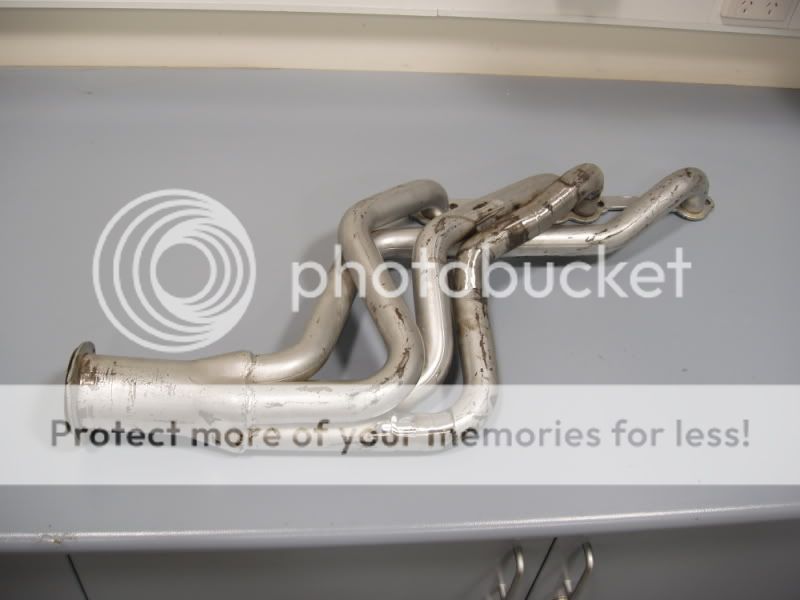
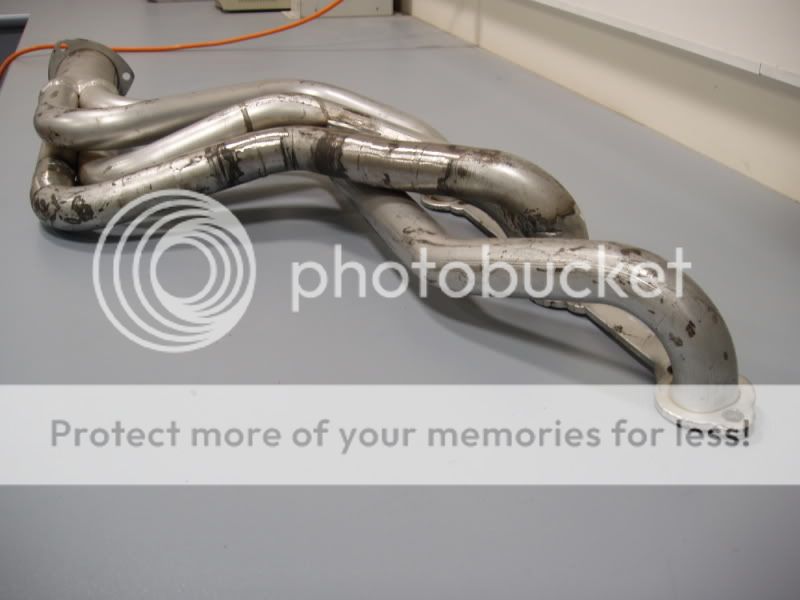
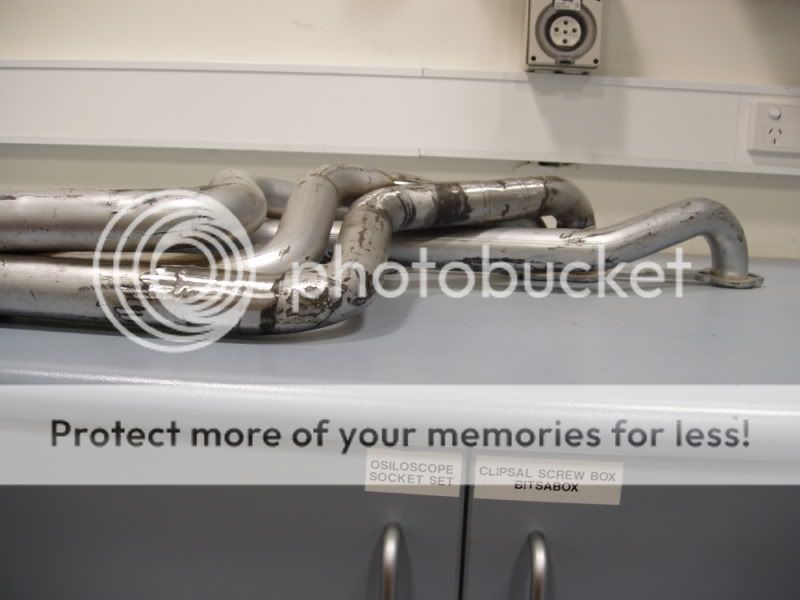
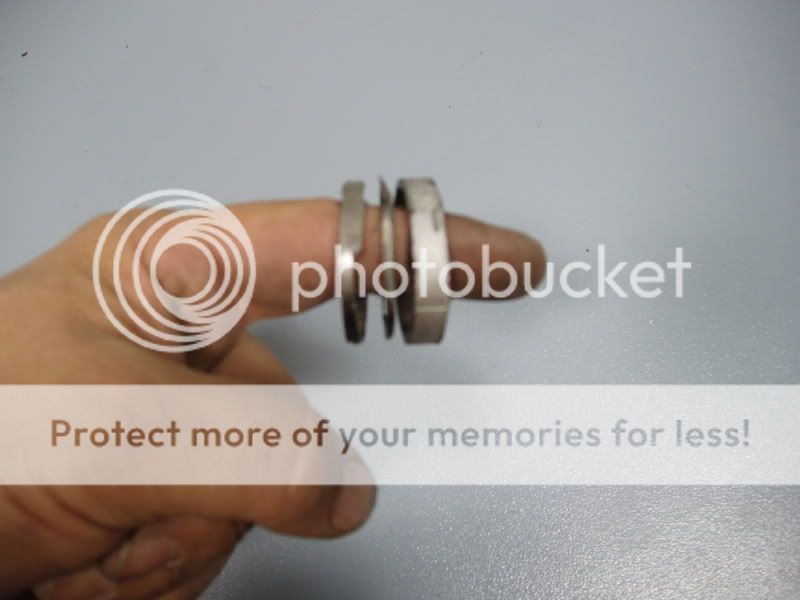
Working on converting a set of Camaro headers to fit my Burb.
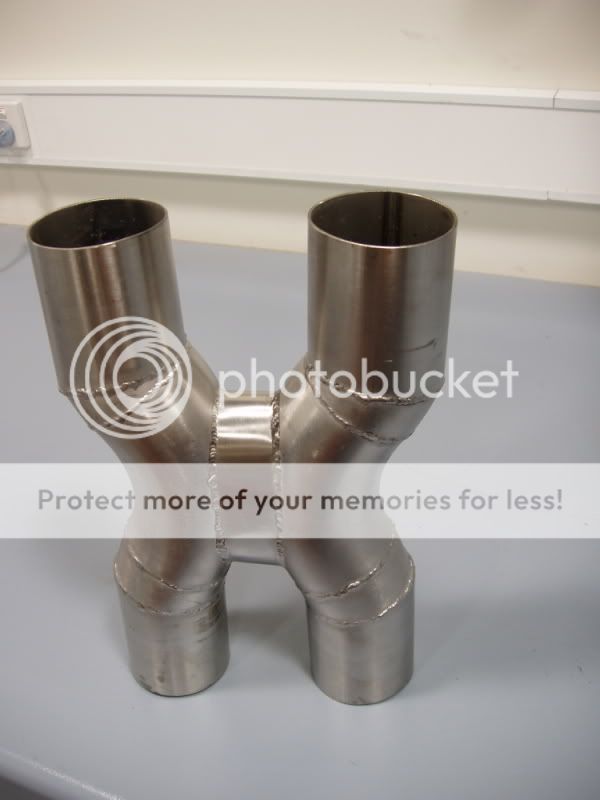
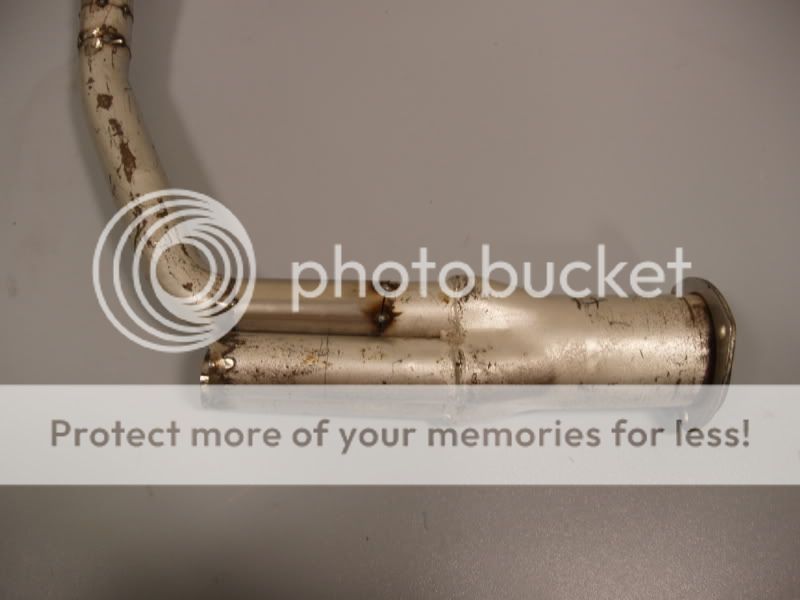
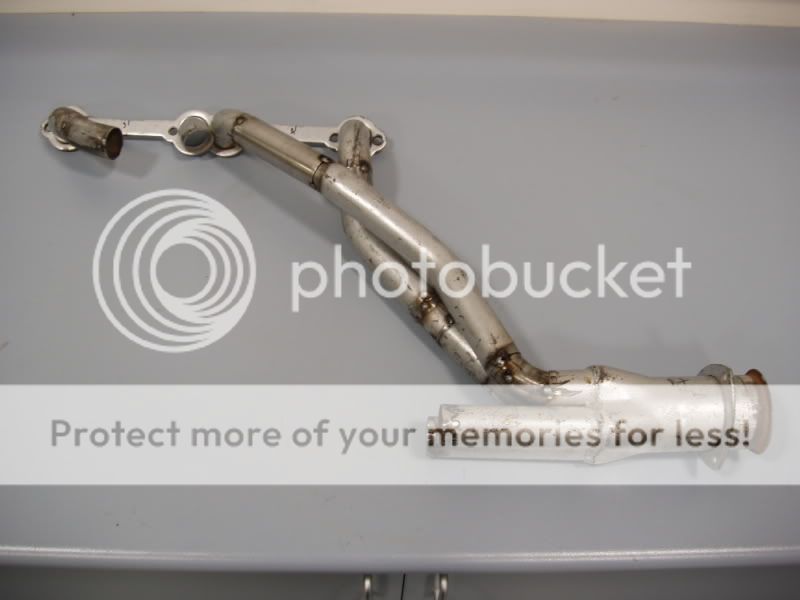
Last night I made the X pipe.
Two 3" stainless 90deg bends, some 3" stainless tube and a piece of 4" stainless tube.
Here's what I did:
Cut a slice of 4" and put it in the vice and squash it into an oval shape.
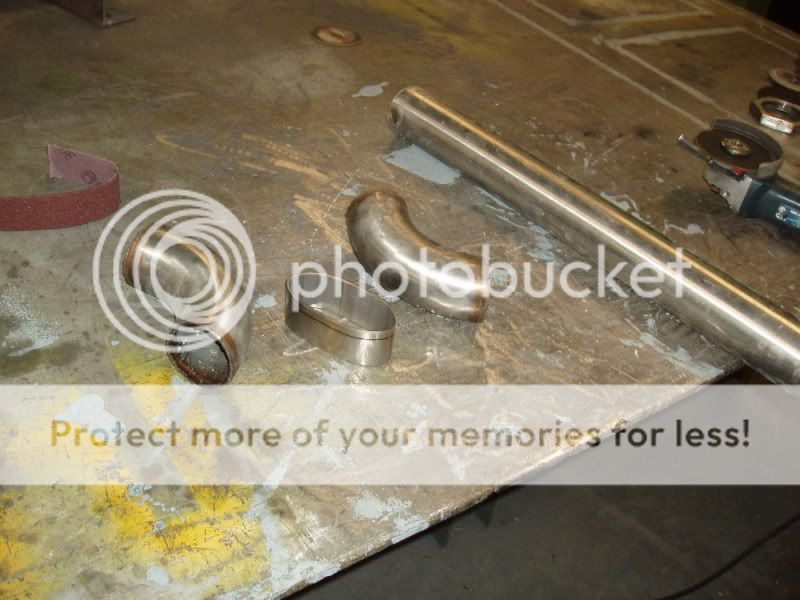
Adjust the 4" oval to fit neatly between the two bends.
Mark the oval on both bends and cut to suit.
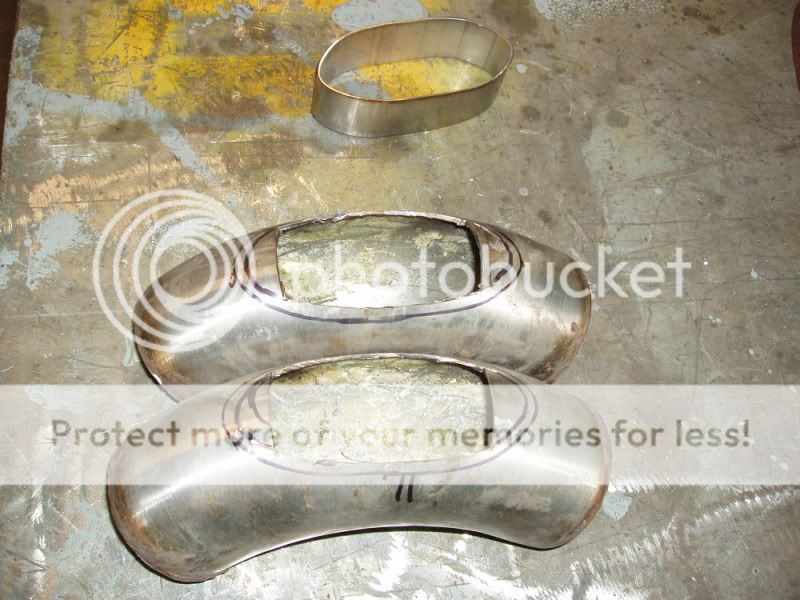
Clamp and tack.
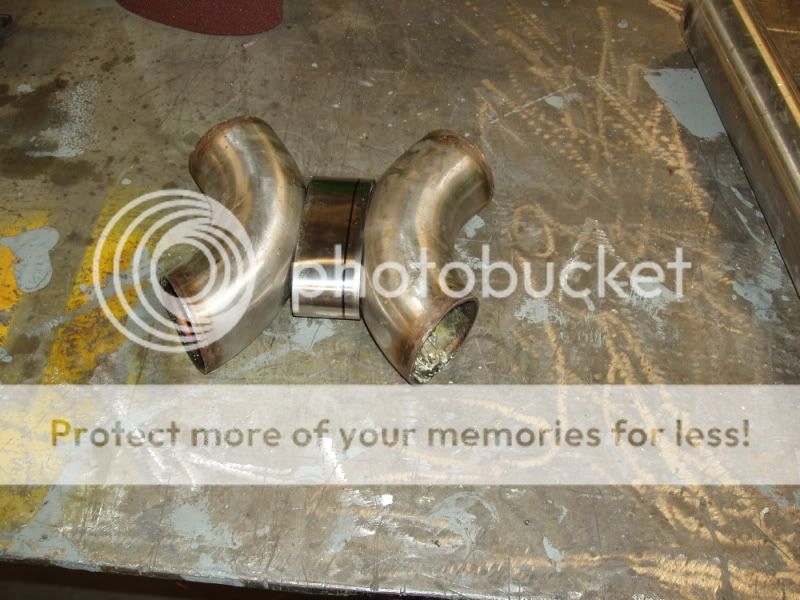
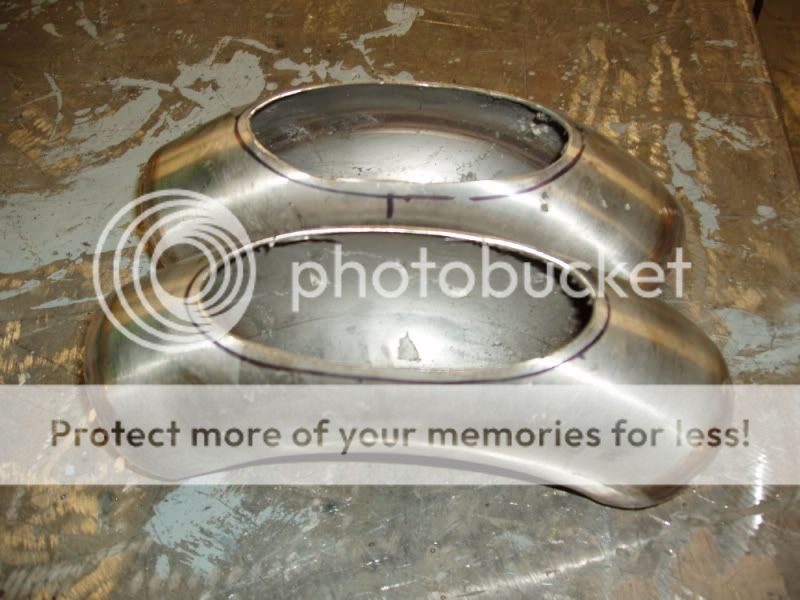
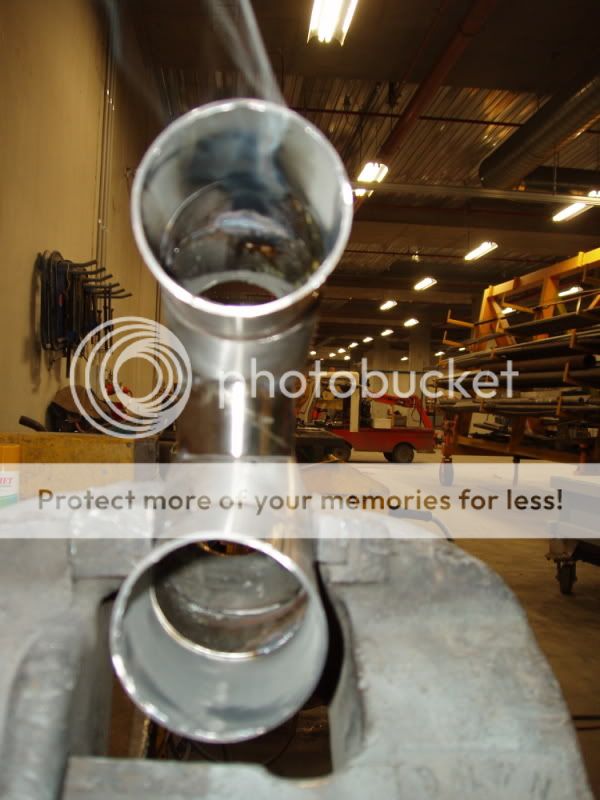
Something I didn't get a chance to take pic's of was...next I cut the ends of the bends off and spun them 180deg
to try and get a better angle to bring the pipes out straight/parrallel.
An extra couple of bends would have made this easier....but I didn't want to cut up any more as I'll
need them for the rest of the exhaust.
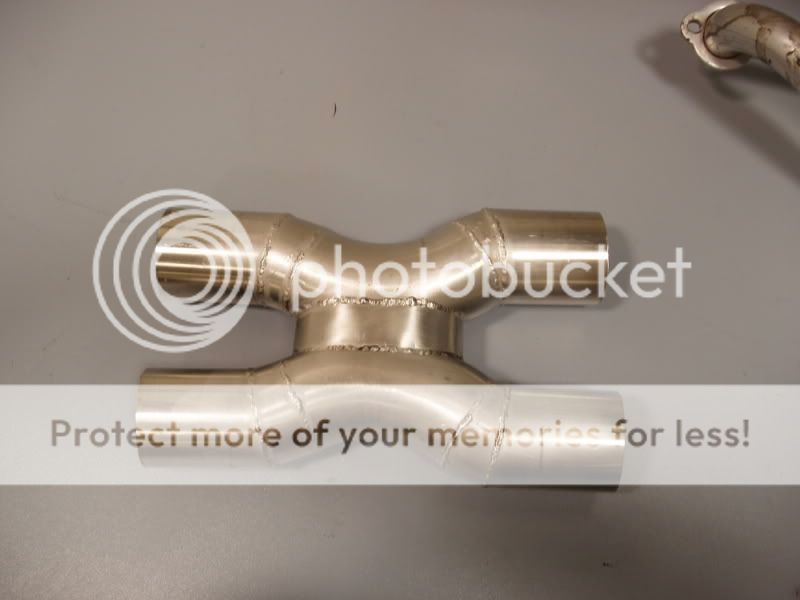
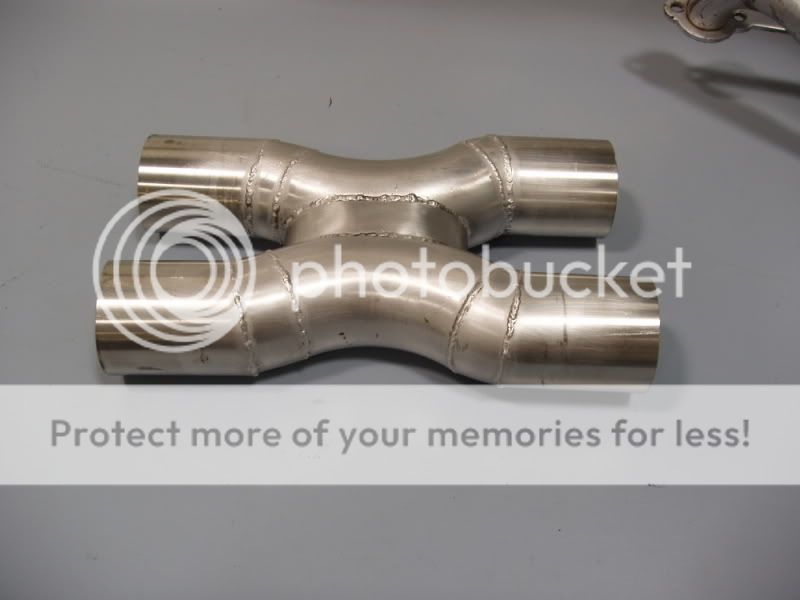
I then cut some straight pieces at an angle to pull the 4 ends around straight and tacked it together.
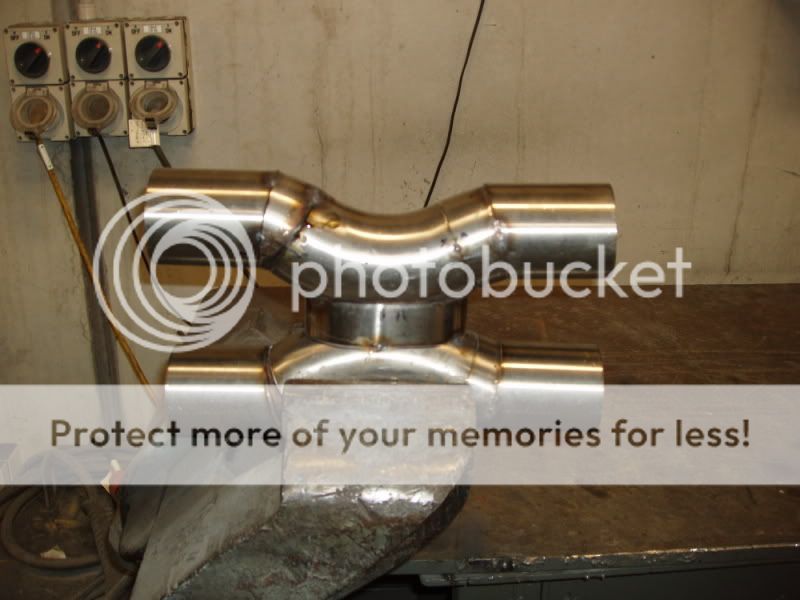
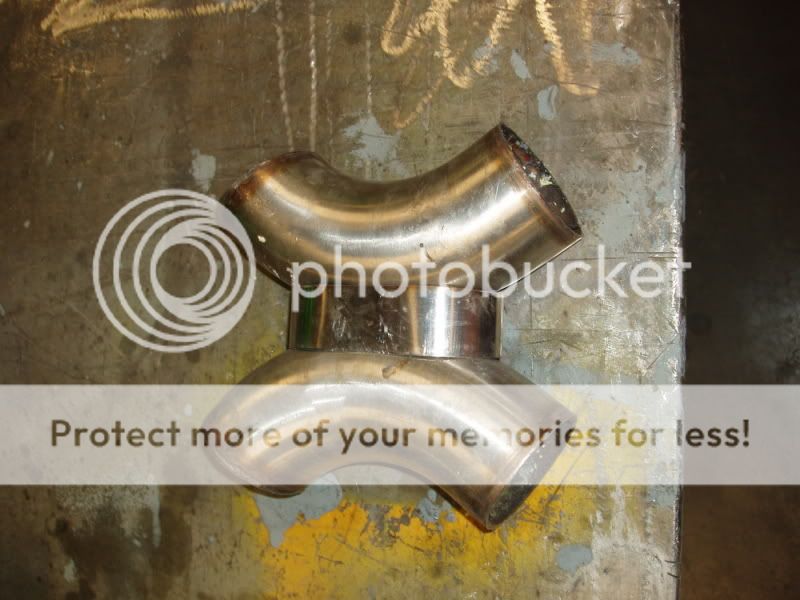
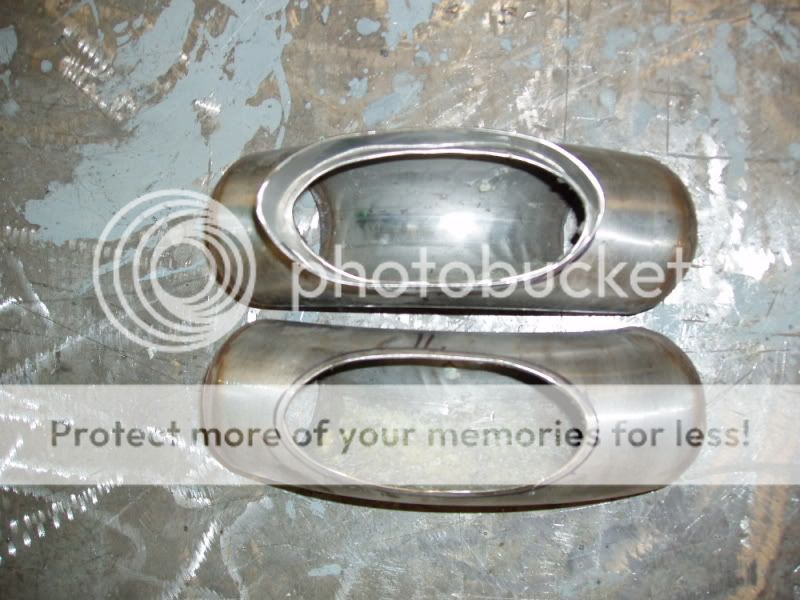
Finished product after a clean up with 'pickling paste'.
Last night I made the X pipe.
Two 3" stainless 90deg bends, some 3" stainless tube and a piece of 4" stainless tube.
Here's what I did:
Cut a slice of 4" and put it in the vice and squash it into an oval shape.
Adjust the 4" oval to fit neatly between the two bends.
Mark the oval on both bends and cut to suit.
Clamp and tack.
Something I didn't get a chance to take pic's of was...next I cut the ends of the bends off and spun them 180deg
to try and get a better angle to bring the pipes out straight/parrallel.
An extra couple of bends would have made this easier....but I didn't want to cut up any more as I'll
need them for the rest of the exhaust.
I then cut some straight pieces at an angle to pull the 4 ends around straight and tacked it together.
Finished product after a clean up with 'pickling paste'.
Feb 21, 2010 | 11:45 PM
#2

good work man, how are the customized headers working out? the oval 4" in the middle wasnt really necessary, could have just welded the angled pieces together but still looks good. keep the pics coming!
 Feb 22, 2010 | 01:18 PM
#5
Thread Starter
TECH Apprentice
Joined: Jul 2005
Posts: 363
Likes: 1
From: Melbourne, Oz
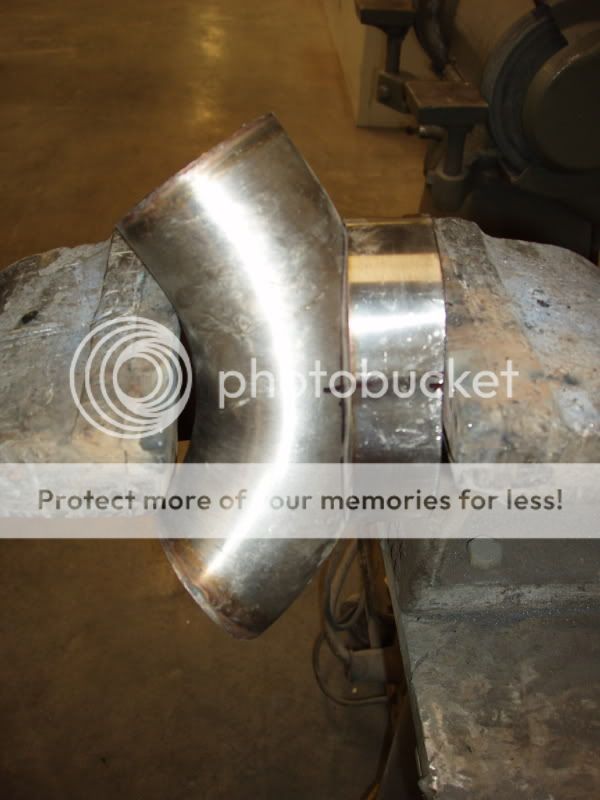
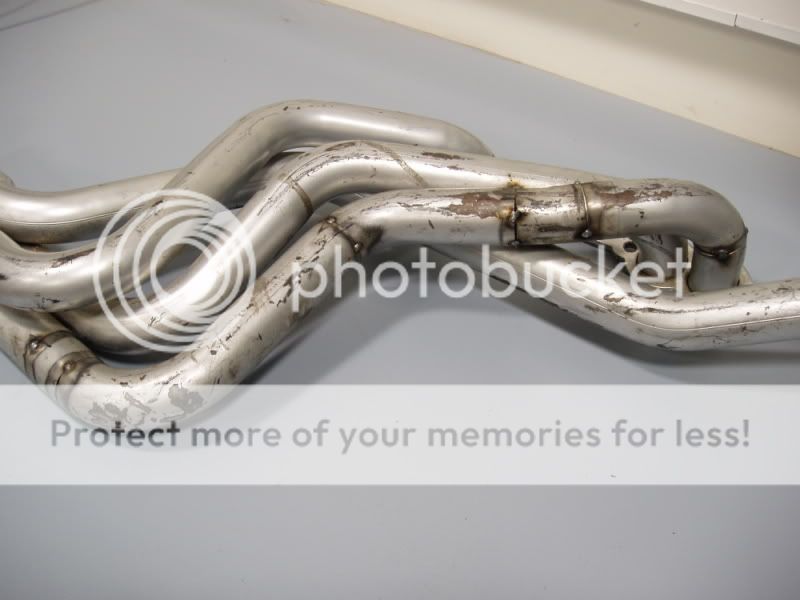
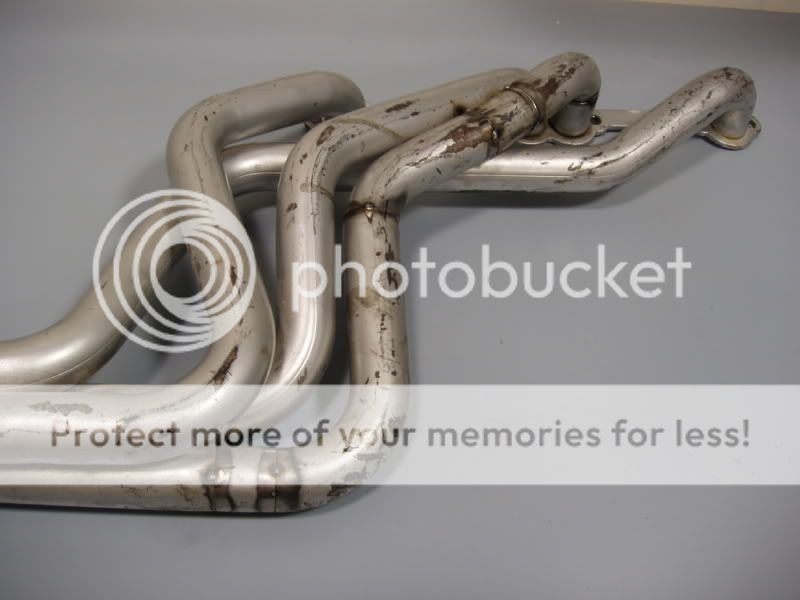
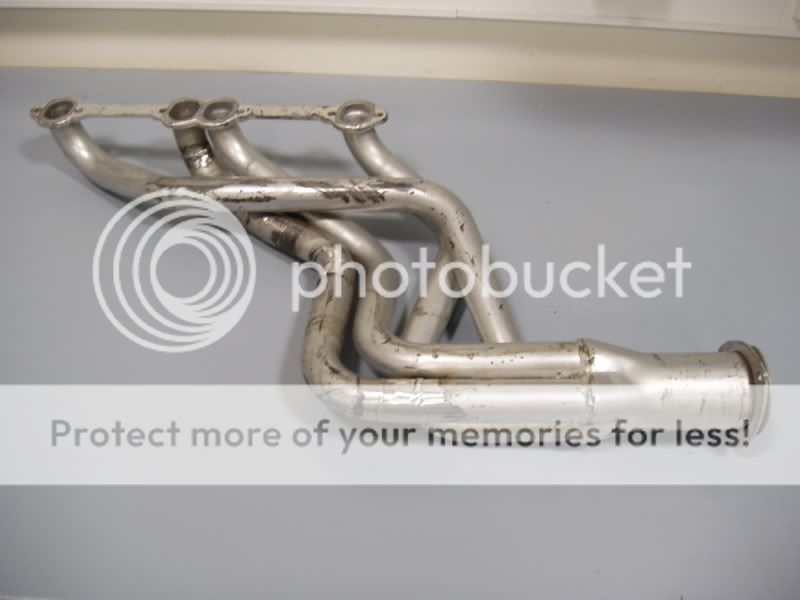
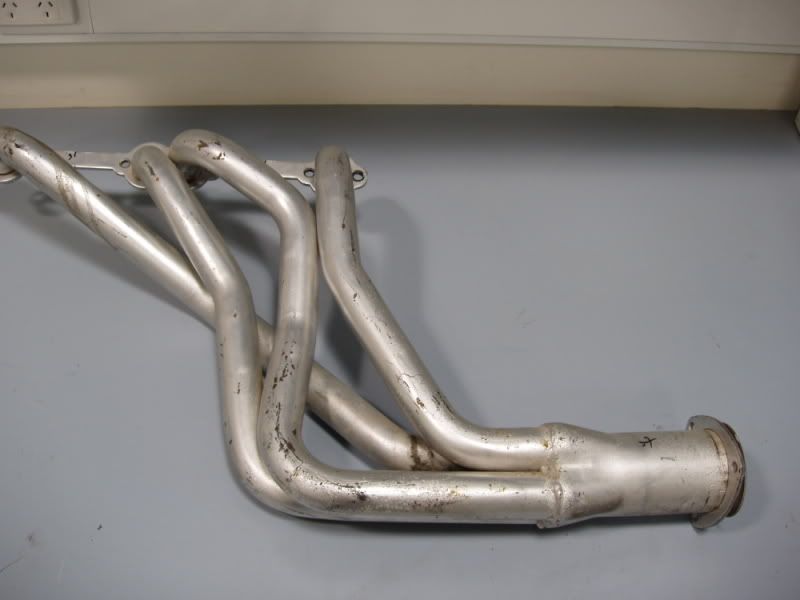
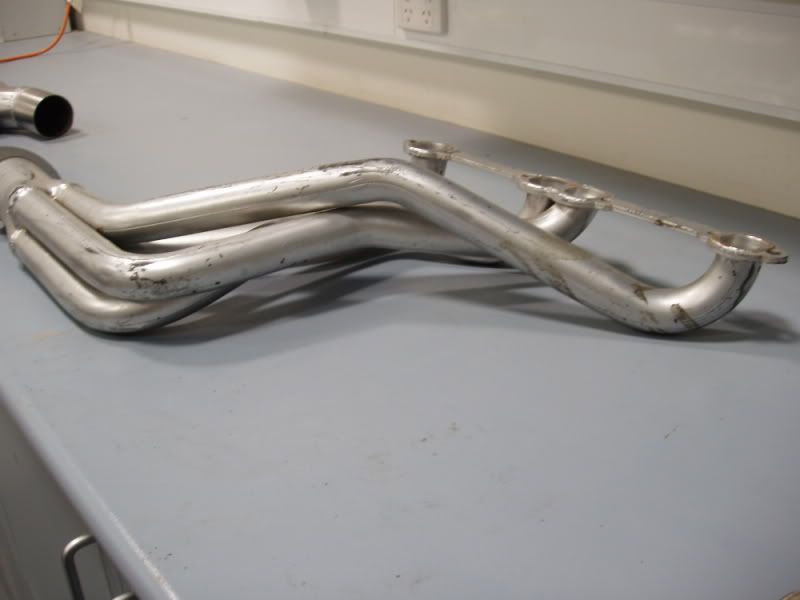
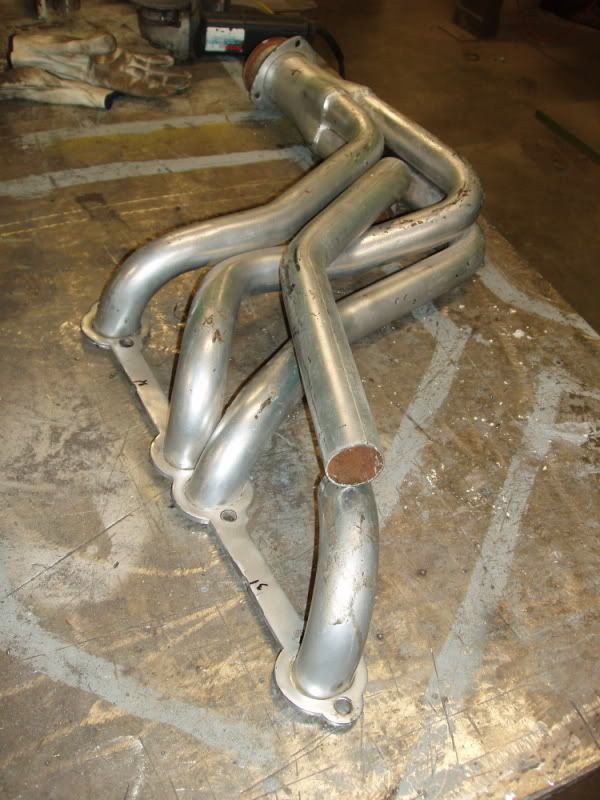
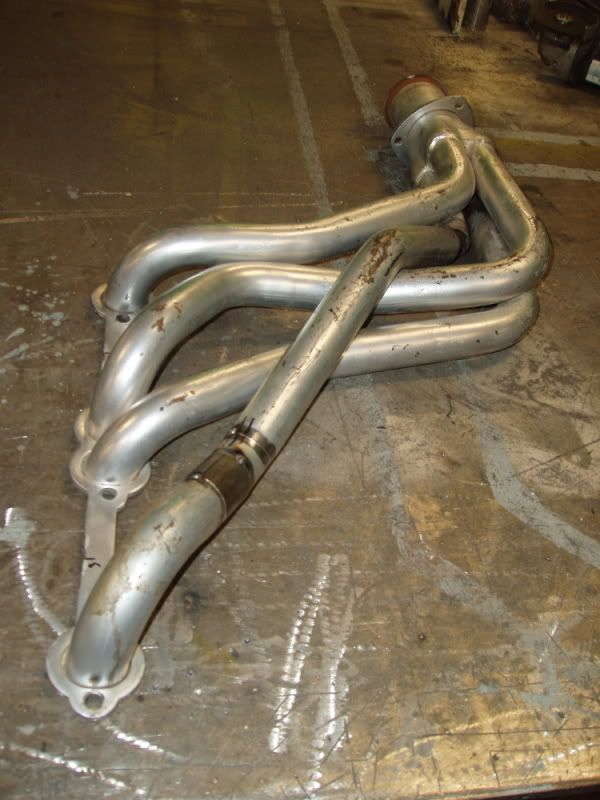
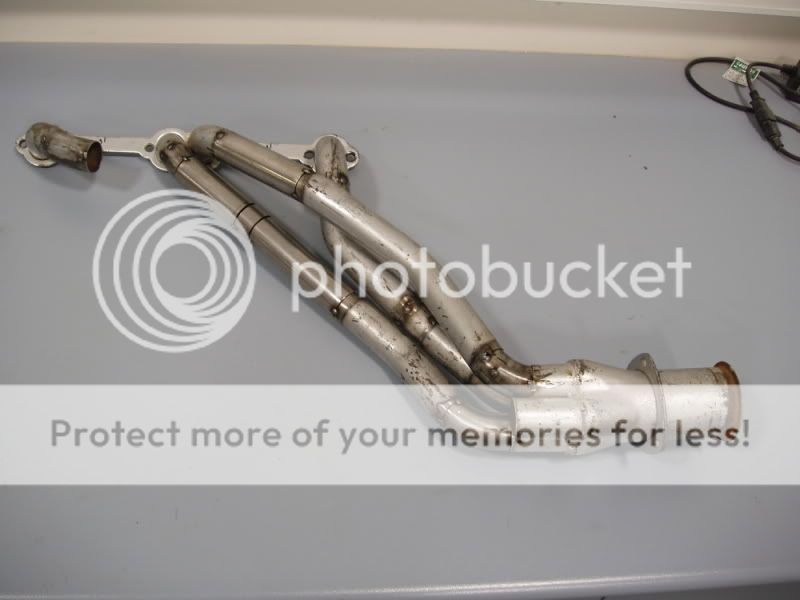
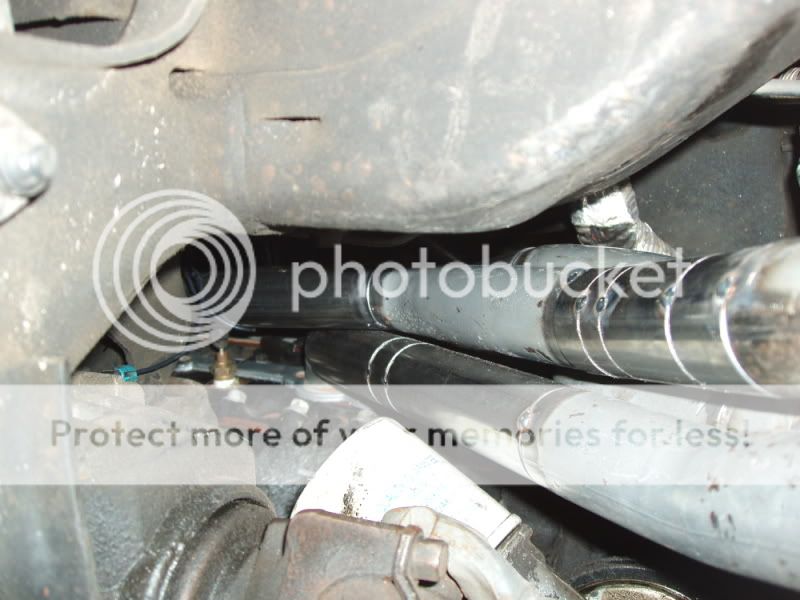
Here's some details of the header customization.
Keep in mind...these started life as a set of late model 98+ I guess..Camaro headers. I bought them for the head flanges and collectors.
Thankfully....they turned out to be a pretty close fit.


Keep in mind...these started life as a set of late model 98+ I guess..Camaro headers. I bought them for the head flanges and collectors.
Thankfully....they turned out to be a pretty close fit.
Trending Topics
Feb 22, 2010 | 01:46 PM
#8
Thread Starter
TECH Apprentice
Joined: Jul 2005
Posts: 363
Likes: 1
From: Melbourne, Oz
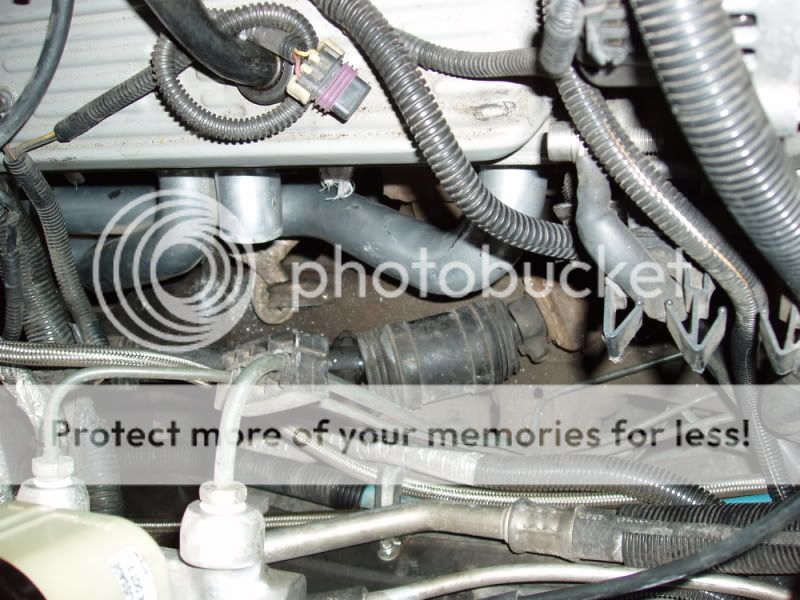
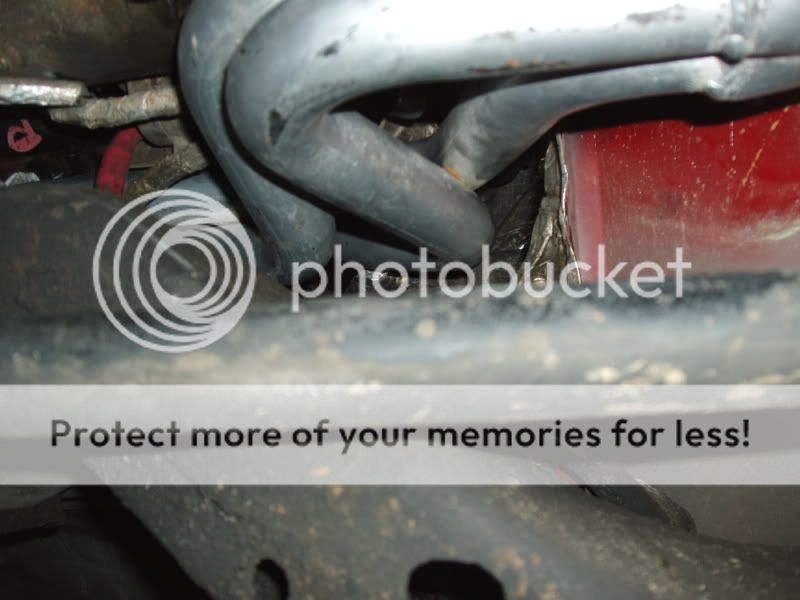
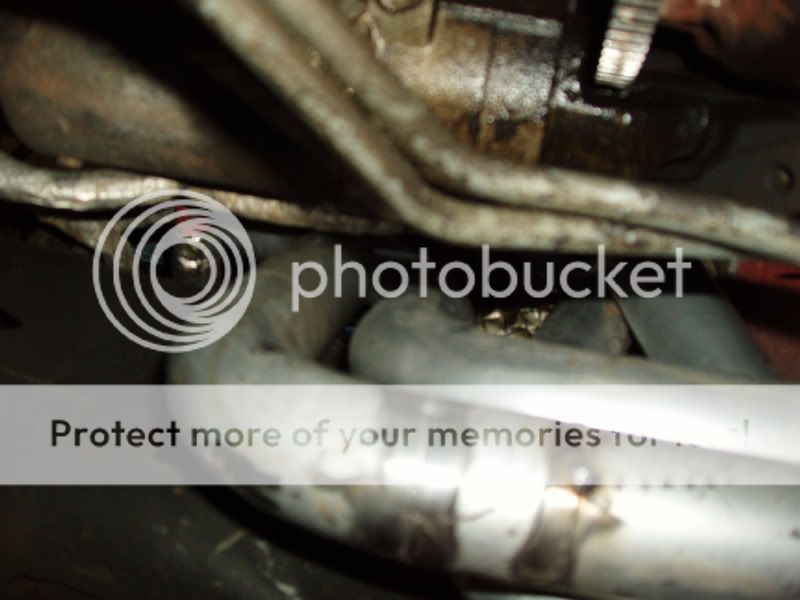
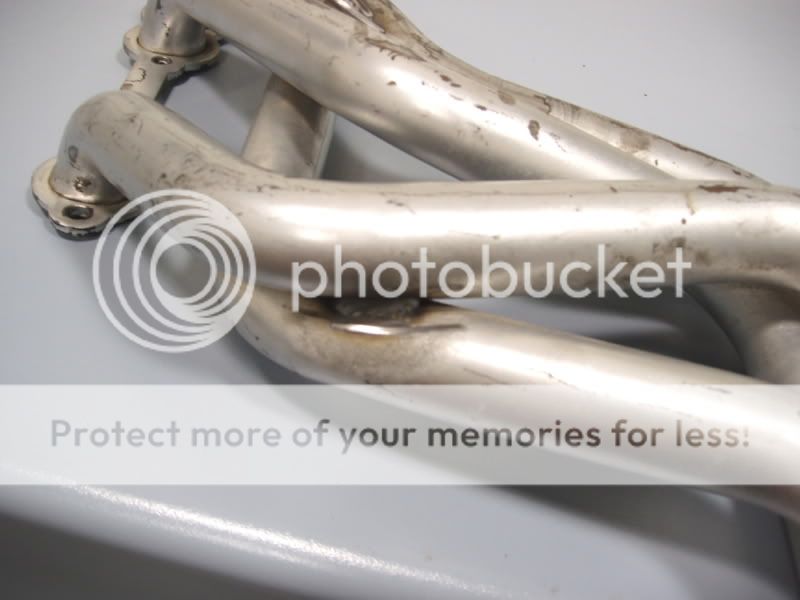
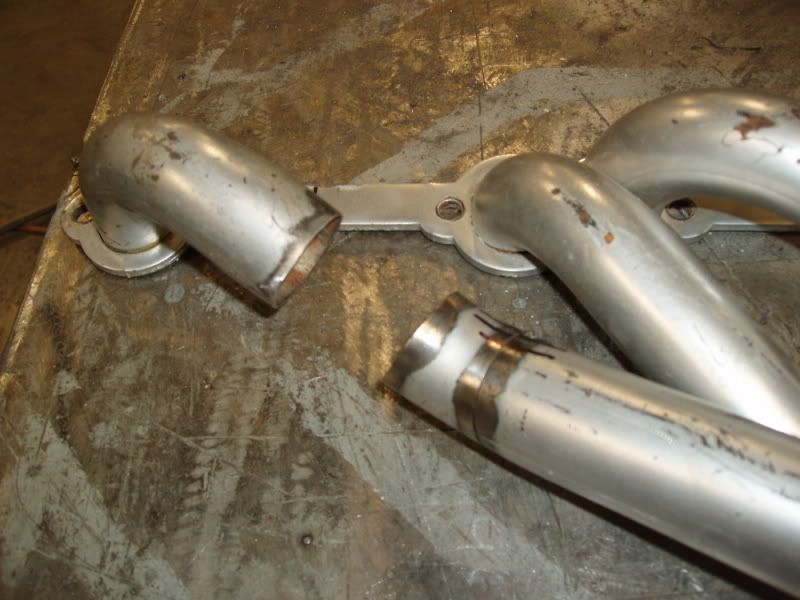
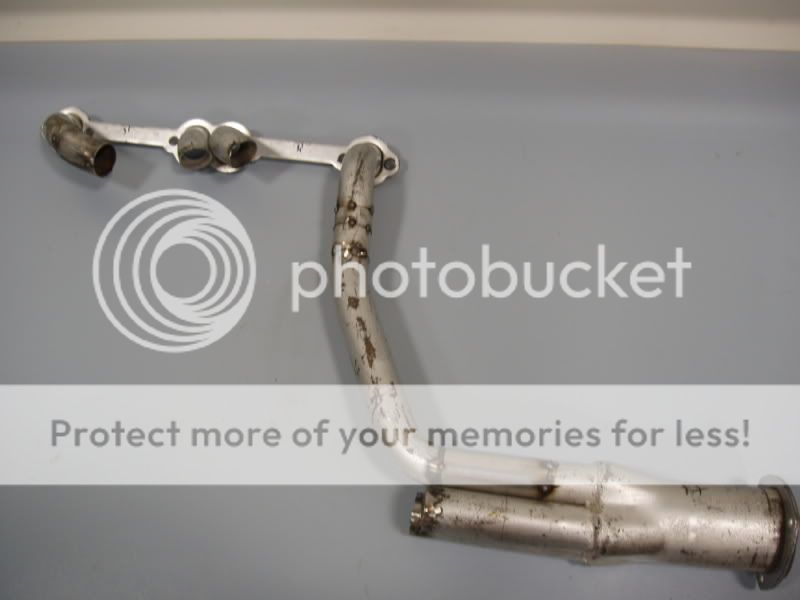
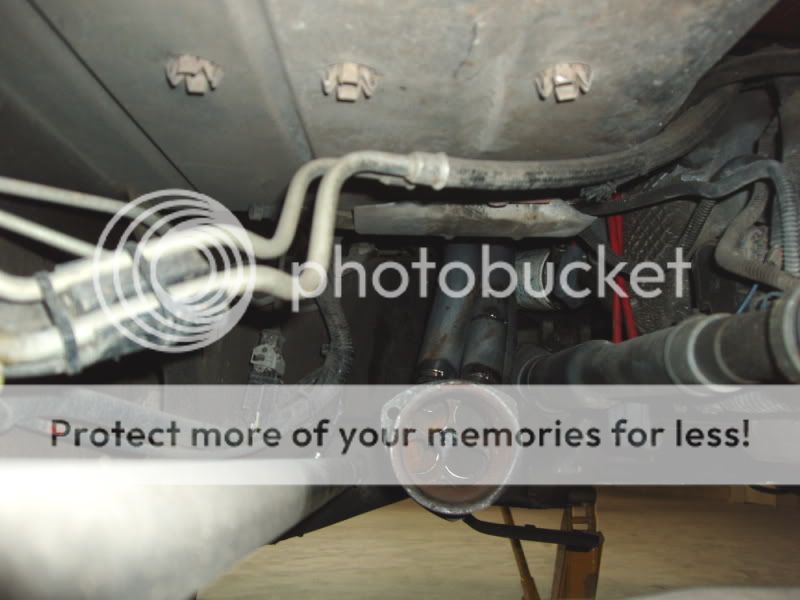
So....I thought the first header was the difficult one, and the second would just fall into place....WRONG!!!
I didn't figure on the oil filter.
Also...the angle of the flange means the collector will be against the car body....no good.
So...I had to re-route the primary which was hitting the oil filter and once done (tonight....I've got to pick up some 5/8th 90deg bends today) I'll have to bolt the flange to the bench, heat all 4 primaries and try to alter the flange angle slightly.
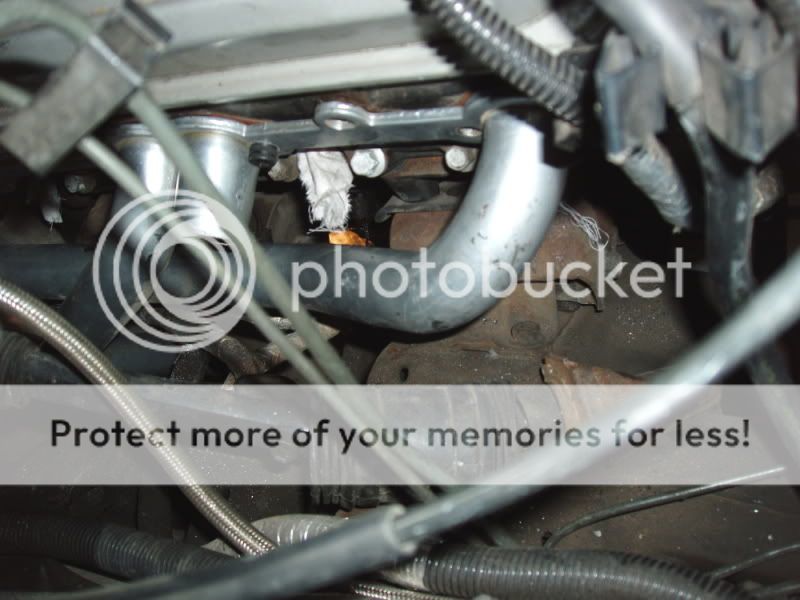
Here's some pic's of where the primary was...and where it's being relocated to.
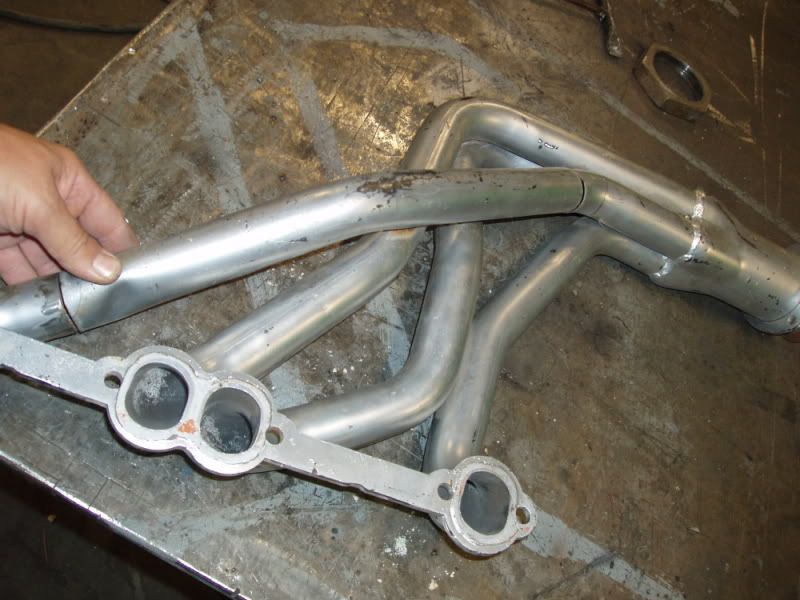
New location.
I didn't figure on the oil filter.
Also...the angle of the flange means the collector will be against the car body....no good.
So...I had to re-route the primary which was hitting the oil filter and once done (tonight....I've got to pick up some 5/8th 90deg bends today) I'll have to bolt the flange to the bench, heat all 4 primaries and try to alter the flange angle slightly.
Here's some pic's of where the primary was...and where it's being relocated to.
New location.
Last edited by howard quick; Feb 22, 2010 at 03:09 PM.
Feb 25, 2010 | 11:29 PM
#9
Thread Starter
TECH Apprentice
Joined: Jul 2005
Posts: 363
Likes: 1
From: Melbourne, Oz
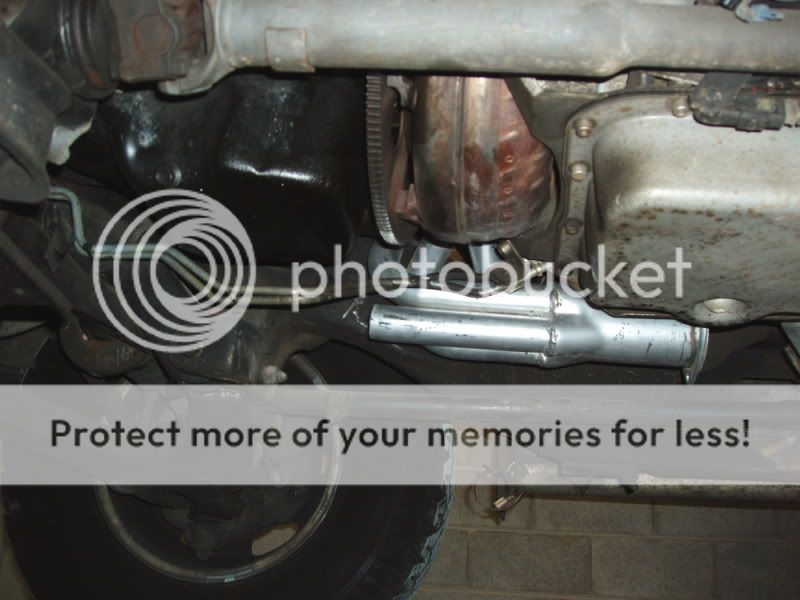
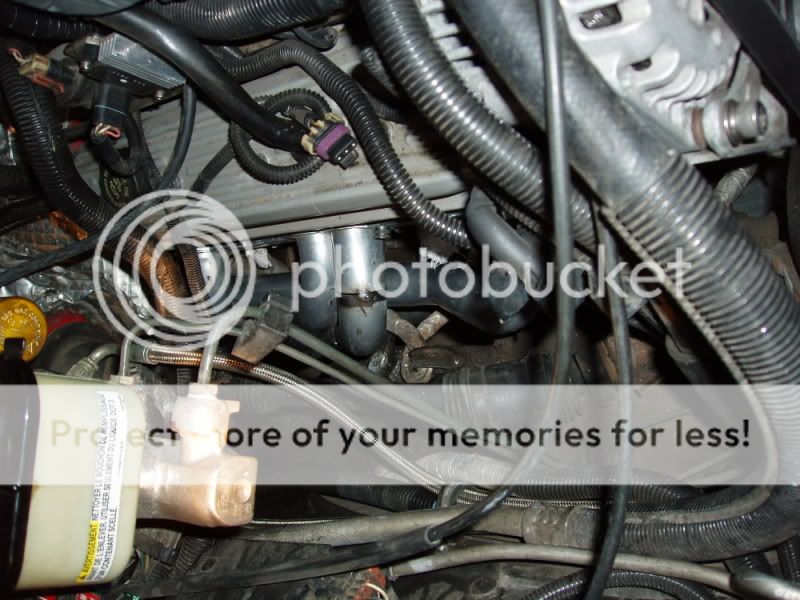
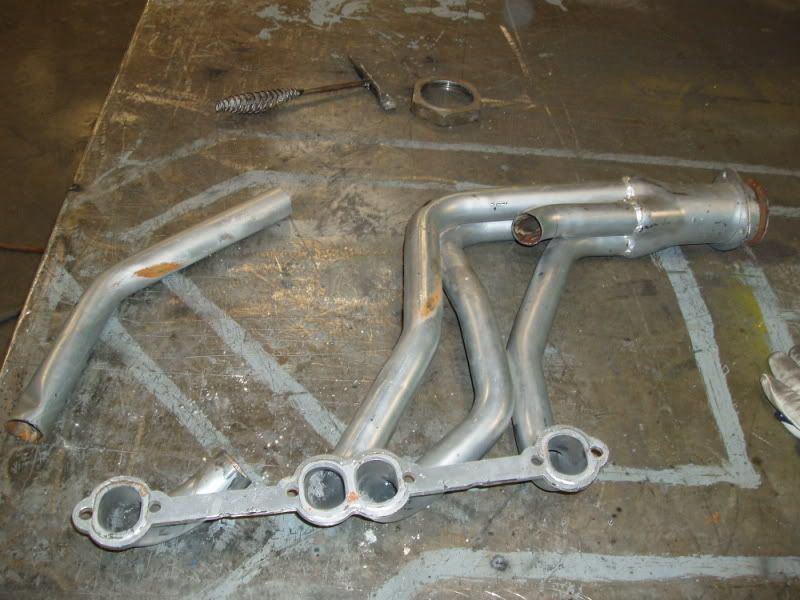
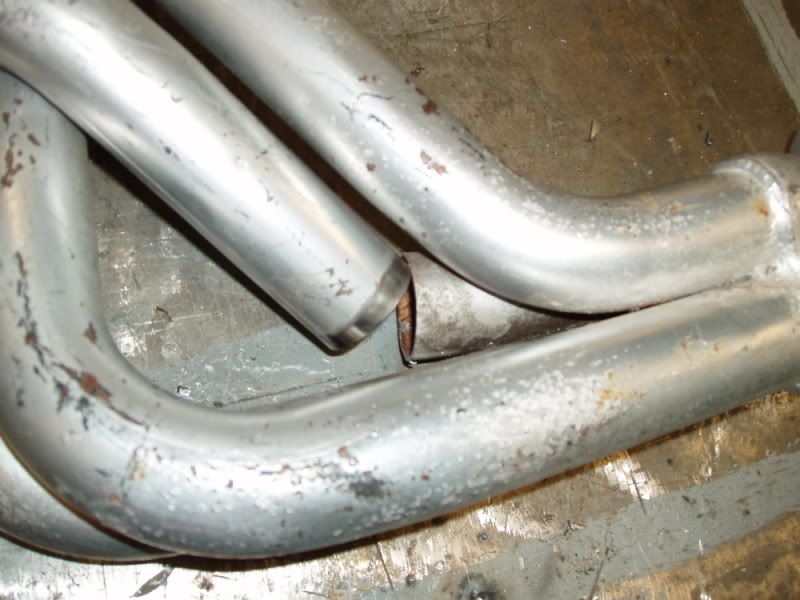
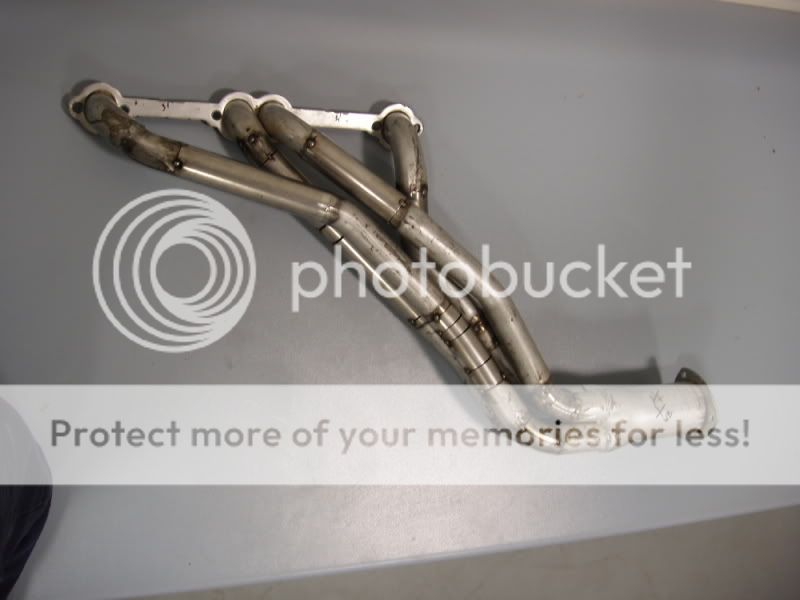
Well...a little more progress last night...although it may not look like it.
I found 'direction'. Lol!
In other words...I have finally got the headers to fit with no clearance issues....but there's a catch. I only have ONE primary holding them together.
BUT...the others now have room to be installed and the angle of the collector to head flange is good.
So...here's where I'm at.
Had to add 4" in order to give the other primaries room to get past the frame rails.
Slotted and bent the remaining primary in order to get the collector to move sideways to clear the front driveshaft.
Now the header flange bolts to the heads and the collector clears everything.

So here's where I'm at now. I reckon I'll come close to knocking them over tonight.
I found 'direction'. Lol!
In other words...I have finally got the headers to fit with no clearance issues....but there's a catch. I only have ONE primary holding them together.
BUT...the others now have room to be installed and the angle of the collector to head flange is good.
So...here's where I'm at.
Had to add 4" in order to give the other primaries room to get past the frame rails.
Slotted and bent the remaining primary in order to get the collector to move sideways to clear the front driveshaft.
Now the header flange bolts to the heads and the collector clears everything.
So here's where I'm at now. I reckon I'll come close to knocking them over tonight.
Feb 25, 2010 | 11:30 PM
#10
Thread Starter
TECH Apprentice
Joined: Jul 2005
Posts: 363
Likes: 1
From: Melbourne, Oz
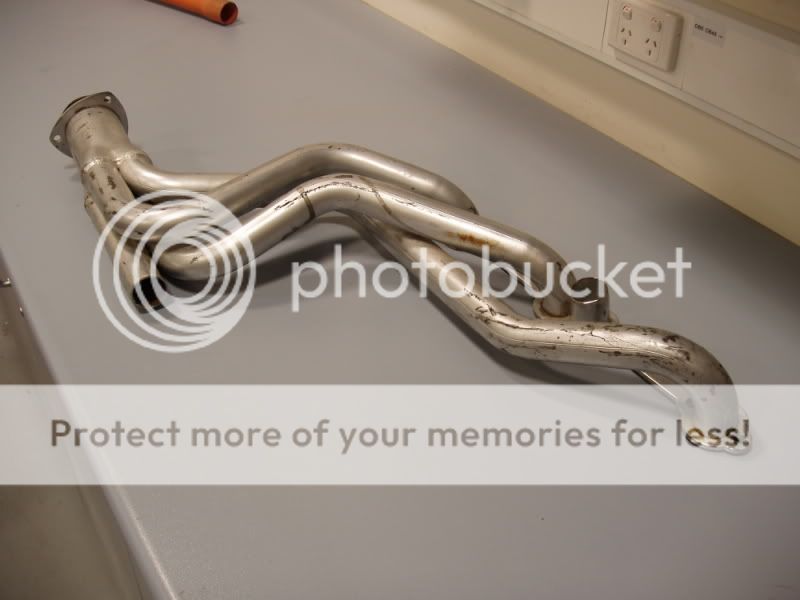
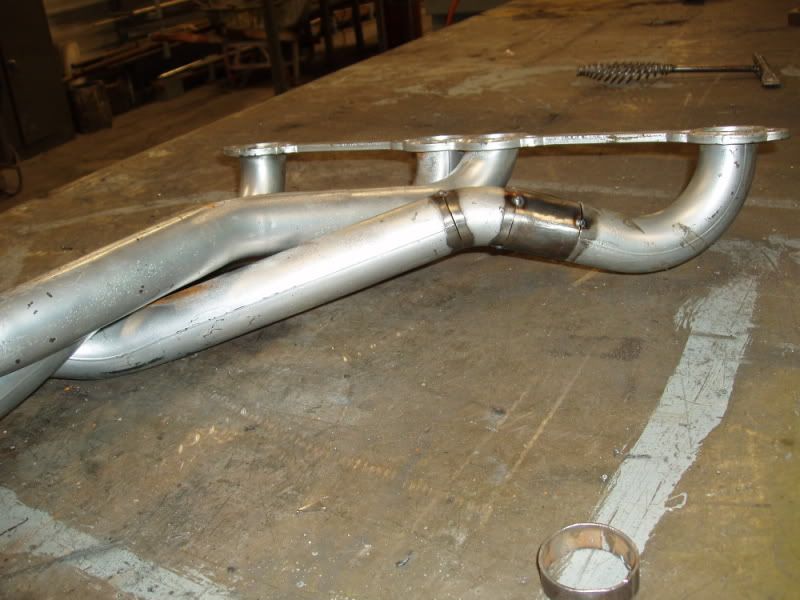
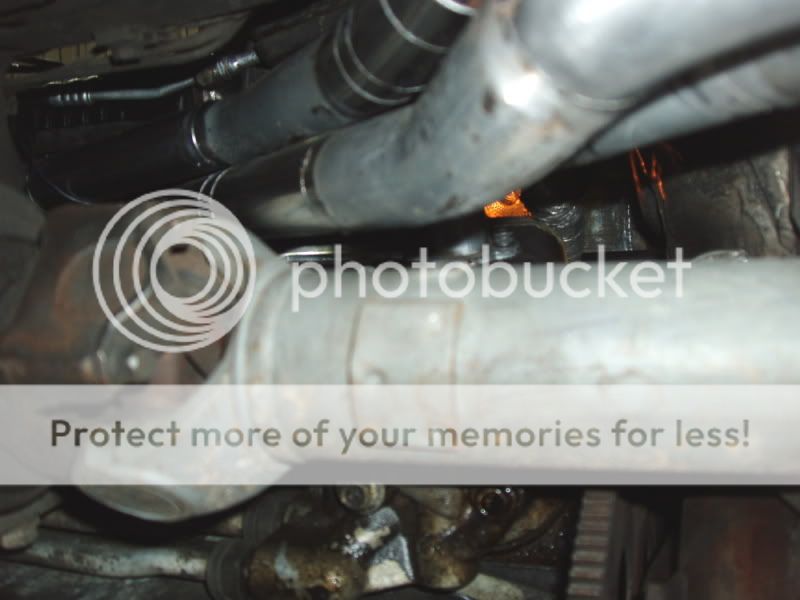
Alot of progress last night....finally.
I welded the flange to the bench and marked where the collector sits.
I then cut the final primary and repositioned it on a different 'outlet'. I also changed the shape slightly to give me more room to fit the other primaries through the gap between the frame rail and the other obstacles such as oil filter brake lines and front drive shaft.
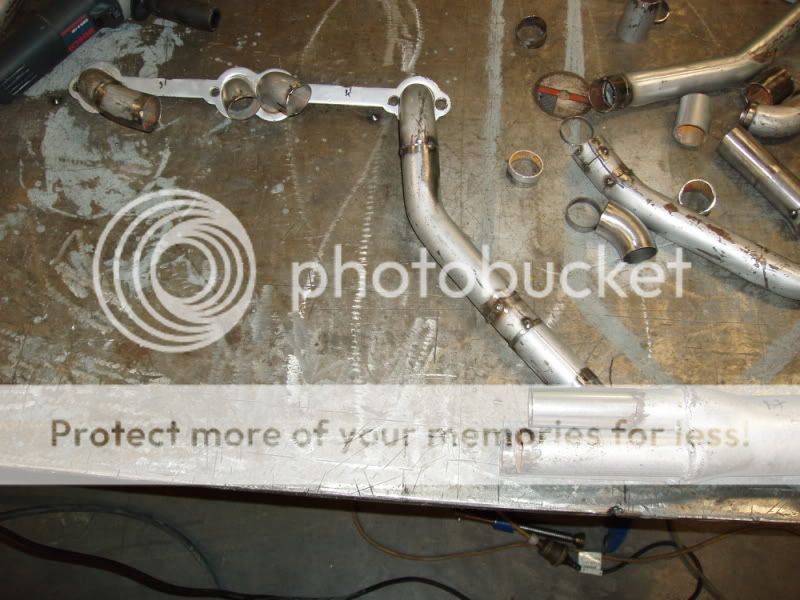
I then test fitted it and made the next primary.
Then the next
And finally the last one
I then tested it in position one last time.
All looks good. Plenty of clearance for everything.
There's more room between the headers, oil filter and front drive shaft than it looks in these pic's.
It was too difficult to get the angle to show.

Tonight they'll be welded up properly and then I'd like to get them blasted and try the VHT paint.
I'll use a large BBQ at work and make a box to fit over it to turn it into a baking oven to cure the paint.
I'd like to get them ceramic coated but it's rediculously expensive here.
I welded the flange to the bench and marked where the collector sits.
I then cut the final primary and repositioned it on a different 'outlet'. I also changed the shape slightly to give me more room to fit the other primaries through the gap between the frame rail and the other obstacles such as oil filter brake lines and front drive shaft.
I then test fitted it and made the next primary.
Then the next
And finally the last one
I then tested it in position one last time.
All looks good. Plenty of clearance for everything.
There's more room between the headers, oil filter and front drive shaft than it looks in these pic's.
It was too difficult to get the angle to show.
Tonight they'll be welded up properly and then I'd like to get them blasted and try the VHT paint.
I'll use a large BBQ at work and make a box to fit over it to turn it into a baking oven to cure the paint.
I'd like to get them ceramic coated but it's rediculously expensive here.