
4l80E Rebuild Thread
 Jul 7, 2007 | 11:19 AM
#1

Thread Starter
TECH Regular
Joined: Aug 2006
Posts: 458
Likes: 0
From: Allen, TX
Well, after alot of contimplation I decided to rebuild my 4l80E myself. I haven't seen many transmission rebuild threads (there is a 4l60E thread on tech) so I am documenting this as best I can. I am attempting this using as few special tools as possible. I have bought 2 special tools at this point which I would highly recommend.
1: a transmission holding fixture. The 4l80E is just too big to manhandle.
2: an ATSG 4l80E manual.
Here is the junkyard 4l80E on the holding fixture ready for surgery. I love how they destroyed a perfectly good dipstick tube.
[IMG]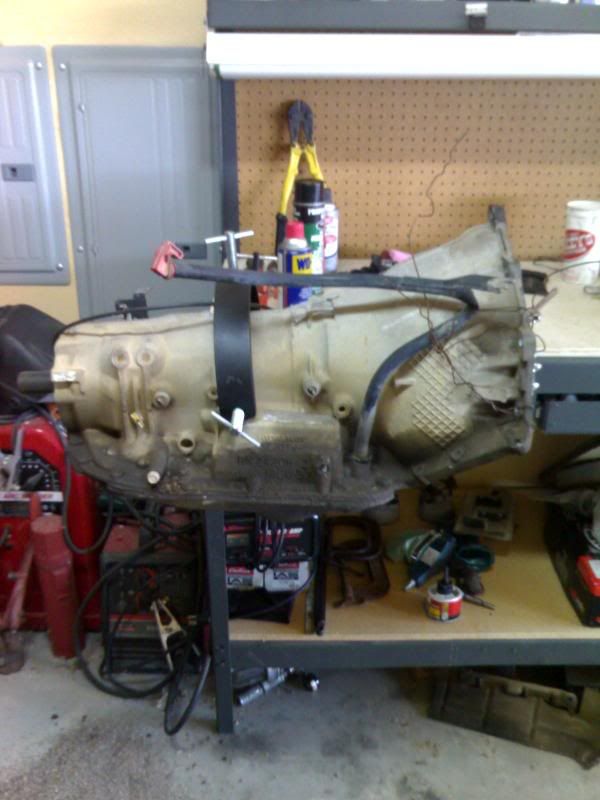 [/IMG]
Here is the view from the front
[IMG]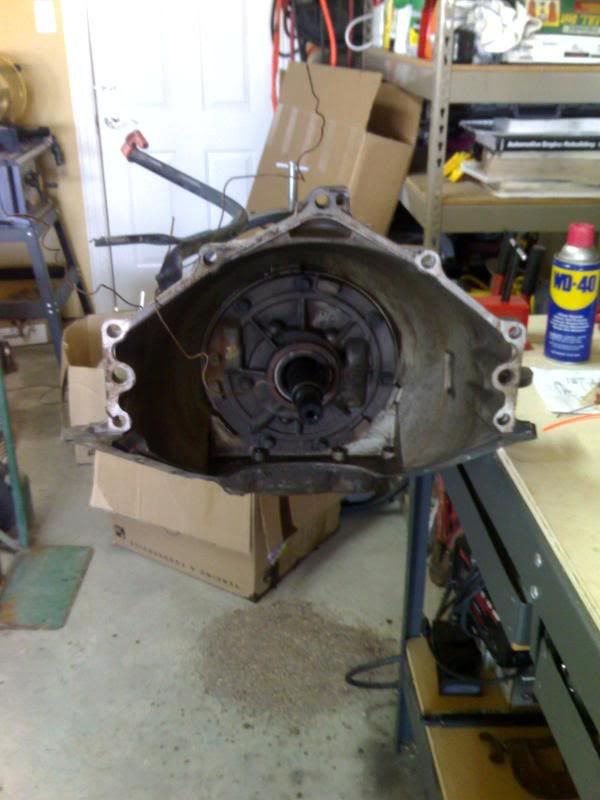 [/IMG]
**NOTE I had to reinforce my cheap workbench to handle the weight of the 4l80E. This particular transmission holding fixture is designed for a 200-r4,350, and 400. There is adapter for the 4l80E but I was able to make it work w/ a little help from my trusty angle grinder.**
1: a transmission holding fixture. The 4l80E is just too big to manhandle.
2: an ATSG 4l80E manual.
Here is the junkyard 4l80E on the holding fixture ready for surgery. I love how they destroyed a perfectly good dipstick tube.
[IMG]
[/IMG]Here is the view from the front
[IMG]
[/IMG]**NOTE I had to reinforce my cheap workbench to handle the weight of the 4l80E. This particular transmission holding fixture is designed for a 200-r4,350, and 400. There is adapter for the 4l80E but I was able to make it work w/ a little help from my trusty angle grinder.**
Jul 7, 2007 | 11:45 AM
#2
Thread Starter
TECH Regular
Joined: Aug 2006
Posts: 458
Likes: 0
From: Allen, TX
Like many 4l80E's the drain plug on the pan was stripped but drainig it was possible w/o making a mess of the garage.
Trans rotated 90* on fixture.
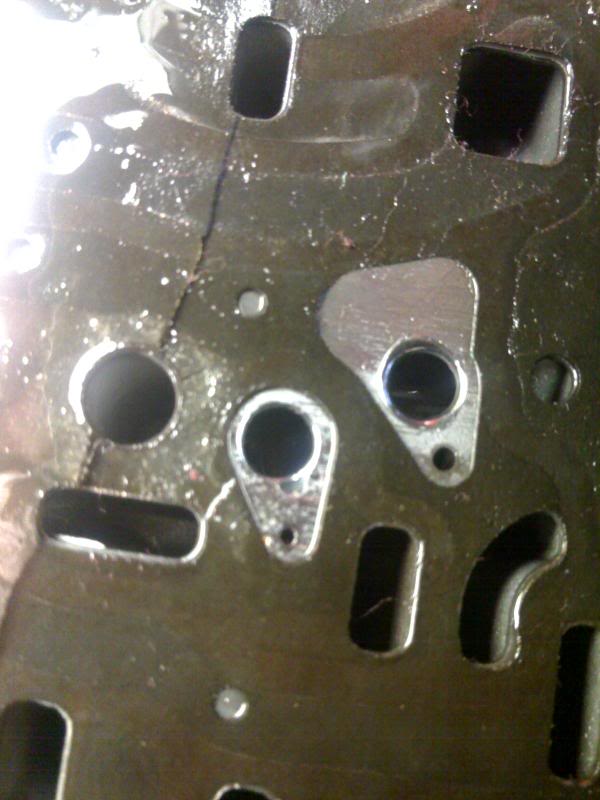
Here's a view of the underside of of the trans w/ the pan removed.
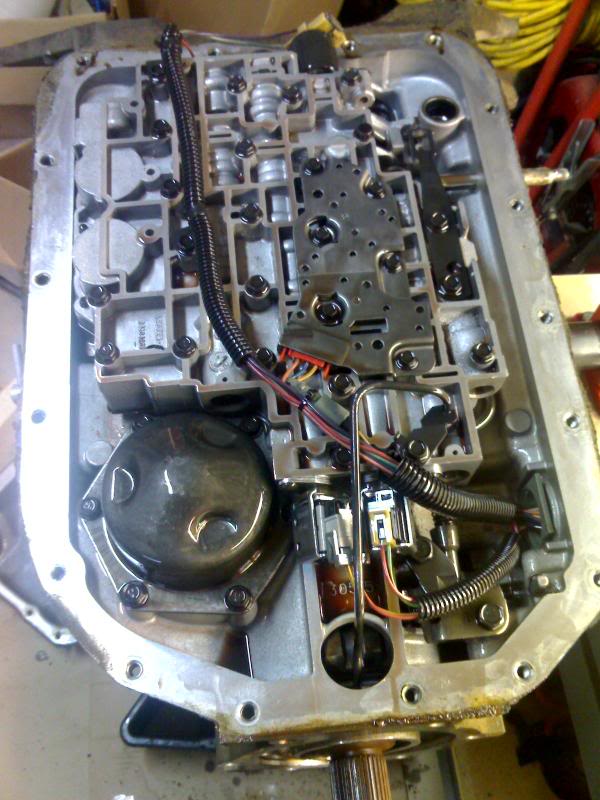
valve body ready for removal. At the bottom of this pic you can see where I had to grind the holding fixture.
[IMG]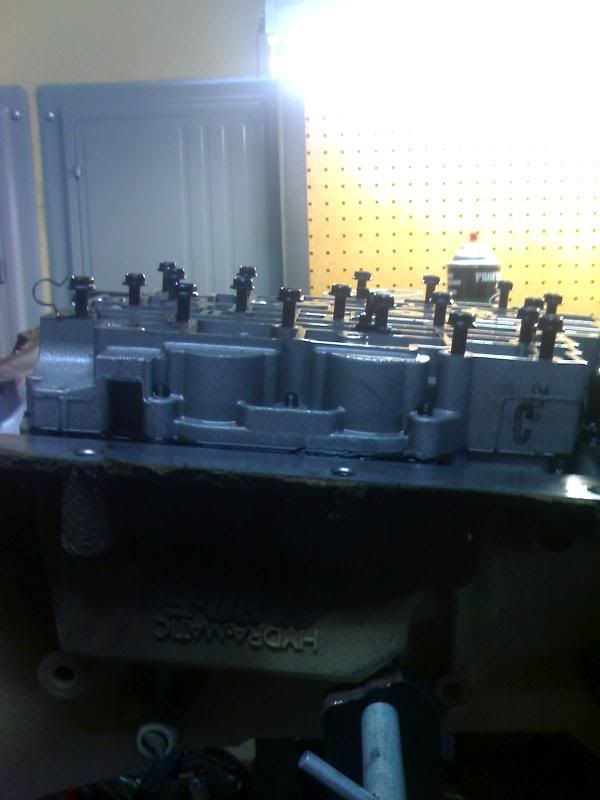 [/IMG]
Don't lose your check *****! total of 8.
[IMG]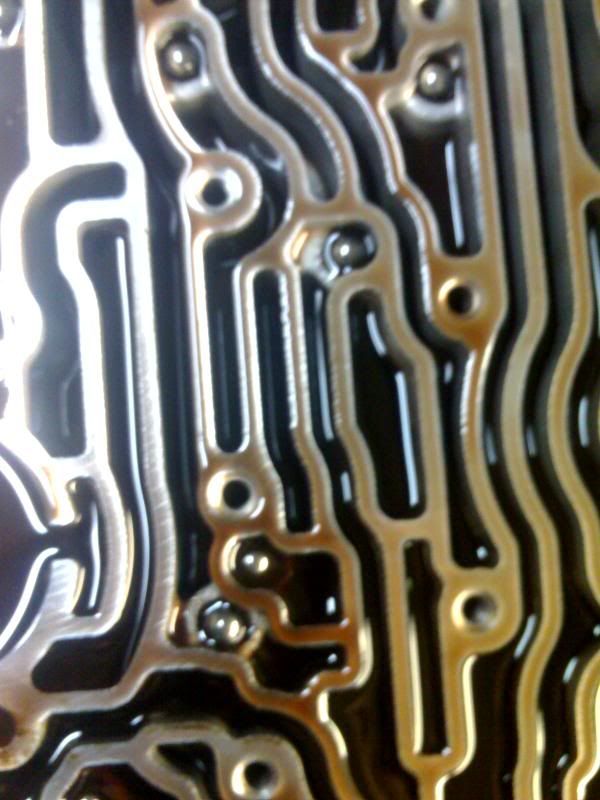 [/IMG]
Trans rotated 90* on fixture.
Here's a view of the underside of of the trans w/ the pan removed.
valve body ready for removal. At the bottom of this pic you can see where I had to grind the holding fixture.
[IMG]
[/IMG]Don't lose your check *****! total of 8.
[IMG]
[/IMG]
 Jul 7, 2007 | 12:02 PM
#4
Thread Starter
TECH Regular
Joined: Aug 2006
Posts: 458
Likes: 0
From: Allen, TX
This is the wear the check ***** cause to the holes on the valve body seperator plate. The transgo seperator plate is a tougher piece.
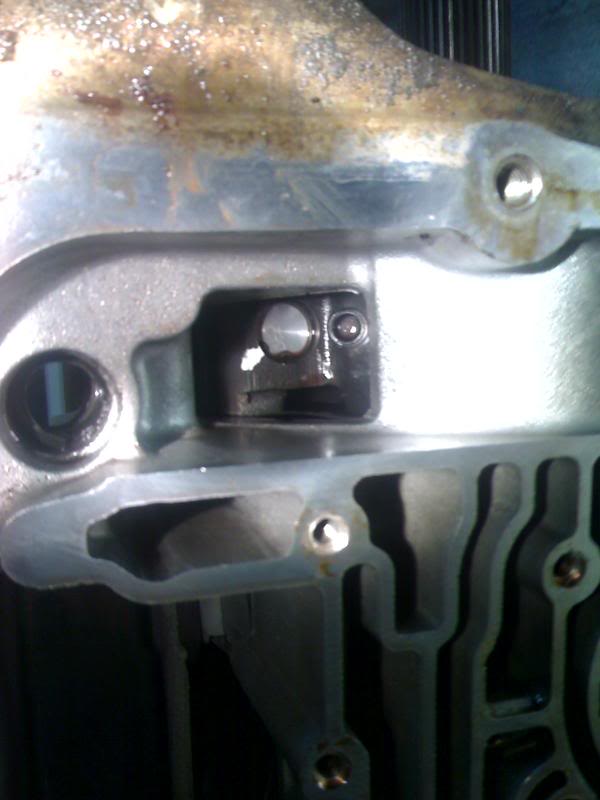
The manual calls for a puller to remove the pump assembly but you can put a prybar through this rectangular hole and gently pry under the pump to remove it.
I got a little carried away during teardown and forgot to take pictures showing every snap ring and what not but the manual is pretty clear as far as that goes.
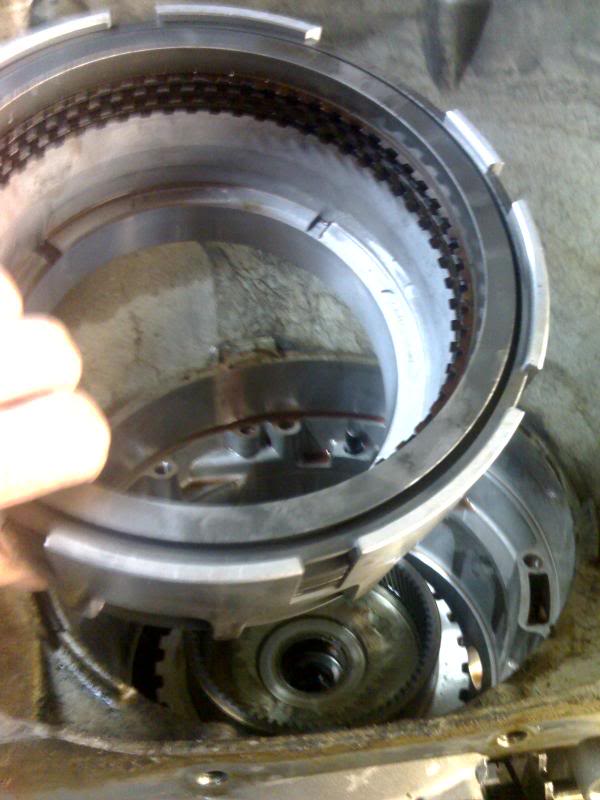
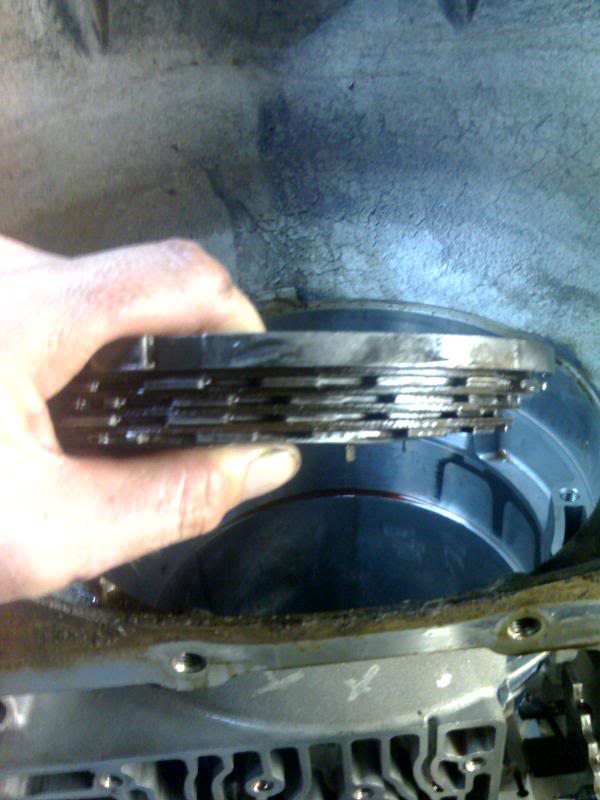
removal of turbine shaft and overrun clutch assembly
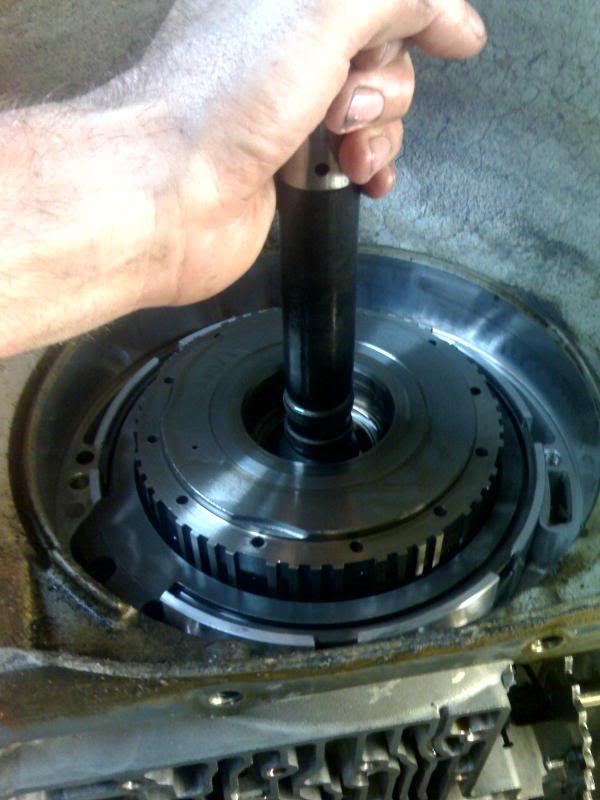
4th clutches and piston
removal of 4th clutches and piston assembly
The manual calls for a puller to remove the pump assembly but you can put a prybar through this rectangular hole and gently pry under the pump to remove it.
I got a little carried away during teardown and forgot to take pictures showing every snap ring and what not but the manual is pretty clear as far as that goes.
removal of turbine shaft and overrun clutch assembly
4th clutches and piston
removal of 4th clutches and piston assembly
Jul 7, 2007 | 12:23 PM
#5
Thread Starter
TECH Regular
Joined: Aug 2006
Posts: 458
Likes: 0
From: Allen, TX
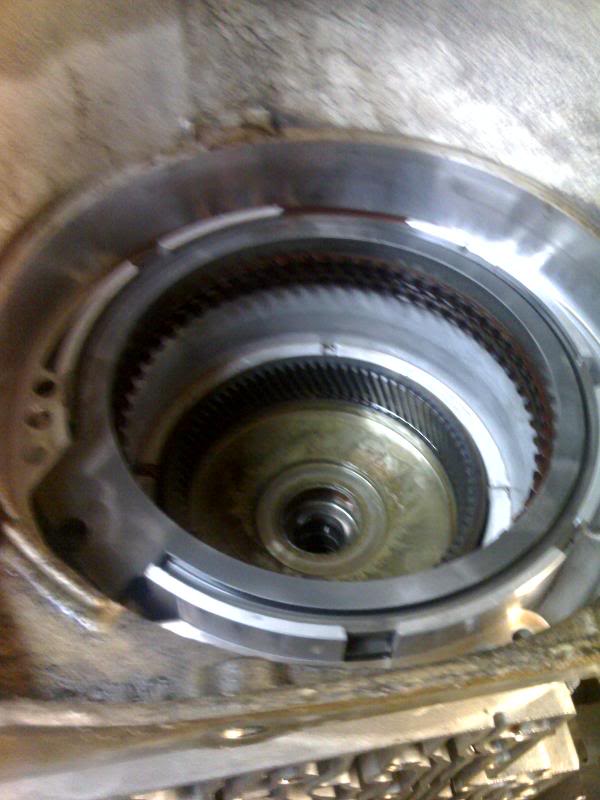
Removal of forward clutch drum assembly.
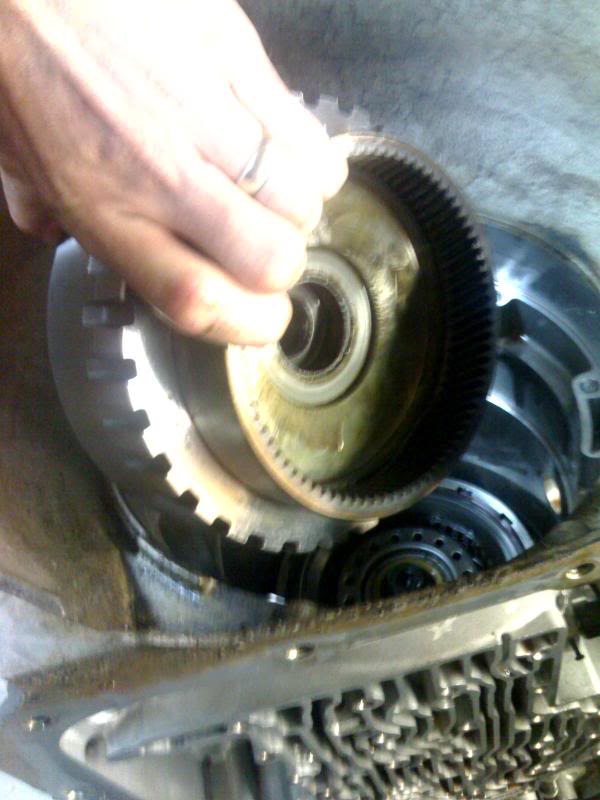
Direct drum/ clutch assembly removal.
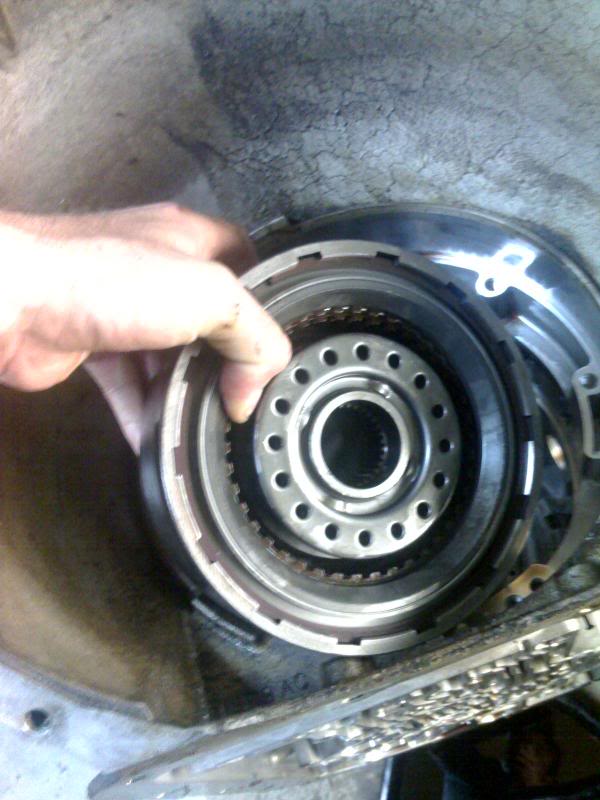
Next you remove the intermediate band and intermediate clutch snap ring.
now the intermediate clutches come right out.
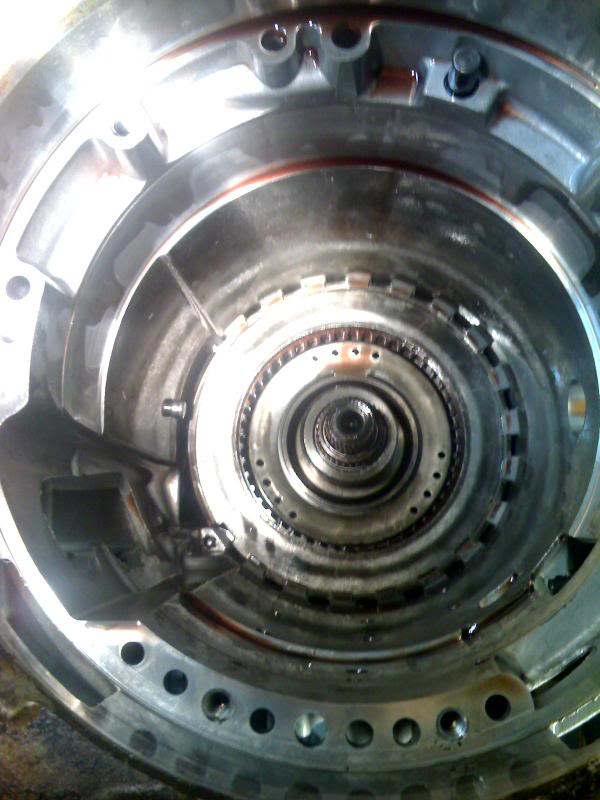
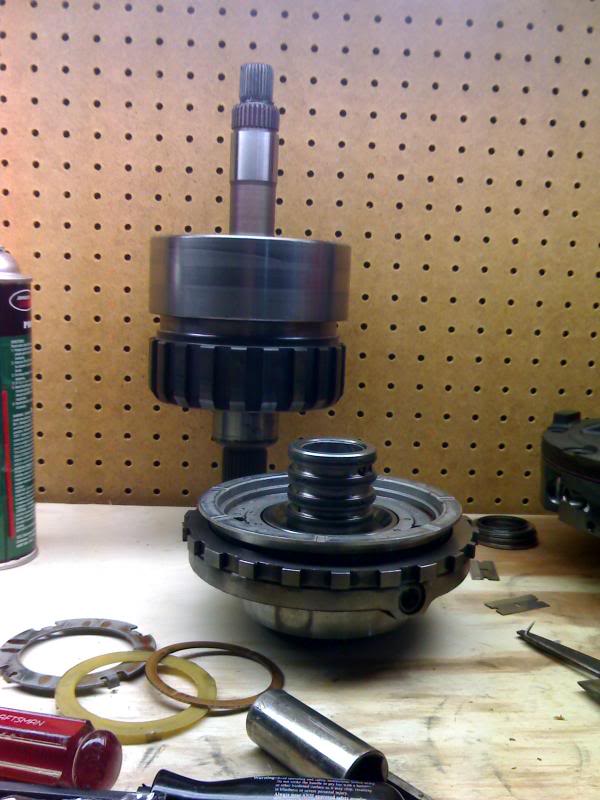
Next you remove the center support and gear train. There is a bolt which holds the center support to the case. I removed it durring the valve body removal This bolt will be replaced and should come with the overhaul kit.
Also the manual is not very clear on this, but you do need to remove the cooler line fitting because it extends into the center support.
center support and gear train on work bench during reassembly. *NOTE the round hole in the side of the center support is where the cooler line fitting seats*
Direct drum/ clutch assembly removal.
Next you remove the intermediate band and intermediate clutch snap ring.
now the intermediate clutches come right out.
Next you remove the center support and gear train. There is a bolt which holds the center support to the case. I removed it durring the valve body removal This bolt will be replaced and should come with the overhaul kit.
Also the manual is not very clear on this, but you do need to remove the cooler line fitting because it extends into the center support.
center support and gear train on work bench during reassembly. *NOTE the round hole in the side of the center support is where the cooler line fitting seats*
Jul 7, 2007 | 12:38 PM
#6
Thread Starter
TECH Regular
Joined: Aug 2006
Posts: 458
Likes: 0
From: Allen, TX
At this point you can remove the center support spacer and rear band, which is now just sitting in the case.
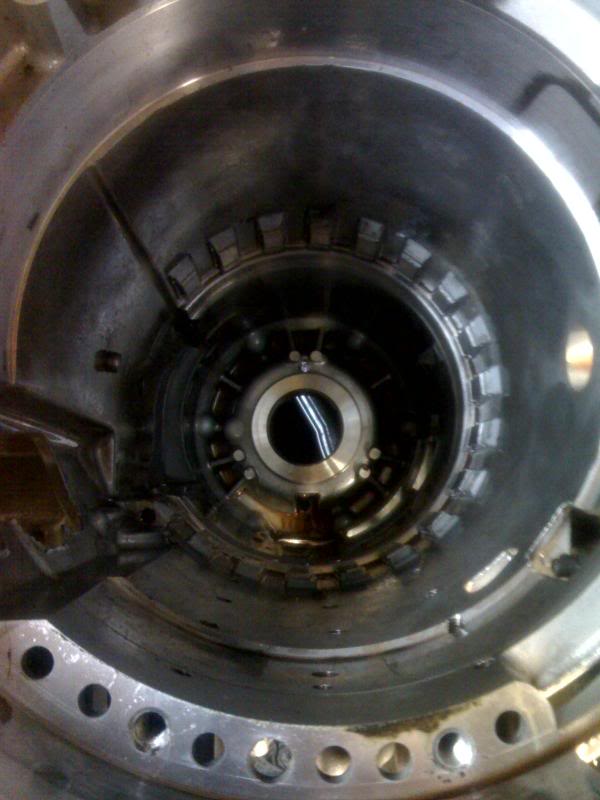
hear is a pic of the inside of the case w/ everything removed. There is a selective thrust washer tha sits in the bottom of the case at the tail shaft hole. Remove it if it didn't stick to the bottom of the geartrain.
Here are the drums and valve body sitting in a tote waiting to be rebuilt.
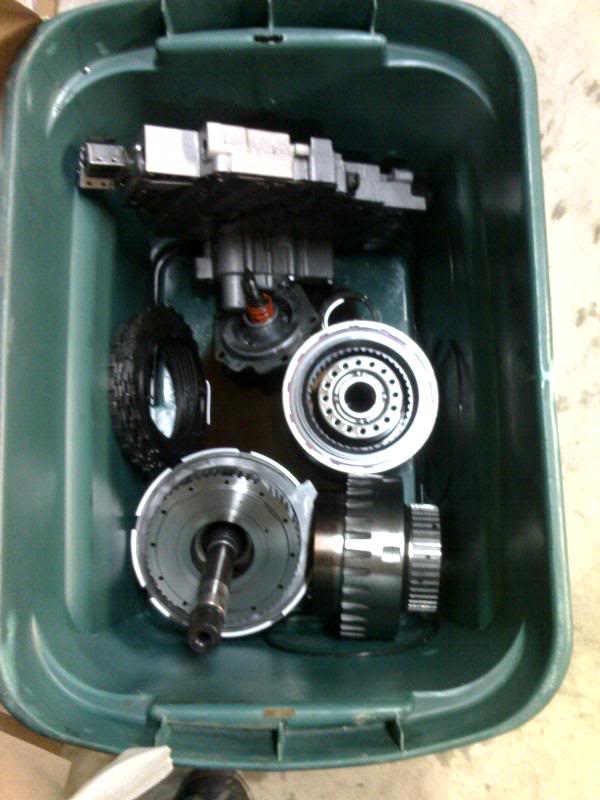
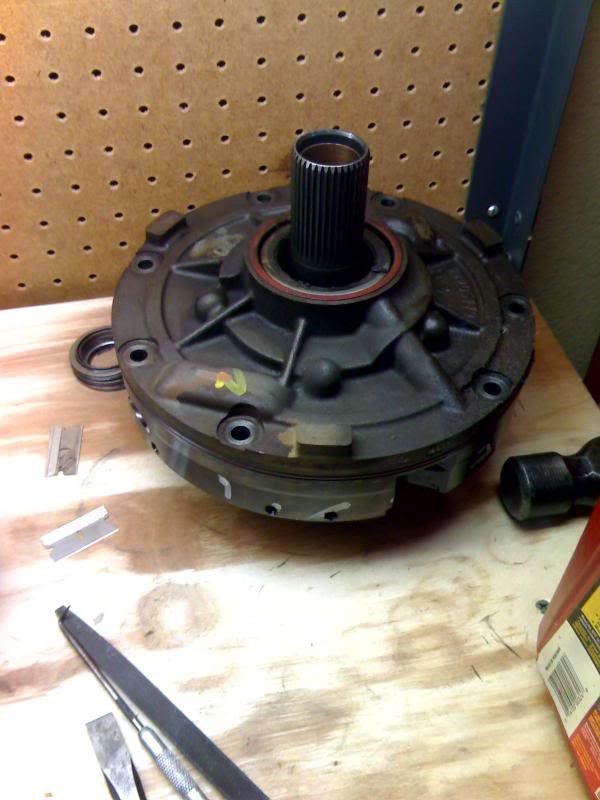
here's the pump
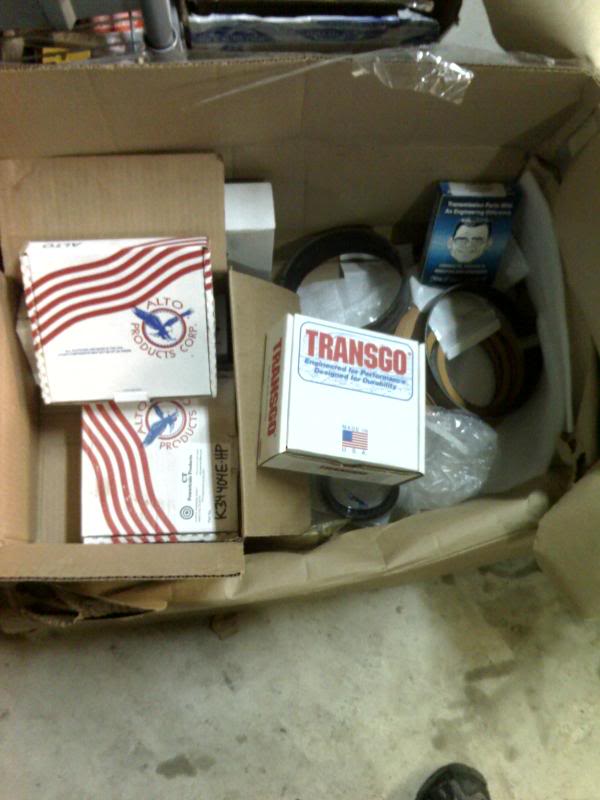
Hereis my box full of goodies. I'm using Alto RedEagle powerpacks. They are a little pricey and might be a little overkill for an already stout transmission. You can get borgwarner or raybestos high energy clutches much cheaper. The Alto power packs come w/ their red eagle clutches and kolene treated steels in selective thicknesses to add extra clutch packs to the forward, direct, and intermediate drums. I was told that Alto will be coming out w/ a similar power pack for the 4th and overrun clutches soon.
hear is a pic of the inside of the case w/ everything removed. There is a selective thrust washer tha sits in the bottom of the case at the tail shaft hole. Remove it if it didn't stick to the bottom of the geartrain.
Here are the drums and valve body sitting in a tote waiting to be rebuilt.
here's the pump
Hereis my box full of goodies. I'm using Alto RedEagle powerpacks. They are a little pricey and might be a little overkill for an already stout transmission. You can get borgwarner or raybestos high energy clutches much cheaper. The Alto power packs come w/ their red eagle clutches and kolene treated steels in selective thicknesses to add extra clutch packs to the forward, direct, and intermediate drums. I was told that Alto will be coming out w/ a similar power pack for the 4th and overrun clutches soon.

Trending Topics
 Jul 7, 2007 | 03:32 PM
#9

Great work. I will be doing the same rebuild shortly, this helps a lot. When you re-assemble you can use torlon check *****, that will prevent any future wear on the case and separator plate.
Jul 7, 2007 | 04:44 PM
#10
Thread Starter
TECH Regular
Joined: Aug 2006
Posts: 458
Likes: 0
From: Allen, TX
Originally Posted by Stoichiometric
Great work. I will be doing the same rebuild shortly, this helps a lot. When you re-assemble you can use torlon check *****, that will prevent any future wear on the case and separator plate.
Originally Posted by litreddevil
these trans don't have that much to them