Conversion of Stock 2000 GMT800 Dash to Double DIN Integrated Nav/Receiver
 03-17-2011, 11:14 PM
#1
LS1 Tech Veteran
Thread Starter
iTrader: (1)

Join Date: Oct 2003
Location: Wichita, Ks
Posts: 1,172
Likes: 0
Received 0 Likes
on
0 Posts
I bought my 2000 GMC Yukon XL new and have made a number of modifications to the truck since it was new. One of the things that I’ve wanted to do for several years was to upgrade to a Double DIN Head Unit with integral GPS/Receiver capabilities. In the spring of 2009, I got a good deal on a Kenwood KNX8120 receiver (closeout on a 2008 model) from Crutchfield. I also added a KTC HR-200 HD AM/FM receiver module that has since been exchanged to a HTC HR-300 under warranty (HR-200 would intermittently drop preset stations). Additionally I’ve installed a BOYO VTL425 backup camera to make it easy to hook up my trailer the first time and is an aid as a reference in backing up anytime. The majority of this installation was done in May of 2009, but I’ve just now gotten around to documenting the project now.
I would describe this upgrade as an intermediate to advanced task. I wanted to integrate everything in a manner that would have pretty much a factory/OEM appearance. In my day job, I am an avionics (aviation electronics) engineer for a general aviation manufacturer. So this task was a lot like some of the things that I do on a regular basis. I’ve also fabricated a lot of things for vehicles, so this project fell right in line with other things that I like to do.
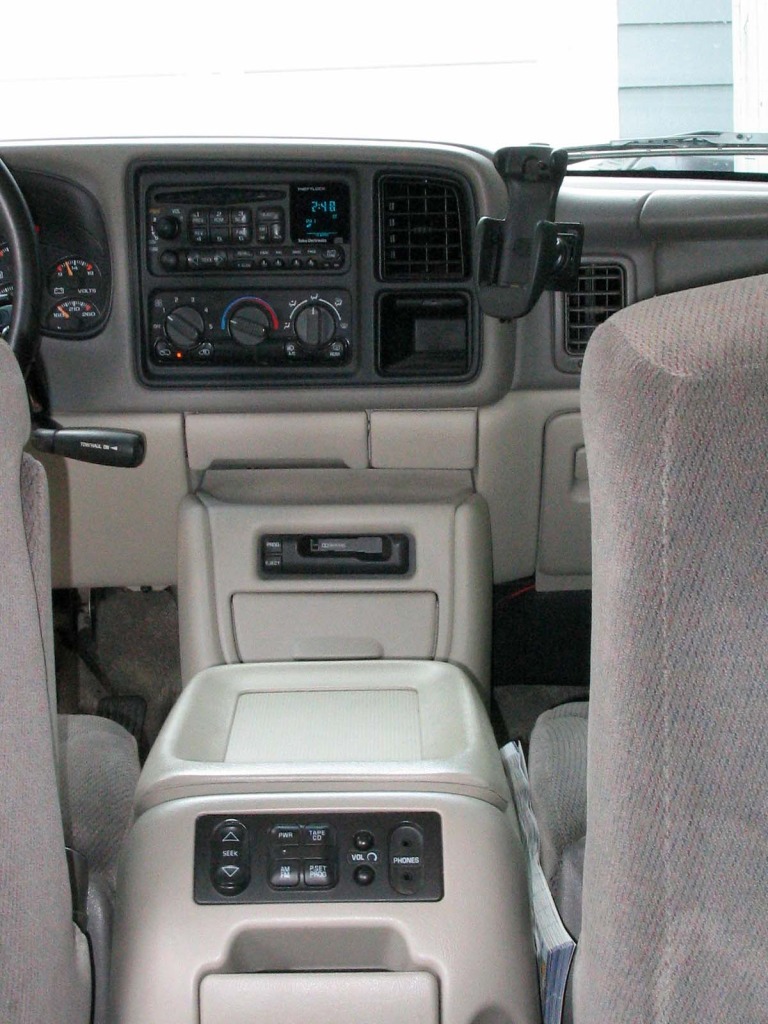
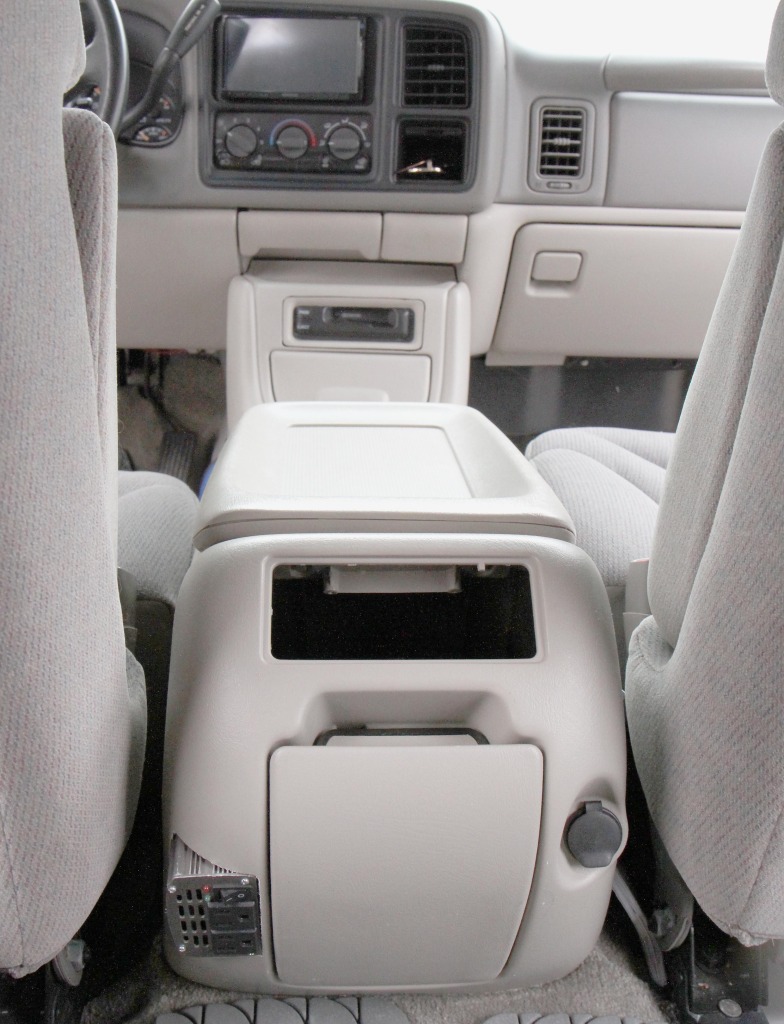
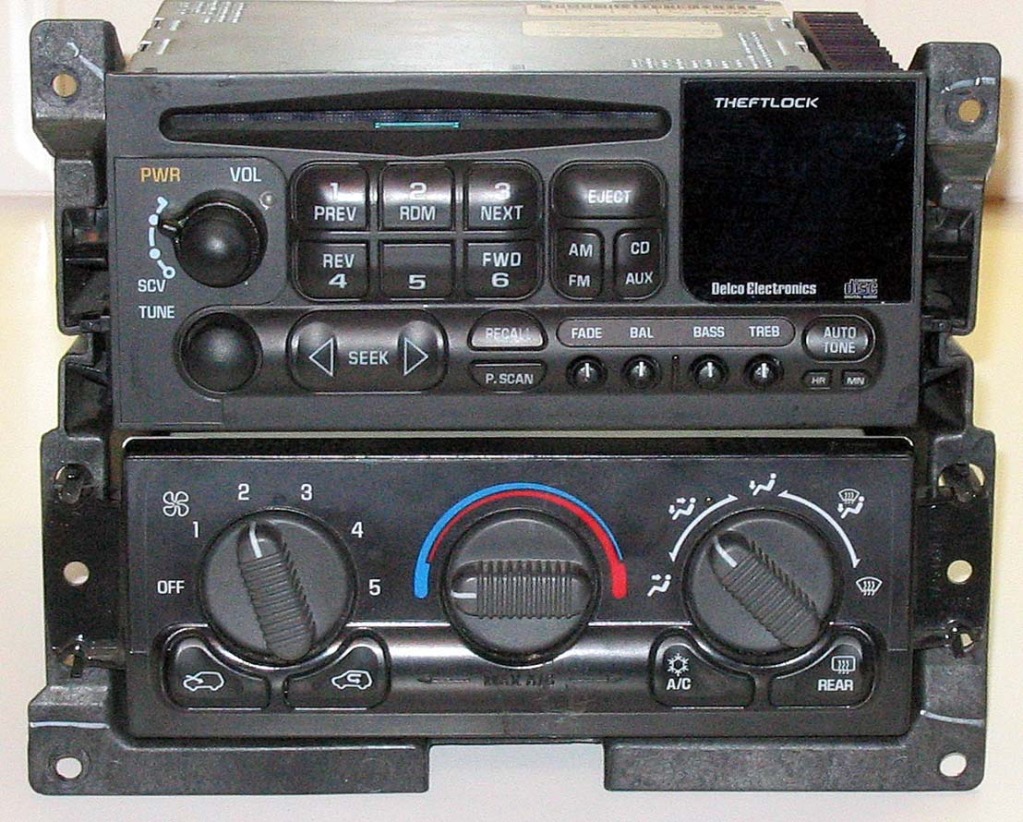
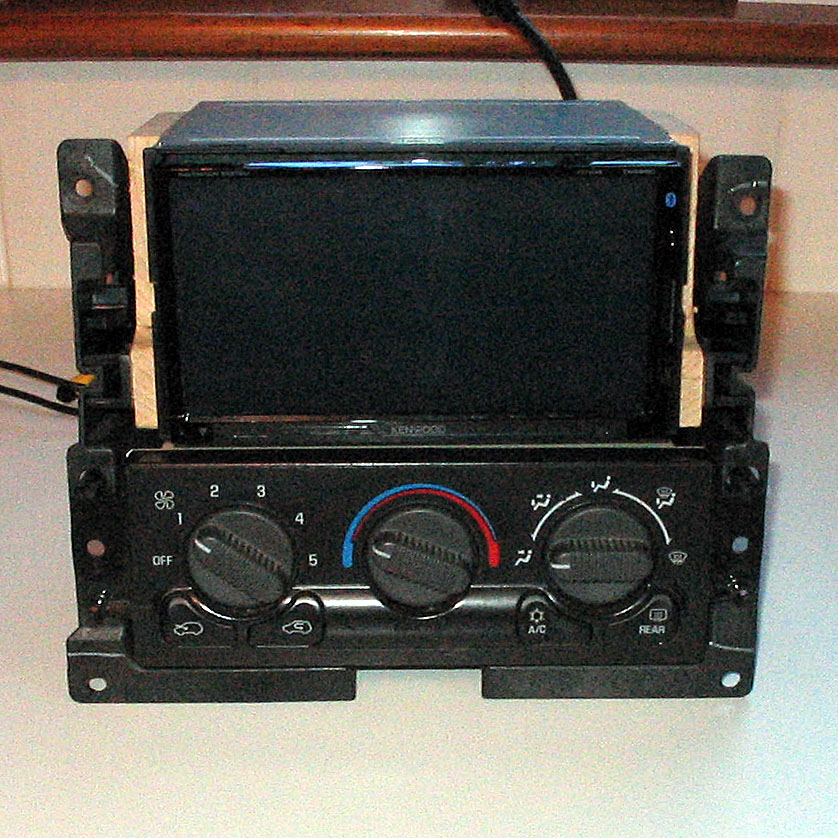
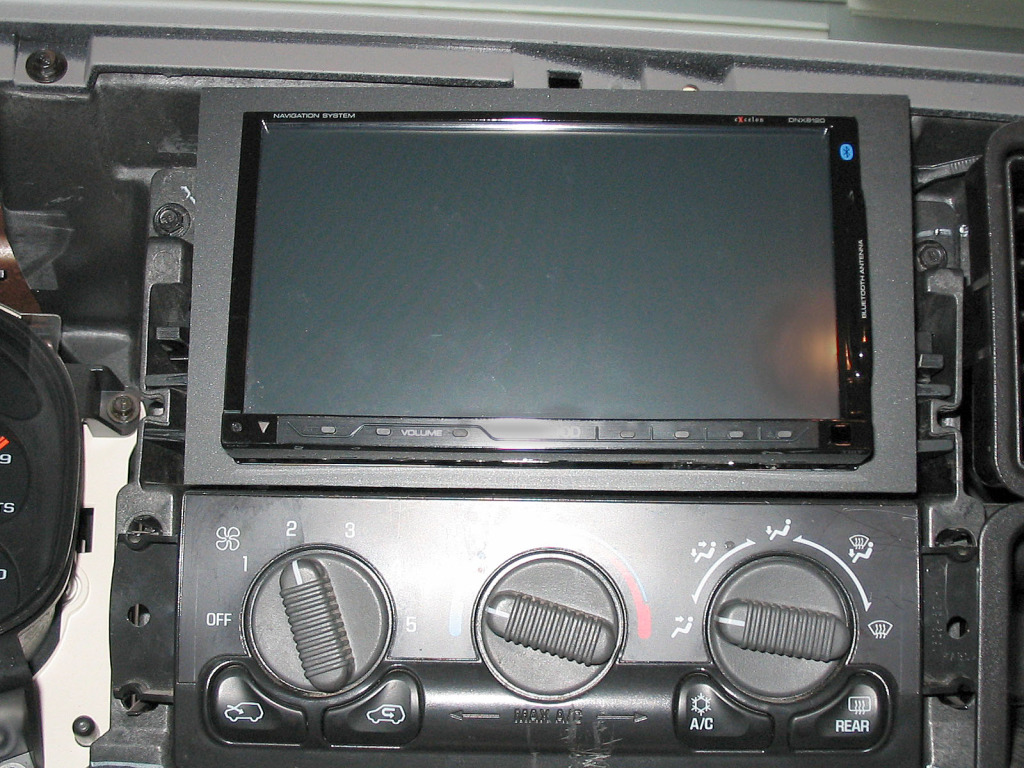
Here are overview pictures “before” and “after” pictures of the radio installation:
I would describe this upgrade as an intermediate to advanced task. I wanted to integrate everything in a manner that would have pretty much a factory/OEM appearance. In my day job, I am an avionics (aviation electronics) engineer for a general aviation manufacturer. So this task was a lot like some of the things that I do on a regular basis. I’ve also fabricated a lot of things for vehicles, so this project fell right in line with other things that I like to do.
Here are overview pictures “before” and “after” pictures of the radio installation:
Last edited by Steve Bryant; 05-25-2012 at 03:55 PM. Reason: Replaced pictures with better versions of same.
 03-17-2011, 11:16 PM
#2
LS1 Tech Veteran
Thread Starter
iTrader: (1)
Join Date: Oct 2003
Location: Wichita, Ks
Posts: 1,172
Likes: 0
Received 0 Likes
on
0 Posts
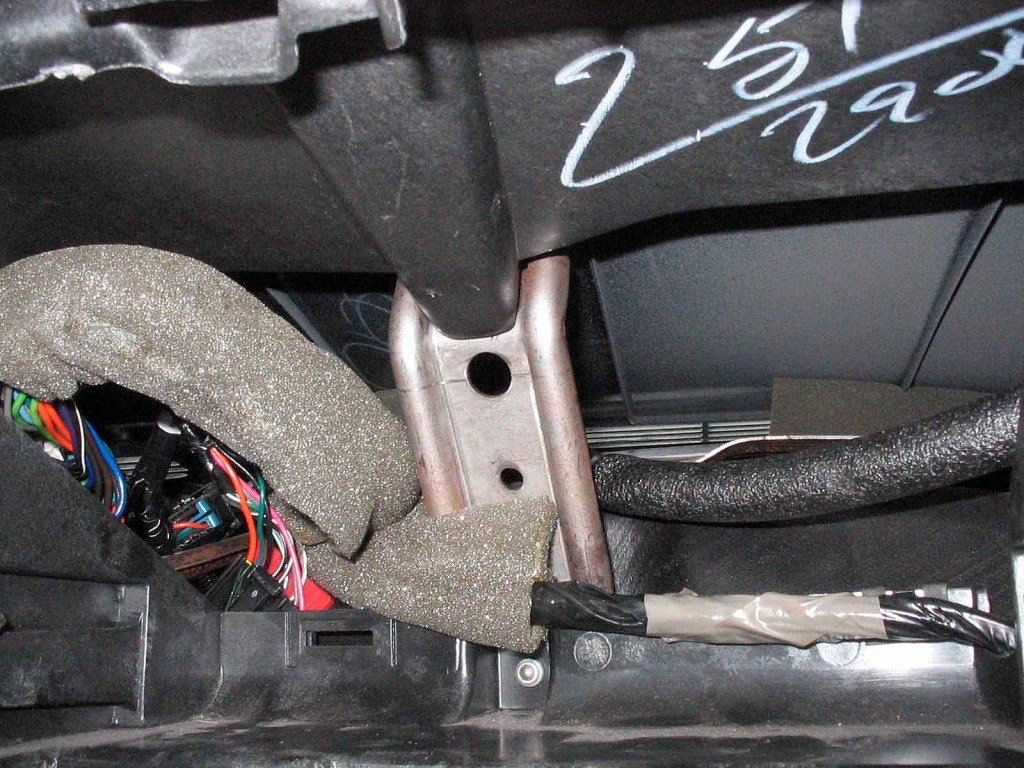
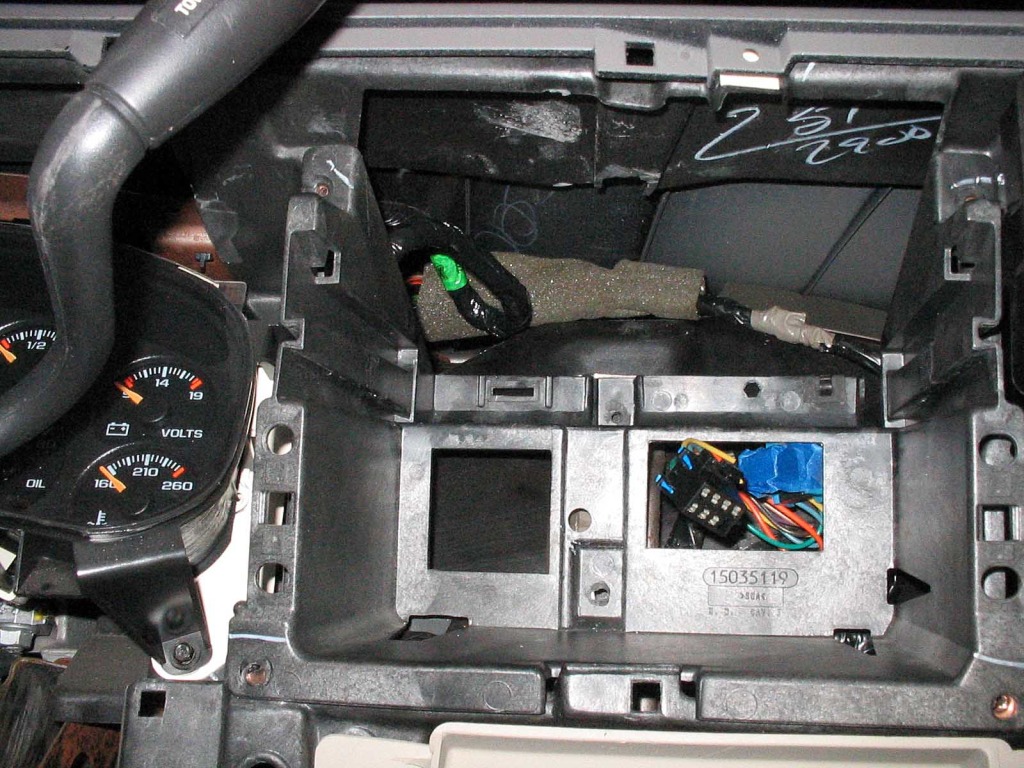
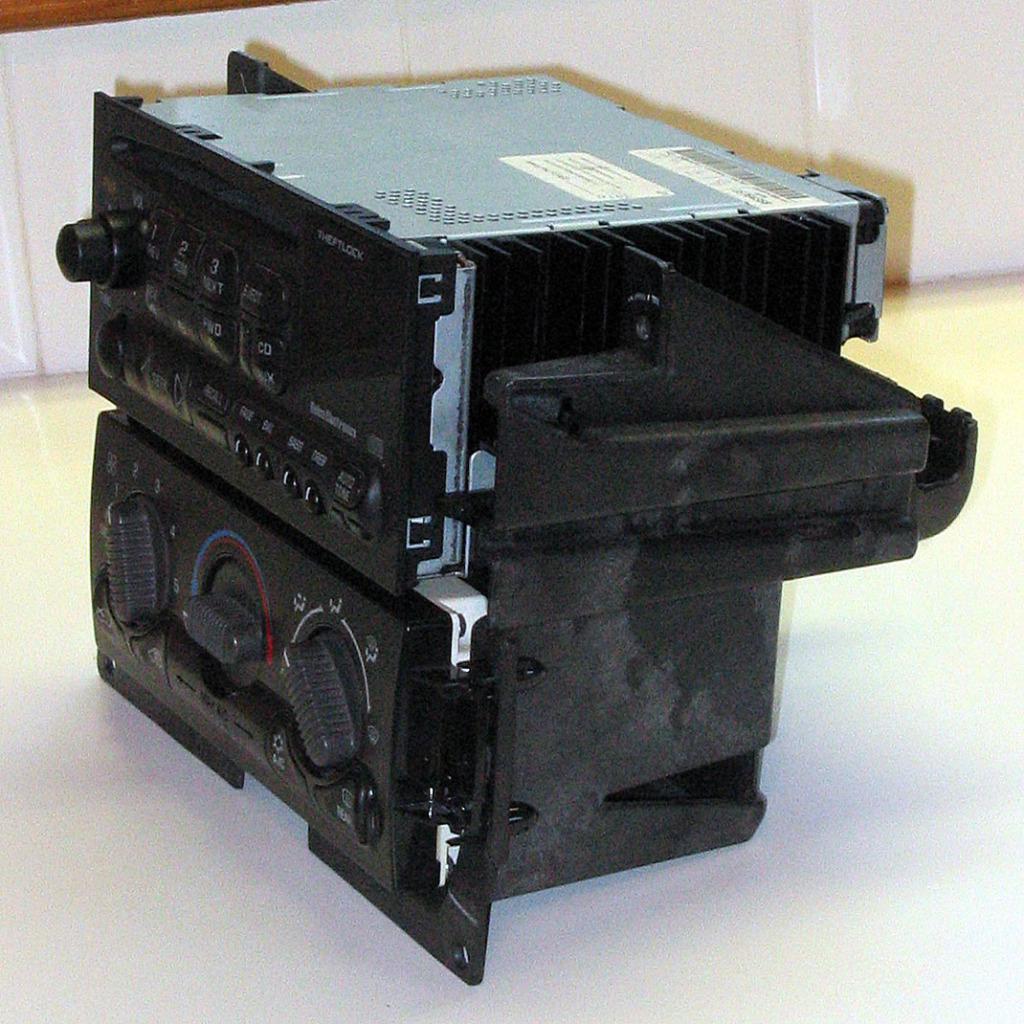
In order to have enough vertical clearance, I had to remove the “bucket” mounting assembly and cut out a plastic rib and metal brace.
Last edited by Steve Bryant; 05-25-2012 at 05:09 PM. Reason: Replace pictures with improved versions.
03-17-2011, 11:17 PM
#3
LS1 Tech Veteran
Thread Starter
iTrader: (1)
Join Date: Oct 2003
Location: Wichita, Ks
Posts: 1,172
Likes: 0
Received 0 Likes
on
0 Posts
Here’s the front view of the factory 1.5 DIN Radio and the Kenwood KNX8120 Double DIN head unit. Note I had to make some plywood (Baltic Birch Plywood about 6mm thick) and I retained the factory style mounting rails using aftermarket plastic rails that were cut out of an aftermarket GM mounting adapter. A number of folks have done similar projects using 2003 and after parts that directly accommodate a 2 DIN head unit. My project is a little different in that I modified my 1.5 DIN parts to accommodate the 2 DIN head unit.
Last edited by Steve Bryant; 05-25-2012 at 05:11 PM. Reason: Replace pictures with improved versions.
03-17-2011, 11:19 PM
#4
LS1 Tech Veteran
Thread Starter
iTrader: (1)
Join Date: Oct 2003
Location: Wichita, Ks
Posts: 1,172
Likes: 0
Received 0 Likes
on
0 Posts
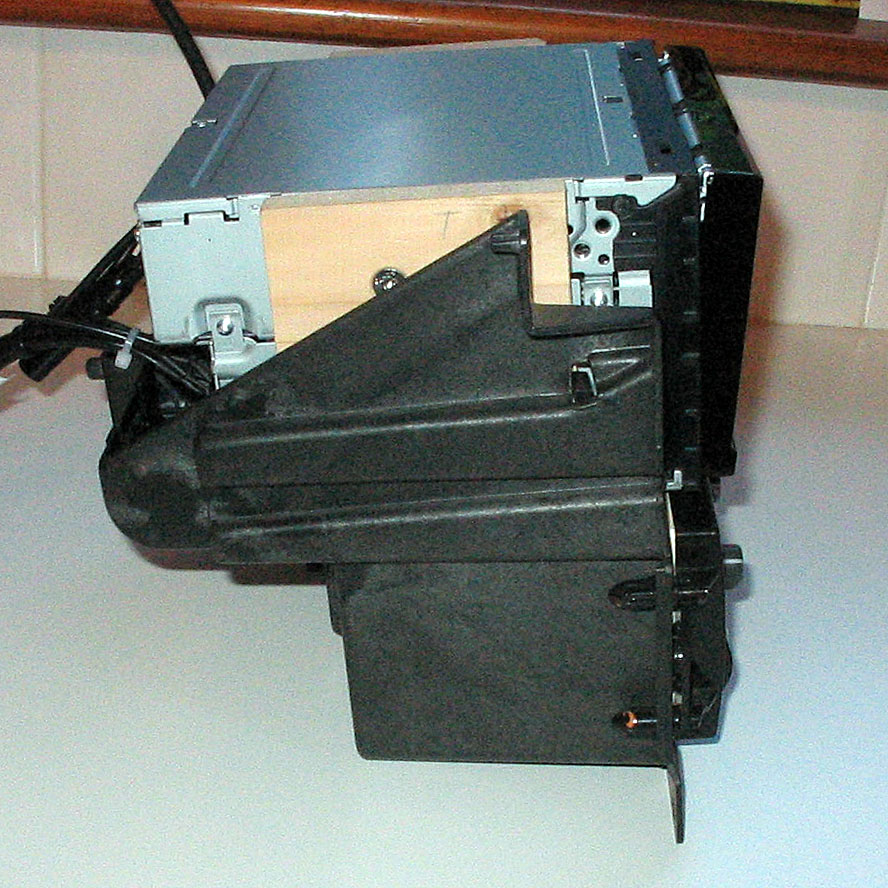
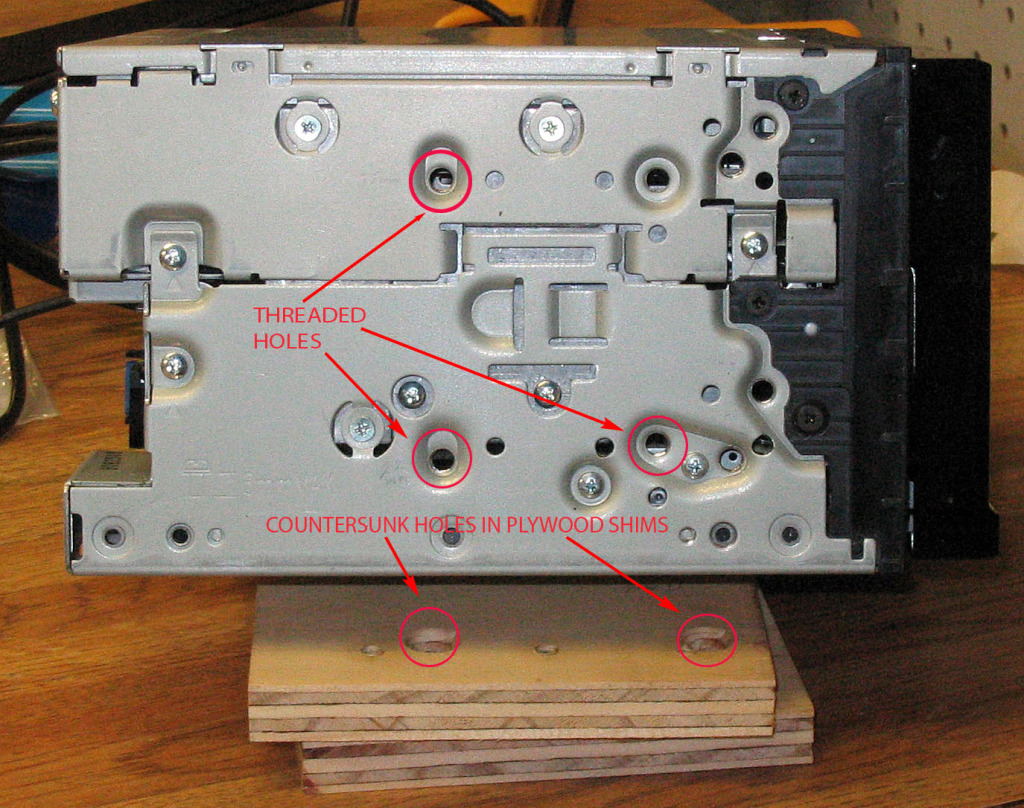
Here are the side views of the two receivers plus a bit of detail on the plywood shims. I wish that I had taken another picture of the 2 DIN unit with the shims installed, but I was trying to press ahead to get the installation done and the photographic documentation was secondary.
Last edited by Steve Bryant; 05-25-2012 at 05:15 PM. Reason: Replace pictures with improved versions.
03-17-2011, 11:21 PM
#5
LS1 Tech Veteran
Thread Starter
iTrader: (1)
Join Date: Oct 2003
Location: Wichita, Ks
Posts: 1,172
Likes: 0
Received 0 Likes
on
0 Posts
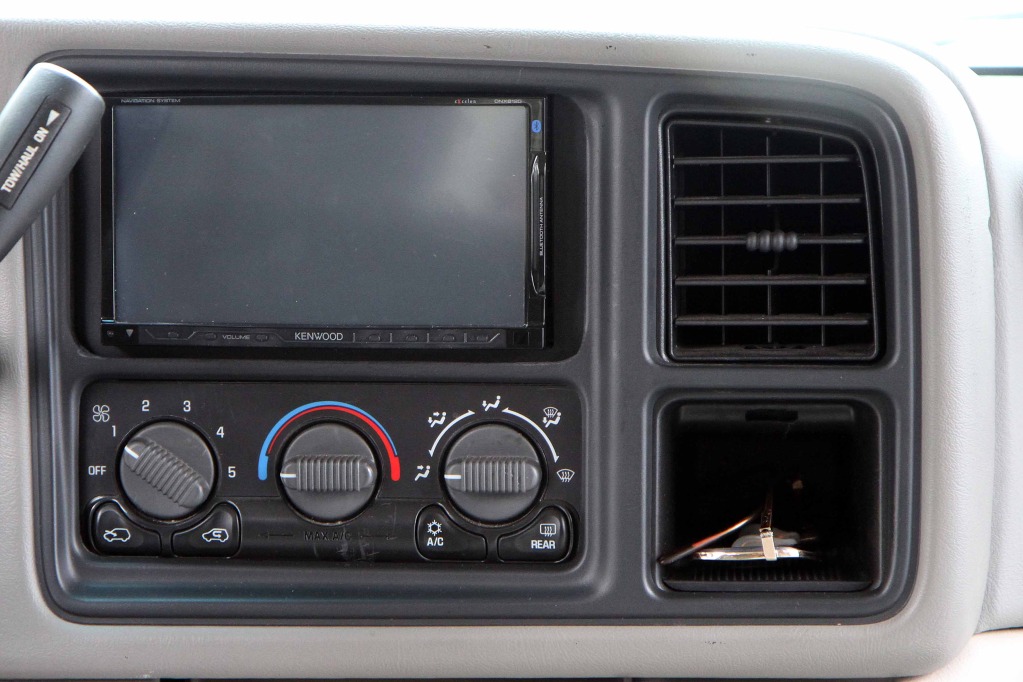
Now, the “bucket” with radio is installed back in its home in the Yukon. In the first picture note the frame or mask that is included with the Kenwood unit (must be cut to size to fit the vehicle). The second picture shows the instrument panel bezel reinstalled. Note: the horizontal bar in the bezel that visually separates the receiver and the climate controls had to be cut down and smoothed quite a bit for clearance with the head unit. The same is true for the upper portion of the bezel where it comes into close proximity to the top of the double DIN unit. Also, it took two or three tries to get the head unit properly placed vertically in order to clear the bottom part of the bezel frame and still fit into the space available on top without hitting the area where I had to cut out the plastic reinforcing rib shown earlier.
Last edited by Steve Bryant; 05-25-2012 at 05:18 PM. Reason: Replaced pictures with improved versions.
03-17-2011, 11:23 PM
#6
LS1 Tech Veteran
Thread Starter
iTrader: (1)
Join Date: Oct 2003
Location: Wichita, Ks
Posts: 1,172
Likes: 0
Received 0 Likes
on
0 Posts
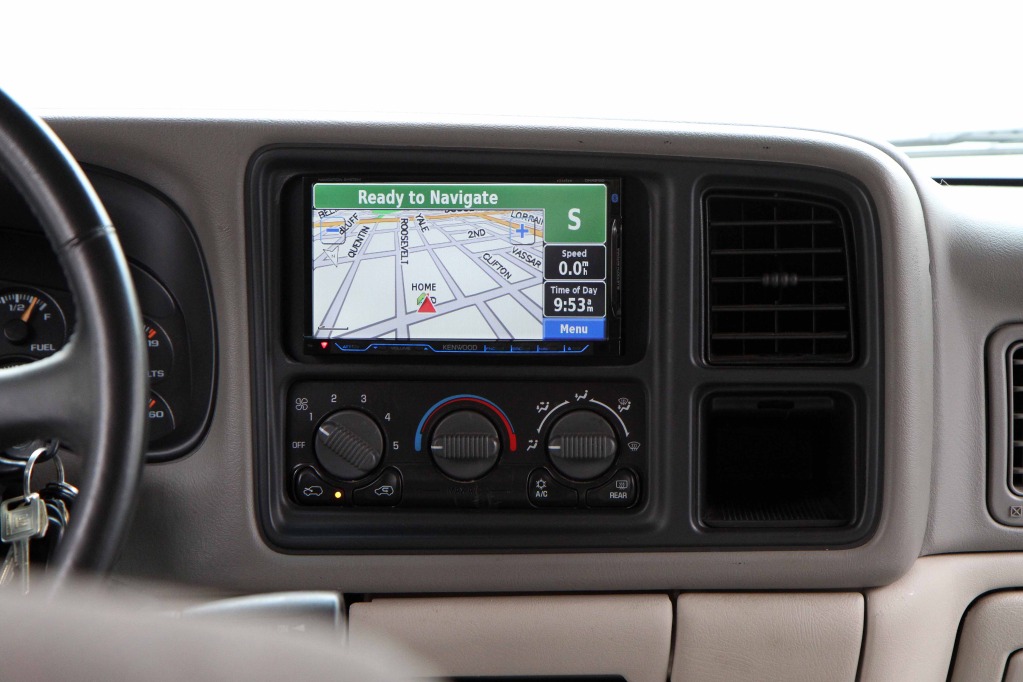
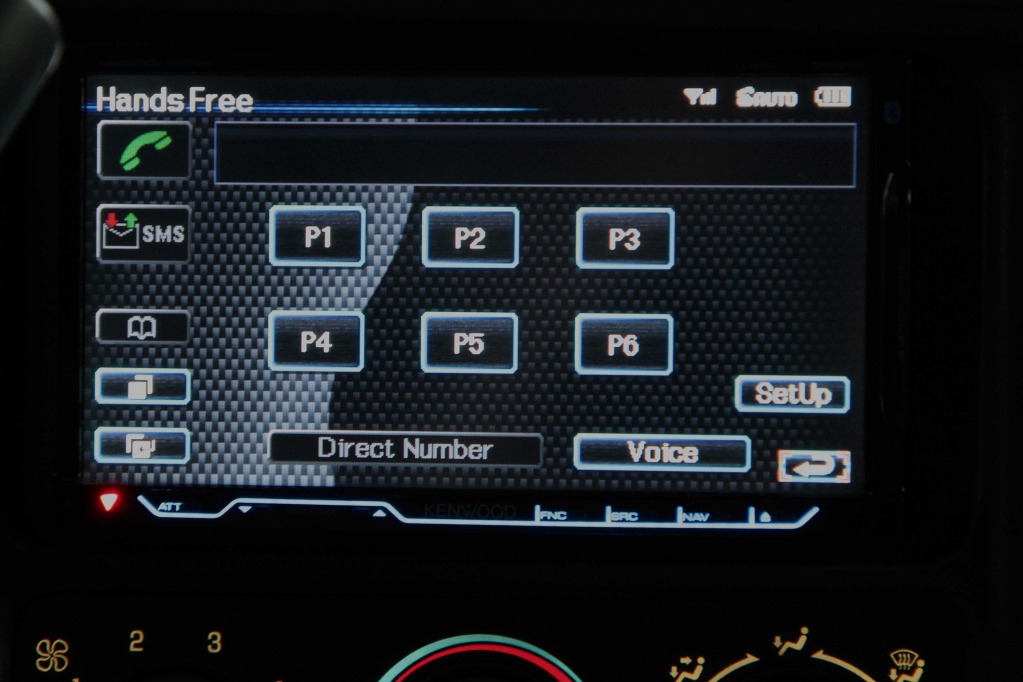
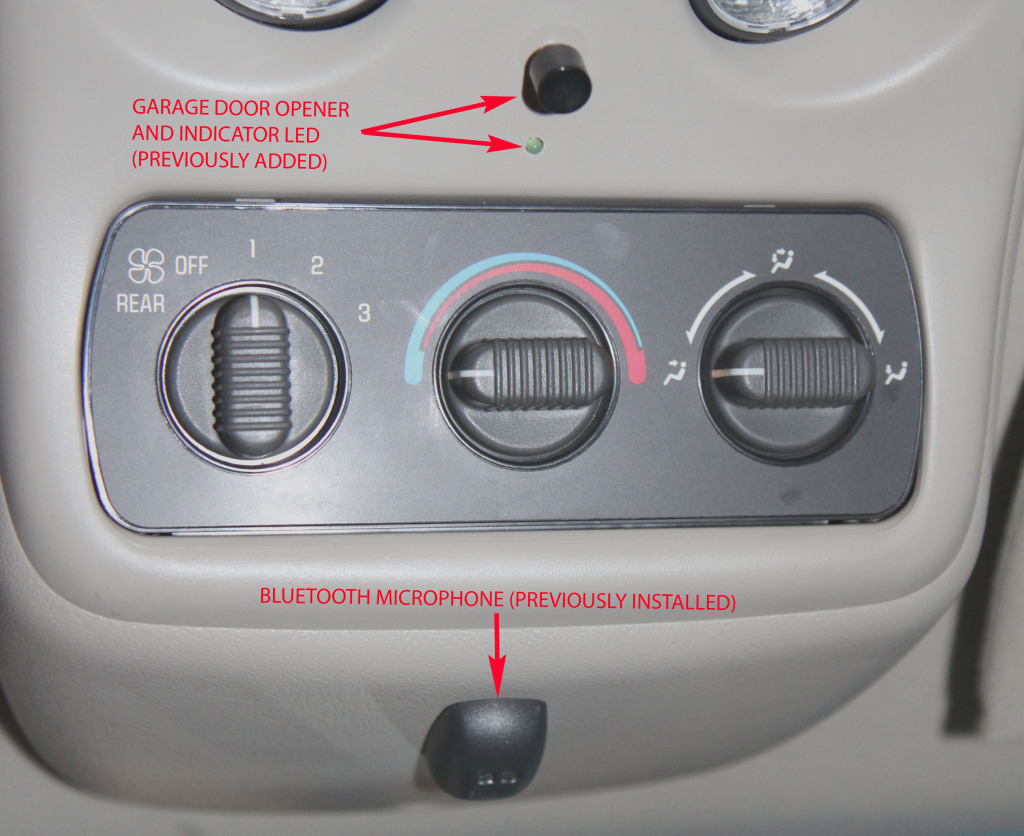
Here are some close ups of the Garmin-based GPS Navigation Display and the hands-free (blue tooth coupled) cell phone screen. Regarding the hands-free interface to the blue tooth capable cell phone, I re-used my microphone from a previous hard-wired hands free phone installation because it was already in place and I thought that it was esthetically more pleasing than the Kenwood supplied unit. The audio fidelity was equally good with either microphone. Also, you can see in the overhead console a project of about eight years ago where I integrated the sun visor clip on garage door opener. I hooked the power that runs the eyeball lights to the garage door opener and re located the green LED into an appropriate sized hole. I also installed a momentary push button switch from Radio Shack to activate the door opener.
Last edited by Steve Bryant; 05-25-2012 at 05:21 PM. Reason: Replace pictures with improved versions.
03-17-2011, 11:25 PM
#7
LS1 Tech Veteran
Thread Starter
iTrader: (1)
Join Date: Oct 2003
Location: Wichita, Ks
Posts: 1,172
Likes: 0
Received 0 Likes
on
0 Posts
Here’s the rear view of the vehicle provided by the Boyo VTL425 license plate bar type camera (shown in second photo).


Last edited by Steve Bryant; 05-25-2012 at 05:25 PM. Reason: Replace pictures with improved versions.
Trending Topics
03-17-2011, 11:27 PM
#8
LS1 Tech Veteran
Thread Starter
iTrader: (1)
Join Date: Oct 2003
Location: Wichita, Ks
Posts: 1,172
Likes: 0
Received 0 Likes
on
0 Posts
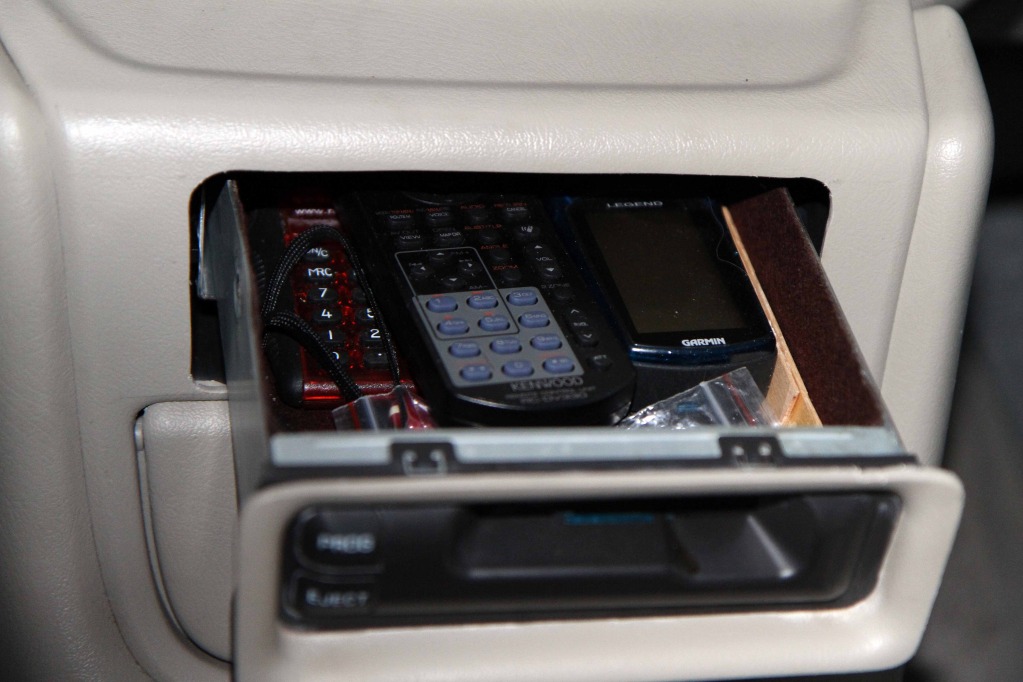
Now for some additional touches; I first re-purposed the tape drive by gutting the innards of the cassette tape drive and lined the bottom and sides with glued-in felt. I also pre-marked the line (using a pencil) where the bone colored escutcheon contacts the black face of the tape drive. Next, I removed the escutcheon and cut around the perimeter of the rectangular opening with a jig saw, making a frame of sorts for the drawer. Next, I glued the bone colored frame that was extracted from the escutcheon to the black face of the tape drive using the pre-marked pencil line as a placement guide.
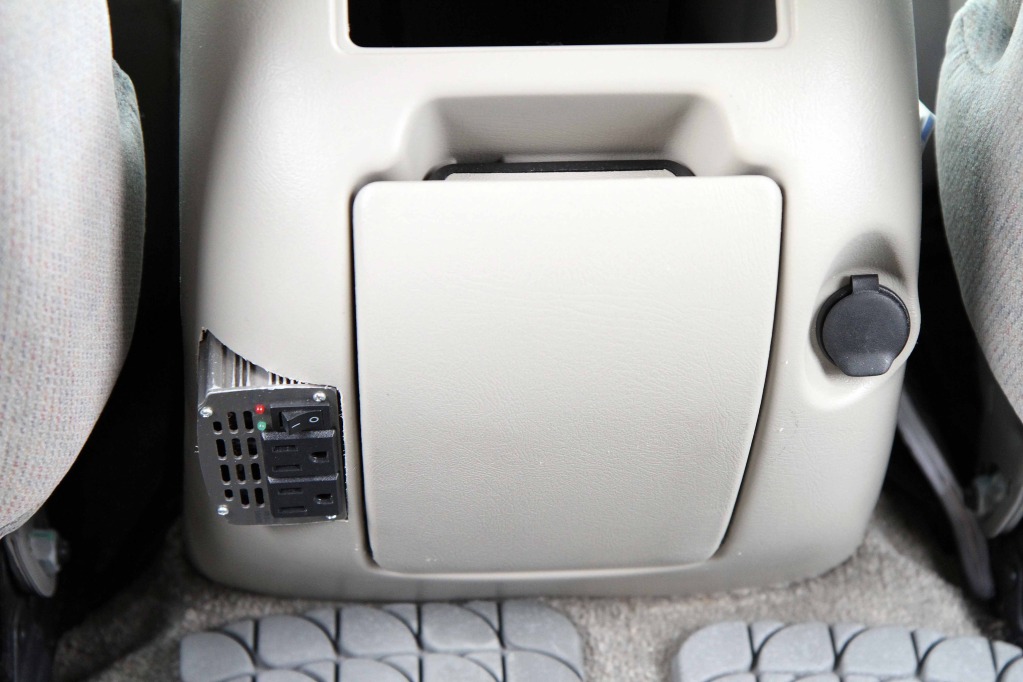
The second finishing touch was to install a 300W inverter that I’d had for about five years into the back of the console. Note: I’m still looking for some ideas on what to do with the space where the rear seat audio control was installed. If anyone has a suggestion, let me know.
The second finishing touch was to install a 300W inverter that I’d had for about five years into the back of the console. Note: I’m still looking for some ideas on what to do with the space where the rear seat audio control was installed. If anyone has a suggestion, let me know.
Last edited by Steve Bryant; 05-25-2012 at 05:28 PM. Reason: Replace pictures with improved versions.
 03-20-2011, 09:01 AM
#10
LS1 Tech Veteran
Thread Starter
iTrader: (1)
Join Date: Oct 2003
Location: Wichita, Ks
Posts: 1,172
Likes: 0
Received 0 Likes
on
0 Posts
As I recall from my investigations, I would have had to replace more than just the bezel if I used the newer bezel. I don't remember all of the details, but it seemed like it would be more work and more expense.
However, there was more work than I had initially anticipated by doing this modification the way I did. I'm glad though that it turned out as well as it did.
Steve
However, there was more work than I had initially anticipated by doing this modification the way I did. I'm glad though that it turned out as well as it did.
Steve

Thread
Thread Starter
Forum
Replies
Last Post
Offroadunleashed
Trucks and SUV Classifieds
0
07-20-2015 02:25 PM
FlowmasterMufflers
Foreign Performance Discussion
0
07-09-2015 12:23 PM
Nimoryan
GMT 800 & Older GM General Discussion
0
07-05-2015 03:50 PM