

Mirror caps, how did you match yours?

 Apr 12, 2010 | 06:15 PM
#22
Thread Starter
TECH Fanatic
Joined: Mar 2009
Posts: 1,513
Likes: 0
From: St. Louis Area

Ws6ls, on a side note did you remove the reflectors in your headlights yourself or have someone else do it?
Apr 12, 2010 | 07:09 PM
#24
Thread Starter
TECH Fanatic
Joined: Mar 2009
Posts: 1,513
Likes: 0
From: St. Louis Area
I got ya. I want to get rid of that nasty orange. lol I like the way yours looks and there is another truck on here 8Mc that looks awesome. I was just curious. I've heard that it takes a lot of patience which I am limited with. lol That will be on the list of things to do after I get my mirrors painted.
Apr 13, 2010 | 08:23 PM
#26
Thread Starter
TECH Fanatic
Joined: Mar 2009
Posts: 1,513
Likes: 0
From: St. Louis Area
Ok so i didn't wait until the weekend to do it. I have so much to do right now, as I'm sure we all do . . . but those black mirror caps were driving me insane. So here are the pics of what I did with it and some after shots. Hope this helps someone down the road.
Let me know what you think
Here is my process in a nutshell so you don't have to read everything.
sand
wash
2 coats adhesion promoter
1 coat primer
3 light coats of summit white
2 clear coats
Ok, well the first thing I had to do was get the caps off the mirrors. This is a lot easier than everyone makes it out to be. If they are out in the sun they come right off because they are held on by two sided tape. There are 4 tabs on the back but as long as you pry them off gently they shouldn't break. Here is a pic of the mirror without the tabs. You can see the slots where they go.

Then when I had the caps off I sanded them down. I used 4 different sizes of sandpaper and this is what order. . . .
1) 100 grit
2) 220 grit
3) 400 grit
4) 800 grit
Here is a pic of them sanded down and ready to be washed up

Then i washed them with dish soap and water and then dried them off


This is what I chose to work with but I'm sure there is a lot of products out there that would work just as well.

first the adhesion promoter (the cans are there so I could spray the edges more easily.

Then spray on the primer

Duplicolor summit white/olympic white is what it says on the can when you buy it at the store

Then the clear coat

Let me know what you think
Here is my process in a nutshell so you don't have to read everything.
sand
wash
2 coats adhesion promoter
1 coat primer
3 light coats of summit white
2 clear coats
Ok, well the first thing I had to do was get the caps off the mirrors. This is a lot easier than everyone makes it out to be. If they are out in the sun they come right off because they are held on by two sided tape. There are 4 tabs on the back but as long as you pry them off gently they shouldn't break. Here is a pic of the mirror without the tabs. You can see the slots where they go.
Then when I had the caps off I sanded them down. I used 4 different sizes of sandpaper and this is what order. . . .
1) 100 grit
2) 220 grit
3) 400 grit
4) 800 grit
Here is a pic of them sanded down and ready to be washed up
Then i washed them with dish soap and water and then dried them off
This is what I chose to work with but I'm sure there is a lot of products out there that would work just as well.
first the adhesion promoter (the cans are there so I could spray the edges more easily.
Then spray on the primer
Duplicolor summit white/olympic white is what it says on the can when you buy it at the store
Then the clear coat
Apr 13, 2010 | 08:30 PM
#27
Thread Starter
TECH Fanatic
Joined: Mar 2009
Posts: 1,513
Likes: 0
From: St. Louis Area
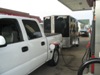
Here are some after pics.
Thanks to Ws6ls1, Derek, and everybody else for their help & input.


The dog felt like she needed to be included since she slept on the garage floor the whole time I was doing this.


Thanks to Ws6ls1, Derek, and everybody else for their help & input.
The dog felt like she needed to be included since she slept on the garage floor the whole time I was doing this.


Thread
Thread Starter
Forum
Replies
Last Post