Project "Rebel Yell"
 09-01-2018, 12:11 PM
#61
100% Redneck
Thread Starter

How are you liking the sloppy stage 2 cam and the 3200 stall for the LQ9? Now that you have driven it a good bit would you choose something bigger, smaller, or is it just right for you?
I am getting ready to swap in an LQ9 in my truck, and I am trying to decide what cam to go with. The truck is my daily, so it will need to drive well. Not going to be a race truck only. Really the only towing I do is if I am hauling my RZR somewhere, so maybe 2500-3000lbs occasionally. I was thinking a 3000 Yank or Circle D converter for mine.
Thoughts? I love the way your truck is coming along.
I may have over done the assembly lube


The following users liked this post:
RedXray (09-10-2018)
09-15-2018, 09:42 AM
#63

Great looking truck. How's it running? im about 20 mins south of Charlotte i would love to come see it after this hurricane passes, hope all is well and your family stay safe
11-20-2018, 12:38 AM
#64
100% Redneck
Thread Starter
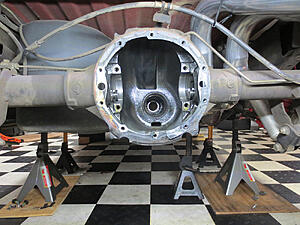
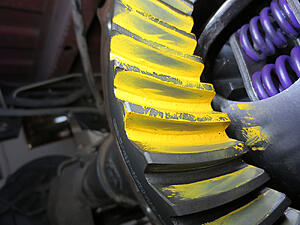
Installed a Yukon DuraGrip with 4.10's to replace the open diff and 3.42's. Getting the proper carrier preload and backlash I pulled and reinstalled the carrier eight times. I was just within specs at .010 backlash (.006 to .010) but wanted it a bit tighter. The next try was a little tight at .004 then the last test fit came to .008 backlash exactly what I wanted.
The pattern looked good with a .034 pinion shim (oem shim was .033) so I didn't have to re-shim the pinion and start over. The crush sleeve eliminator kit took three tries .027 shim no pinion preload, .024 shim to much preload, and last the .025 shim came out to 18 in/lbs preload at the tight end of the 14 to 19 spec.
Hooked up HP Tuners and changed the settings in the Tire/Gear Wizard to adjust the speedo for the new gear ratio and to automatically scale the transmission parameters. During the test drive I heard no gear noise and noticed the truck pulled the hills on the road effortlessly where with the 3.42's I'd have to open the throttle more to keep the same highway speed. The camshaft is closer to the RPM range, you know the sound and feel where she wants to pull really hard! I wanted to get a little rowdy but I'm just starting the 500 mile gear break in and you're supposed to stay under 60 mph the first 100 miles.
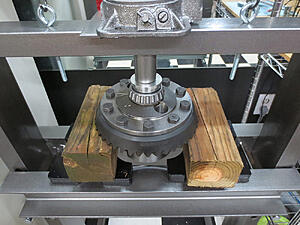
Pressing on carrier bearings plus installing the ring gear and torquing the bolts
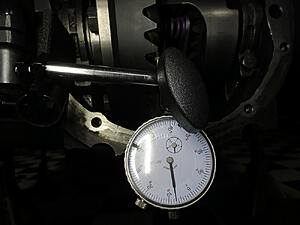
Backlash .008
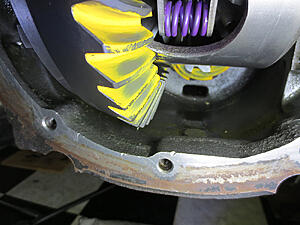
Drive side pattern
Coast side pattern
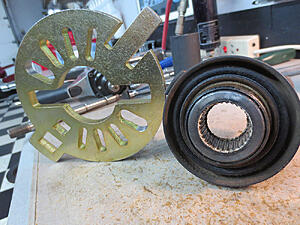
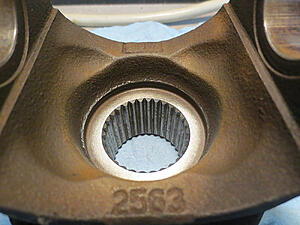
The factory grease used to install the yoke had turned to glue after 19 years and was tough to drive off the pinion splines. I soaked it overnight in lacquer thinner to remove.
The pattern looked good with a .034 pinion shim (oem shim was .033) so I didn't have to re-shim the pinion and start over. The crush sleeve eliminator kit took three tries .027 shim no pinion preload, .024 shim to much preload, and last the .025 shim came out to 18 in/lbs preload at the tight end of the 14 to 19 spec.
Hooked up HP Tuners and changed the settings in the Tire/Gear Wizard to adjust the speedo for the new gear ratio and to automatically scale the transmission parameters. During the test drive I heard no gear noise and noticed the truck pulled the hills on the road effortlessly where with the 3.42's I'd have to open the throttle more to keep the same highway speed. The camshaft is closer to the RPM range, you know the sound and feel where she wants to pull really hard! I wanted to get a little rowdy but I'm just starting the 500 mile gear break in and you're supposed to stay under 60 mph the first 100 miles.


Pressing on carrier bearings plus installing the ring gear and torquing the bolts

Backlash .008

Drive side pattern

Coast side pattern

The factory grease used to install the yoke had turned to glue after 19 years and was tough to drive off the pinion splines. I soaked it overnight in lacquer thinner to remove.


Last edited by RedXray; 11-20-2018 at 12:47 AM.
The following users liked this post:
strutaeng (09-22-2022)

The following users liked this post:
RedXray (11-27-2018)

The following users liked this post:
RedXray (11-27-2018)
12-01-2018, 05:41 AM
#68
100% Redneck
Thread Starter
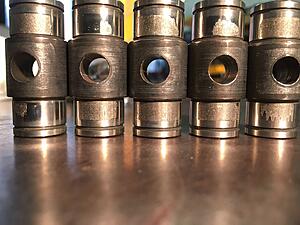
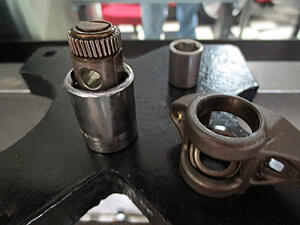
I've felt a little uncomfortable not doing the trunion upgrade during the build. Now I can sleep easier not having nightmares of needle bearings dancing around in the oil pan. I went with the brass bushings after researching and finding out the Comp, BTR and all of the caged needle kits have abnormal wear patterns on the bottom of the trunions.
Abnormal trunion wear.
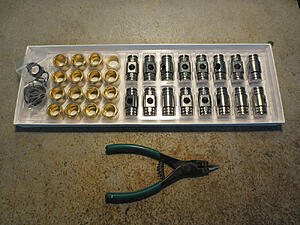
I went with the Smith Brothers kit. It's packaged very well and came with two extra snap rings. Not a bad deal for $140 shipped (ebay). I ordered on a Wednesday and it was delivered the next day with standard shipping!
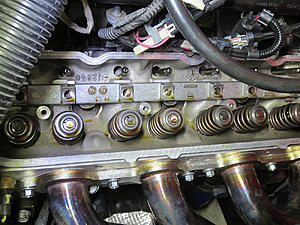
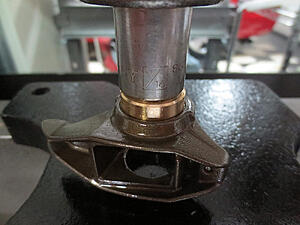
Tear down happy to see no stray needles
The 20 Ton Harbor Freight easily dismantled the old trunions. I used just my thumb in the bottle jack to lessen the power and to have a better tactile feel.
Pressing the bushings in the rockers.
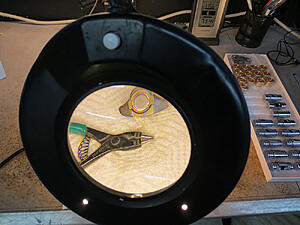
I had to bust out my lighted magnifying glass to better see the clips and the tiny holes for the snap ring pliers. Getting old has a few draw backs... like seeing small objects... it's better than NOT getting old!
First two!

All pressed in ready to reassemble!
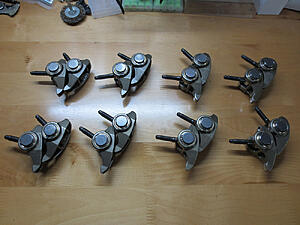
Installed and torqued to 22 ft/lbs
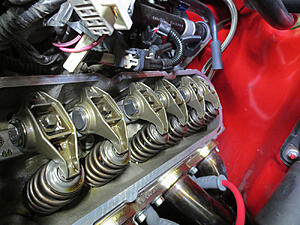
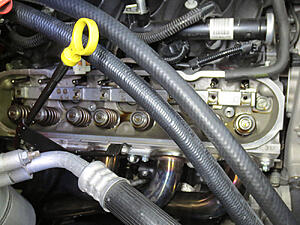
Valve covers back on and plugs & wires back in.
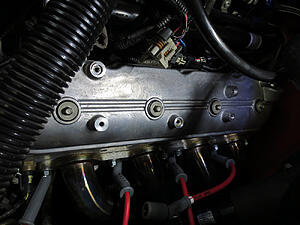
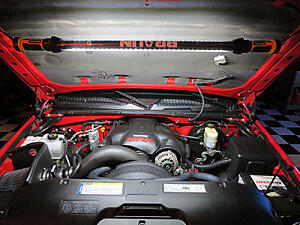
All finished
Abnormal trunion wear.

I went with the Smith Brothers kit. It's packaged very well and came with two extra snap rings. Not a bad deal for $140 shipped (ebay). I ordered on a Wednesday and it was delivered the next day with standard shipping!

Tear down happy to see no stray needles


The 20 Ton Harbor Freight easily dismantled the old trunions. I used just my thumb in the bottle jack to lessen the power and to have a better tactile feel.

Pressing the bushings in the rockers.

I had to bust out my lighted magnifying glass to better see the clips and the tiny holes for the snap ring pliers. Getting old has a few draw backs... like seeing small objects... it's better than NOT getting old!

First two!

All pressed in ready to reassemble!

Installed and torqued to 22 ft/lbs

Valve covers back on and plugs & wires back in.

All finished
 12-01-2018, 09:04 AM
#69
On The Tree

Nice job on the Rockers and it's good to see you going the extra step setting up your gears, I always have some one ask me to look at their gear issues a few months after they didn't set theirs up right the first time.
The following users liked this post:
RedXray (12-01-2018)
12-01-2018, 07:02 PM
#70
100% Redneck
Thread Starter
I'm a paint, body, collision guy done some wrenching along the way but always ended back in the primer and bondo dust. I now have the utmost respect for guys that specialize in gears. Just driving the pinion yoke off was a job in itself. From knocking the races out/in to test fitting the carrier over half a dozen times is very physical work while using jack stands. Then the grease OMG when I was finished I was greasier than the underside of the truck! I didn't even think about washing the work jeans, just tossed um in the trash.

I think I'll stick to mangled sheet metal and deadly paint fumes