Hax's 2008 Silverado RCSB build
 03-03-2017, 01:32 PM
#1
Teching In
Thread Starter

Join Date: Mar 2017
Location: Cuauhtemoc, Chihuahua, MX
Posts: 17
Likes: 0
Received 3 Likes
on
1 Post
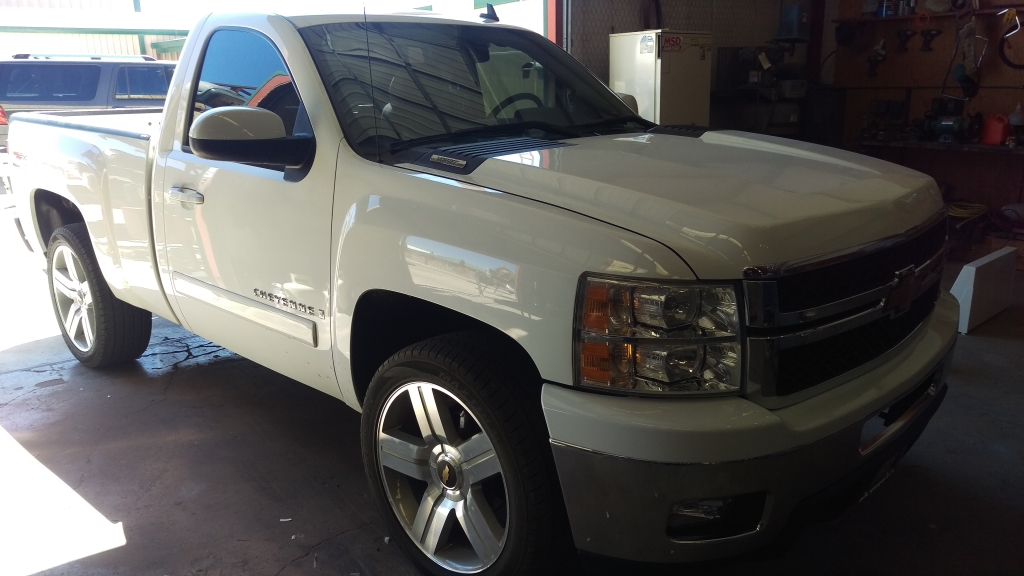
Sup, I'm a new member and here's my work in progress 2008 Silverado RCSB build.
Bought the truck (april 2015), in a somewhat okay shape(needed minor body work)
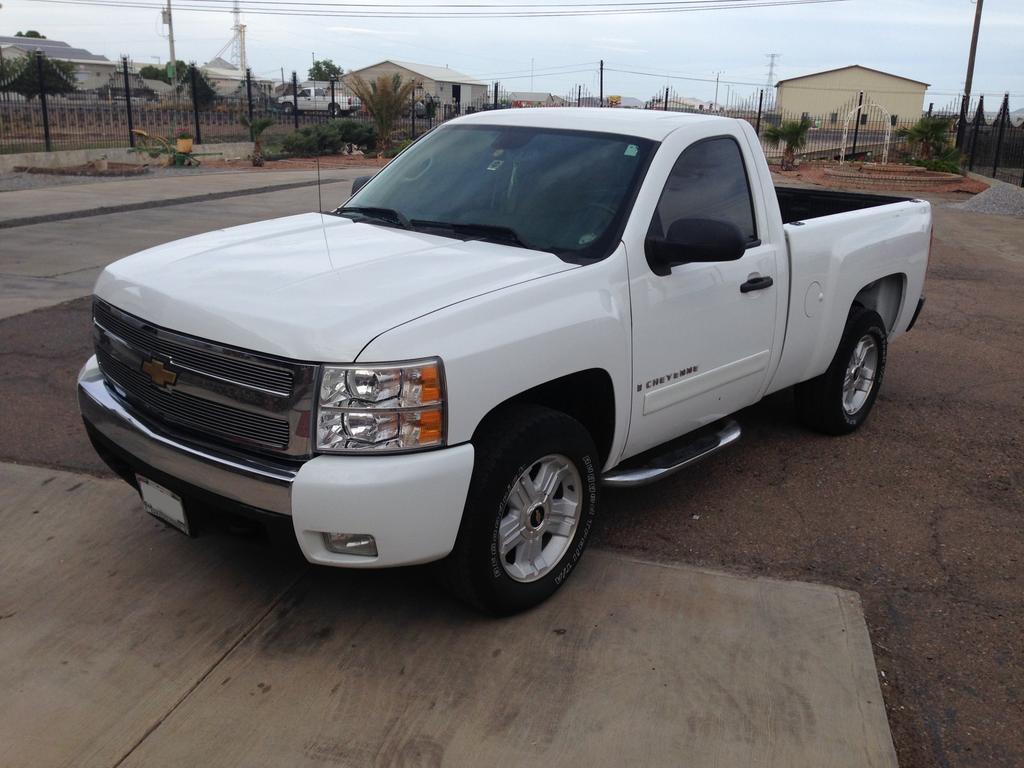
First clean up, installed new fog lights, and removed some stuff I didn't approve of:
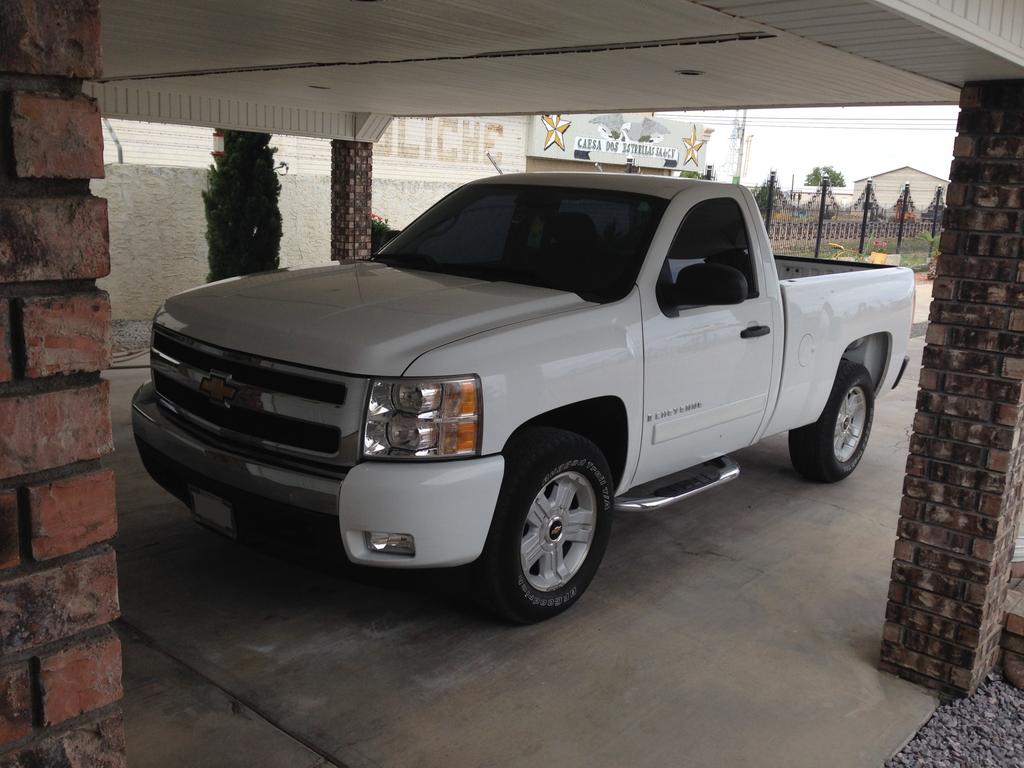
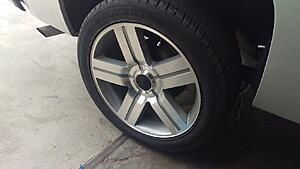
Obviously had to go with some bigger wheels, 20" texas editions oem.
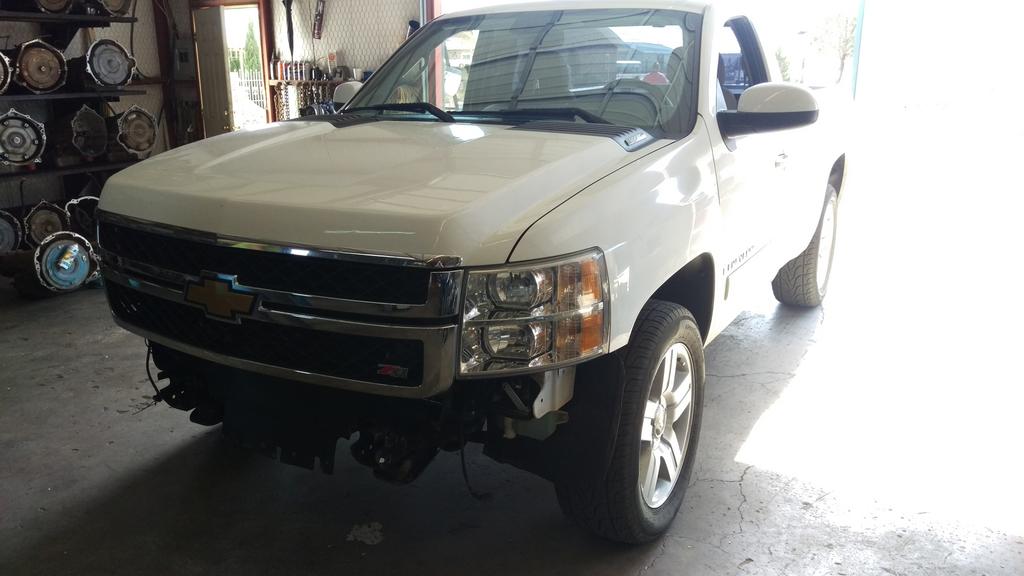
I saw people doing HD conversions to their trucks, and I really liked the look. I started with the grill:
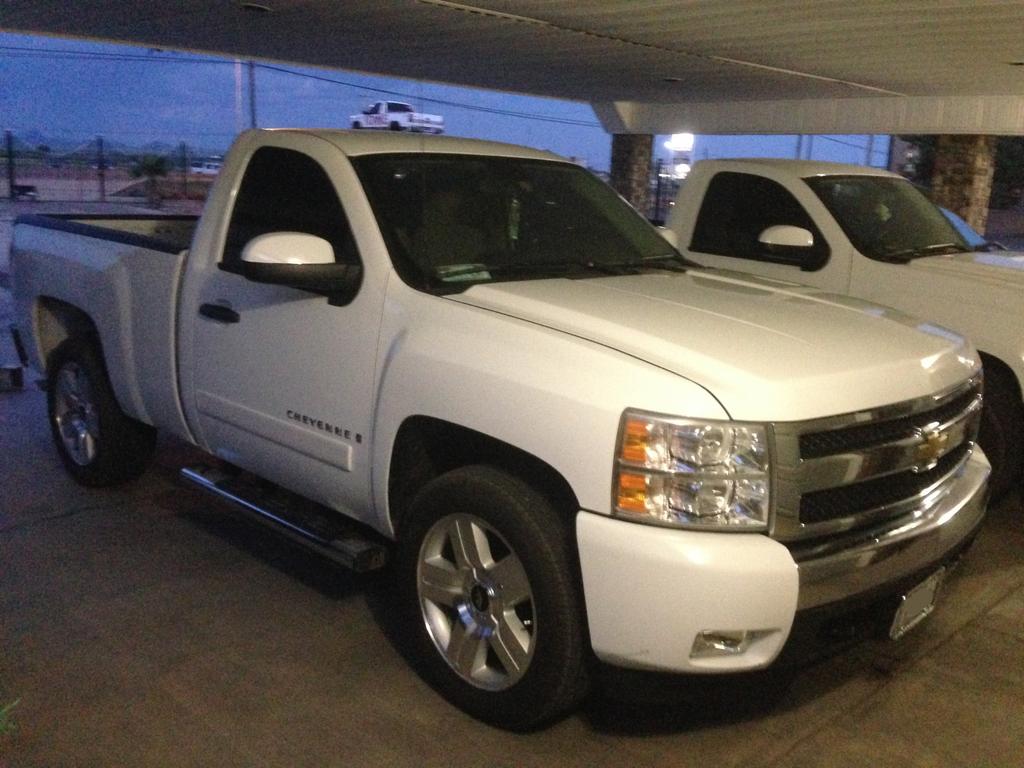
I manage an auto parts shop(used pull-a-part shop) and bought a 3/4 ton 2500hd to take apart, it had the hood I wanted, as well as a LY6 which I'll be putting in later.
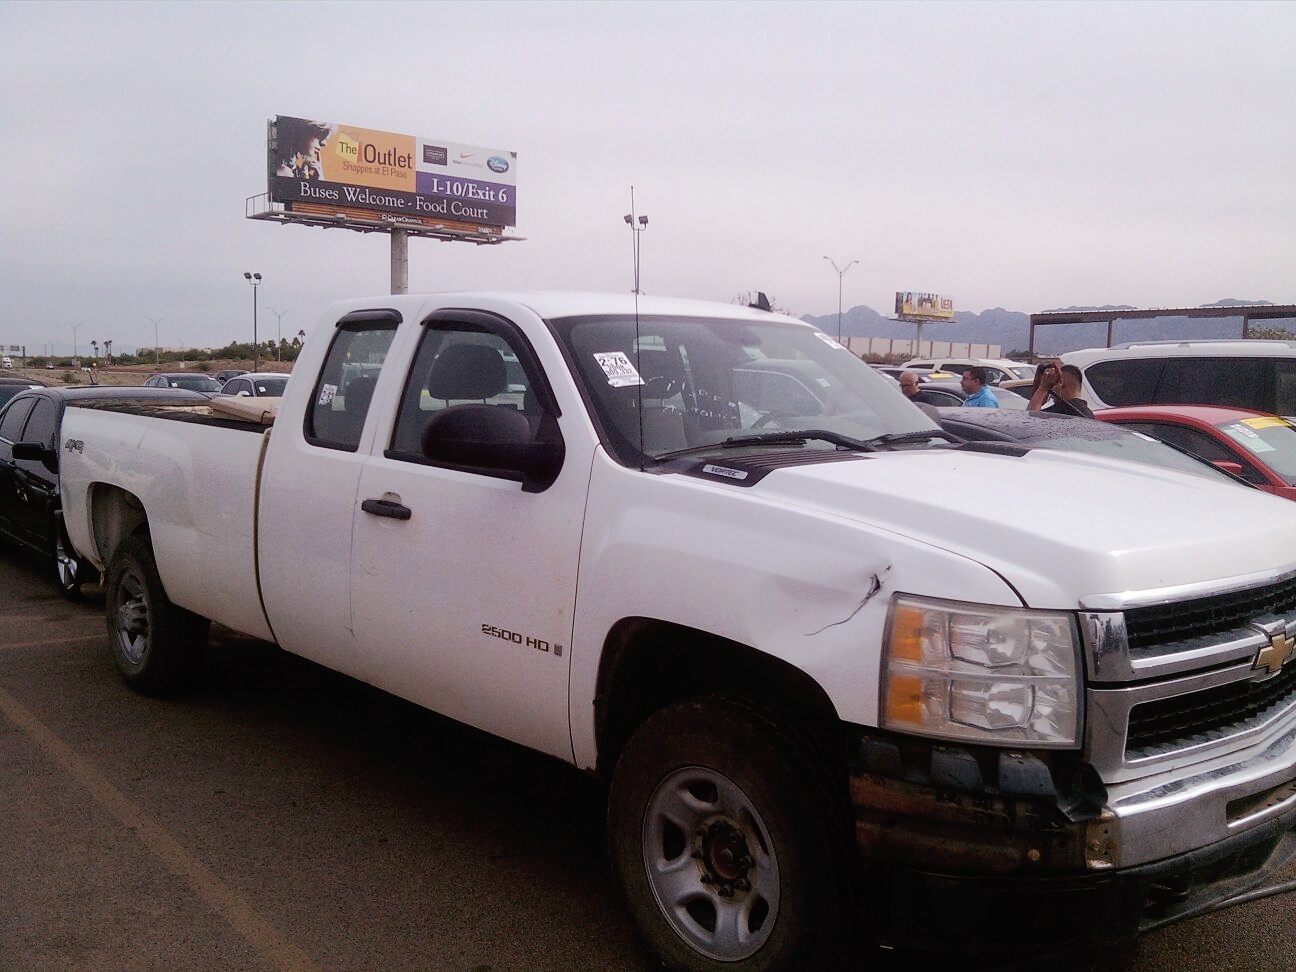
It had minor hail damage, got a body shop to fix it and repaint it and installed the hood on my truck:
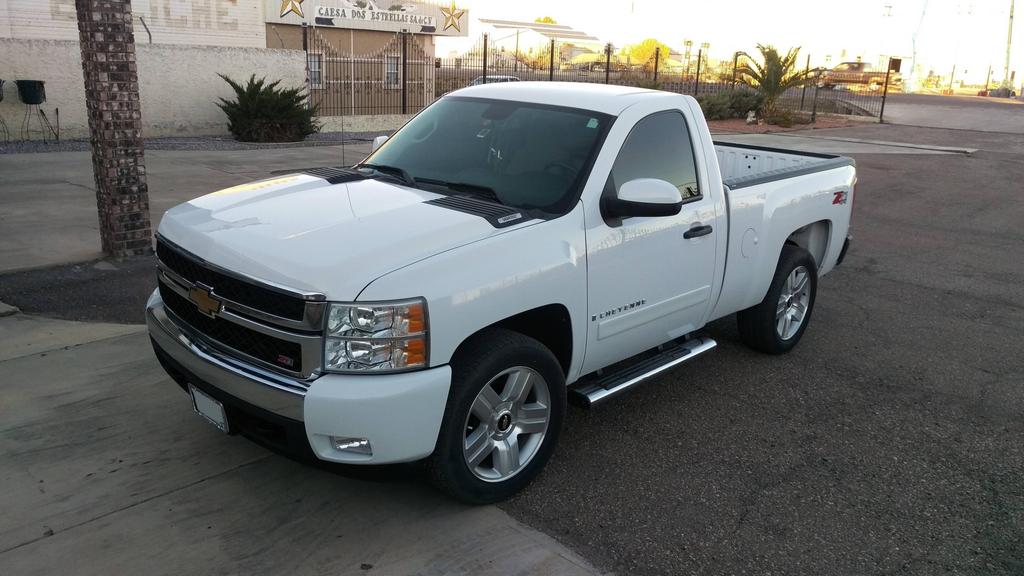
Its a great look imo, def recommend it.
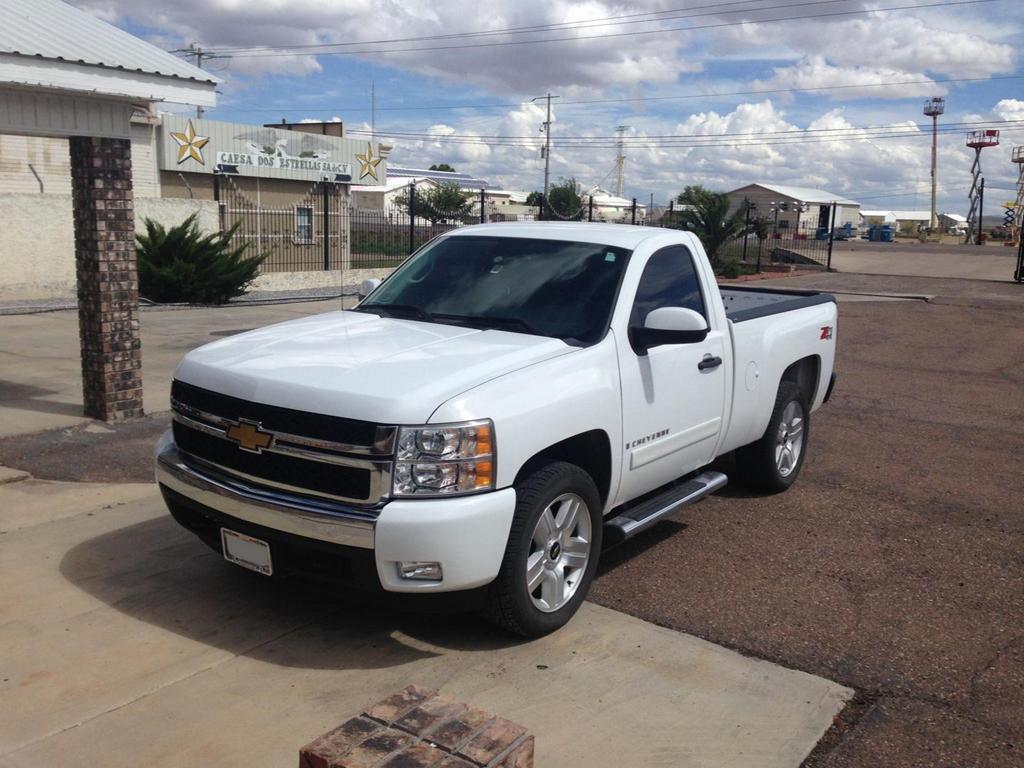
I drove the truck like that for a couple of months as I was saving up money for the front bumper as well, I got the bumper and of course it had to modify the 2500 brackets to fit the 1500:
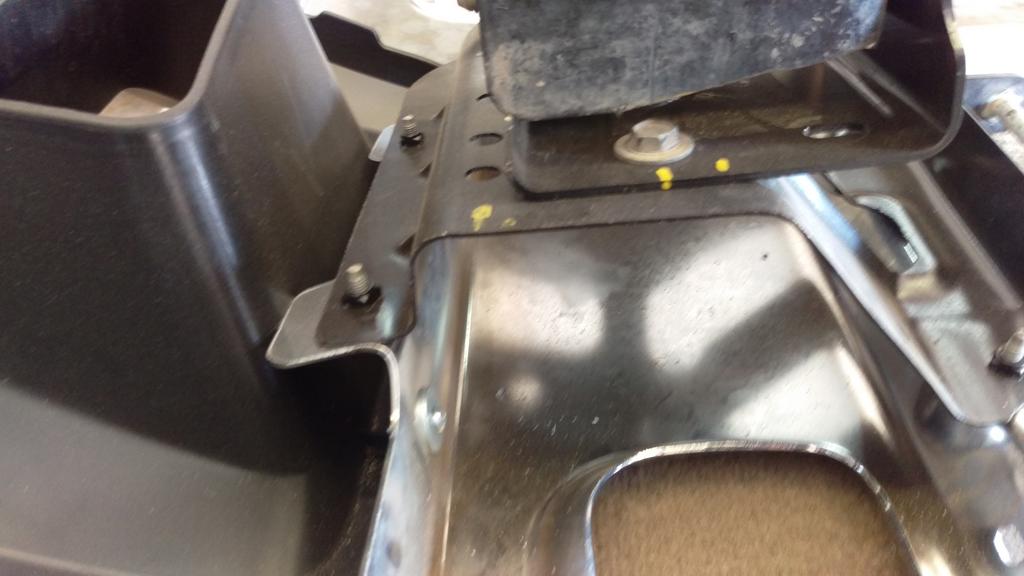
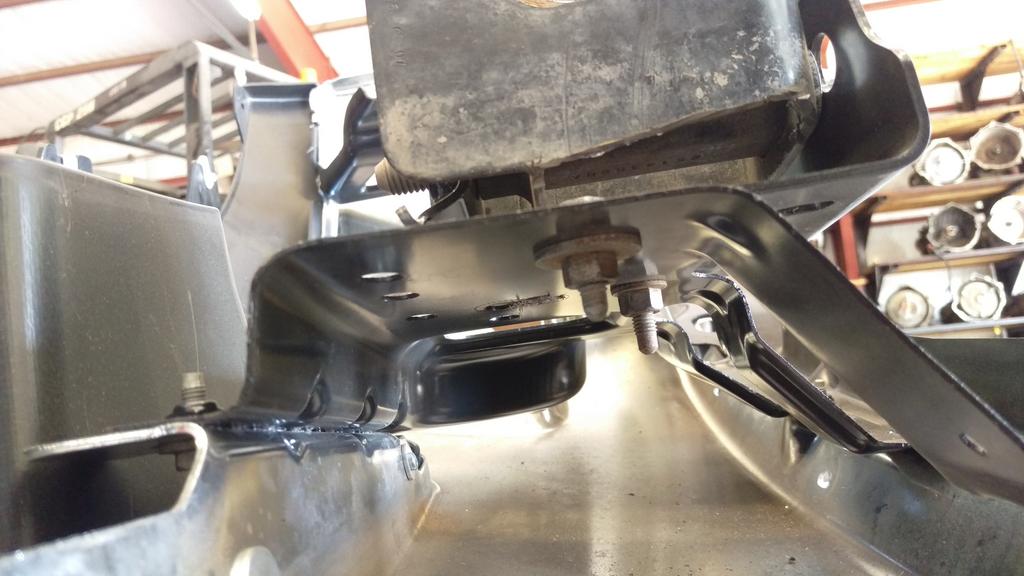
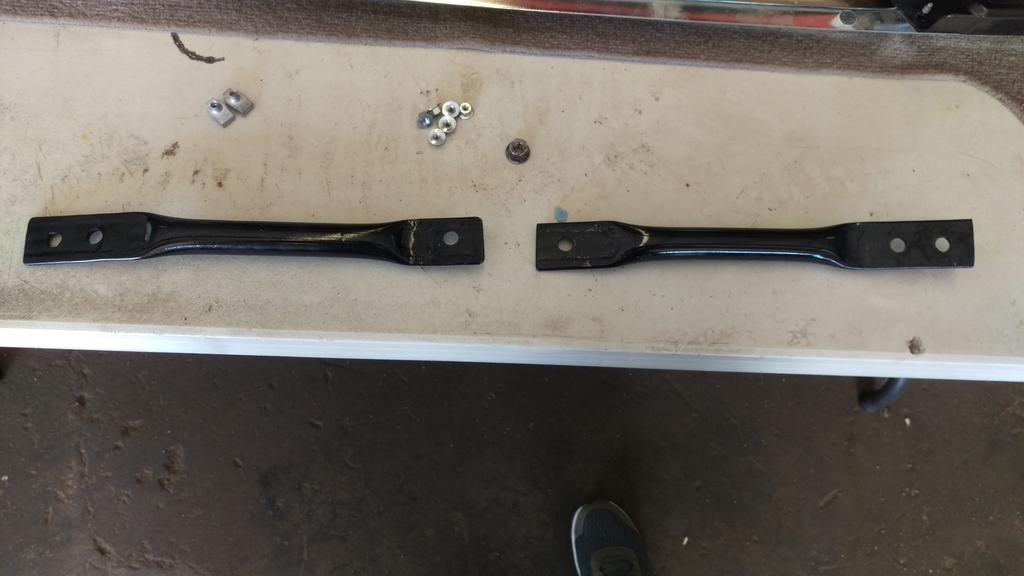
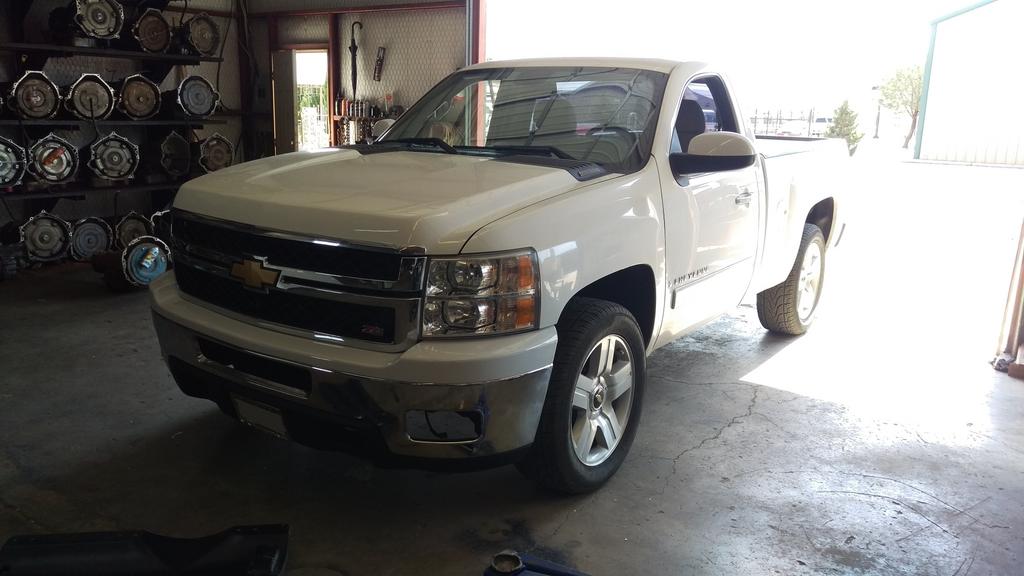
and of course the finished product with fog lights installed:
next post I'll show the 6.0 swap and the truck on 22" replicas.
After that I'm going to swap in a LSA Supercharger with a LS9 cam, so I'll update the thread over the next few months everytime I get some progress done.
Bought the truck (april 2015), in a somewhat okay shape(needed minor body work)
First clean up, installed new fog lights, and removed some stuff I didn't approve of:
Obviously had to go with some bigger wheels, 20" texas editions oem.
I saw people doing HD conversions to their trucks, and I really liked the look. I started with the grill:
I manage an auto parts shop(used pull-a-part shop) and bought a 3/4 ton 2500hd to take apart, it had the hood I wanted, as well as a LY6 which I'll be putting in later.
It had minor hail damage, got a body shop to fix it and repaint it and installed the hood on my truck:
Its a great look imo, def recommend it.
I drove the truck like that for a couple of months as I was saving up money for the front bumper as well, I got the bumper and of course it had to modify the 2500 brackets to fit the 1500:
and of course the finished product with fog lights installed:
next post I'll show the 6.0 swap and the truck on 22" replicas.
After that I'm going to swap in a LSA Supercharger with a LS9 cam, so I'll update the thread over the next few months everytime I get some progress done.
Last edited by Haxman2; 09-10-2017 at 10:30 PM.
 03-03-2017, 02:26 PM
#2
Teching In
Thread Starter
Join Date: Mar 2017
Location: Cuauhtemoc, Chihuahua, MX
Posts: 17
Likes: 0
Received 3 Likes
on
1 Post
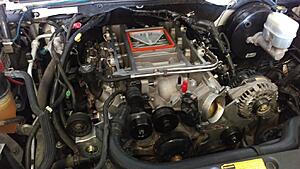
By this time we had the 2500hd fully taken apart, and the engine was just waiting there, so we opened her up, checked for any damage, cleaned everything and closed her up again.
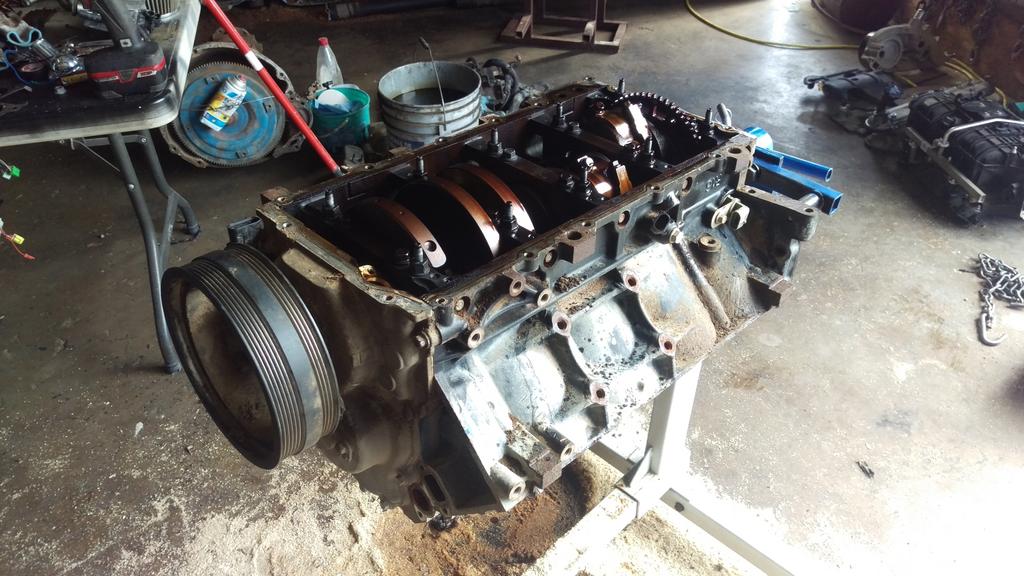
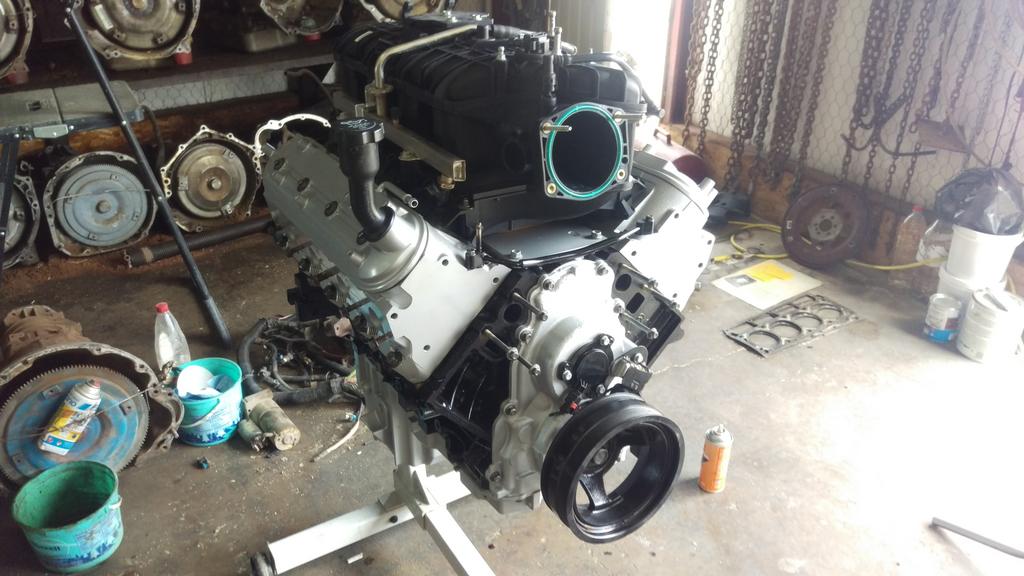
Ready to swap the LY6 in, but first gotta get that 5.3 out.
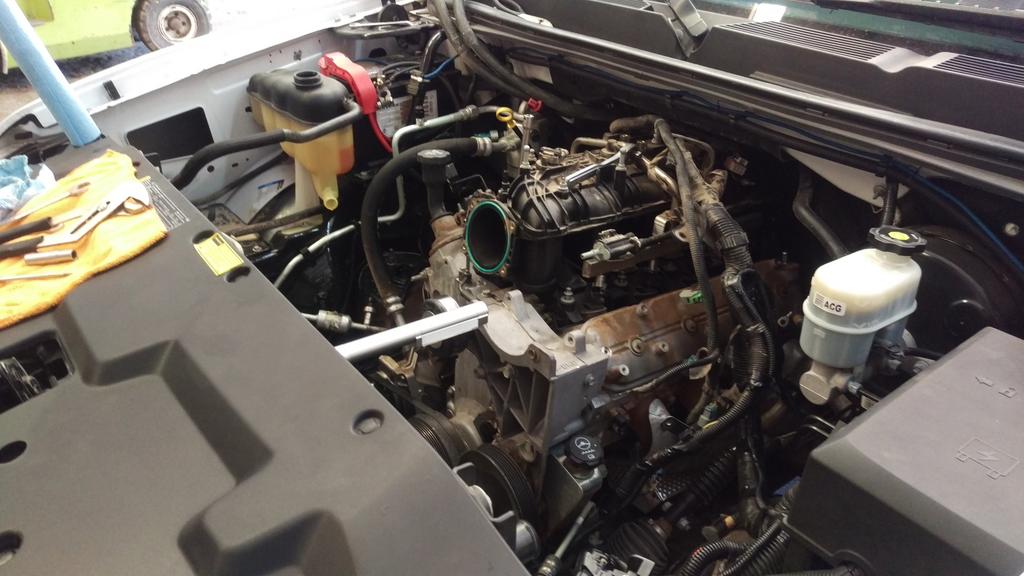
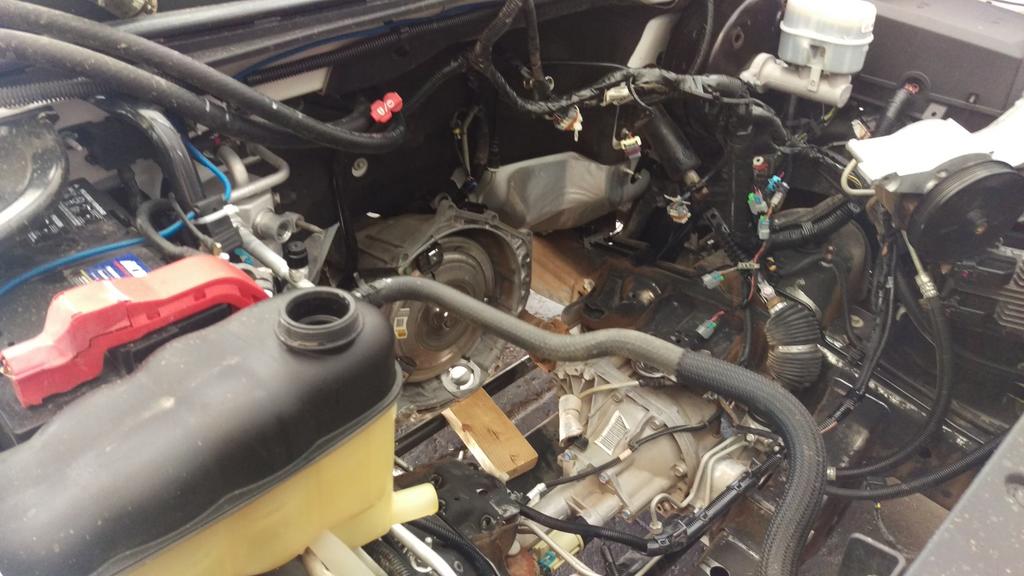
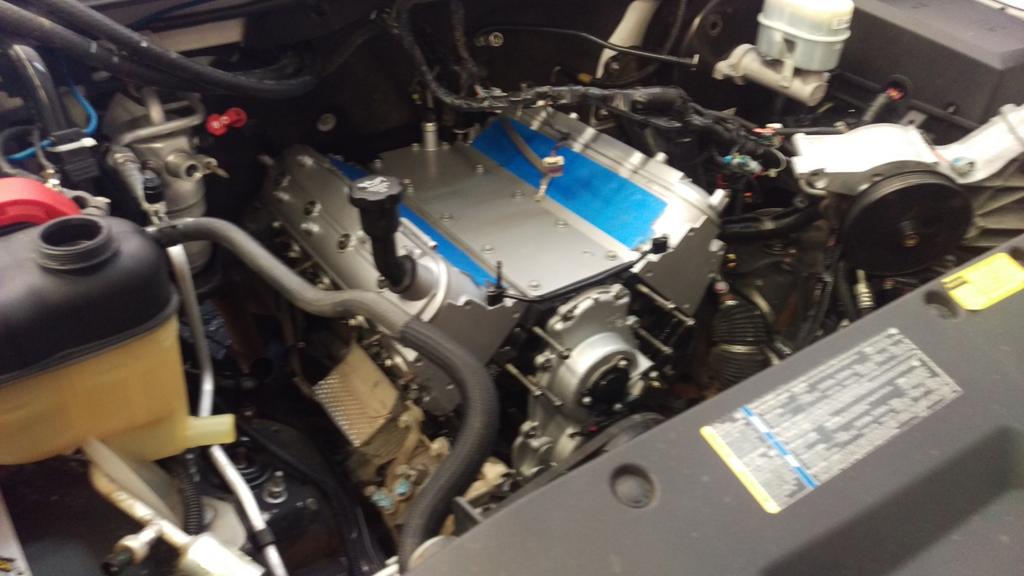
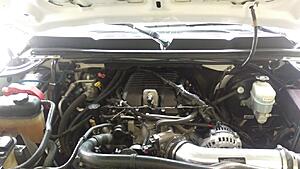
Didn't take too many pics, but oh well, so stock LY6 in, I had to hook up 2 wires to the pcm for the VVT stuff, other than that it was pretty much a drop in.
Also installed some stainless long tube headers, cold air intake kit, electric cutout and removed cats.
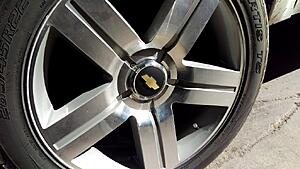
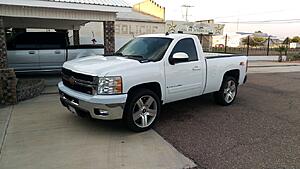
Couple of months ago I ordered some new wheels, since it had the big HD front on it, the 20's looked small.
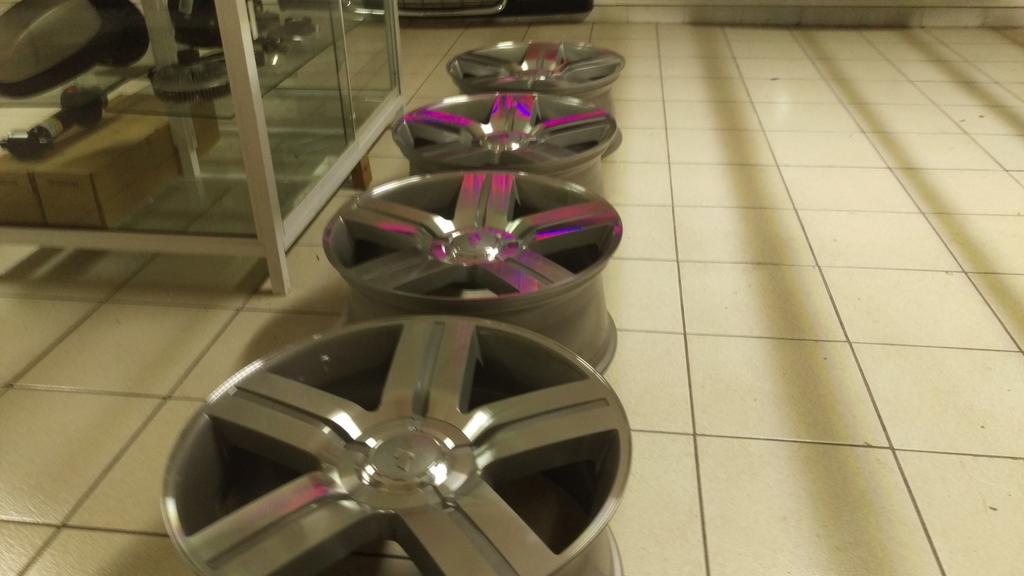
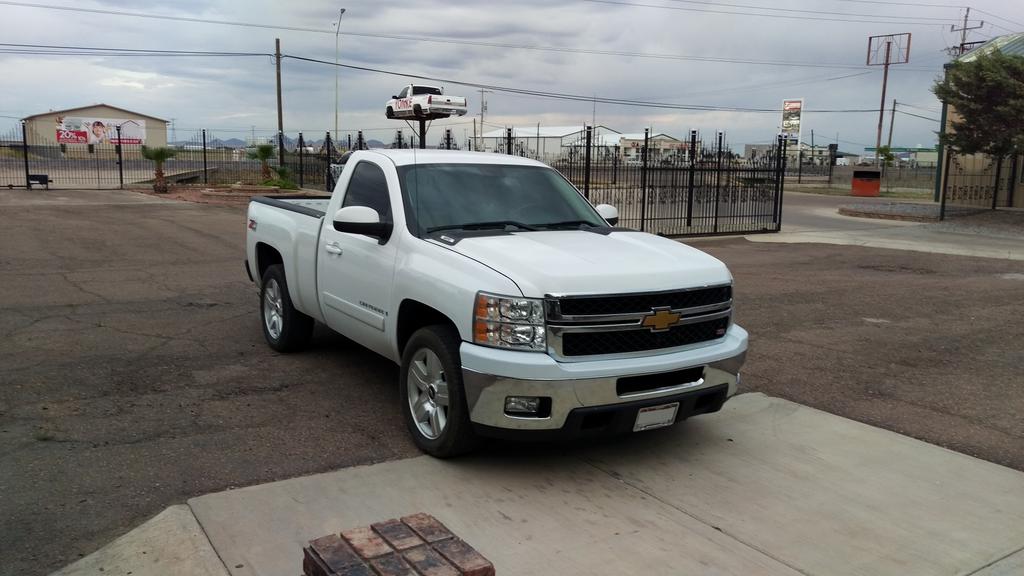
They almost look chrome with matching style caps on it, the fully gray-ish look makes em look pretty clean imo.
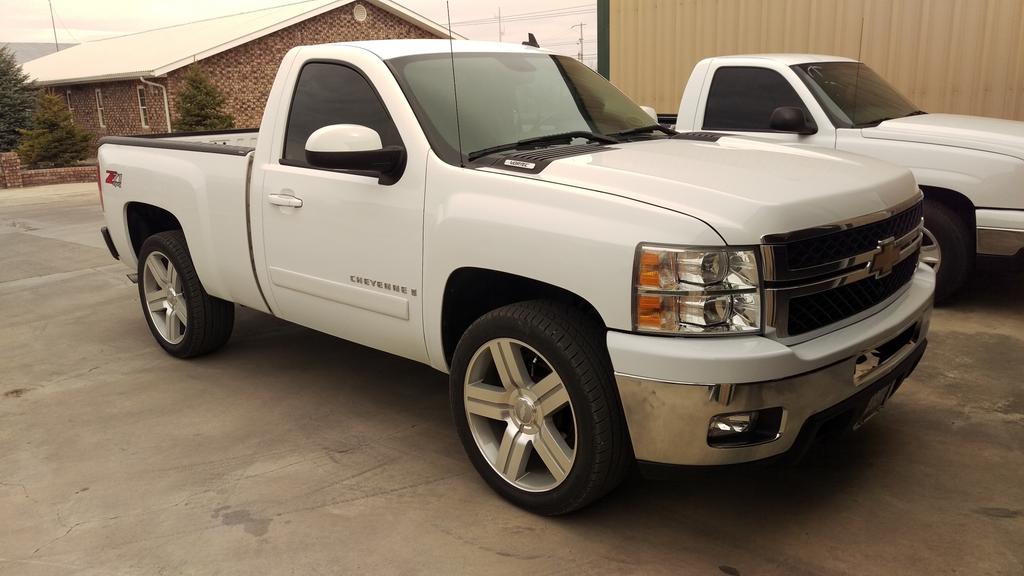
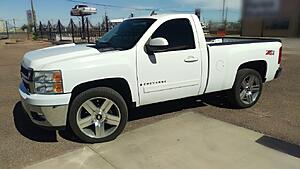
and that's the look of my current truck, been thinking of dropping it a couple inches, but first I'm going to spend the dough on that LSA Supercharger. ;D
Ready to swap the LY6 in, but first gotta get that 5.3 out.
Didn't take too many pics, but oh well, so stock LY6 in, I had to hook up 2 wires to the pcm for the VVT stuff, other than that it was pretty much a drop in.
Also installed some stainless long tube headers, cold air intake kit, electric cutout and removed cats.
Couple of months ago I ordered some new wheels, since it had the big HD front on it, the 20's looked small.
They almost look chrome with matching style caps on it, the fully gray-ish look makes em look pretty clean imo.
and that's the look of my current truck, been thinking of dropping it a couple inches, but first I'm going to spend the dough on that LSA Supercharger. ;D
 05-27-2017, 03:03 PM
#4
Teching In
Thread Starter
Join Date: Mar 2017
Location: Cuauhtemoc, Chihuahua, MX
Posts: 17
Likes: 0
Received 3 Likes
on
1 Post
Little update, I took out the mast l92 cam, and put in a new stock LS9 cam and also removed VVT while I was in there, didn't take any pictures, its not like a cam swap is that exciting anyways. :S
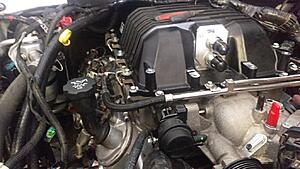
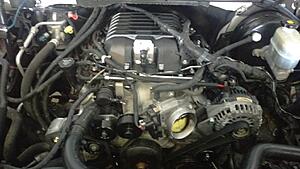
Saved up some money again, and decided to start buying lsa supercharger stuff, starting with the actual unit:

it looked pretty dirty when it arrived.
So I of course pulled it apart to clean it.
Even tho its an used supercharger, its in very good condition.
So after some cleaning it was good as new.
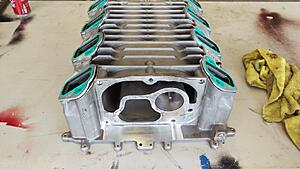
it had the spring loaded isolator in it of course, so I'll be replacing that with a solid one soon.
I also bought the lsa bracket kit from lssimple.
That was all I could afford for now, sometime next month I'll order the remaining parts, like the lid, fuel rails, injectors and heat exchanger.
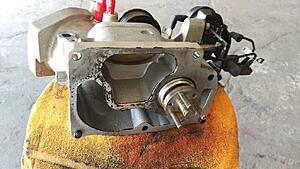
I was curious how the bracket system would look / if it would line up, so I put the supercharger and the bracket kit on an engine we have here, looks like it will all line up good.
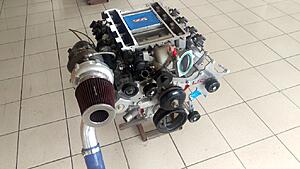
Ignore the turbo, that engine is for another project that were possibly doing!
So I'll keep updating this thread once I get more parts / progress.
Saved up some money again, and decided to start buying lsa supercharger stuff, starting with the actual unit:

it looked pretty dirty when it arrived.
So I of course pulled it apart to clean it.

Even tho its an used supercharger, its in very good condition.
So after some cleaning it was good as new.

it had the spring loaded isolator in it of course, so I'll be replacing that with a solid one soon.
I also bought the lsa bracket kit from lssimple.
That was all I could afford for now, sometime next month I'll order the remaining parts, like the lid, fuel rails, injectors and heat exchanger.
I was curious how the bracket system would look / if it would line up, so I put the supercharger and the bracket kit on an engine we have here, looks like it will all line up good.

Ignore the turbo, that engine is for another project that were possibly doing!
So I'll keep updating this thread once I get more parts / progress.
Last edited by Haxman2; 05-27-2017 at 03:12 PM.


Trending Topics
05-29-2017, 11:05 PM
#8
Teching In
Thread Starter
Join Date: Mar 2017
Location: Cuauhtemoc, Chihuahua, MX
Posts: 17
Likes: 0
Received 3 Likes
on
1 Post
Thanks smokinlmm, your rcsb denali and that lifted duramax are badass as well 
No more sc parts yet sadly, still gotta wait some more for those.
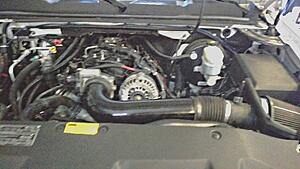
However, I managed to move the air intake to the driver side, prepared the intake so once the supercharger is ready, I'll just have to shorten that intake pipe and cut it at the corner.
Potato pic incoming:
that's all as far as engine stuff goes, I plasti-dipped the center caps of my replica 22's to get more of an oem feel, and I put the chevy emblem on that as well, here's that:
for the chevy logo, I had a bunch of these blazer door emblems with the chevrolet logo on them, so I cut the yellow part out, and stuck that to the center:
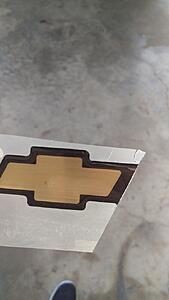
Before that I of course plastidipped the centers:
and we end up with this, close enough to the oem style

Sometimes ya gotta go the cheap DIY way.
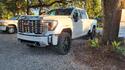
and the truck how it sits currently:
No more sc parts yet sadly, still gotta wait some more for those.
However, I managed to move the air intake to the driver side, prepared the intake so once the supercharger is ready, I'll just have to shorten that intake pipe and cut it at the corner.
Potato pic incoming:

that's all as far as engine stuff goes, I plasti-dipped the center caps of my replica 22's to get more of an oem feel, and I put the chevy emblem on that as well, here's that:
for the chevy logo, I had a bunch of these blazer door emblems with the chevrolet logo on them, so I cut the yellow part out, and stuck that to the center:

Before that I of course plastidipped the centers:

and we end up with this, close enough to the oem style

Sometimes ya gotta go the cheap DIY way.
and the truck how it sits currently:
 08-26-2017, 06:28 PM
#9
Teching In
Thread Starter
Join Date: Mar 2017
Location: Cuauhtemoc, Chihuahua, MX
Posts: 17
Likes: 0
Received 3 Likes
on
1 Post
Back again with another update!
Finally got most of the parts for the supercharger, enough to install it.
So friday we spent the day installing it, and oh man there were some obstacles to overcome, here's some pics:
(Once again I only took a few pics, I'll take more next time)
Here's some of the things we had to do and came across while installing.
So at first I wanted to just use my stock truck injectors for now, not having done much research, they dont fit?, figured out they were longer and didn't fit, I grabbed some truck flex fuel injectors of the shelf and they turn out to be a tiny bit shorter, enough to work.
However that meant the zr1 fuel rail bolted on higher, nothing some washers couldn't fix.
Here's were we messed up with that hack, for anyone wanting to use truck injectors, make sure to not do the same mistake, the mistake came when we bolted the zl1 lid onto the sc, the bolts protrude past the sc holes right into the fuel rail, we only noticed after bolting on all of them.
That's how I dented my new fuel rail in 8 different places, luckily nothing broke, and some more washers fixed that quickly.
The lssimple bracket kit I got was also missing 1 pulley, so we had to bolt one in with some spacers.
and finally mounted the air intake tube.
Had to wire a new connector for the map sensor so I could use the ZR1 3bar map and of course had to wire in the iat sensor.
(That's all the wiring I've had to do so far.)
Had a slight problem with the lssimple bracket kit, the water pump hose would touch the belt tensioner pulley.
I fixed this by putting up a bracket that holds the hose higher so it doesn't touch, not the prettiest, but it'll do for now.
I still need to clean up the wires that are going over the SC obviously, and next week we'll mount the heat exchanger and pump.
Truck runs good, tuned in the flex injectors and converted it to the 2bar os, haven't driven her much yet because no intercooler / heat exchanger.
All of this for under $3,000. not too bad.
I'll post a video in a week or two once I get everything done with it.
Any questions? feel free to ask!
Finally got most of the parts for the supercharger, enough to install it.
So friday we spent the day installing it, and oh man there were some obstacles to overcome, here's some pics:
(Once again I only took a few pics, I'll take more next time)
Here's some of the things we had to do and came across while installing.
So at first I wanted to just use my stock truck injectors for now, not having done much research, they dont fit?, figured out they were longer and didn't fit, I grabbed some truck flex fuel injectors of the shelf and they turn out to be a tiny bit shorter, enough to work.
However that meant the zr1 fuel rail bolted on higher, nothing some washers couldn't fix.
Here's were we messed up with that hack, for anyone wanting to use truck injectors, make sure to not do the same mistake, the mistake came when we bolted the zl1 lid onto the sc, the bolts protrude past the sc holes right into the fuel rail, we only noticed after bolting on all of them.
That's how I dented my new fuel rail in 8 different places, luckily nothing broke, and some more washers fixed that quickly.
The lssimple bracket kit I got was also missing 1 pulley, so we had to bolt one in with some spacers.


and finally mounted the air intake tube.

Had to wire a new connector for the map sensor so I could use the ZR1 3bar map and of course had to wire in the iat sensor.
(That's all the wiring I've had to do so far.)
Had a slight problem with the lssimple bracket kit, the water pump hose would touch the belt tensioner pulley.
I fixed this by putting up a bracket that holds the hose higher so it doesn't touch, not the prettiest, but it'll do for now.
I still need to clean up the wires that are going over the SC obviously, and next week we'll mount the heat exchanger and pump.
Truck runs good, tuned in the flex injectors and converted it to the 2bar os, haven't driven her much yet because no intercooler / heat exchanger.
All of this for under $3,000. not too bad.
I'll post a video in a week or two once I get everything done with it.
Any questions? feel free to ask!
09-10-2017, 10:25 PM
#10
Teching In
Thread Starter
Join Date: Mar 2017
Location: Cuauhtemoc, Chihuahua, MX
Posts: 17
Likes: 0
Received 3 Likes
on
1 Post
I'm back again with another small update and a video!
I got the intercooler and ic pump installed, I was running and tuning the truck without it for over a week, had some high iats for a bit heh.
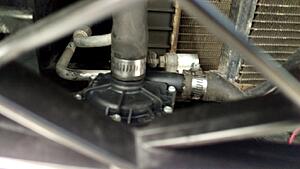
All is well now, some pics of the intercooler and pump:
I mounted the ic lower, so that HD bumper hole has an use!
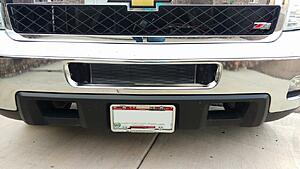
Pump is mounted vertically at the lower passenger side behind the grill, a bit above the brackets for the bumper:
and another picture of how she looks now, because why not. lol
Here's a video of the first WOT test run, with a rough tune, and possible boost leak or belt slip?
It ran a bit lean from a stand still, but it recovers quickly and goes around 11.0 a/f ratio. I'll retune it this week once I get a better belt because possible belt slip.
With the stock pulleys I should be getting 6psi, but since I have headers, I "lose" a couple of psi, so 4,500 rpm and lower it runs 4 psi, however once I go above 4,500 rpm it starts dropping, and by 5,000 rpm I only have 2 psi. My guess is belt slip? idk, I did check the bypass valve, and adjusted it, nothing changed after testing it, so I guess it wasn't that, any ideas?
Sooner or later I'll be upgrading the pulleys to something like a 2.4 upper and 8.20 lower or something like that, so if I have a boost leak or something I want to fix it in time.
I got the intercooler and ic pump installed, I was running and tuning the truck without it for over a week, had some high iats for a bit heh.
All is well now, some pics of the intercooler and pump:
I mounted the ic lower, so that HD bumper hole has an use!

Pump is mounted vertically at the lower passenger side behind the grill, a bit above the brackets for the bumper:

and another picture of how she looks now, because why not. lol

Here's a video of the first WOT test run, with a rough tune, and possible boost leak or belt slip?
It ran a bit lean from a stand still, but it recovers quickly and goes around 11.0 a/f ratio. I'll retune it this week once I get a better belt because possible belt slip.
With the stock pulleys I should be getting 6psi, but since I have headers, I "lose" a couple of psi, so 4,500 rpm and lower it runs 4 psi, however once I go above 4,500 rpm it starts dropping, and by 5,000 rpm I only have 2 psi. My guess is belt slip? idk, I did check the bypass valve, and adjusted it, nothing changed after testing it, so I guess it wasn't that, any ideas?
Sooner or later I'll be upgrading the pulleys to something like a 2.4 upper and 8.20 lower or something like that, so if I have a boost leak or something I want to fix it in time.