'06 Silverado 2500HD Fleet Offerup rehab
 10-30-2018, 11:37 PM
#11
Teching In
Thread Starter

Join Date: Oct 2018
Location: Tucson
Posts: 35
Likes: 0
Received 0 Likes
on
0 Posts
Thanks!
Didn't make any progress today. Had to take the kid to soccer practice. I did get some pictures and some more parts arrived so I will update.
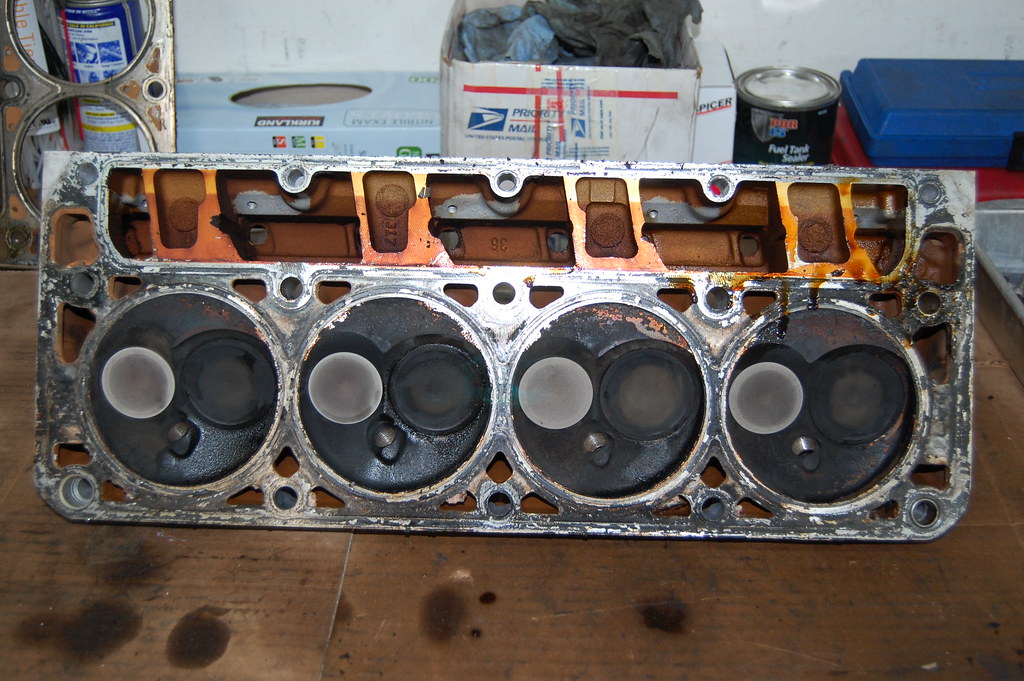
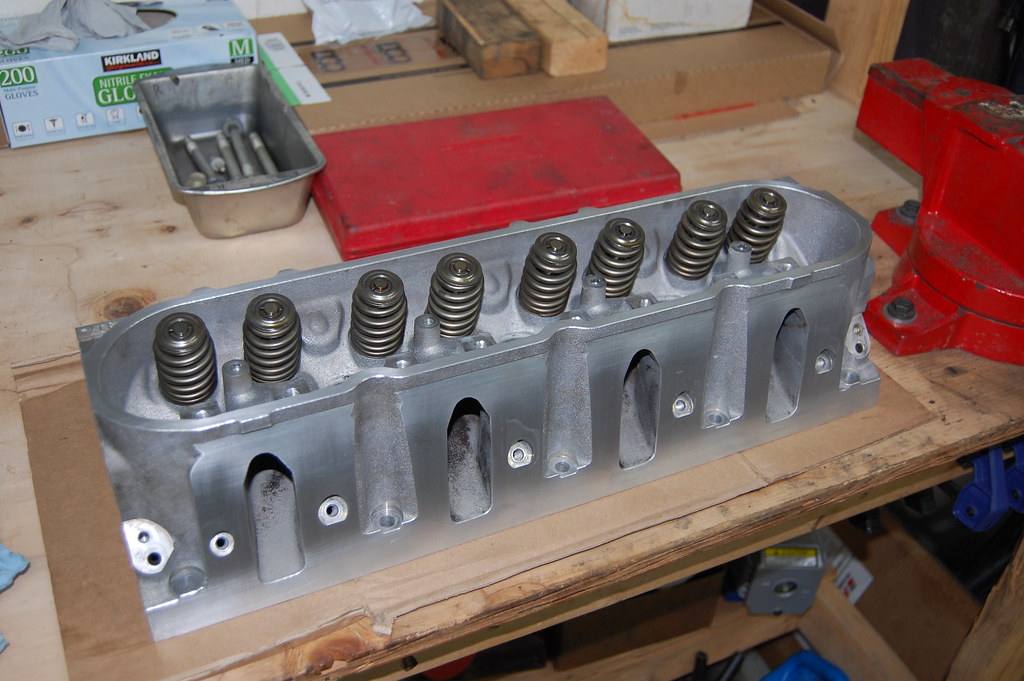
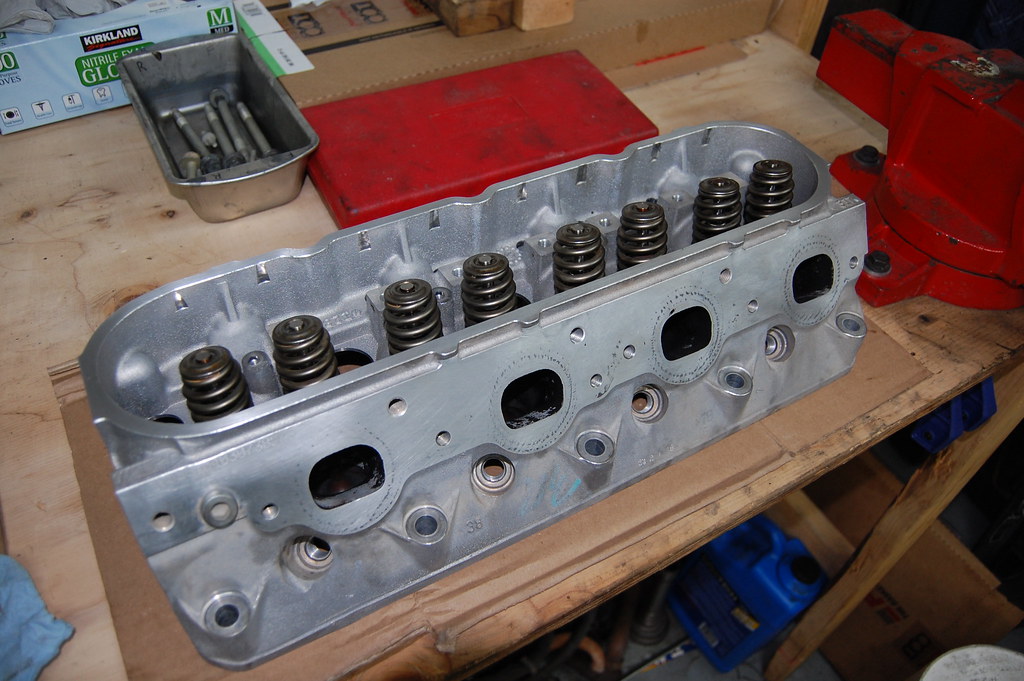
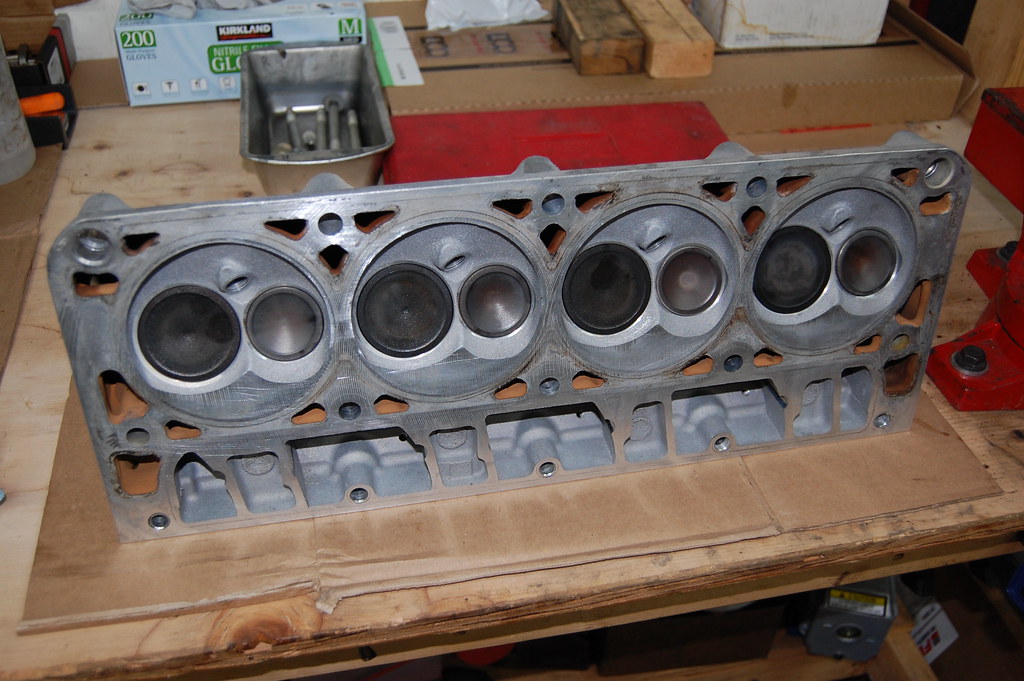
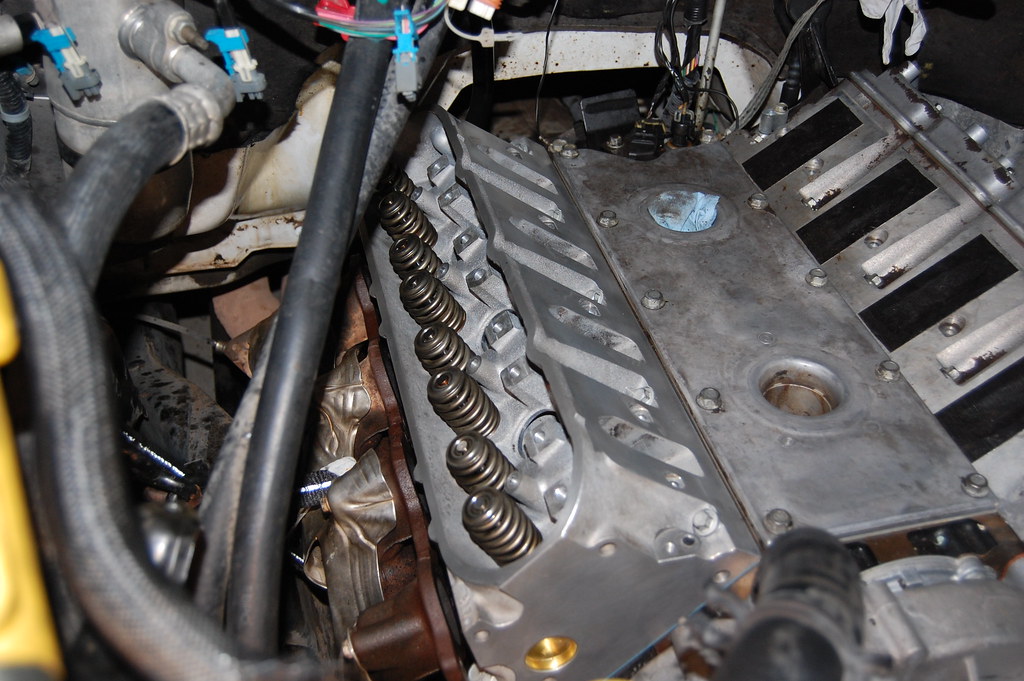
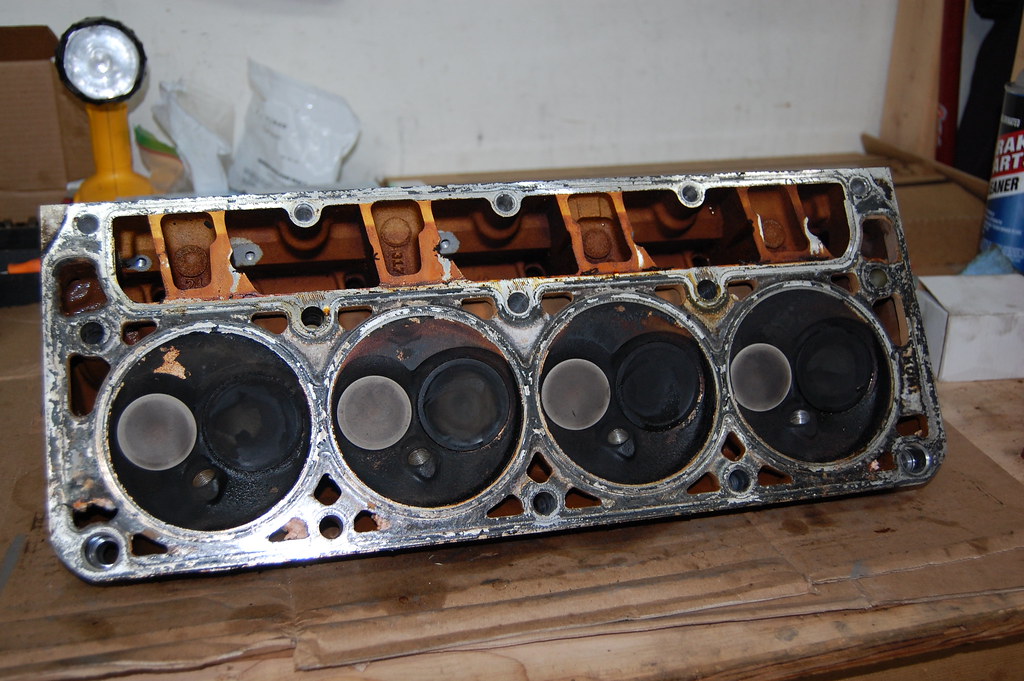
Heads looked good. They should clean up real nice. You can't see the one broken exhaust bolt in these pictures, but it came out easy with a set of vise grips. Win!

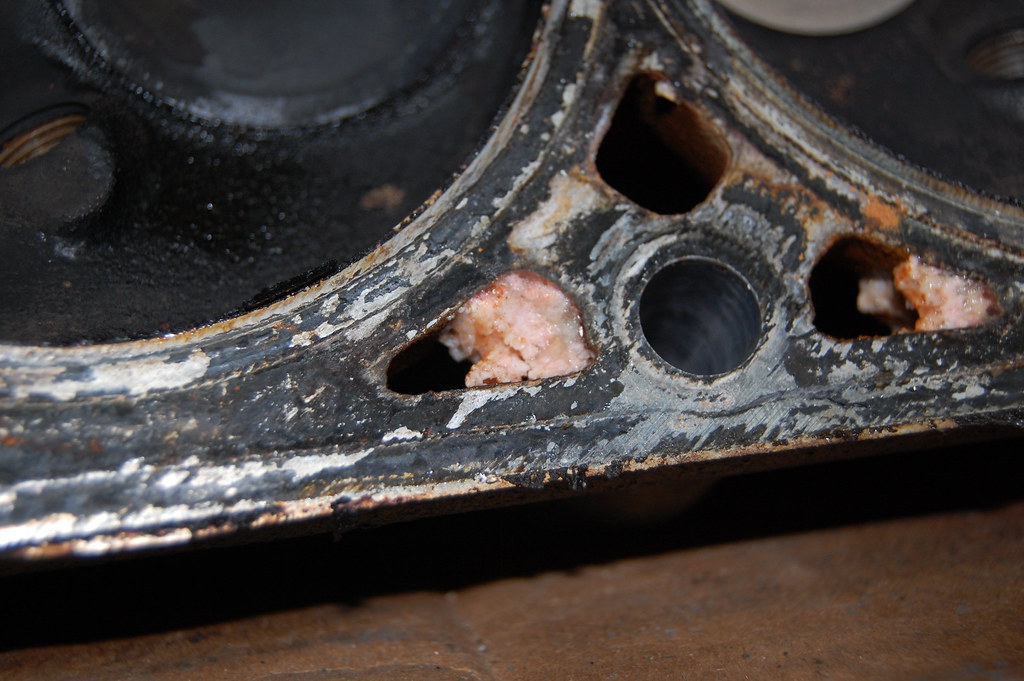
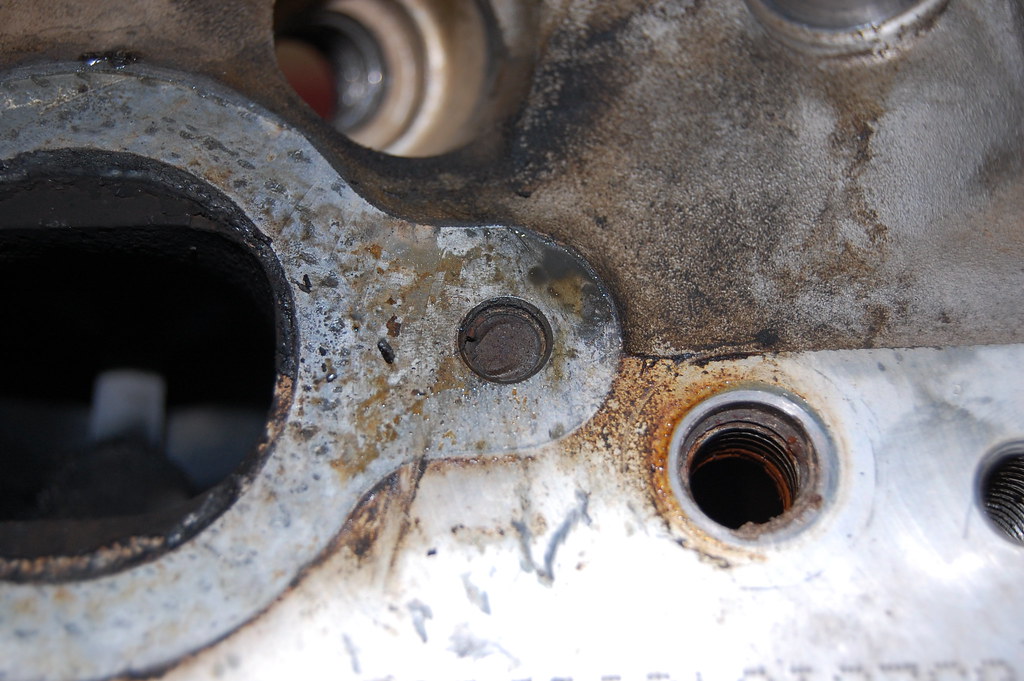
Block/pistons looked good. Hard to get a decent shot with a full size DSLR so you'll have to take my word for it. I don't think it will take much to get the carbon off those pistons either. You guys tell me... How do those water jackets look? Is that typical for an engine with 300k?


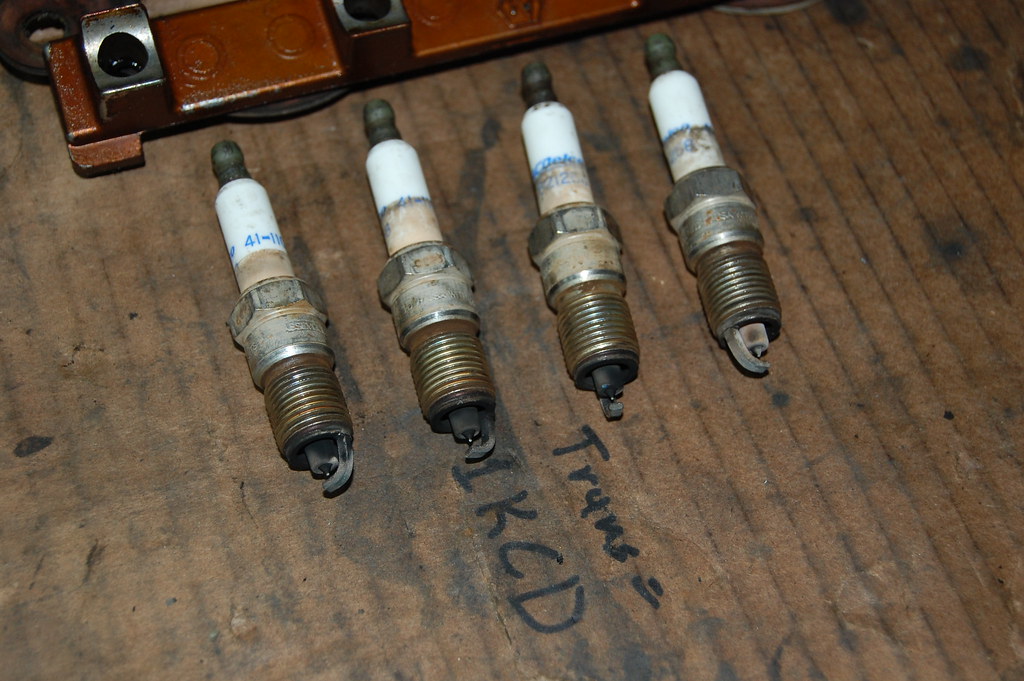
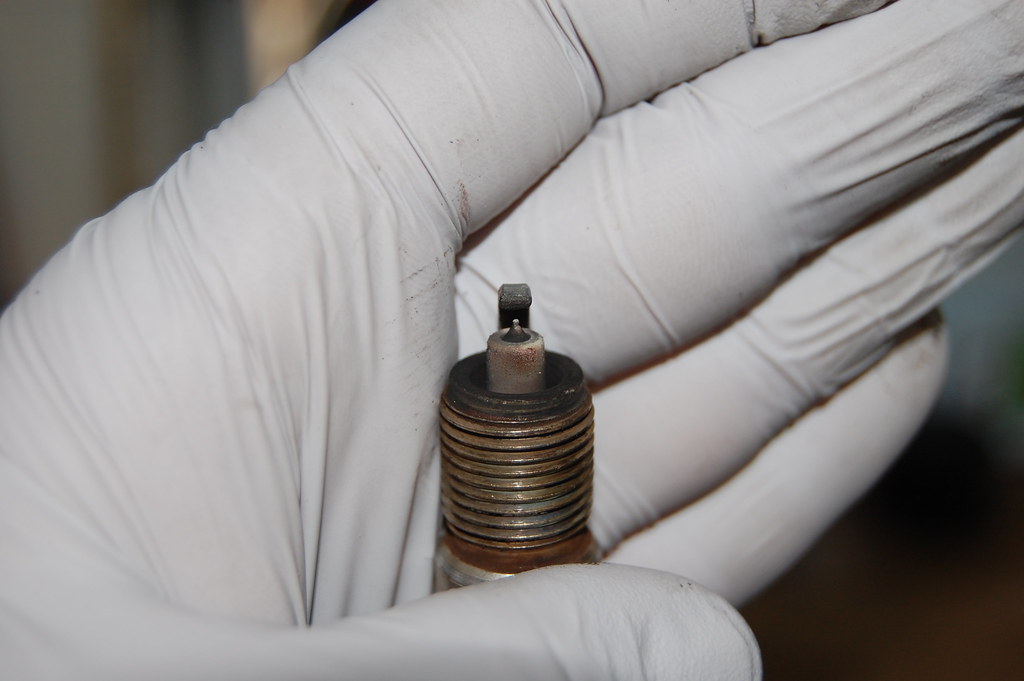
Spark plugs looked good enough. They'll be going back in. At least for now.
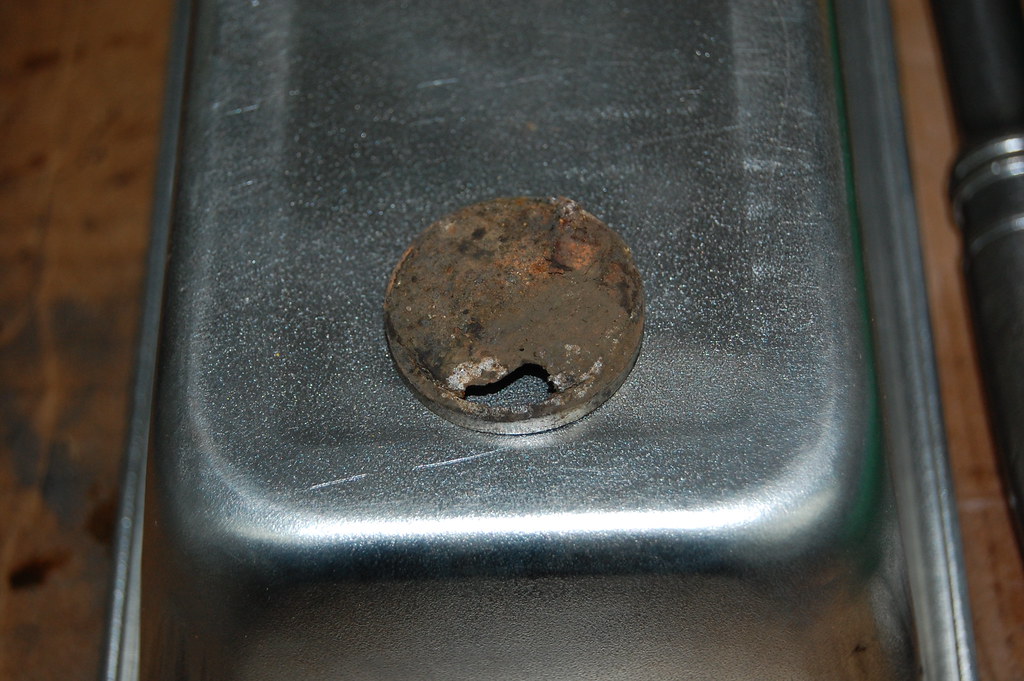
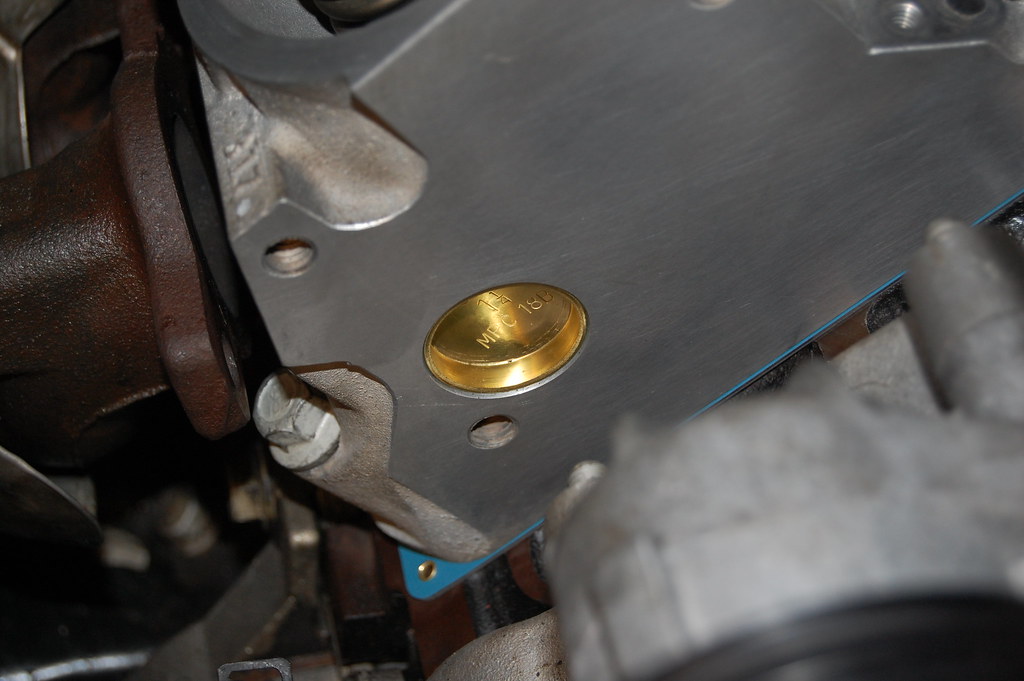
All this work for what amounts to a $2 expansion plug. Not going to complain though. That's how I got it so cheap!
$981 - Previous
$124 - Head gasket set
$37 - TTY head bolt set x2
$1142 - Total
I also spent $29 on a nice torque angle gauge. I'm not counting that towards the total though.
Didn't make any progress today. Had to take the kid to soccer practice. I did get some pictures and some more parts arrived so I will update.
Heads looked good. They should clean up real nice. You can't see the one broken exhaust bolt in these pictures, but it came out easy with a set of vise grips. Win!
Block/pistons looked good. Hard to get a decent shot with a full size DSLR so you'll have to take my word for it. I don't think it will take much to get the carbon off those pistons either. You guys tell me... How do those water jackets look? Is that typical for an engine with 300k?
Spark plugs looked good enough. They'll be going back in. At least for now.
All this work for what amounts to a $2 expansion plug. Not going to complain though. That's how I got it so cheap!
$981 - Previous
$124 - Head gasket set
$37 - TTY head bolt set x2
$1142 - Total
I also spent $29 on a nice torque angle gauge. I'm not counting that towards the total though.

 11-03-2018, 11:21 PM
#13
Teching In
Thread Starter
Join Date: Oct 2018
Location: Tucson
Posts: 35
Likes: 0
Received 0 Likes
on
0 Posts
Thanks! I like to document stuff like this. It's fun for me to come back once the project is done and review everything I did.
So, slow progress but still moving forward. I got the deck surface on the block all cleaned up and the pistons decarbed. Right head is clean, deburred and reassembled. Nothing special there. Just new valve guide seals.
I've been debating if I should pull the left head while the truck is down. After seeing the other expansion plug from this head, there's no doubt. It's coming off and all the plugs are getting replaced.
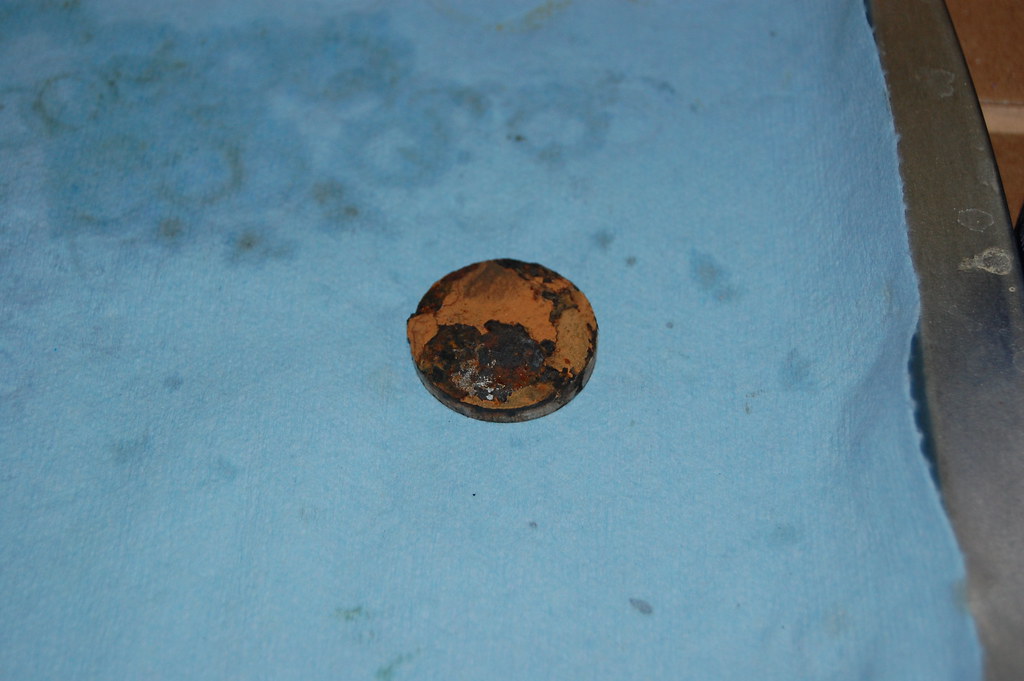
Glad I ordered the plug kit.
Which as it turns out, it's nothing more than a standard 1-1/4" expansion plug.
I kind of suspected that. It measured 1.252" on the dial caliper, but due to the condition of the plug, I didn't really trust that measurement. I wanted to pick up a single expansion plug at the parts store to confirm. Here's how that went...
I walk into O'reillyzone, wait my turn and set my rotted plug on the counter. Barry is there to help me.
Barry: Hello! How you doing? What can we do for you today?
Me: Hello. Great! I'm pretty sure I need a 1-1/4" expansion plug.
Barry: No problem. Year, make and model please.
Me: I mean... Do you just have single expansion plugs? It's a generic part.
Barry: Um... I think so. [walks me down an isle] Hmmm... not here. [walks back behind the counter, turns to other clerk. We'll call him Jos�] Hey Jos�, do we have expansion plugs?
Jos�: What?
Me: Some people call them freeze plugs.
Jos�: Oh yeah! [Hands me one of those rubber expanding plugs]
Me: Oh, I was kind of looking for brass.
Barry: Do you have a part number?
Me: Huh?
Barry: If I try to look up a part number on this computer with Google it will freeze. Can you look up a part number on your phone?
Me: You don't just have an assortment of expansion plugs back there?
Barry: I think so, but I don't know where to find them.
Me: Oh... Really? Okay, let me... I'll see if I can find a part number and come back
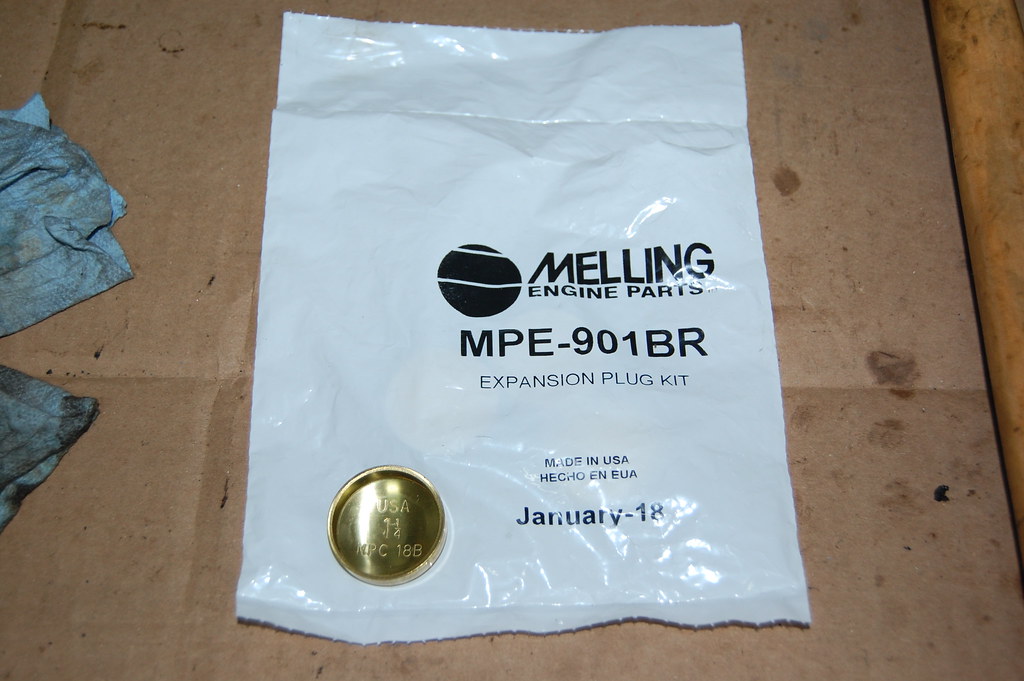
I drove straight home and ordered the plugs. Probably twice the price to have the plugs shipped to my mailbox via internet parts warehouse place, but at zero effort. $9 was a bargain.
$1142 - Previous
$9 - Expansion plugs
$1151 - Total
So, slow progress but still moving forward. I got the deck surface on the block all cleaned up and the pistons decarbed. Right head is clean, deburred and reassembled. Nothing special there. Just new valve guide seals.
I've been debating if I should pull the left head while the truck is down. After seeing the other expansion plug from this head, there's no doubt. It's coming off and all the plugs are getting replaced.
Glad I ordered the plug kit.
Which as it turns out, it's nothing more than a standard 1-1/4" expansion plug.
I kind of suspected that. It measured 1.252" on the dial caliper, but due to the condition of the plug, I didn't really trust that measurement. I wanted to pick up a single expansion plug at the parts store to confirm. Here's how that went...
I walk into O'reillyzone, wait my turn and set my rotted plug on the counter. Barry is there to help me.
Barry: Hello! How you doing? What can we do for you today?
Me: Hello. Great! I'm pretty sure I need a 1-1/4" expansion plug.
Barry: No problem. Year, make and model please.
Me: I mean... Do you just have single expansion plugs? It's a generic part.
Barry: Um... I think so. [walks me down an isle] Hmmm... not here. [walks back behind the counter, turns to other clerk. We'll call him Jos�] Hey Jos�, do we have expansion plugs?
Jos�: What?
Me: Some people call them freeze plugs.
Jos�: Oh yeah! [Hands me one of those rubber expanding plugs]
Me: Oh, I was kind of looking for brass.
Barry: Do you have a part number?
Me: Huh?
Barry: If I try to look up a part number on this computer with Google it will freeze. Can you look up a part number on your phone?
Me: You don't just have an assortment of expansion plugs back there?
Barry: I think so, but I don't know where to find them.
Me: Oh... Really? Okay, let me... I'll see if I can find a part number and come back
I drove straight home and ordered the plugs. Probably twice the price to have the plugs shipped to my mailbox via internet parts warehouse place, but at zero effort. $9 was a bargain.
$1142 - Previous
$9 - Expansion plugs
$1151 - Total
11-04-2018, 10:10 AM
#14

I hate trying to buy stuff from local stores. That may have had it under make and model, but more than once I've walked out of those places just fuming mad. Last time was for a strap kit for an AAM 9.5, which comes in ******* everything light duty 8lug except
Ford and the kids were just blank stares.
Ford and the kids were just blank stares.
11-04-2018, 10:56 PM
#15
Teching In
Thread Starter
Join Date: Oct 2018
Location: Tucson
Posts: 35
Likes: 0
Received 0 Likes
on
0 Posts
I think it's just luck of the draw on who you get to help. Sometimes they get it, other times they don't. I had talked to a guy at a different parts place a couple days prior to that debacle. Asked him if they had expansion plugs in stock. He said "Yep. Just bring in the old plug and we'll match it up, or bring in the whole head. Whatever it takes, I got you covered." Great! I thought. Fast forward to a couple days later when I had the plug in hand. Went back to that store, (different guy working) set my plug on the counter as he picks up the ringing phone. After a couple minutes of being ignored I walked out thinking "I'll just hit the other parts store around the corner. No big deal" Live and learn.
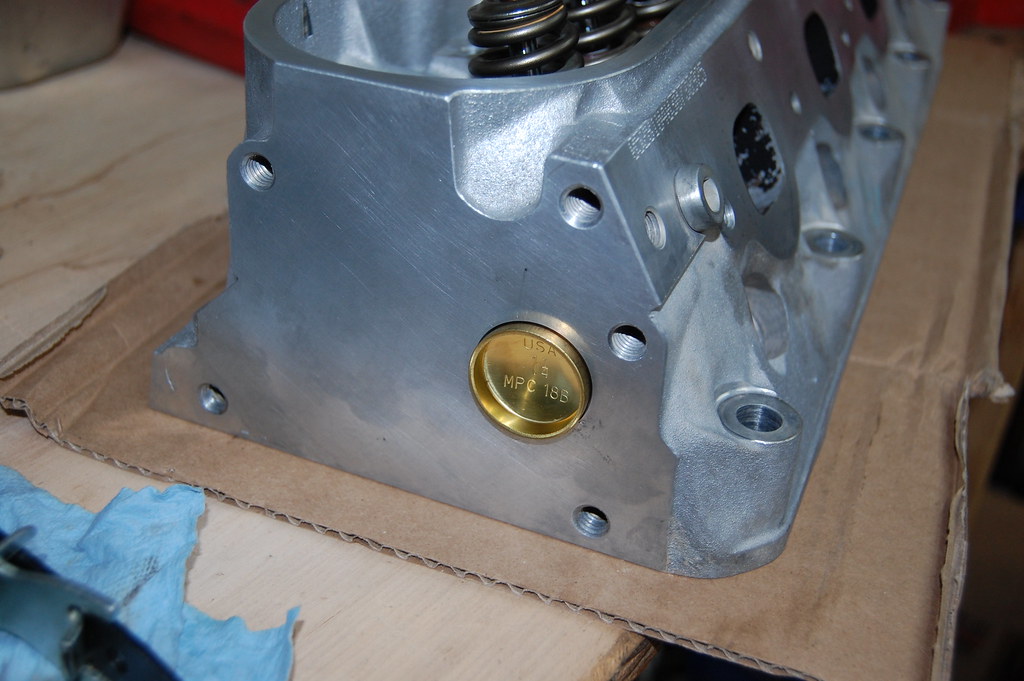
Today I got the plugs installed in the head and the head set on the engine. Finger tightened the screws and called that good. I need to mock up my wrench/angle gauge setup for those back holes. Spacing is going to be an issue. Not much room for a wrench head. If I'm being totally honest, I think those back screws are going to be "best guess" for 90� and 50�. That's tomorrow's problem.
Them brass plugs lookin' good though.
Feels like it's taking forever, but my wrenching time is really limited. Small bites and eventually I'll eat this Elephant.
 11-05-2018, 09:42 PM
#17
Teching In
Thread Starter
Join Date: Oct 2018
Location: Tucson
Posts: 35
Likes: 0
Received 0 Likes
on
0 Posts
Got the left head pulled. This side looks like it has less carbon buildup, if only slightly.
I noticed when I was removing the exhaust manifold bolts, there was only three still in there. The center three. Looks like my good fortune has run out. The "missing" three were all broke off. Two of them below deck. Now I know this isn't the end of the world, but it's certainly not as easy as grabbing a stud with the vise-grips. I guess I'll be attempting to booger weld a couple nuts onto what's left.
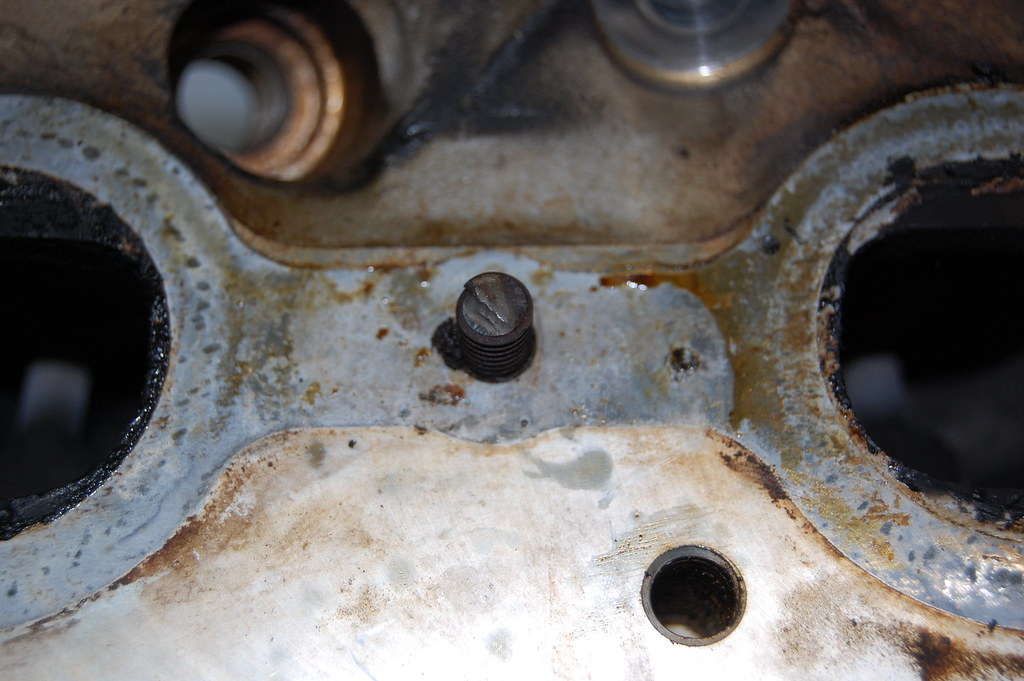
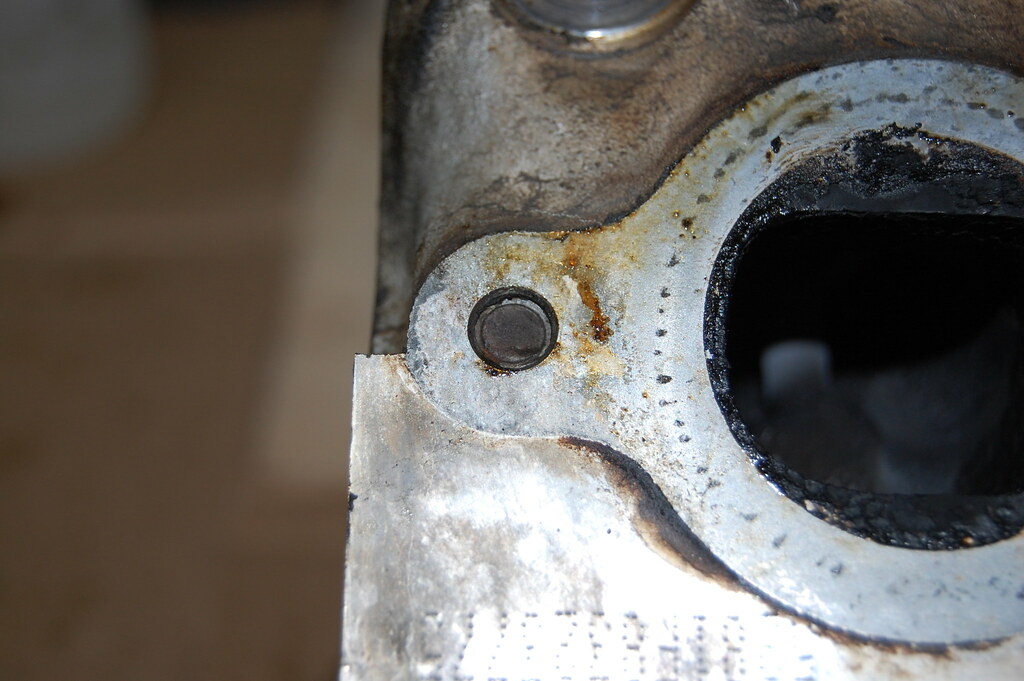
And I'm pretty sure this isn't right.