Recent Cooling and Electrical Upgrades
 07-18-2009, 09:24 PM
#1

Well i was having some issues with my truck charging and cooling... So it was time for some upgrades.
First i started out with some 07+ efans. From looking 05-06 one fan as 5 blades the other has 7 blades. The 07+ both have 7 blades. These fans use a TON of amps, so jsut keep that in mind if you upgrade. I also picked up a new 34" radiator. These seem to really help my cooling problems. I can beat on the truck in 107* heat and it never goes above 203* right where i have the efans set to come on... Before they would climb to 230ish...
Here are some pics.
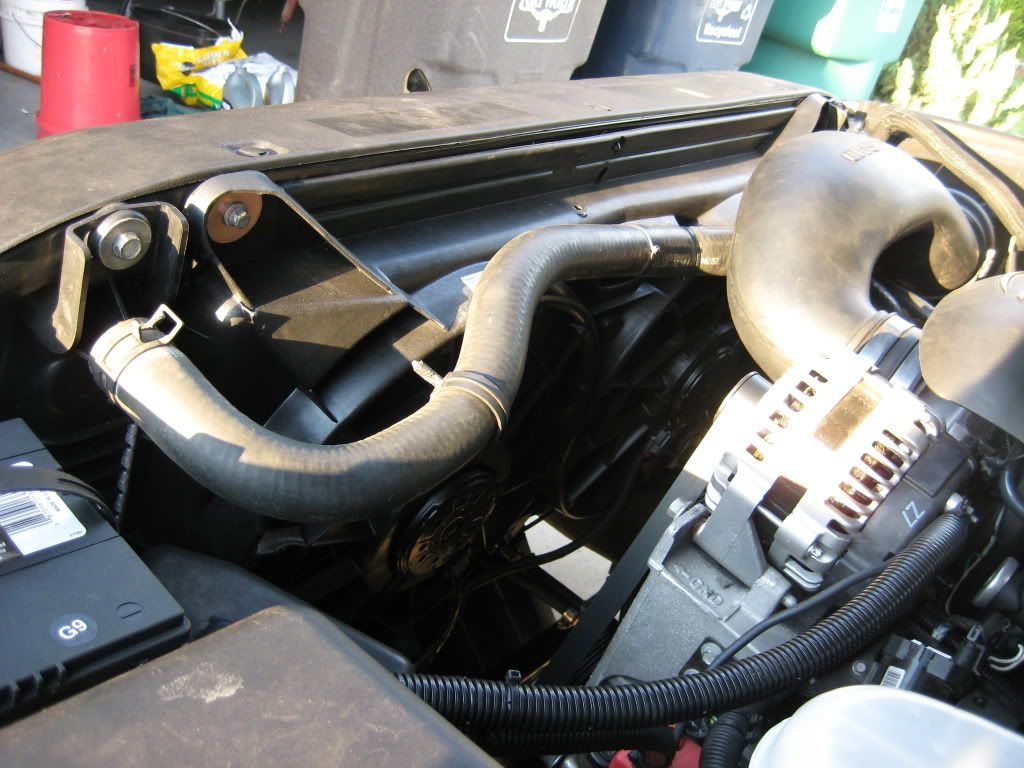
So after i got these installed, my volts would drop to 11.8ish, so i decided to order a 145a alternator from ebay... It was a direct fit no issues at all, but that still did not fix the charging issue, so i had the batery tested and sure enough it was dead. So i bought another one from Oreillys, it is a little bit bigger than the stocker. The new alternator and battery really seemed to help my volts would move between 13.5 and 13.8.. I was still not satisified so i figured i would do the Big 3 upgrade. I ordered all the stuff from ebay for about $70.... All wiring is 1/0 gauge, which is freaking HUGE... I had to use my butane torch to sodder the new ends on.... I also had to use a hack saw to cut it... So everything is soddered and heat shrunk...
here are some more pics
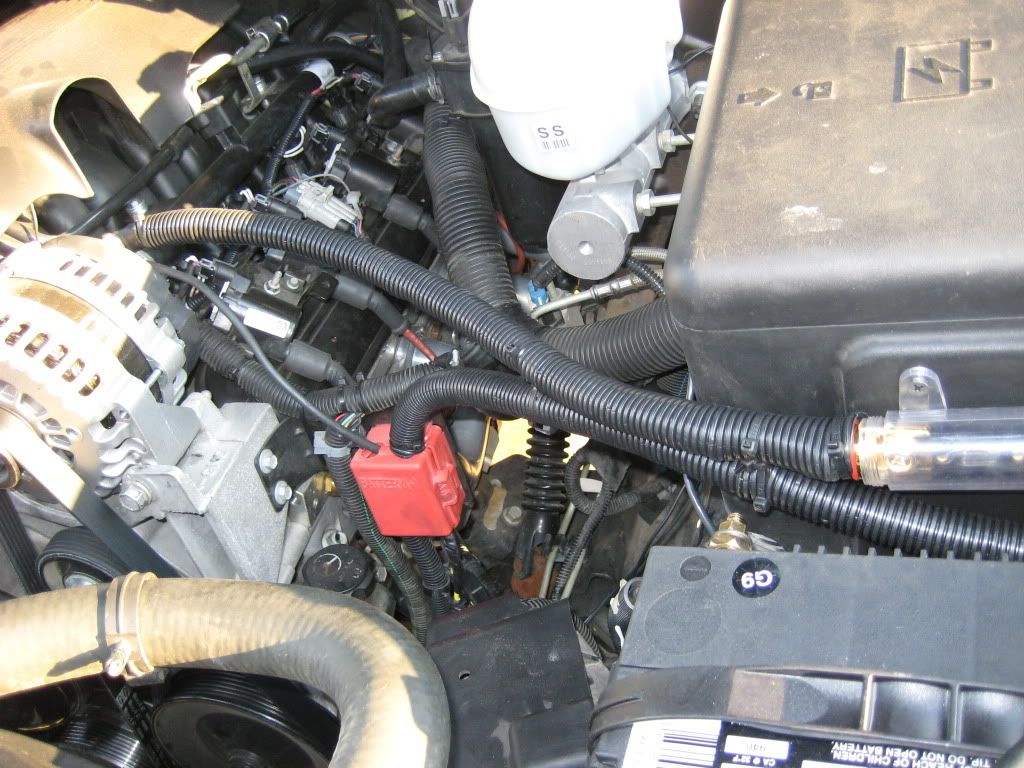
New battrery terminals and 175a fuse.

1 fused wire going from the alternator to the battery and another wire from the Red box to the battery
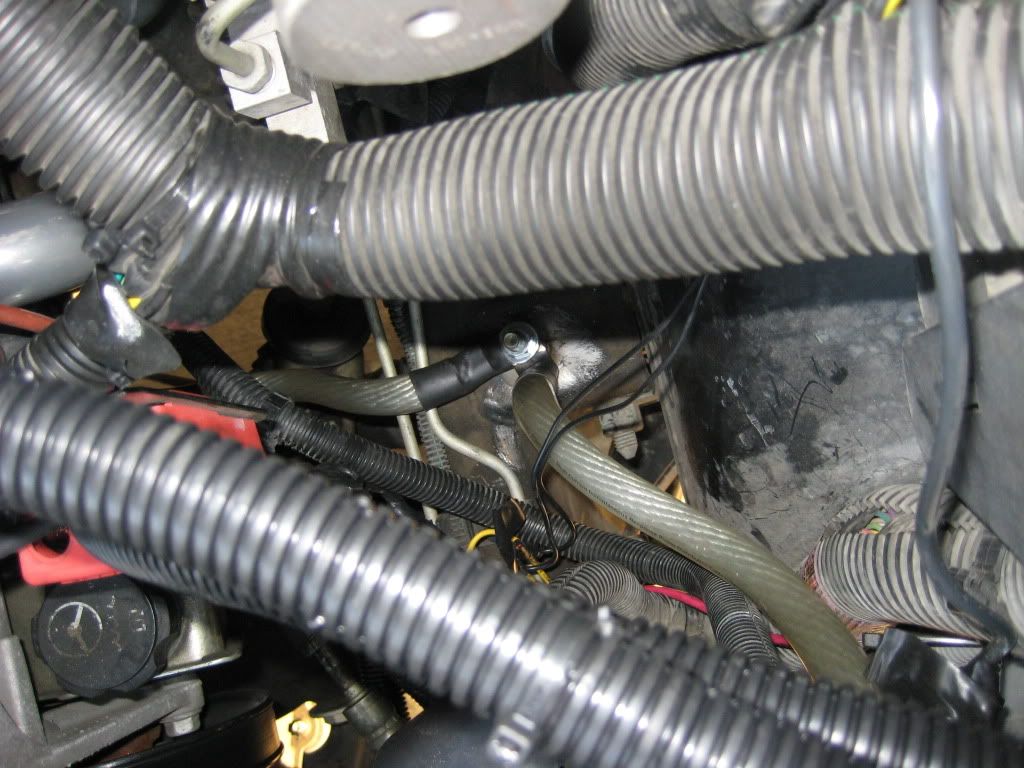
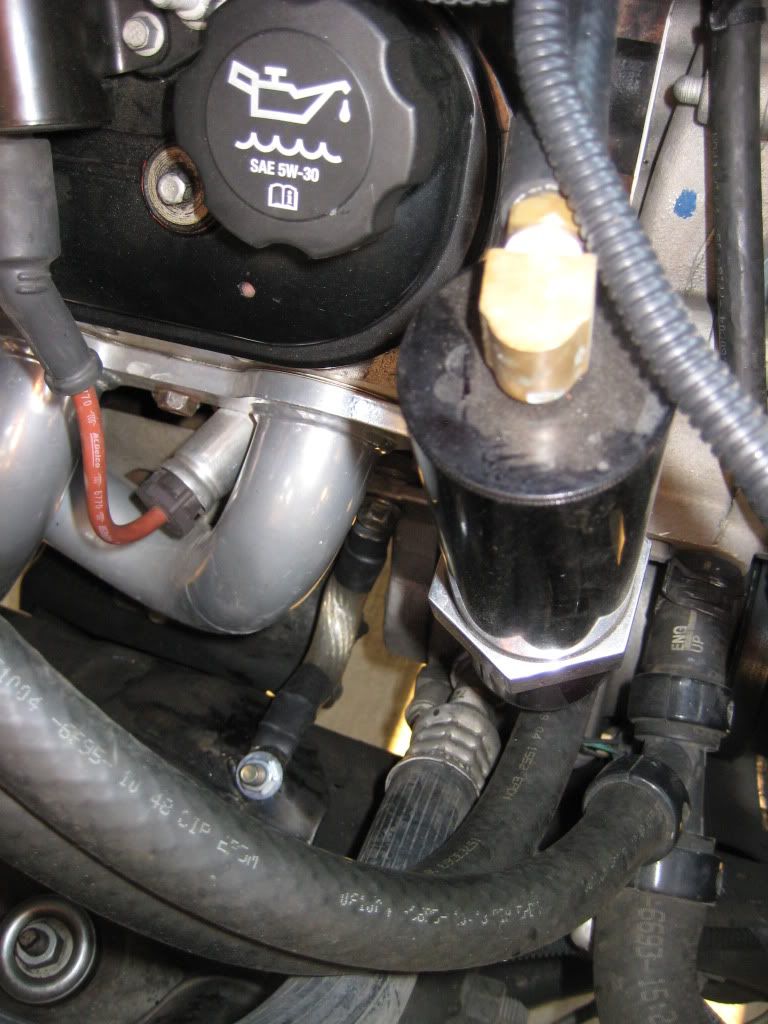
Next i welded a bolt to the frame on each side of the motor, I have 1 wire going from the battery to the bolt, then from the bolt to the engine block. The other side just has a wire going from the block to the bolt on the frame.

First i started out with some 07+ efans. From looking 05-06 one fan as 5 blades the other has 7 blades. The 07+ both have 7 blades. These fans use a TON of amps, so jsut keep that in mind if you upgrade. I also picked up a new 34" radiator. These seem to really help my cooling problems. I can beat on the truck in 107* heat and it never goes above 203* right where i have the efans set to come on... Before they would climb to 230ish...
Here are some pics.
So after i got these installed, my volts would drop to 11.8ish, so i decided to order a 145a alternator from ebay... It was a direct fit no issues at all, but that still did not fix the charging issue, so i had the batery tested and sure enough it was dead. So i bought another one from Oreillys, it is a little bit bigger than the stocker. The new alternator and battery really seemed to help my volts would move between 13.5 and 13.8.. I was still not satisified so i figured i would do the Big 3 upgrade. I ordered all the stuff from ebay for about $70.... All wiring is 1/0 gauge, which is freaking HUGE... I had to use my butane torch to sodder the new ends on.... I also had to use a hack saw to cut it... So everything is soddered and heat shrunk...
here are some more pics
New battrery terminals and 175a fuse.
1 fused wire going from the alternator to the battery and another wire from the Red box to the battery
Next i welded a bolt to the frame on each side of the motor, I have 1 wire going from the battery to the bolt, then from the bolt to the engine block. The other side just has a wire going from the block to the bolt on the frame.


 07-18-2009, 11:15 PM
#7
TECH Enthusiast
iTrader: (24)
Join Date: May 2007
Location: Stockton, Ca
Posts: 646
Likes: 0
Received 0 Likes
on
0 Posts
Looks really nice and clean...I did the big 3 upgrade for 200amp alt with some 2guage, made a good difference...Would using 1/0 work better? Just curious why didnt you take the red box out?
Trending Topics
07-18-2009, 11:40 PM
#8
On The Tree

Join Date: Dec 2008
Location: Metamora, IL
Posts: 113
Likes: 0
Received 0 Likes
on
0 Posts
I have to agree, you did a really nice job on the wiring. When you solder and heat shrink the connections, it really helps to lock out the corrosion. Did the extra large ground wiring and alternator cure the voltage fluctuations?
07-18-2009, 11:46 PM
#9
I did not see any reason to get rid of the red box, I use it for several other connections, such as my efans, starter, etc...
Ya my voltage fluctuations are gone, the voltage stays basically the same all the time, I have tried it with my head lights on, efans on high and AC on high. When the fans kick on and off there is not fluctuation either...
I also changed up my efans settings so it would delay the fans starting... I have them both set to delay, so the AC kicks on, then a pause then fan #1, then a pause then fan #2...
Here are my settings, the bold are the delays...
LABELS Type Of Fans Fitted To vehicle
Parameters Value
{G1203} Type Of Fans Fitted To vehicle Series Parallel Fans
{G0901} Fan #1 Turn-on Temp 197.023438 �F
{G0902} Fan #1 Turn-off Temp 194.984375 �F
{G0903} Fan #1 Turn-on By A/C Temp 220.015625 �F
{G0904} Fan #1 Turn-off Speed 45.000000 MPH
{G0905} Fan #1 Turn-on Speed 42.000000 MPH
{G0906} Fan #1 Turn-on Delay 5.000000 Seconds
{G0907} Fan #1 Turn-off Delay 0.000000 Seconds
{G0908} Fan #1 Minimum On-Time 30.000000 Seconds
{G0909} Fan #1 Run-on temp 199.976563 �F
{G0910} Fan #1 Run-on time 204.793750 Seconds
{G0911} Fan #1 A/C Pressure Enable 1378.951817 kPa
{G0912} Fan #1 A/C Pressure Disable 861.844886 kPa
{G0913} Fan #2 Turn-on Temp 203.000000 �F
{G0914} Fan #2 Turn-off Temp 201.031250 �F
{G0915} Fan #2 Turn-on Delay 10.000000 Seconds
{G0916} Fan #2 Turn-off Delay 0.000000 Seconds
{G0917} Fan #2 Minimum On-Time 30.000000 Seconds
{G0918} Fan #2 A/C Pressure Enable 1723.689772 kPa
{G0919} Fan #2 A/C Pressure Disable 1385.684980 kPa
{G0920} Fan#1 and #2 Both Off 46.000000 MPH