LQ4 Rebuild for Towing
 12-21-2016, 11:46 AM
#11
Registered User
Thread Starter

Join Date: Dec 2016
Posts: 23
Likes: 0
Received 0 Likes
on
0 Posts
I think a crank is beyond the scope of this rebuild.
For anyone curious, the cam specs are:
TSP212218R6
adv. dur. 264/270, 212/218, .600/.600, LSA114+3
So that gives me 39* overlap, -13* @.050
From what I've read, that should stay within the limits of retaining idle quality, drivability/emissions. Close to the edge, but okay. Agree/Disagree? Any opinions on combining this cam with 799 Heads? I've read that a .600 lift would justify porting, but IIRC, the conversation involved a considerably longer duration.
Edit: the porting would be a mild diy job.
Good info on tuning - I'll have to call around and figure out what I want to do.
Also, I thought it might be fun to do a autopsy post. should I start another thread in GM specific forum or just start logging it here?
Thankyou PowellSixO for your advice so far, it's appreciated!
Last edited by Seth 2500HD; 12-21-2016 at 12:26 PM.
 12-21-2016, 01:04 PM
#12

You can go up to a 220/220 duration cam and stay driveable on a stock converter. But with your big heavy truck, and if you stay with your stock heads, you will notice a very tiny bit of loss in power from your lower rpms (off idle to 1800-2000 rpms). With 799 heads though, you'll gain some torque from the added compression, which will help your bottom end. Realistically you could probably run the TSP 220/220 cam with the right LSA and keep it very driveable. If you were to run 799 heads, the Texas Speed 220/220 cam, the correct springs and push rods, 8.1 liter injectors, long tube headers, and a good local tune, you'd be very very happy. But if you don't go with the 799 heads, I'd stick with the 212/218 cam duration.
I had a pair of 243 heads for my truck, but decided I was going to put a whipple charger on it, and I sold them. I'm still trying to save the coin for the whipple charger at this time. That's the reason I put a reverse split duration cam in my truck. But it still runs very well for what it is. It's basically a 220/220 duration. I can feel a slight lack of power off idle to 2000 rpms, and then it comes alive. When I shift between 1st and 2nd, it will bark the tires even with the 35's. Can't wait to put a little positive pressure on the manifold. Lol.
My two cents.
01-07-2017, 12:44 AM
#13
Registered User
Thread Starter
Join Date: Dec 2016
Posts: 23
Likes: 0
Received 0 Likes
on
0 Posts
Well, I think the heads are out for now. I've torn the engine completely down, and I had assumed I'd find serviceable pistons when I started this, but they are all at 3.998x. Couple that with bores at 4.0015, and I'm past .0028 piston to wall clearance. I haven't really been able to find any opinions on how stringent that clearance limit is, so I'm going to assume there's no wiggle room. I have one piston at the limit, and the rest are up to .0034. Boring the cylinders and getting oversized pistons stretches the budget thin, and a cam cannot be ignored since #3 bearing spun, and put that journal 3/10 thous. from wear limit - I think you'd have to take the rest of that just to make it smooth again. By the grace of God, it only took about 5/10 thous. from the bearing bore, so I'm okay there.
So with pistons in need, I found LQ9 replacements at summit. I have the second design lq4 (floating pins) so I think it's plug and play, right? If the new pistons turn out to be a true 4.0, that'll put it back within spec. Any flaws with this part of the plan?
Onto Cam. I was really looking forward to a high lift cam, until I started shopping springs to get the job done. Ouch! Spend 400 on a cam, spend half again as much for springs, retainers, etc. I think my mind was stuck in flat tappet world...
So I jumped back down to Comp Cam with .554/.558 lift (208/212) dur. - relatively cheap, and I figured this could be done with some good 'ole LS6 springs (GM Part No. 12625033, 16 pack sold under # 12499224). Or so I thought.
I would like to get a reliable source for specs on springs #12586484. I saw them mentioned in GMPP 2006, they were installed in a cnc ported head, but they were not listed independently under LS parts in that same catalog. It stated .570 max lift. If I can't find a reliable lead, I think I'll just have to lower the lift on the cam. IF someone knows of another affordable spring alternative, please share
Current total sans a bearing puller and springs is sitting at $1200. I had some photos of the damage, but the uploader here acts like it uploads, then just resets.
-Beginning of Rant-
(skip if you don't like reading people fuming about BS)
Hot Rod or Engine Builder had an article talking about .03-.04 being the min. margin from coil bind, and .06+ being preferable. So, at 1.8 Installed height, and 1.22 Bind, that leaves us .58 to coil bind; With my selected cam, I'm left with .022 margin. But Wait, EVERYBODY is saying max .570 lift! Can you safely run with only .01 from bind? I doubt it.
GMPP Catalog, 2016 and 2017, pages 267 and 269 respectively, bottom half of the page.
Clearly states .550 MAX LIFT. Apparently GM agrees that .03 is min. margin.
Summit, GM Parts Direct, and Lingenfelter all list .570 lift max. GM Parts Direct is particularly funny, as the story changes whether you're looking at the single spring or pack. Jegs, ironically, has the spec right - as on a lot of products they don't list ANY details....
Do a search and you get all sorts of bad info. someone on a corvette forum stated bind occurred at 1.085; on ls1tech, 1.160 is claimed. GM Parts Direct says 1.150.
U N B E L I E V A B L E. When you think about how much money someone can sink into a motor, or a whole car, you'd think people would be more responsible with what they state as fact. Especially when you're selling it.
-End of Rant-.
01-19-2017, 09:04 AM
#14
I like the plan. With flat pistons, there is no need to get heads. You'll bump your compression back up. The 317's that came on your lq4 are essentially the same as 243 or 799 heads, just with higher cc combustion chambers.
As far as affordable springs, look into PAC springs. I believe the PAC 1218 is what I'm running (been running them for 45K+ miles now). They're more than capable of handling that cam, and they are recognized as a very good valve spring for the LS motors. Not a lot of failures.
As far as affordable springs, look into PAC springs. I believe the PAC 1218 is what I'm running (been running them for 45K+ miles now). They're more than capable of handling that cam, and they are recognized as a very good valve spring for the LS motors. Not a lot of failures.
01-27-2017, 01:32 AM
#15
Registered User
Thread Starter
Join Date: Dec 2016
Posts: 23
Likes: 0
Received 0 Likes
on
0 Posts
Powell, I went back through our conversation, and just went with the low lift TSP cam (package) you suggested and called it a day. I had my fill of looking at valve springs.
I had erroneously measured my cylinder bores with the block ice cold; my original measurements were WAY off. With the block heated up to a little above room temp, my measurements expanded by 4-5 thousands. So let that be a lesson for the uninitiated - measure when warm. I was aware of this rule, but didn't think it would have that dramatic effect.
So anyways, off to the machine shop....
Got my block back, they bored 20 over, matched to pistons, new wrist pins, honed the rods and polished the crank. I asked them if they had measured the crank bores and they claimed they checked with a straight edge, but not measured. (I didn't ask them to since I have a bore gauge) That's it.
Here's the problem -
I'm using clevite P series mains, part MS2199P
I assembled my caps, torqued it all down to measure the main bores - vertically, they measure 2.745", manual says 2.75-2.751. Well, I thought "let's see". Installed crank, plastigage, and got .001-.0015 bearing clearance. I think to myself, "hey, I probably didn't have my bore gauge just right, or the block was too cold....yada yada. Disassembled, lubed it up and re-torqued inner cap bolts. Go for a test spin and crank is LOCKED SOLID. Couldn't even begin to turn it, and lifted a stand wheel off the ground trying. (dumb, should only take 20-30lbs torque to rotate)
Went back to manual; forgot to "seat" thrust bearing - so I removed caps #2 and 4 and left 1,3,5 in place finger tight and only with inner bolts in place. tapped front and back and put it back together again with inner bolts only. At 15lbs, crank spins. Put 80* on first bolt (cap #3), and crank is locked again. I back it off, re-torque and only go to 30* - crank is locked. I completely remove cap 3, and try torqueing #2 cap - crank locked.
I'm really at a loss here - initially I thought perhaps the machine shop had mixed up my caps with someone else's that were meant to get a line bore (thus the 5 thou under) - I may call them about it, but then how on earth would the plastigage show any readable clearance?
Then I thought bent crank? but surely it would give resistance at some point turning when only torqued? (I also did a crude test and measured .001 runout at journal #3 during tear down, but I dismissed it since #3 has .001 out of round)
Checked for dirt behind bearings - clean.
Checked Clevite part no. on the bearing and ref. their catalog - it's standard size.
Checked bearing locks were opposing sides.
Checked all caps in order and facing correctly (1-4 drivers side, 5 pass. side)
Are new main bearings made to be "paired"? i.e. matching bottom and top halves? I searched for this and found no reference of such a thing.
I guess I'll tear it down and measure with bearings installed - not sure what that'll gain other than confirm or deny the bearing clearance...I know plastigage isn't super accurate - but with journals half worn I was surprised the clearance was that tight anyways.
I'll also check end play, but if that were the problem, wouldn't it lock under initial torque?
Anyone got an idea of what to check next? I really need to get this buttoned up and back into service.
Thanks in advance!
Last edited by Seth 2500HD; 01-27-2017 at 01:50 AM.
01-27-2017, 07:19 PM
#16
Registered User
Thread Starter
Join Date: Dec 2016
Posts: 23
Likes: 0
Received 0 Likes
on
0 Posts
Update.
Checked mic and bore gage, used 2 different calibration bars, checked 4 times.
Removed crank and main bearings, reassembled and remeasured main bores. Same result. Reinstalled bearings, measured again. 3.5 thou under 2.558 (reference measurement, my crank is actually 2.5585). At this point I stopped and called the machine shop and asked them if they had another SBC in, and if there was anyway my caps may have been mixed up with someone else's. Of course, his initial response was, "no, were are super careful..." yada yada. We go over cap order and orientation, which I'm fairly certain he was citing for a LS1 or LS2, tells me bearing locks should line up on 2,3,4 - which is diametrically opposed to what clevite says....I humor him by telling him I'll turn my caps around and check, and in the meantime if he could please check on his end (I practically begged him).
On 1 and 5, I do have recesses for the bearing locks on both sides, so on 1 I flipped it around retorqued it just for giggles. No change. By that time he calls me back, and confirmed. He has another 6.0 iron block in the shop, and his bore measurements are way off. Apologies ensue. I'm sure it was embarrassing, as he was probably thinking "another green horn and another ruined SBC".....on SBC's - yeah, I'm new. but I've been turning wrenches for 20 years - but I always take the attitude first that I must be wrong, until I must be right!
TBH, I'm not mad, just grateful this mystery is solved. If I had to do it over again, I'd find a way to stamp my initials into every cap, rod, bolt, and block. So over the weekend I'll be verifying everything else they did is correct. I'm already taking the block back as something(not by me) gouged my cylinder deck surface from the cylinder wall all the way across to the water jacket, and then onto the lifter gallery....I was peeved about that but just wanted to get on with it.....but now, since I have to go back, they're gonna fix it or I will be getting mad. It's obvious it's a glancing blow from a cutter or something, as it's straight as a ruler and very uniform.
The question now is, are my $85 set of main bearings toast from being squished 4 thous? Is it my fault for not stopping when I encountered the weird bore measurement, when, if I had my actual caps, this wouldn't have happened? Who do you think should pay - or will they be fine?
02-08-2017, 11:58 AM
#17
Registered User
Thread Starter
Join Date: Dec 2016
Posts: 23
Likes: 0
Received 0 Likes
on
0 Posts
Long block back together, the bearings survived - clearance landed between 15 and 20 ten thou.
Alarming that I could not find a spec for cam bearings. Read a white paper from mahle, rule of thumb .0015 - .002 per in. of journal. 2-4 came to .0045, 1 and 5 came to .0055. Kinda worried about that. With starter installed and on stand, I'm getting 30 psi oil pressure, and 140-145 psi on all cylinders. A little disappointed about cyl. Pressure, i know w/ new rings they need to seat, but was expecting a little higher w/ flat top pistons. I'll check again after a couple hundred miles.
Overlooked cam retainer plate - it's seeping a little, so i have a new one on the way. Stupid torx bolts....
I've read a few break-in procedures, all fairly close to eachother. Does anyone have advice/cautions they could add regarding break-in?
02-14-2017, 07:51 AM
#18
Sorry Seth, been busy lately. I've been working on my truck some more. Lol. It looks like you're making some good progress though. Which heads did you end up running? As far as break in, I've heard a million different ways. I've read a bunch on the subject, and I think that a hard break in makes sense to me. I've done a few tuck engines this way, and a bunch of 450 dirt bike engines this way and it seems to work. Here's a link.
Break In Secrets--How To Break In New Motorcycle and Car Engines For More Power
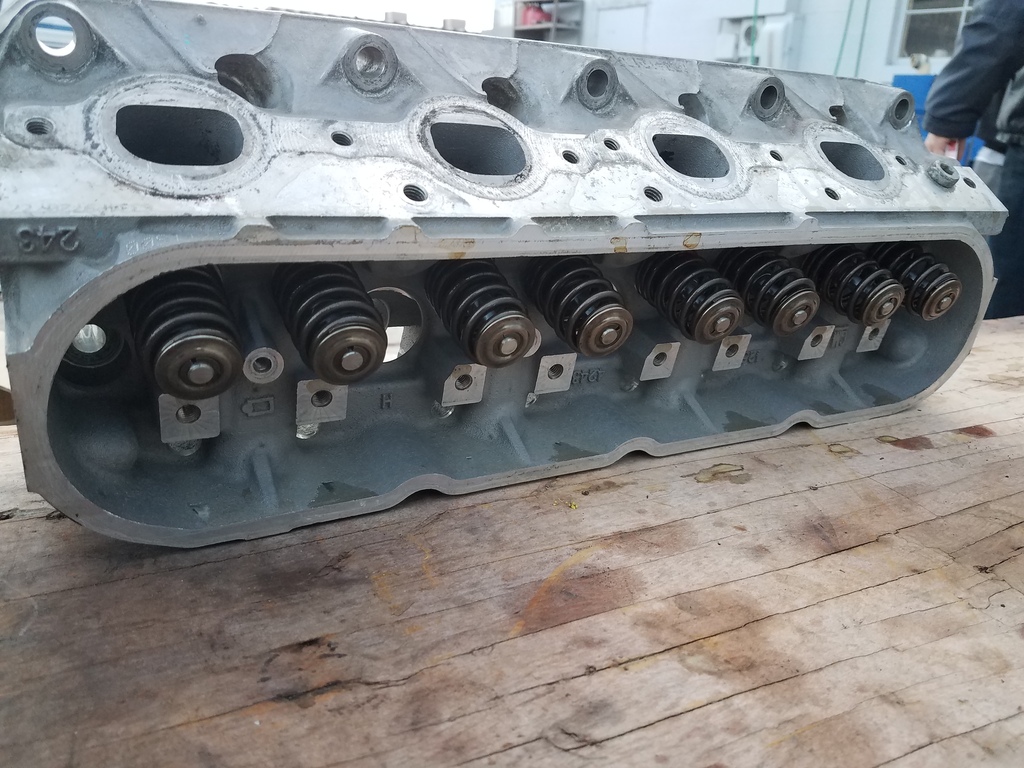
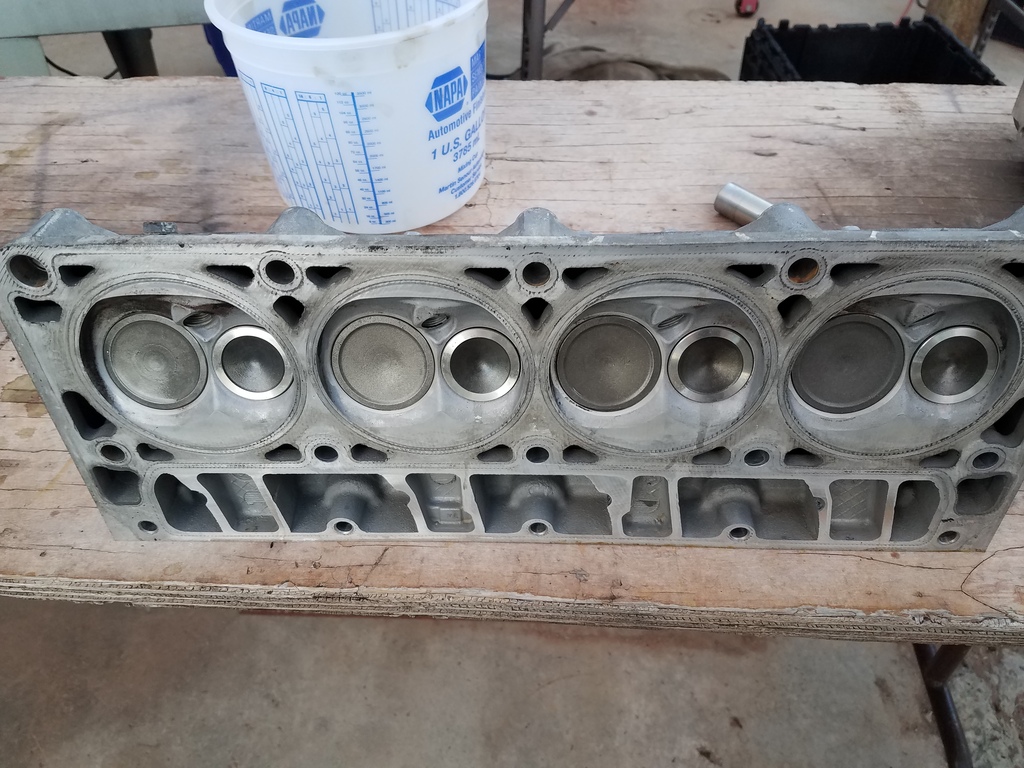
I just got done installing 243 heads on my lq4. I haven't had it tuned yet, but the torque added is amazing. It pulls harder from off idle all the way to 6000 rpm (had to try it once hehe). I'm currently not driving it though, until I can get my tune. I'm taking it down to NicD to have hime tune it on Feb 25th. I'm really looking forward to it.
Pair of 243's I rebuilt and put new vales in.
Back in the truck.
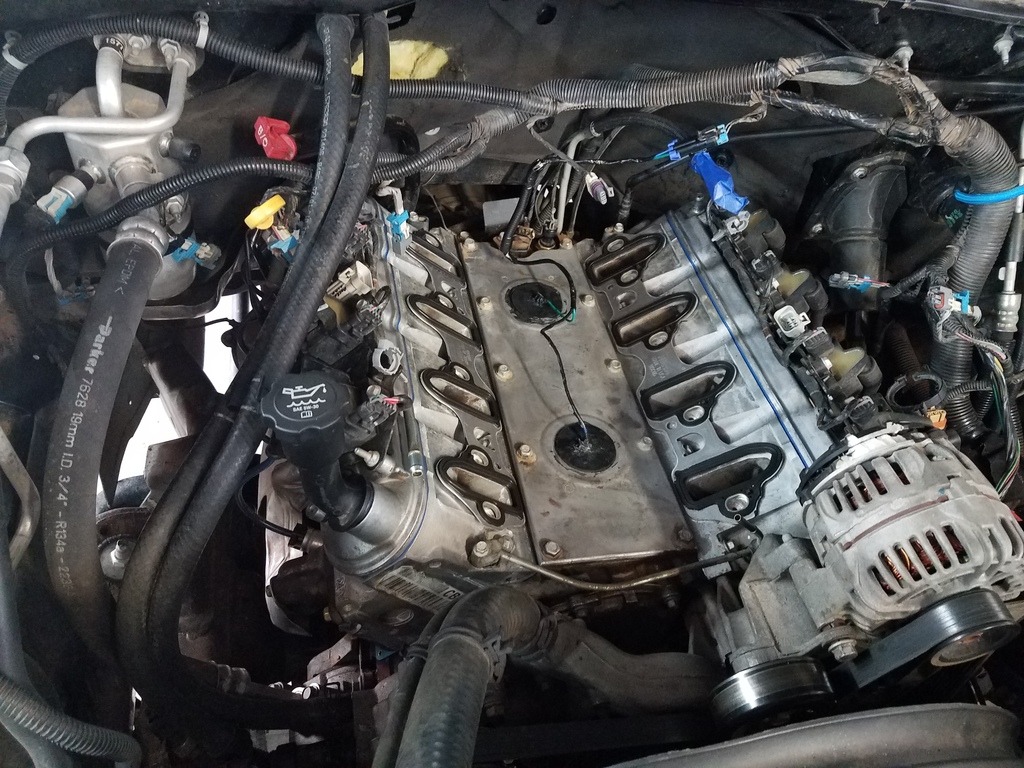
First fire up.
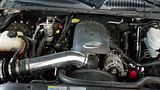
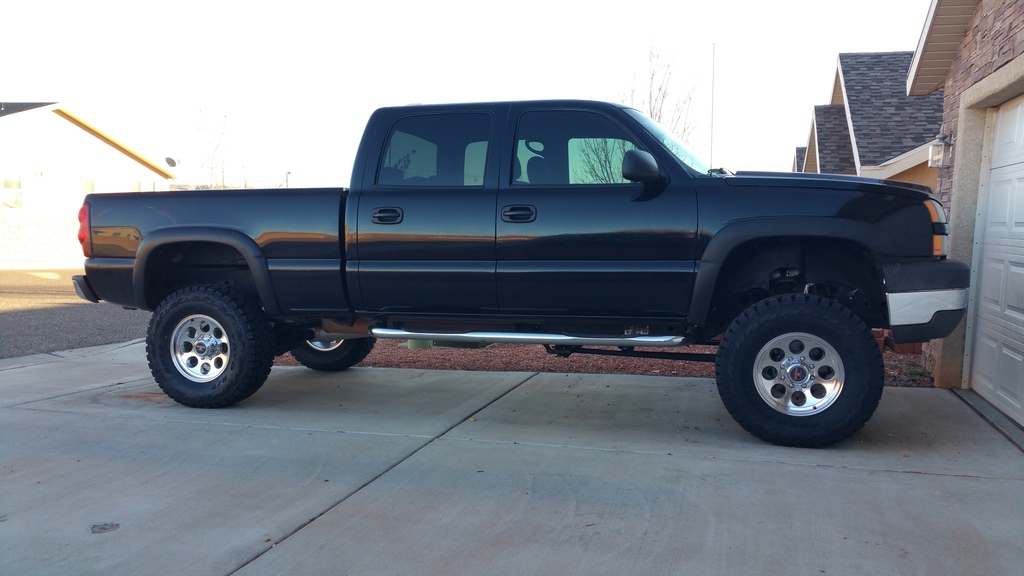
The truck.
Break In Secrets--How To Break In New Motorcycle and Car Engines For More Power
I just got done installing 243 heads on my lq4. I haven't had it tuned yet, but the torque added is amazing. It pulls harder from off idle all the way to 6000 rpm (had to try it once hehe). I'm currently not driving it though, until I can get my tune. I'm taking it down to NicD to have hime tune it on Feb 25th. I'm really looking forward to it.
Pair of 243's I rebuilt and put new vales in.


Back in the truck.

First fire up.
The truck.
 02-14-2017, 08:55 AM
#19
Registered User
Thread Starter
Join Date: Dec 2016
Posts: 23
Likes: 0
Received 0 Likes
on
0 Posts
Hi powell, I stuck with my 317's - i massaged them, lapped and cleaned the valves and polished the chambers. Not a mirror finish, just smoothed out the casting. Gave the exhaust ports the same treatment and left the intakes alone. My only motivation for this was to mitigate detonation. At some point, I'll probably have to readdress the heads, as the valve guides were questionable. I may switch to 243's at that point if its still lacking power.
Did you buy new valves for your heads? I had new intake valves to install, as i was expecting the margin to be around .05 - but the new valves were the same as the old ones - around 2 maybe 3 hundredths.
The hard break-in makes sense but I'm honestly scared to do it - chiltons is along the same lines, so I'll probably do a "moderate" break-in, say, up to 4k. I think I'd cry if it were to break...been a month getting it back together, and every day there was "something". I was set to install last Saturday, then discovered the driver's side motor mount bracket was sheared in half - didn't noticed because it stayed in place when i pulled the motor...
Anyways, I should be firing it up later today, wanted to lastnight but ran out of daylight - stupid garage is too small for the truck to fit into.
Nice truck btw, wish mine was at least half as shiny as that!
02-14-2017, 09:12 AM
#20
Yeah I did put brand new valves in. To my surprise, the valves came in right at the same valve height as the old ones. So I didn't have to adjust the valve length by shaving some of the valve tips off. We didn't cut new seats either. The valve to valve seat contact pattern looked good. So we just lapped the new valves in.
With you going to flat top pistons, you'll get a noticeable bump in compression. You'll be at 10:1 like the lq9's. You should be able to make some pretty good numbers with your setup, especially if you have the supporting mods to go with it (cold air intake, headers, and exhaust). Just make sure you find someone that knows their **** to do the tune for you. The tune is were you can really wake these thing up. Do you have any pictures of your motor, and truck?
With you going to flat top pistons, you'll get a noticeable bump in compression. You'll be at 10:1 like the lq9's. You should be able to make some pretty good numbers with your setup, especially if you have the supporting mods to go with it (cold air intake, headers, and exhaust). Just make sure you find someone that knows their **** to do the tune for you. The tune is were you can really wake these thing up. Do you have any pictures of your motor, and truck?