How To: Factory Rear Swaybar Upgrade
 05-21-2011, 12:48 PM
#1
Launching!
Thread Starter
iTrader: (2)

Join Date: Jul 2009
Location: Big Rock, IL
Posts: 208
Likes: 0
Received 0 Likes
on
0 Posts
Things you need
Rear swaybar from a NBS Tahoe, Suburban, Escalade, etc..
Factory Endlinks
Bushings and hardware
2 - 3" exhaust U-bolts
2 inch wide 3/16 steel stock (at least a foot long)
1/2 Shock mount tabs Link
4 - 1/2 Grade 8 bolts 1" long
2 - 1/2 Grade 8 bolts 2 1/2" long
6 - 1/2 Washers
4 - 1/2 Lock Washers
6 - 1/2 Nuts

First you will want to make the brackets that will bolt to the frame and hold the endlinks.
Cut the steel stock to about 3 inches, drill two 1/2 holes on either side and weld the shock tabs to them. I will also note a helpful way to make these is to bolt the tabs to the end link and then tack them to the steel so that they will be aligned.
Here is what the frame brackets should look like

Then you will need to put the sway bar up to the axle to determine where you want to mount the bushings.
I chose to mount them as far to the outside as possible which was where they were on the escalade. This required to grind off the bump stop brackets.
The u bolt goes over the axle and then the bottom bracket slides on the studs, then stick the bushing bracket over the studs and put the nuts on

then position the swaybar so the bars facing the back are perfectly level. (use an angle finder)
then, using a level, mark the center on the frame where the endlinks will also be perfectly vertical. Position the frame bracket so that when the level is vertical, the two eye-holes line up. Mark where the bracket sits, drill the holes and mount the brackets to the frame.

Then all that is left to do is to bolt the endlinks from the swaybar to the brackets.
Here is the finished product.


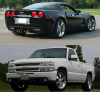
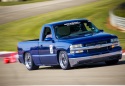
This made the truck handle soo much better. I was genuinely surprised how much the responsiveness and handling improved. It also made the truck more predictable around fast corners.
Also i would like to note that if you are dropped (like mine) you will need to shorten the endlinks. I do not have a welder so i am going to get my endlinks shortened tonight. You will want the Bar and endlinks to be perfectly level so you will need to measure to figure out how much you will need to shorten to get maximum effectiveness. (you can see in my pictures mine are not shortened and the bar is not level, but i accounted for this so when they are shortened, it will be perfect)
Rear swaybar from a NBS Tahoe, Suburban, Escalade, etc..
Factory Endlinks
Bushings and hardware
2 - 3" exhaust U-bolts
2 inch wide 3/16 steel stock (at least a foot long)
1/2 Shock mount tabs Link
4 - 1/2 Grade 8 bolts 1" long
2 - 1/2 Grade 8 bolts 2 1/2" long
6 - 1/2 Washers
4 - 1/2 Lock Washers
6 - 1/2 Nuts
First you will want to make the brackets that will bolt to the frame and hold the endlinks.
Cut the steel stock to about 3 inches, drill two 1/2 holes on either side and weld the shock tabs to them. I will also note a helpful way to make these is to bolt the tabs to the end link and then tack them to the steel so that they will be aligned.
Here is what the frame brackets should look like
Then you will need to put the sway bar up to the axle to determine where you want to mount the bushings.
I chose to mount them as far to the outside as possible which was where they were on the escalade. This required to grind off the bump stop brackets.
The u bolt goes over the axle and then the bottom bracket slides on the studs, then stick the bushing bracket over the studs and put the nuts on
then position the swaybar so the bars facing the back are perfectly level. (use an angle finder)
then, using a level, mark the center on the frame where the endlinks will also be perfectly vertical. Position the frame bracket so that when the level is vertical, the two eye-holes line up. Mark where the bracket sits, drill the holes and mount the brackets to the frame.
Then all that is left to do is to bolt the endlinks from the swaybar to the brackets.
Here is the finished product.
This made the truck handle soo much better. I was genuinely surprised how much the responsiveness and handling improved. It also made the truck more predictable around fast corners.
Also i would like to note that if you are dropped (like mine) you will need to shorten the endlinks. I do not have a welder so i am going to get my endlinks shortened tonight. You will want the Bar and endlinks to be perfectly level so you will need to measure to figure out how much you will need to shorten to get maximum effectiveness. (you can see in my pictures mine are not shortened and the bar is not level, but i accounted for this so when they are shortened, it will be perfect)


 08-26-2011, 04:25 PM
#6
Launching!
Thread Starter
iTrader: (2)
Join Date: Jul 2009
Location: Big Rock, IL
Posts: 208
Likes: 0
Received 0 Likes
on
0 Posts
i do not, i purchased it from a member on here parting out an escalade.
I bought some endlinks from rockauto and some 1/2 shock bushing inserts and cut the links down to the right size and welded the sleve so its stronger, works much better now.
Oh, and i got urethane bushings for everything.
Heres a pic with the shortened endlinks


everything is parallel and working great.
it also does not effect the ride quality at all because the bar rotates with the suspension, its only in effect if there is body roll.
I bought some endlinks from rockauto and some 1/2 shock bushing inserts and cut the links down to the right size and welded the sleve so its stronger, works much better now.
Oh, and i got urethane bushings for everything.
Heres a pic with the shortened endlinks
everything is parallel and working great.
it also does not effect the ride quality at all because the bar rotates with the suspension, its only in effect if there is body roll.