LED dash swap install instructions: 03-08 Classic Silverado
 12-28-2009, 10:38 PM
#21
TECH Junkie
iTrader: (8)

Join Date: Jul 2006
Location: OK
Posts: 3,895
Likes: 0
Received 0 Likes
on
0 Posts
Awesome. Now if I only had the time and patience to do this myself. I look forward to seeing the steering wheel controls done. I have some extra buttons with burnt out bulbs.
 12-28-2009, 10:43 PM
#22
TECH Enthusiast
iTrader: (13)

Join Date: Nov 2005
Location: Ga
Posts: 548
Likes: 0
Received 0 Likes
on
0 Posts
im def going red.
Hey tootall do the window switches basically swap out like the 4wd switch you posted? and the same for the headlight switch?
Where are you buying your leds and resistors i need to order a batch to get started.
Hey tootall do the window switches basically swap out like the 4wd switch you posted? and the same for the headlight switch?
Where are you buying your leds and resistors i need to order a batch to get started.

 12-29-2009, 06:42 AM
#25

thanks . . . big first time experiment with doing a red setup
Stearing wheel controls are not that bad, but making all of them "match" evenly is another story. Using the flat tops is easy, but they come out bright.
Plan on using twice as many LEDs in the cluster vs the other parts, it's worse if it's a SS Cluster. The SS Cluster has smaller "windows" on the over lay for the light to come threw.
I'll post the door switches later this week. This is where the 1/8" drill bit comes in . . . and no it's not like the 4wd switch.
Where do I get them . . . you'll have to search. I haven't found a seller that's 100% dependable. It's a hit or miss sometimes, and that can be expensive. Do not go cheap on the resistors. Use the blue "water resistant" or the larger "gray" resistors. - they got HOT . . . as in hot to the touch

a bunch . . . Once you get this started, you'll figure out what you like and your expatations. . . . there's no standard. What I may think is too bright, may be too dim for you.
I'll post the door switches later this week. This is where the 1/8" drill bit comes in . . . and no it's not like the 4wd switch.
Where do I get them . . . you'll have to search. I haven't found a seller that's 100% dependable. It's a hit or miss sometimes, and that can be expensive. Do not go cheap on the resistors. Use the blue "water resistant" or the larger "gray" resistors. - they got HOT . . . as in hot to the touch
a bunch . . . Once you get this started, you'll figure out what you like and your expatations. . . . there's no standard. What I may think is too bright, may be too dim for you.
12-30-2009, 08:47 AM
#26
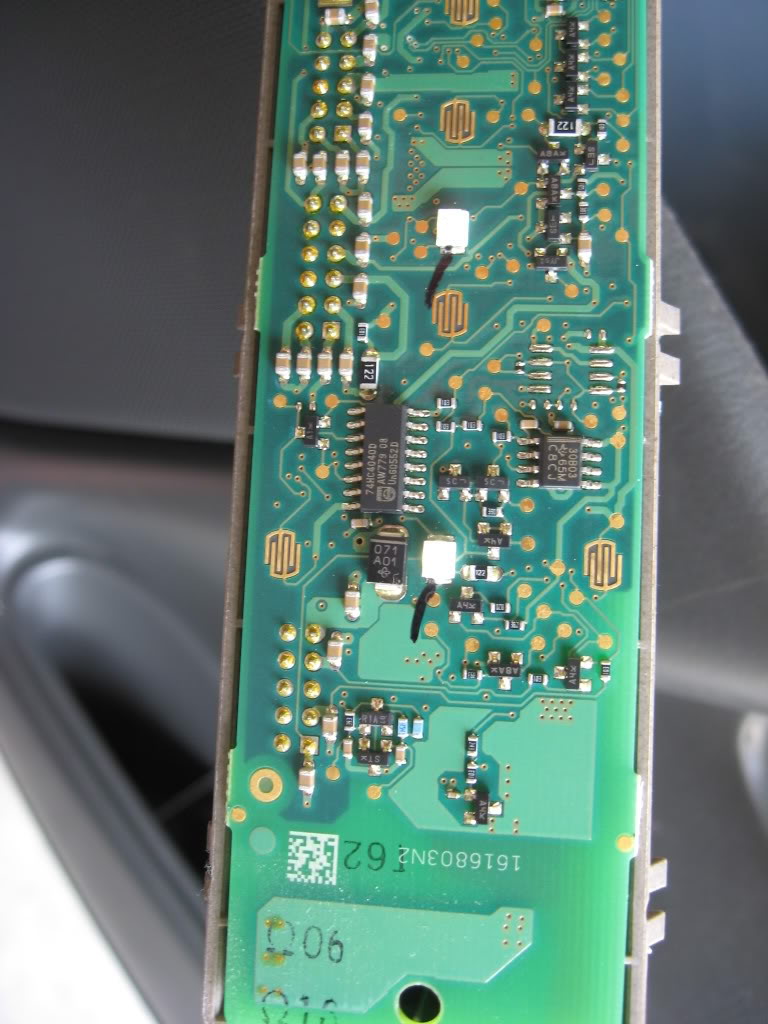
Here's the door switches.
Heat will kill the diodes, and the copper contacts . . . be careful.
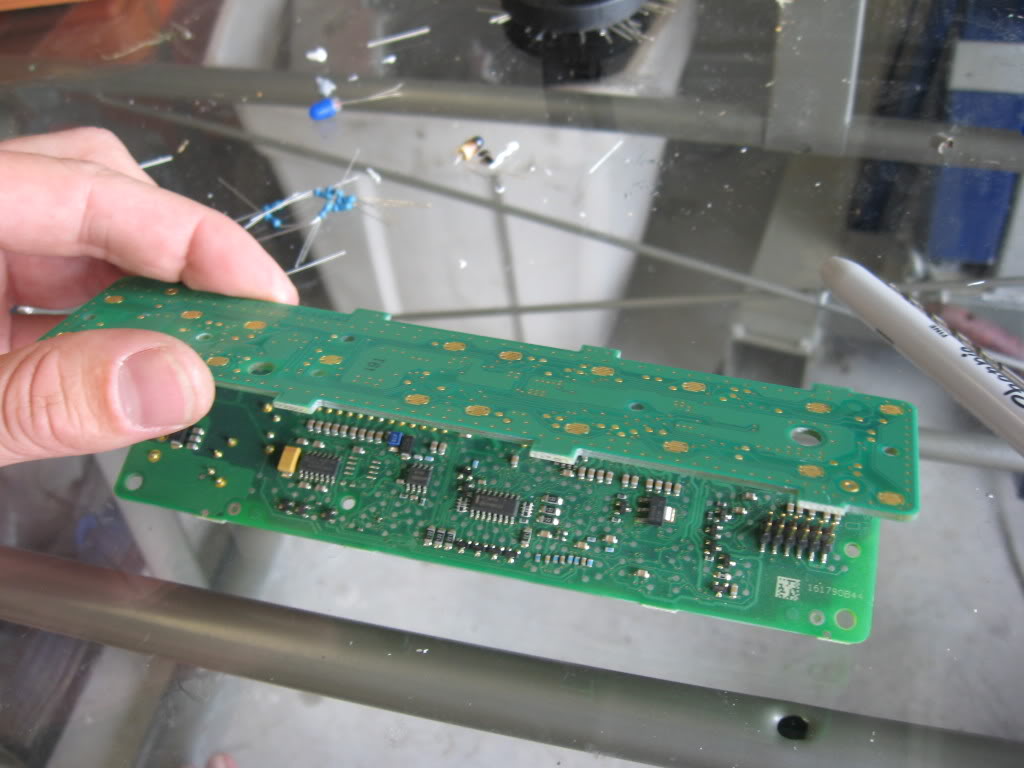
They already come with small yellow and white LEDs. You're going to de-solder the originals from the board and put the new set of whatever color you choose.
Once you have removed the switches from the doors . . . Keep in mind there's screws holding them down from the backside of the door . . . so the door panel has to come off to get to them, or you'll crack the backing in the door.
The door switches themselves come apart like clam shells.
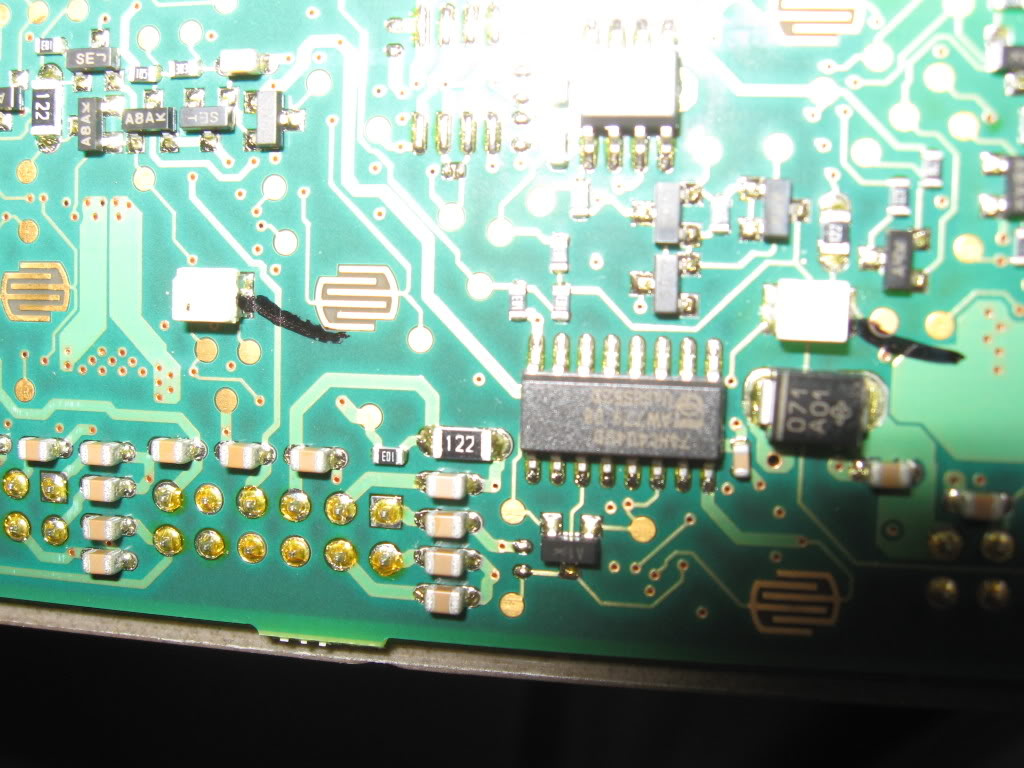
Here's the passenger side. The black reference marks are the positive side. (hint hint)
The LEDs shine/point straight up, and it's offset a little from where the button displays are at . . . meaning no hotspots. The drivers side is like this also
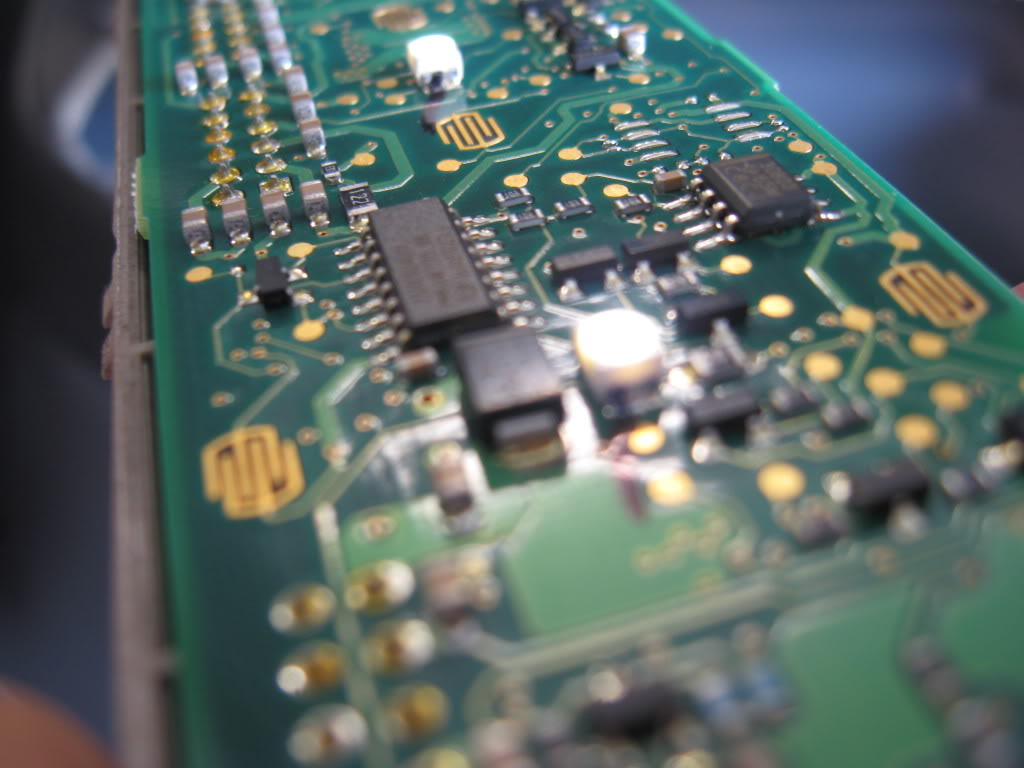
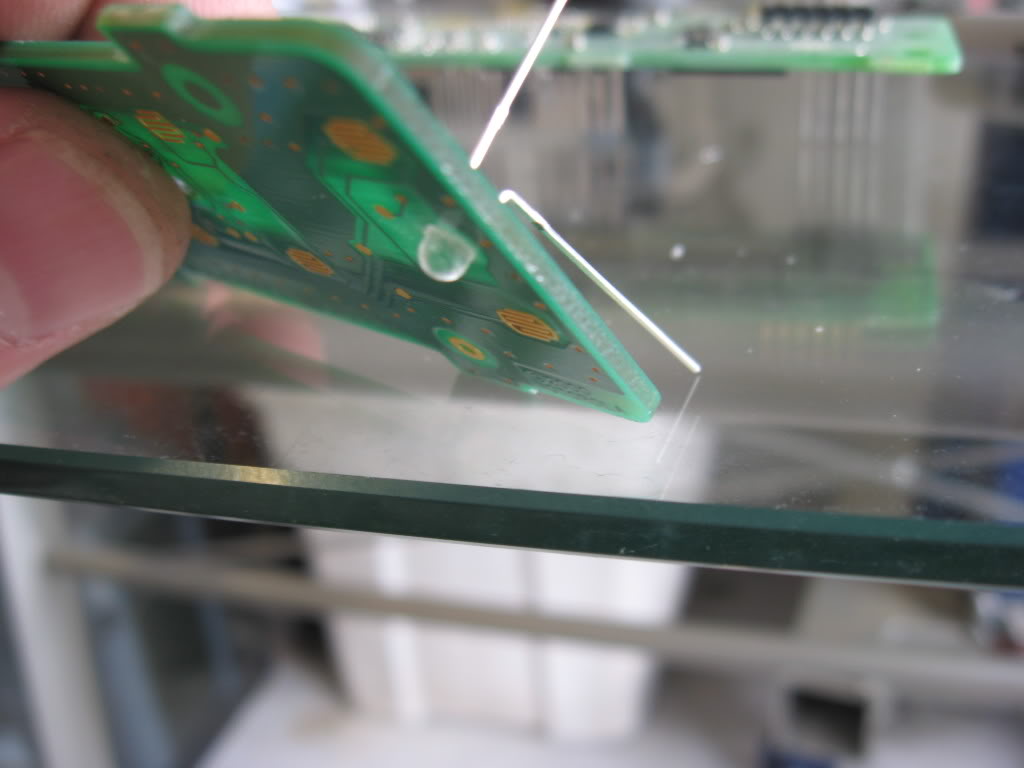
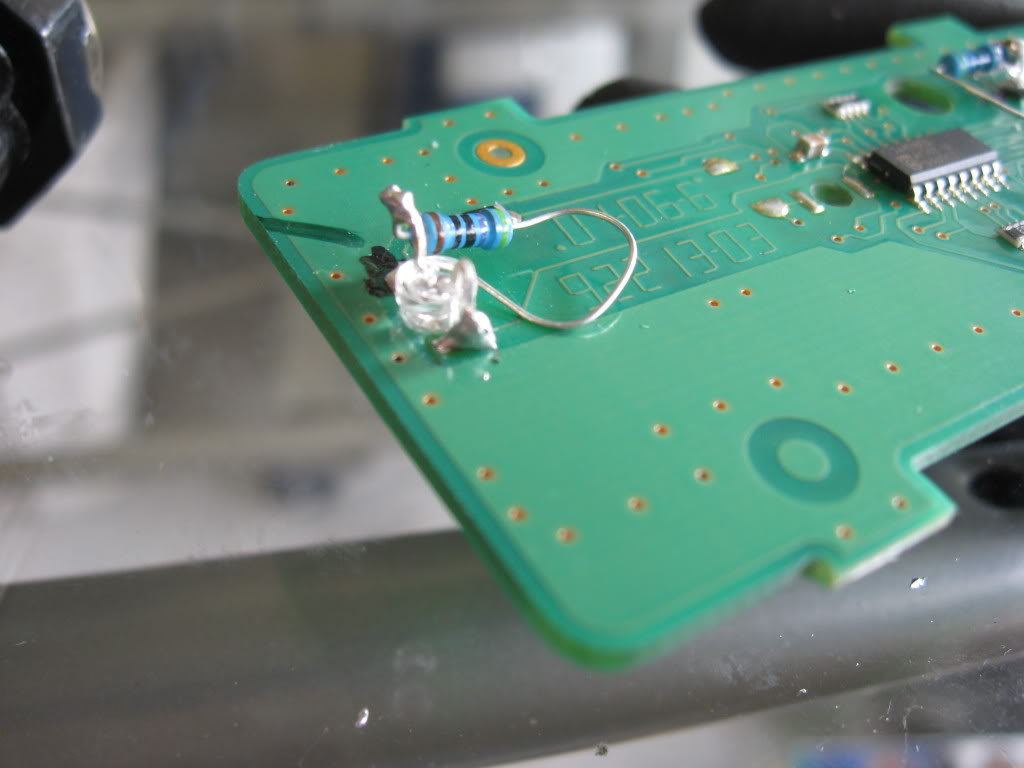
DRIVER'S SIDE
Driver's side uses the same small surface mount LEDs. Again, be careful with the heat.
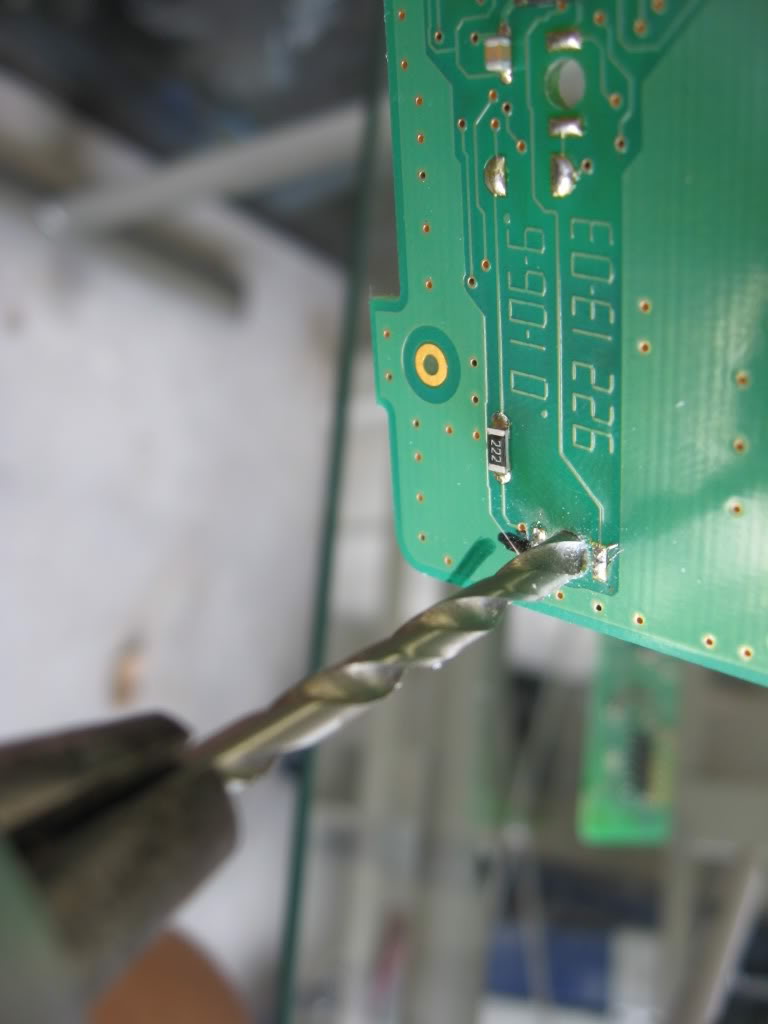
This is where you use the 3mm LEDs. The current holes are too small for the 3mm to be placed in their holes. I use a 1/8 inch drill bit, and this will allow the LED to be set in place. Use the pics as a reference. Be mindful about the loose wires and where/how they hang down. They cannot contact anything else.
Heat will kill the diodes, and the copper contacts . . . be careful.
They already come with small yellow and white LEDs. You're going to de-solder the originals from the board and put the new set of whatever color you choose.
Once you have removed the switches from the doors . . . Keep in mind there's screws holding them down from the backside of the door . . . so the door panel has to come off to get to them, or you'll crack the backing in the door.
The door switches themselves come apart like clam shells.
Here's the passenger side. The black reference marks are the positive side. (hint hint)
The LEDs shine/point straight up, and it's offset a little from where the button displays are at . . . meaning no hotspots. The drivers side is like this also
DRIVER'S SIDE
Driver's side uses the same small surface mount LEDs. Again, be careful with the heat.
This is where you use the 3mm LEDs. The current holes are too small for the 3mm to be placed in their holes. I use a 1/8 inch drill bit, and this will allow the LED to be set in place. Use the pics as a reference. Be mindful about the loose wires and where/how they hang down. They cannot contact anything else.
12-30-2009, 10:06 AM
#28
would the leds and resistors here work? www.oznium.com
you need 3mm and 5mm LEDs . . . resistors, 470 = blue 510 = red

 Great job