Project Silver Bullet!

 08-01-2015, 12:26 AM
#12

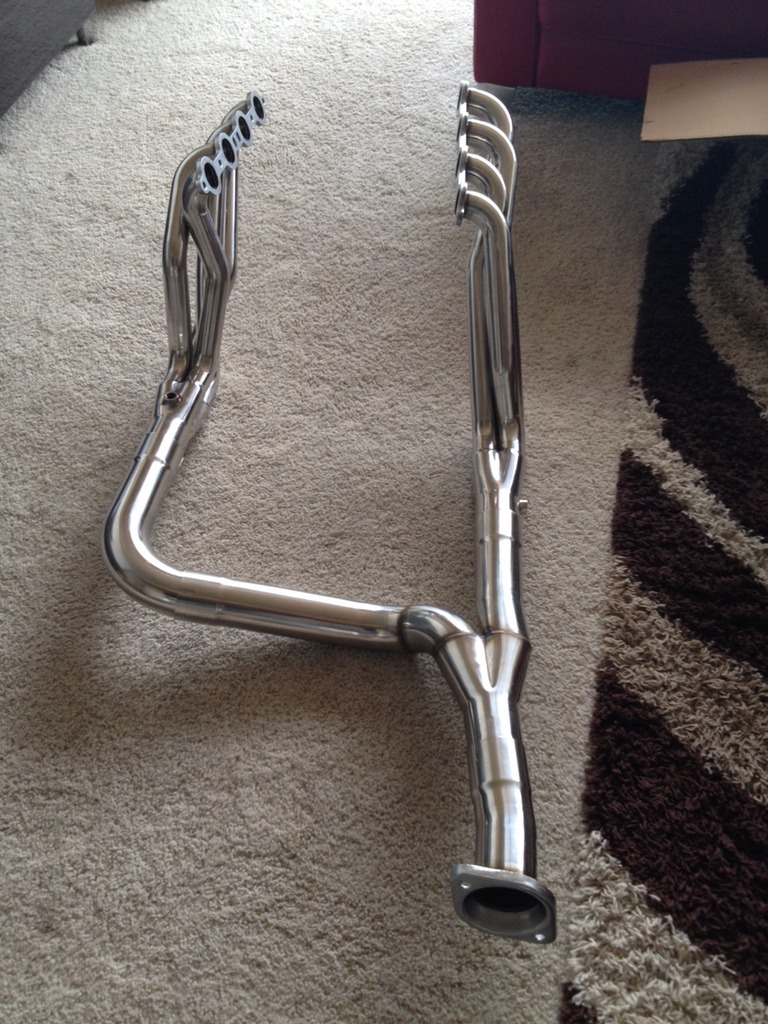
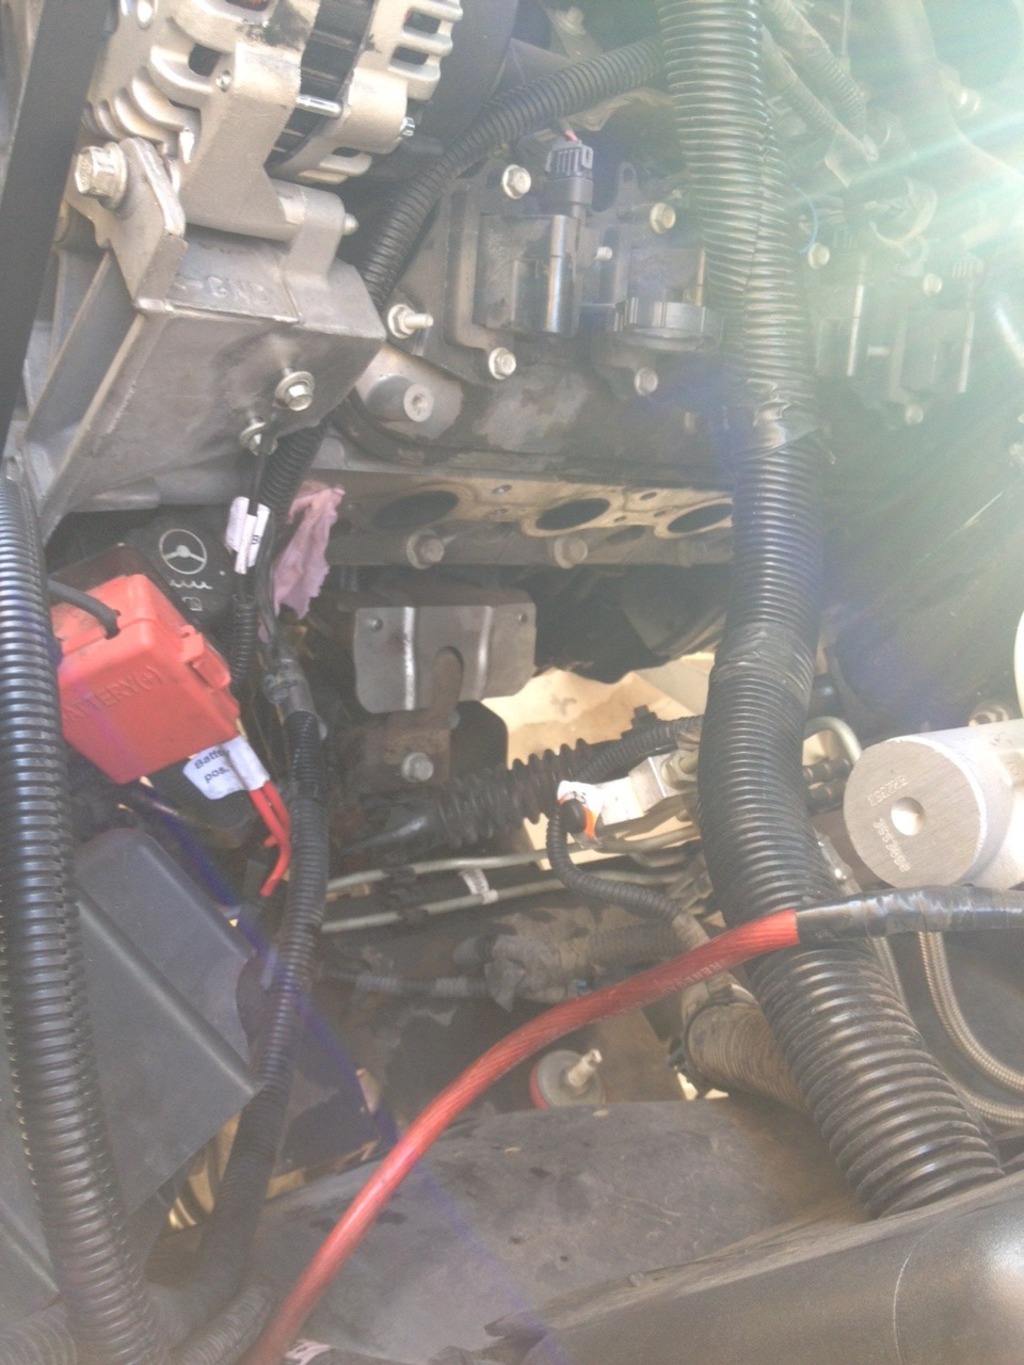
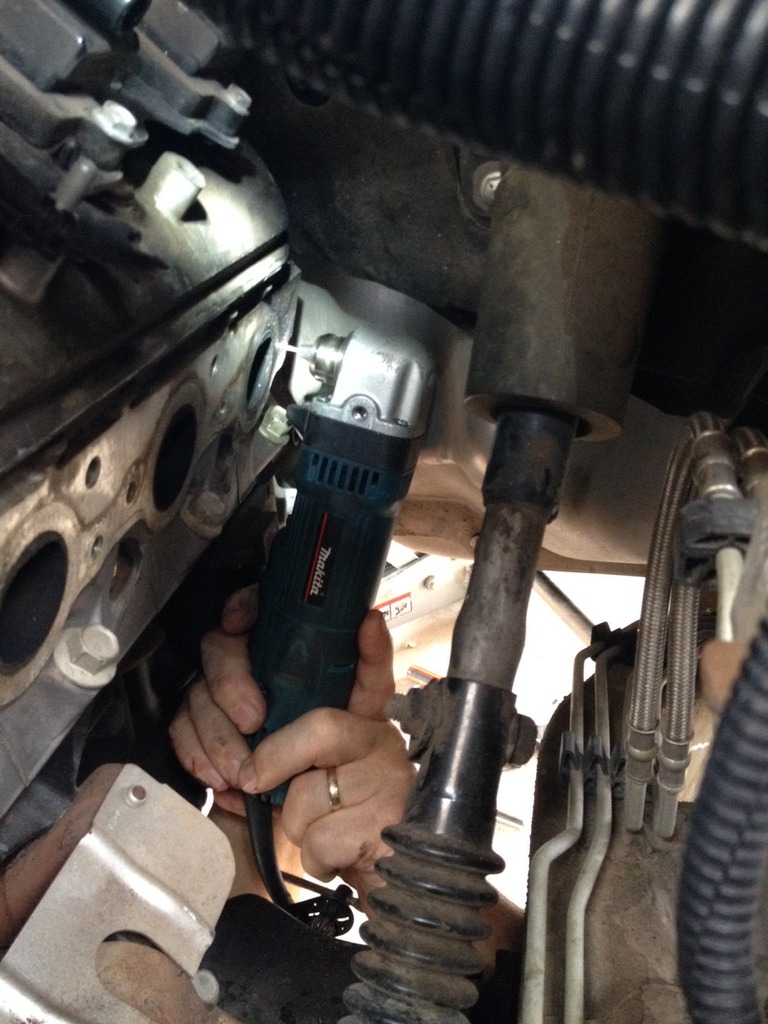
Got my headers in! Went with Speed Engineering 1 3/4" headers with ORY. Just going to mount up to my existing flowmaster muffler/stock tailpipe. The bolts holding the original catted Y pipe the headers were not giving up and I was not able to break them loose. Ended up taking saw sawzall and cutting off the Y pipe. Once I got those out I started to unbolt the headers. Passenger side went without a hitch. Driver side was missing the front and rear bolts ( only had 4 of 6 ) before I even started to unbolt. Crossing my fingers that the bolts are just missing... Got the driver side off and find out the two missing bolts were busted off and just studs hanging out. GREAT!!  So we were able to take some vice grips and just spin it out.. sweet. Went to get the other out that is in the rear ( no space and right up against the firewall.. It breaks right away and now we are working on fitting a drill in there to get it drilled out and use an easy out to get it out ... hopefully tomorrow goes a bit smoother than today... once that bolt is out we can mount everything back up and Ill have my new headers installed! After I got the headers off I contacted my buddy to see if he could weld on a new bung on my driver side header collecter and he hooked it up, so when now I can add my wideband and start tuning asap...
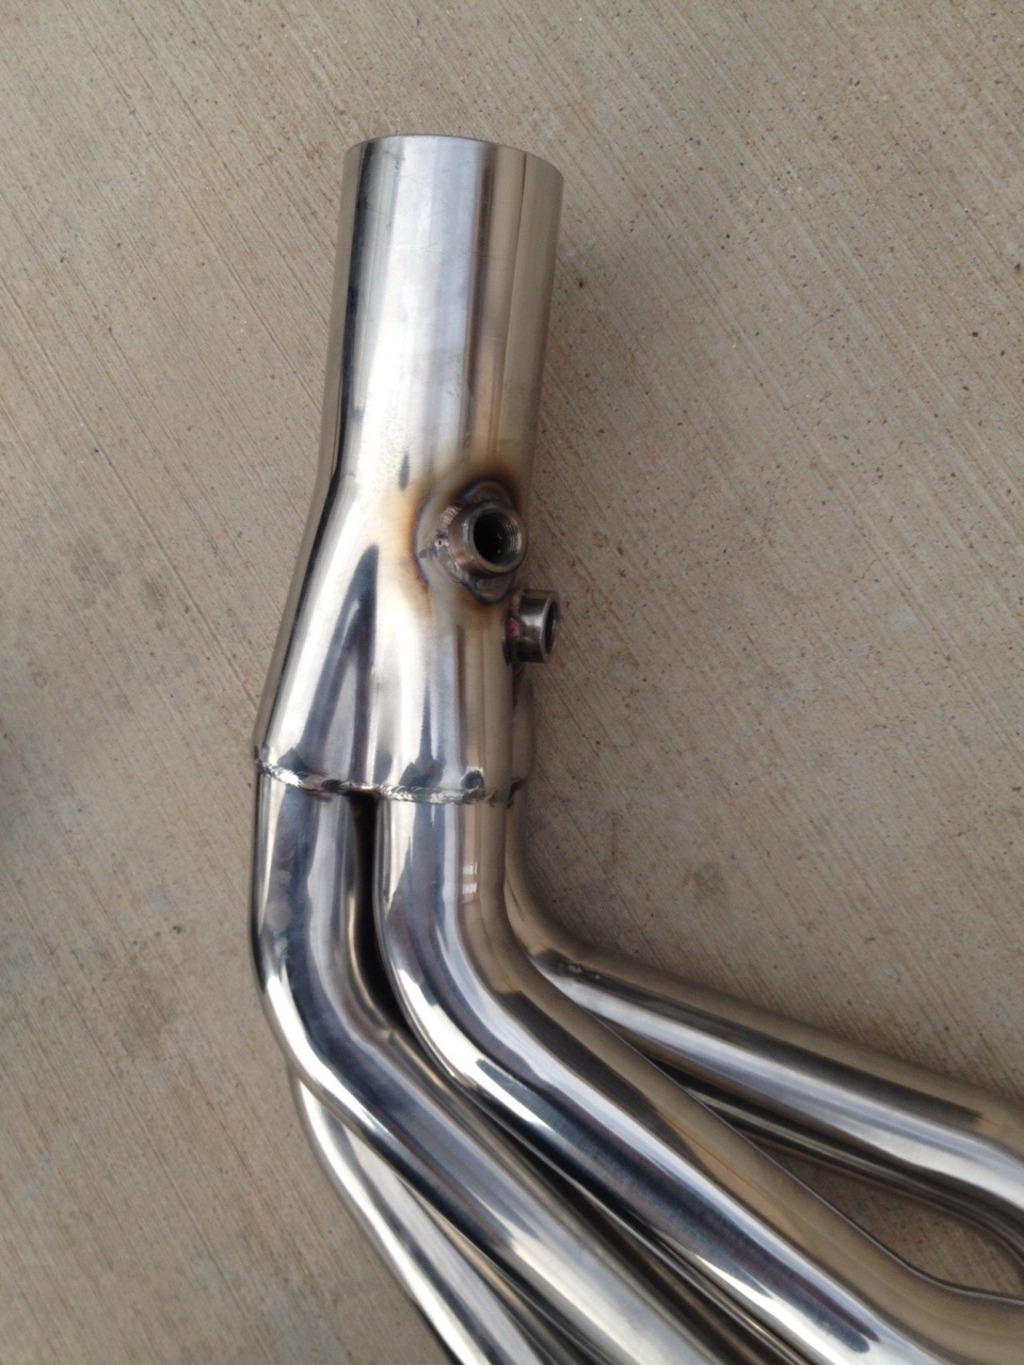
new headers!
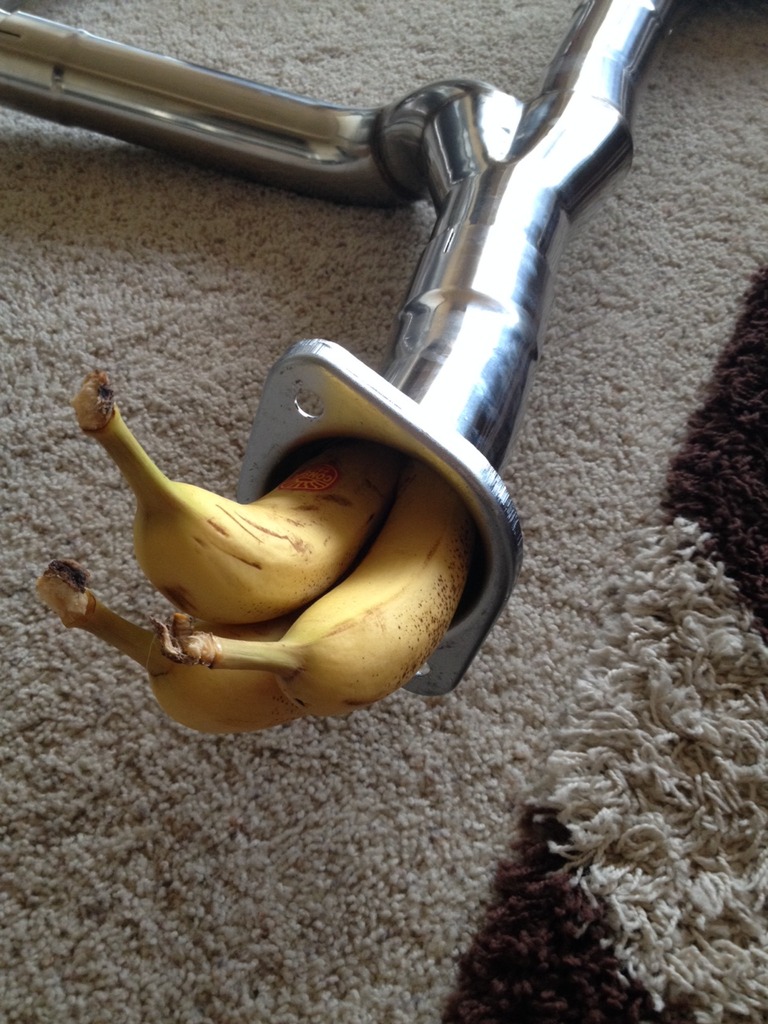
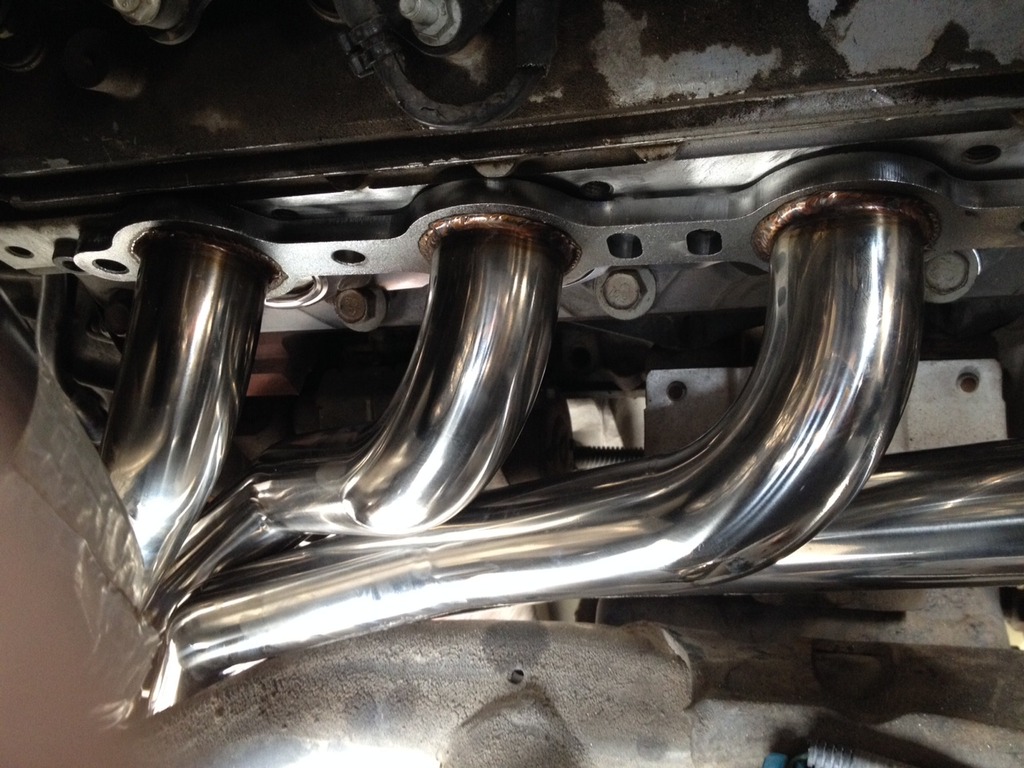
3 inch is big! bananas for scale
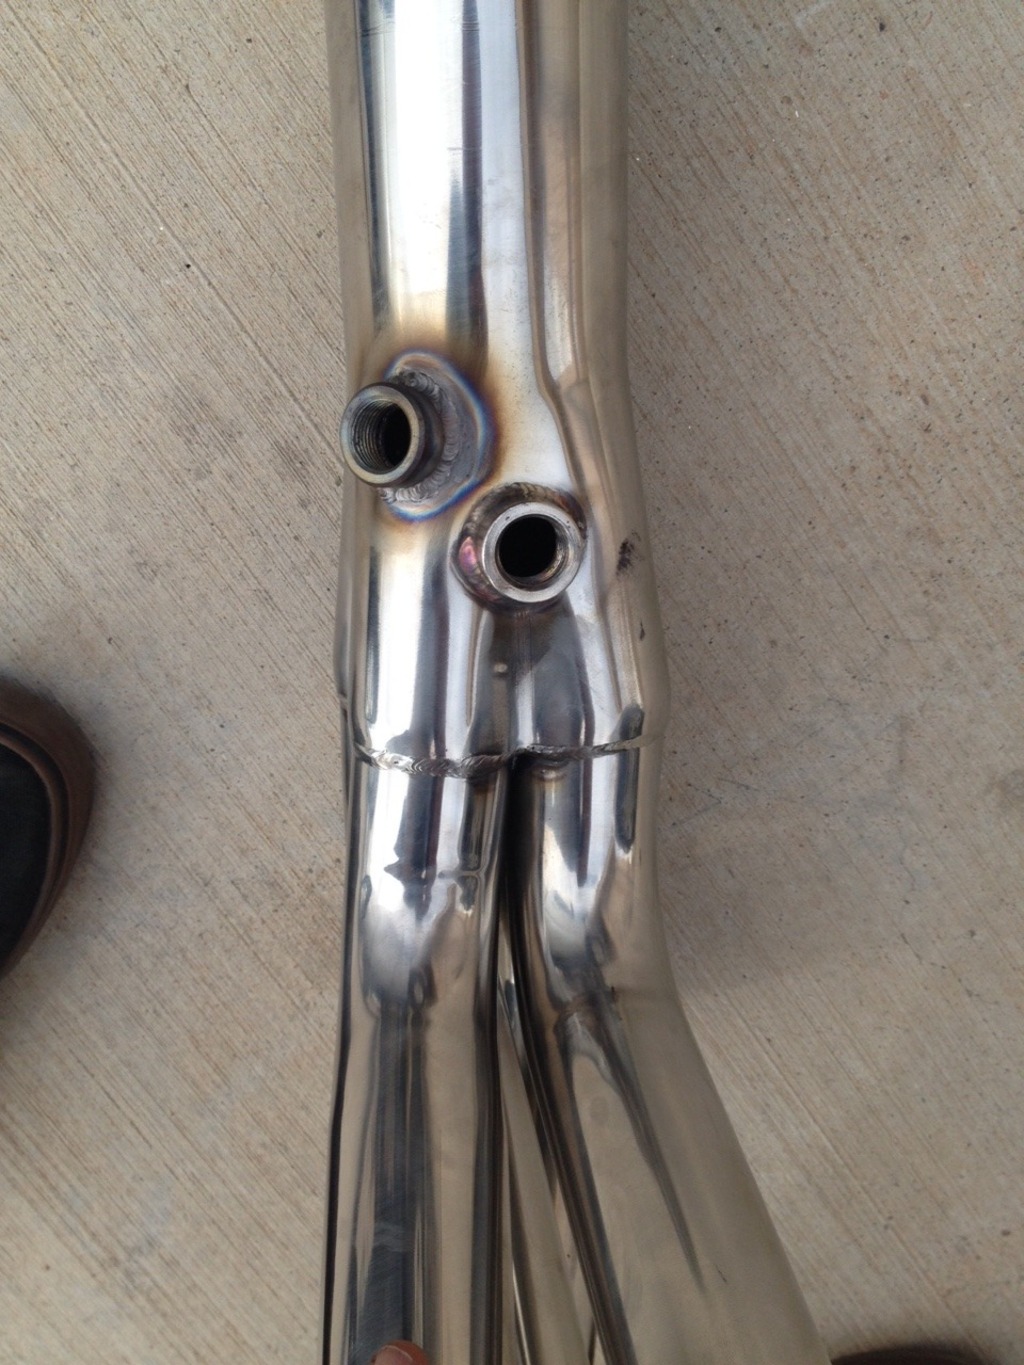
new bung that friend welded up
catted pip cut out!
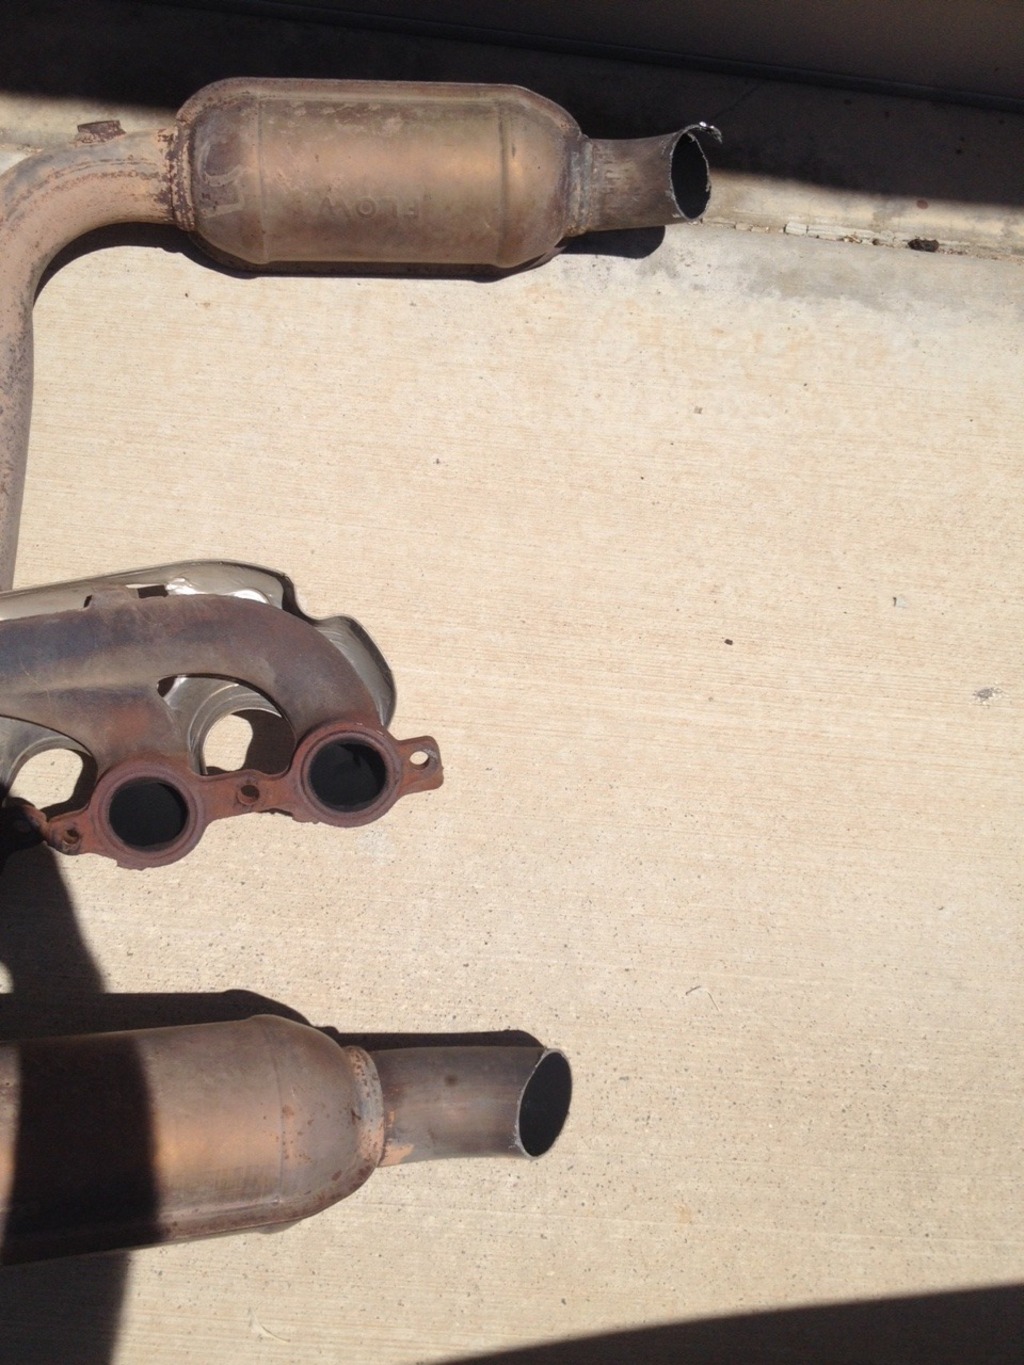
heads out!
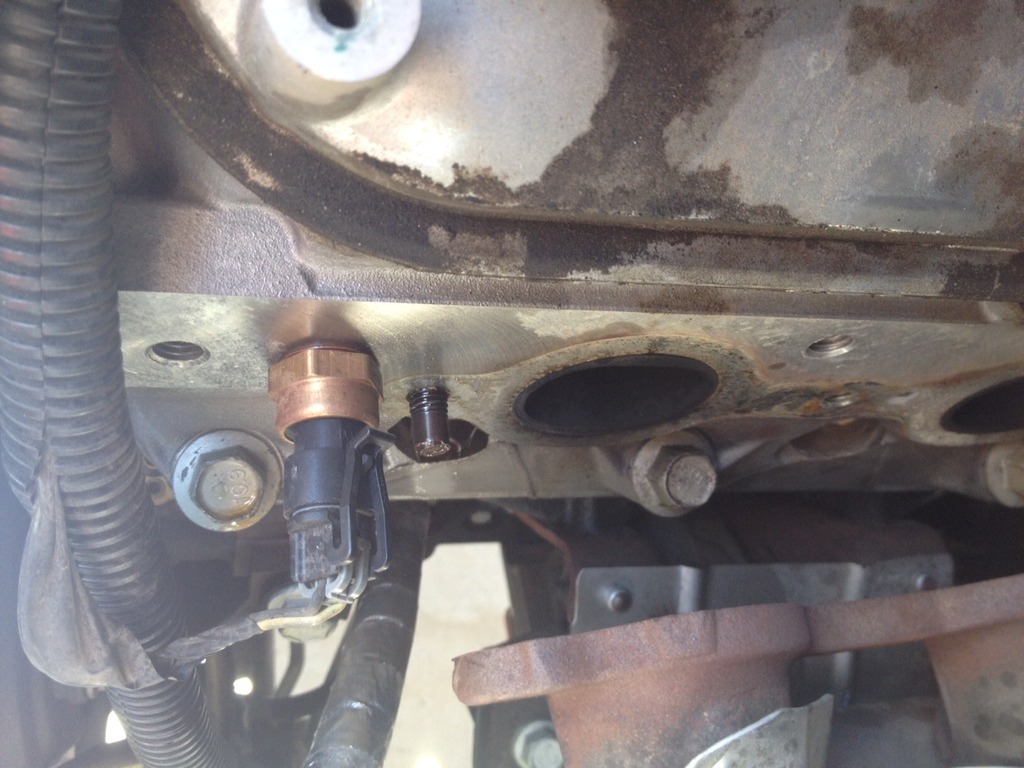
broken bolts
_Zblee
So we were able to take some vice grips and just spin it out.. sweet. Went to get the other out that is in the rear ( no space and right up against the firewall.. It breaks right away and now we are working on fitting a drill in there to get it drilled out and use an easy out to get it out ... hopefully tomorrow goes a bit smoother than today... once that bolt is out we can mount everything back up and Ill have my new headers installed! After I got the headers off I contacted my buddy to see if he could weld on a new bung on my driver side header collecter and he hooked it up, so when now I can add my wideband and start tuning asap...new headers!
3 inch is big! bananas for scale
new bung that friend welded up
catted pip cut out!
heads out!
broken bolts
_Zblee
 08-01-2015, 01:30 PM
#15
So went ahead and started to install the headers. driver side went on and no clearance issues. Now I am on the passenger side and the headers are hitting the frame bad and not allowing me to bolt up. It looks like i will need to dent in the pipes a bit to get them to bold up to the heads correctly...
 08-01-2015, 01:54 PM
#16
All these issues you are going through now I had back in 2008.
The flange on the drivers side will not seal properly without the bolt
As for the headers not fitting, my suggestion would be to loosen up the motor mounts and shift the motor over to the drivers side a bit. Other than that, you get what you pay for fitment wise.
The flange on the drivers side will not seal properly without the bolt
As for the headers not fitting, my suggestion would be to loosen up the motor mounts and shift the motor over to the drivers side a bit. Other than that, you get what you pay for fitment wise.
08-03-2015, 07:09 PM
#17
Ended up leaving the busted bolt and extractor in there for now. It is causing a leak on the last cylinder that will be there until I get new heads installed...
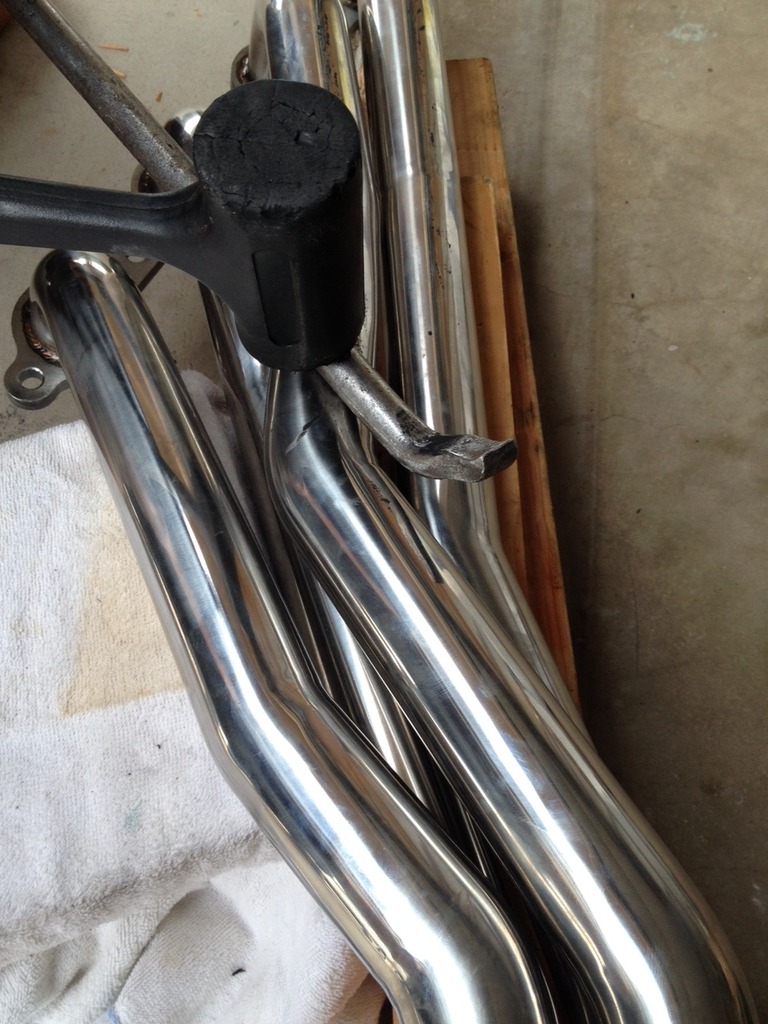
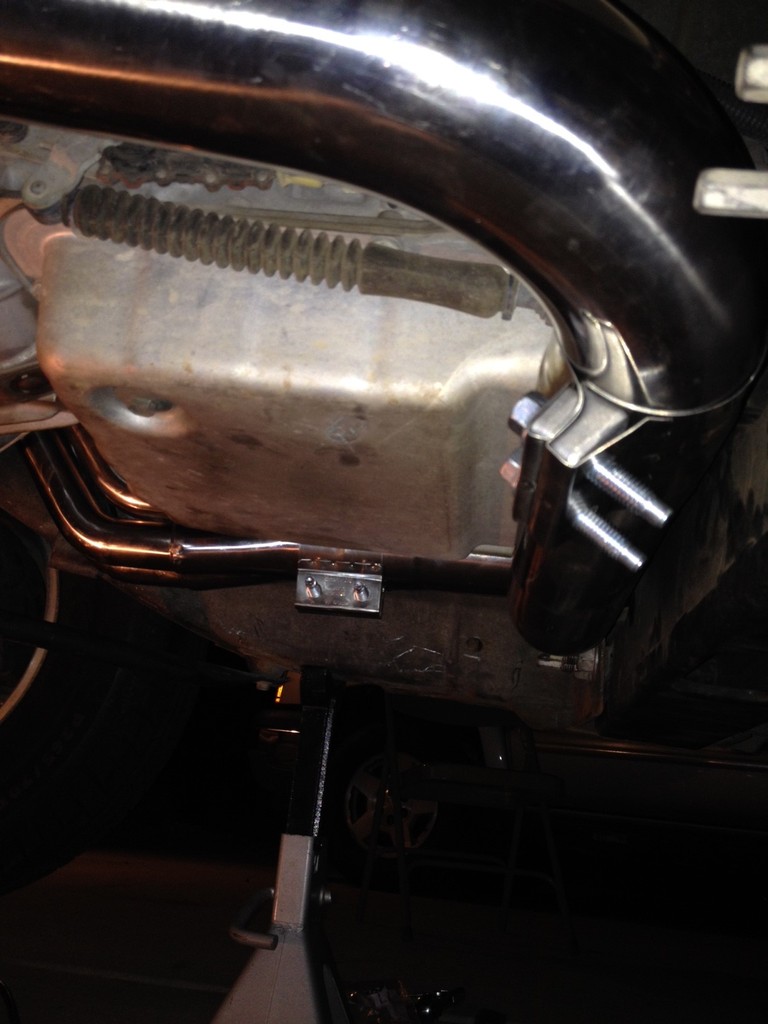
Ended up flattening out one of the tubes to get the passenger side headers to fit past the frame ( forgot to take pic of it installed...)
Here is how we flattened it out..
Had some issues with the supplied header bolts. Started to torque the center bolt and it started digging into the header flange. I was able to back it out and I decided to play it safe and buy different style header bolts and washers. These went on without issue.
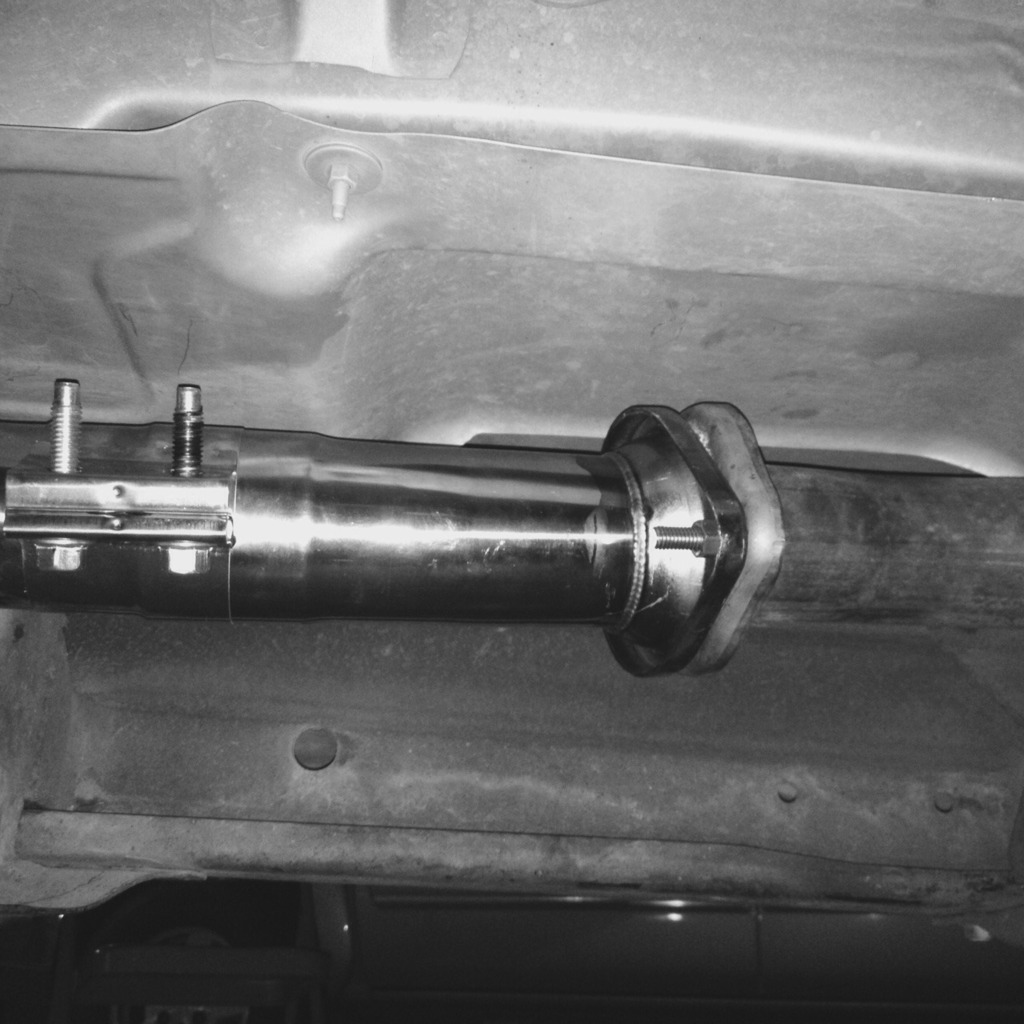
Y pipe install required the transmission cross member to be out. We installed the cross beam first and realized that the slip fit connections wont work unless the cross beam is out of the way. after taking it off again we got the Y pipe up . I went with some band clamps instead of the skinny clamps that are supplied with the headers. as far as i can tell and hear ( using a vacuum hose to listen) I can not spot any leaks on these clamps.
Y pipe runs in front of the transmission cross member and is a tight fit near the back of the transmission pan ( it does not hit though).
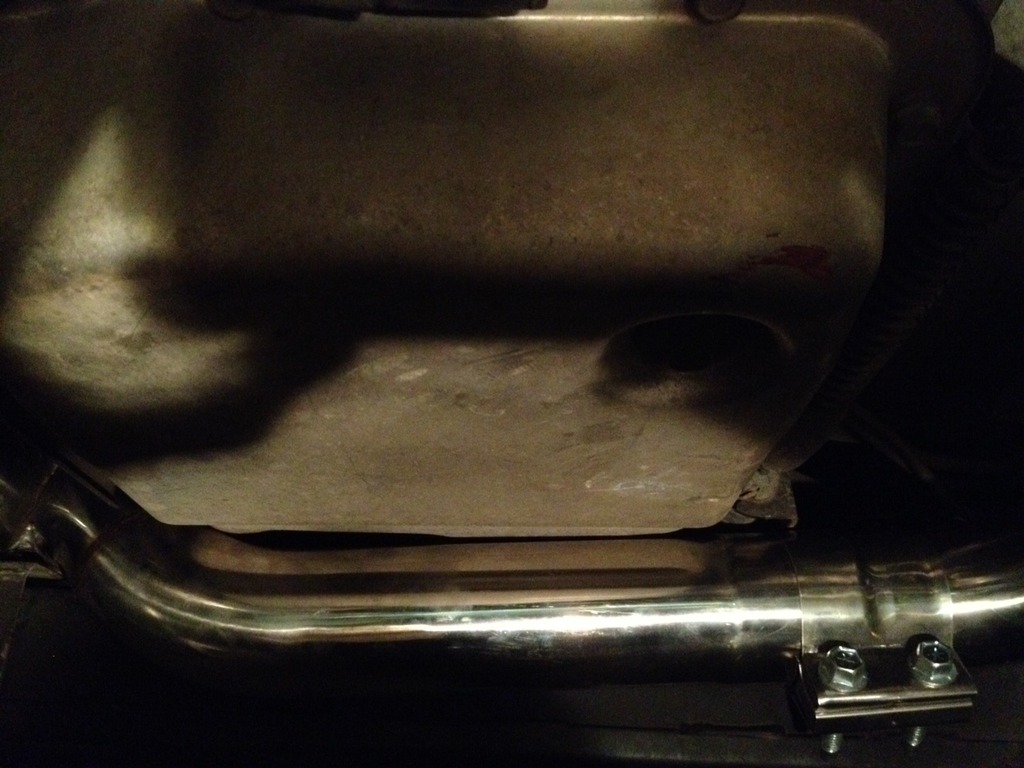
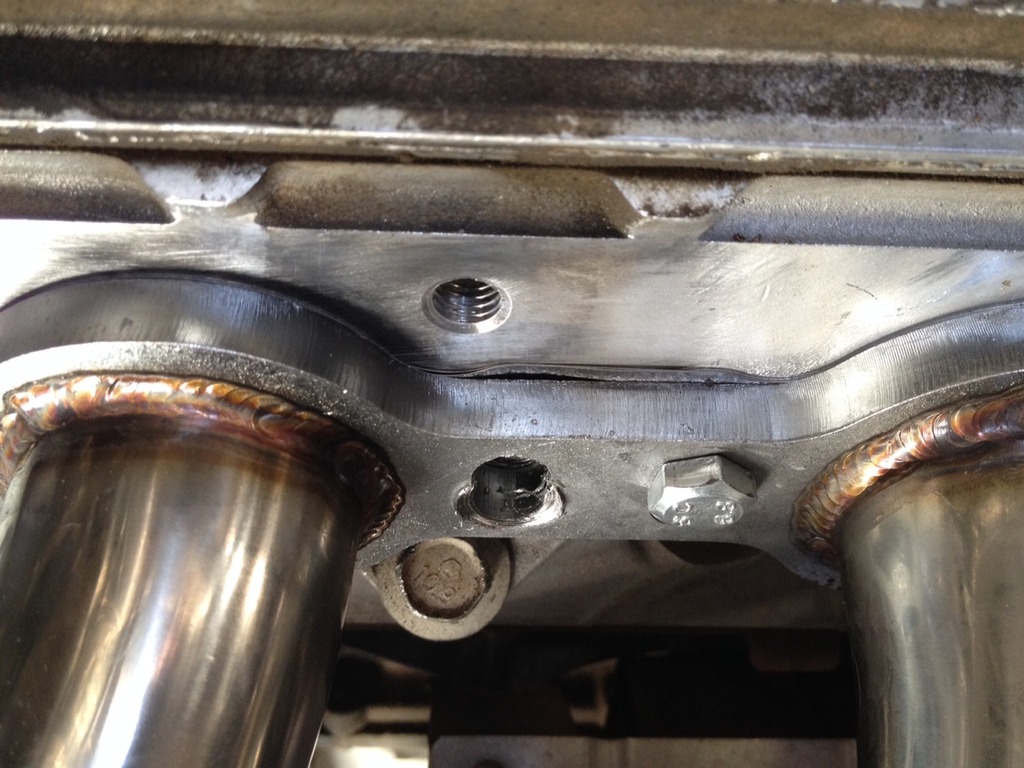
Y pipe to cat back does not seal very good and a pretty large leak is here, you can see in the picture that it is bolted down as tight as it can go but the top of the flange does not mate up very well. There is a bend in the y pipe right here so any rotation would make it even worse, but I was pretty tired at this point so maybe I can just rotate it 180 degress and it will fit better? if not I am thinking I will use some Permatex Ultra Copper or something similar to close the gap.
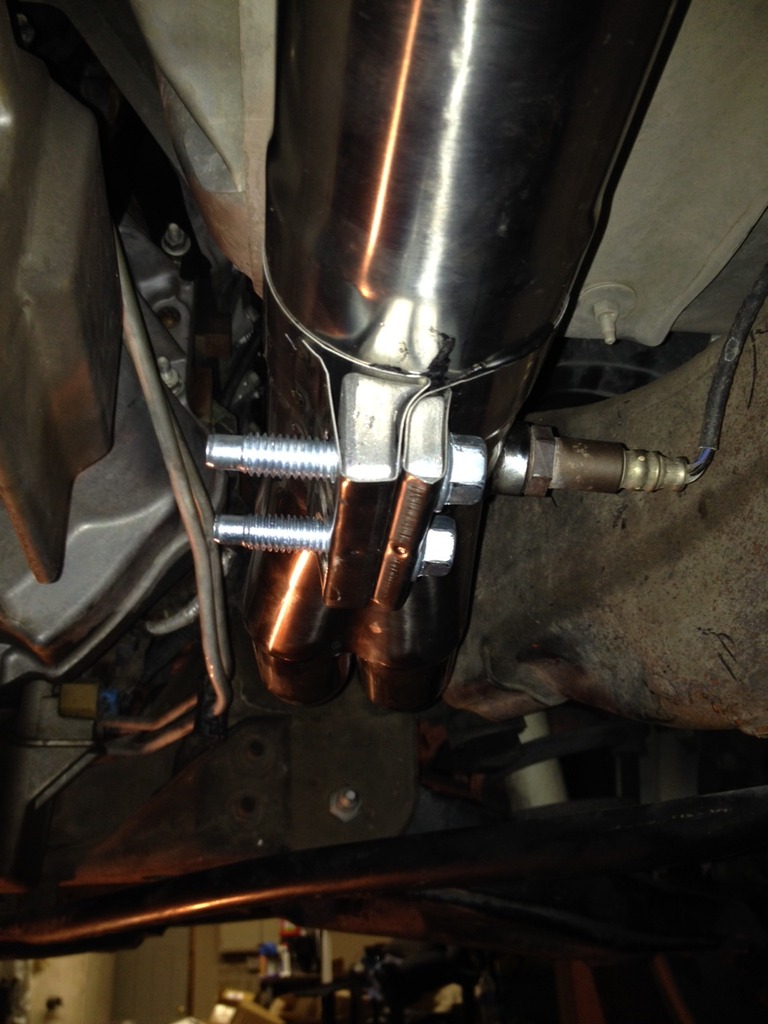
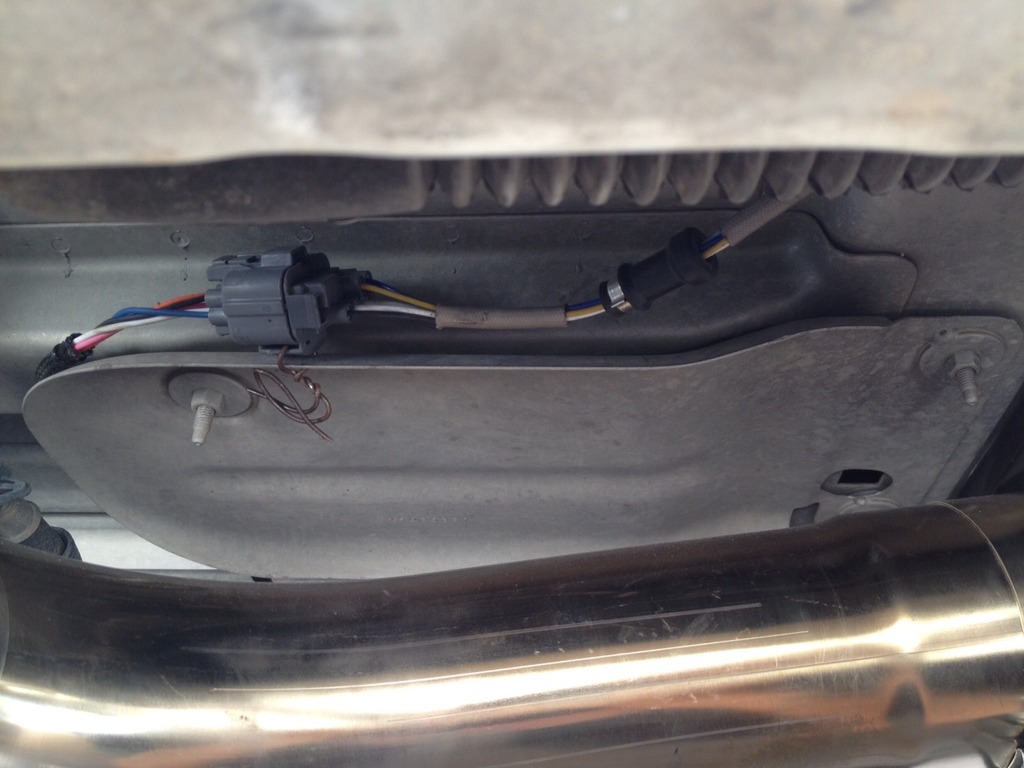
Got the front 02 sensors installed and the wideband on the driver side in new bung that was added.
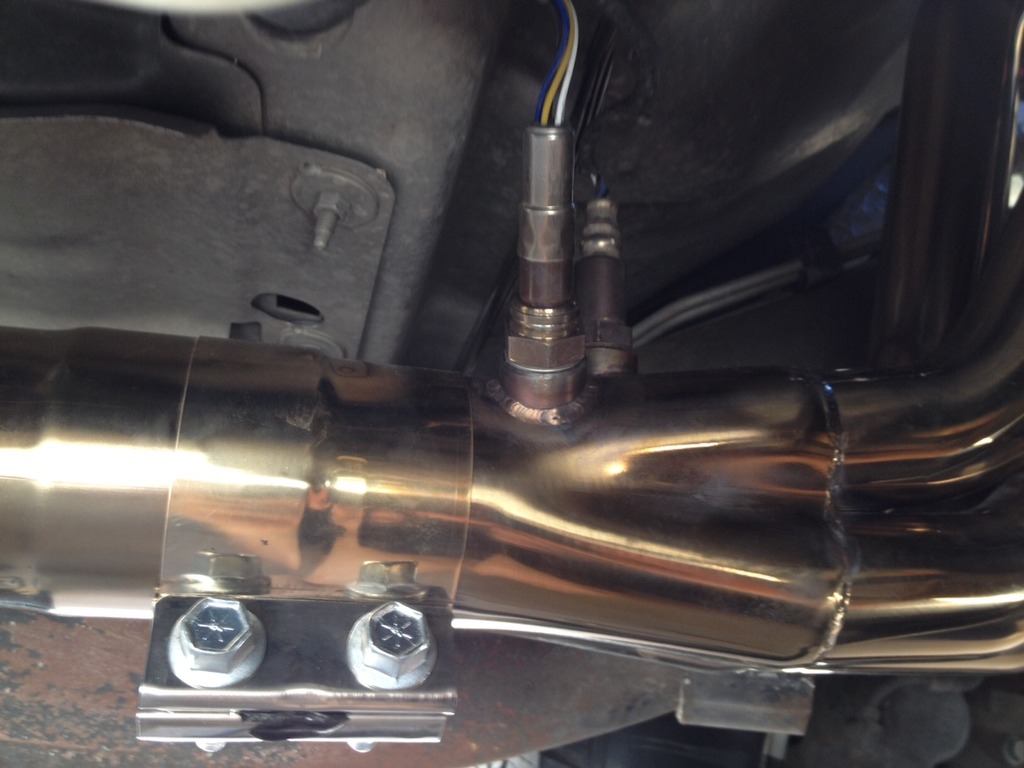
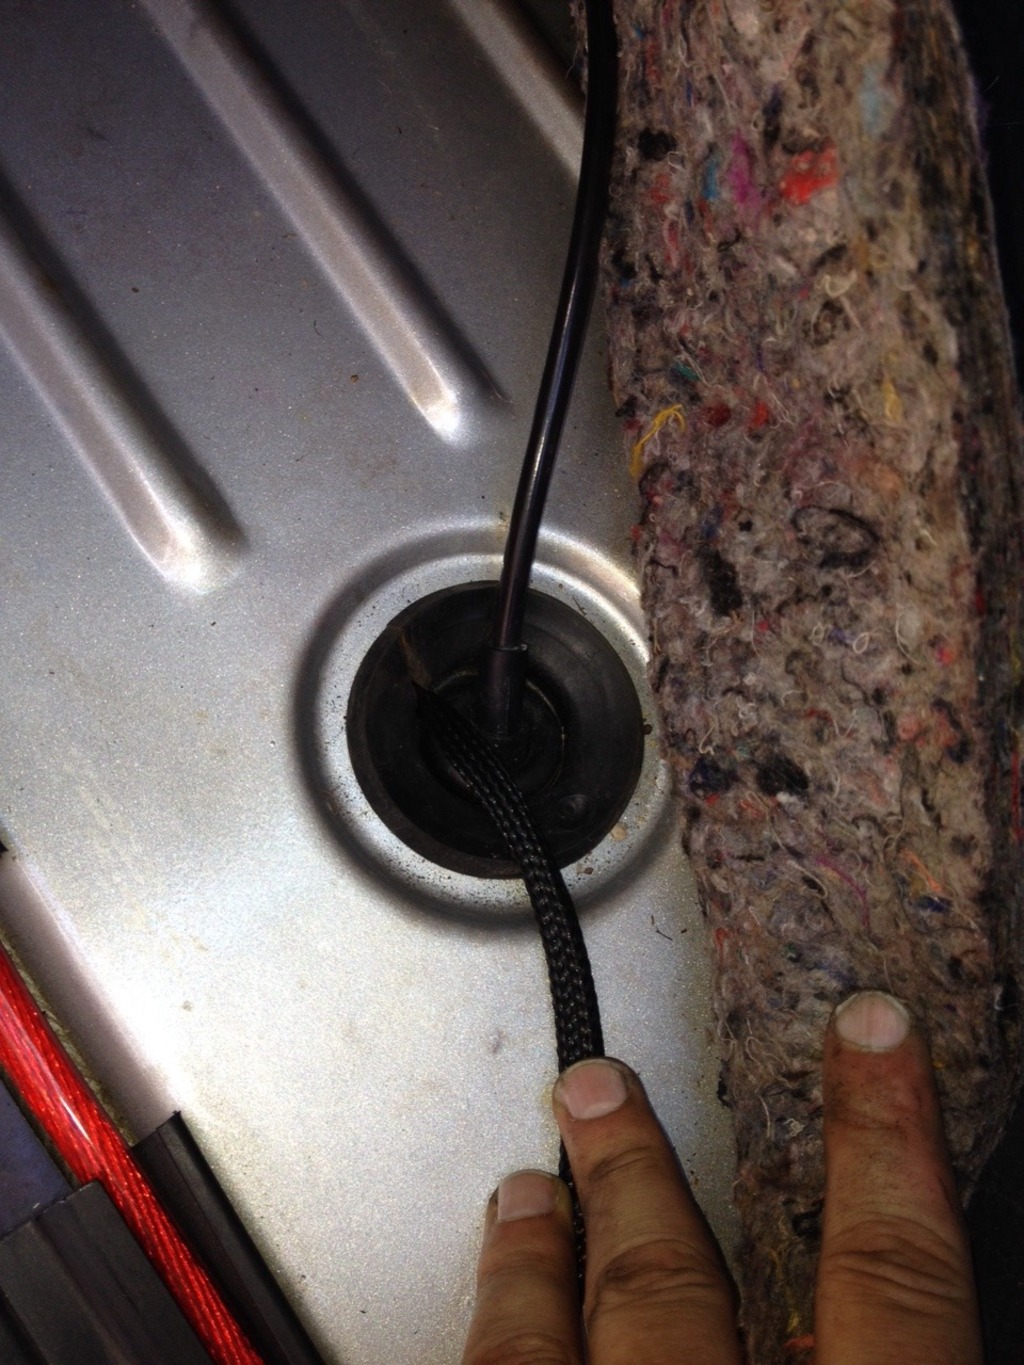
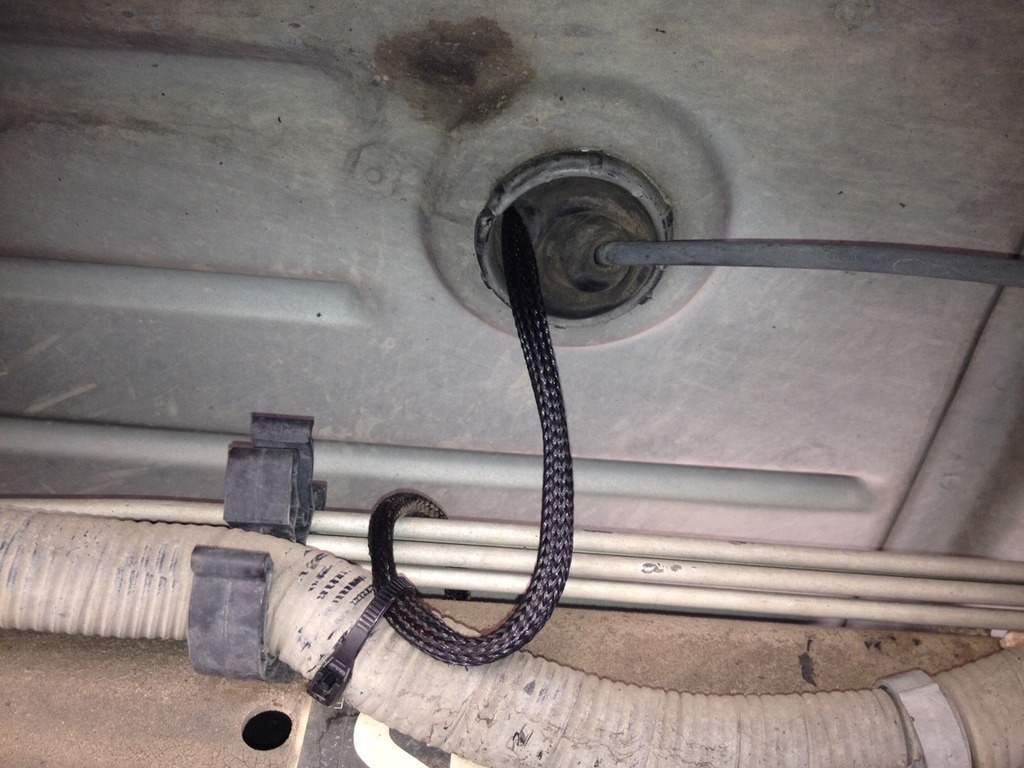
I ran the wideband cable through the existing parking brake boot under the floor board. I cut a slit and slid the wire in so I did not have to create a huge hole for the connector to fit through.
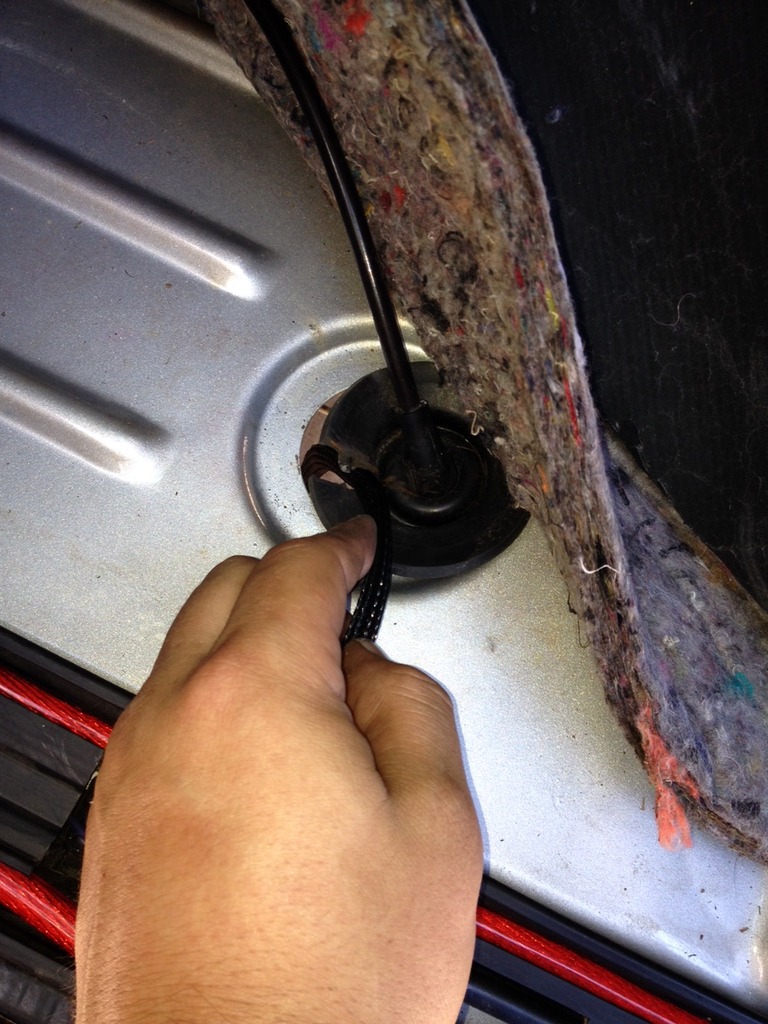
seals up nice using the slit option
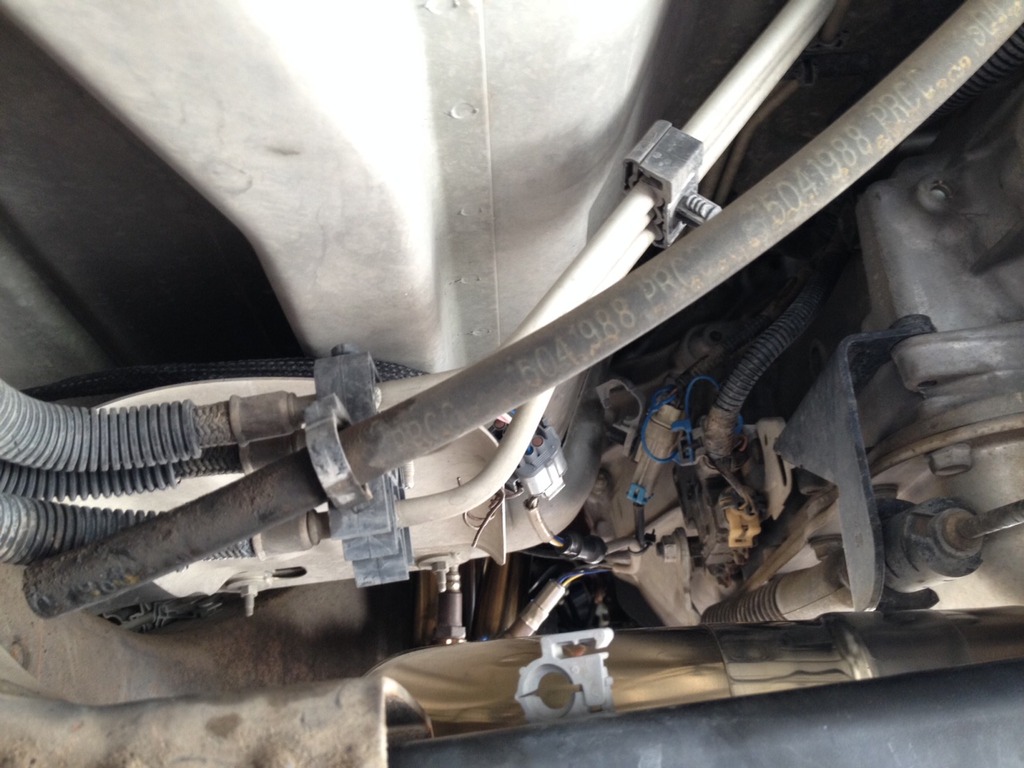
zipped up along front 02 sensor wire to reduce chance of wideband cable hanging too low to exhaust
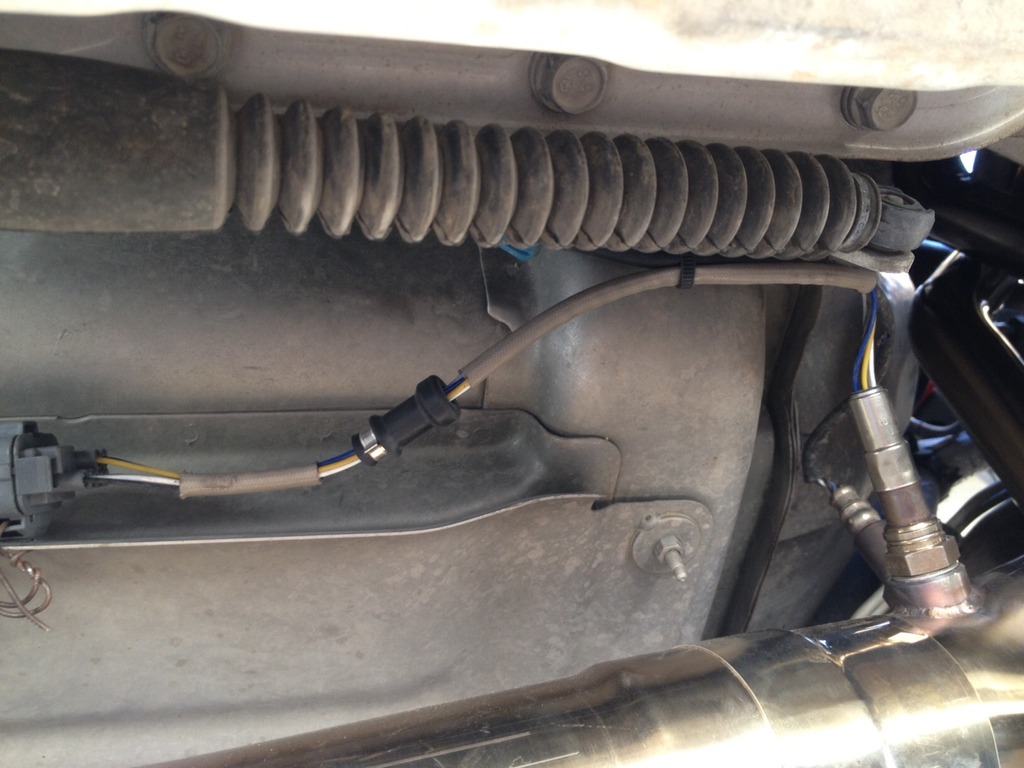
Drilled hole in heat shield so that I can secure the clip by wire and tucked it above the shield
wideband cable running atop the heat shield towards the side of the truck ( where the parking brake boot is)
zipped up to existing cable to minimize play and up into the cab
In the cab it took me a while to find a wire I can use for power. The wideband can foul out if it is not powered/heated when the truck is running. I needed a 12v signal to provide power to the sensor anytime the truck was running. My truck has a remote start and when I use this to start the truck ( with no key in ignition) some of the accessories do not power up, because of the lack of key. So I had to find a cable that had a switched 12v when truck starts, regardless if keys are in it or not. I found one under the steering wheel in the dash that worked and grounded right there. I currently tucked the extra wire and the control unit in the panel where the hood release handle is. Next thing I need to do is extend the wires to hook them up to HPtuners for datalogging and tuning.
_Zblee
Ended up flattening out one of the tubes to get the passenger side headers to fit past the frame ( forgot to take pic of it installed...)
Here is how we flattened it out..
Had some issues with the supplied header bolts. Started to torque the center bolt and it started digging into the header flange. I was able to back it out and I decided to play it safe and buy different style header bolts and washers. These went on without issue.
Y pipe install required the transmission cross member to be out. We installed the cross beam first and realized that the slip fit connections wont work unless the cross beam is out of the way. after taking it off again we got the Y pipe up . I went with some band clamps instead of the skinny clamps that are supplied with the headers. as far as i can tell and hear ( using a vacuum hose to listen) I can not spot any leaks on these clamps.
Y pipe runs in front of the transmission cross member and is a tight fit near the back of the transmission pan ( it does not hit though).
Y pipe to cat back does not seal very good and a pretty large leak is here, you can see in the picture that it is bolted down as tight as it can go but the top of the flange does not mate up very well. There is a bend in the y pipe right here so any rotation would make it even worse, but I was pretty tired at this point so maybe I can just rotate it 180 degress and it will fit better? if not I am thinking I will use some Permatex Ultra Copper or something similar to close the gap.
Got the front 02 sensors installed and the wideband on the driver side in new bung that was added.
I ran the wideband cable through the existing parking brake boot under the floor board. I cut a slit and slid the wire in so I did not have to create a huge hole for the connector to fit through.
seals up nice using the slit option
zipped up along front 02 sensor wire to reduce chance of wideband cable hanging too low to exhaust
Drilled hole in heat shield so that I can secure the clip by wire and tucked it above the shield
wideband cable running atop the heat shield towards the side of the truck ( where the parking brake boot is)
zipped up to existing cable to minimize play and up into the cab
In the cab it took me a while to find a wire I can use for power. The wideband can foul out if it is not powered/heated when the truck is running. I needed a 12v signal to provide power to the sensor anytime the truck was running. My truck has a remote start and when I use this to start the truck ( with no key in ignition) some of the accessories do not power up, because of the lack of key. So I had to find a cable that had a switched 12v when truck starts, regardless if keys are in it or not. I found one under the steering wheel in the dash that worked and grounded right there. I currently tucked the extra wire and the control unit in the panel where the hood release handle is. Next thing I need to do is extend the wires to hook them up to HPtuners for datalogging and tuning.
_Zblee
08-14-2015, 03:31 PM
#18
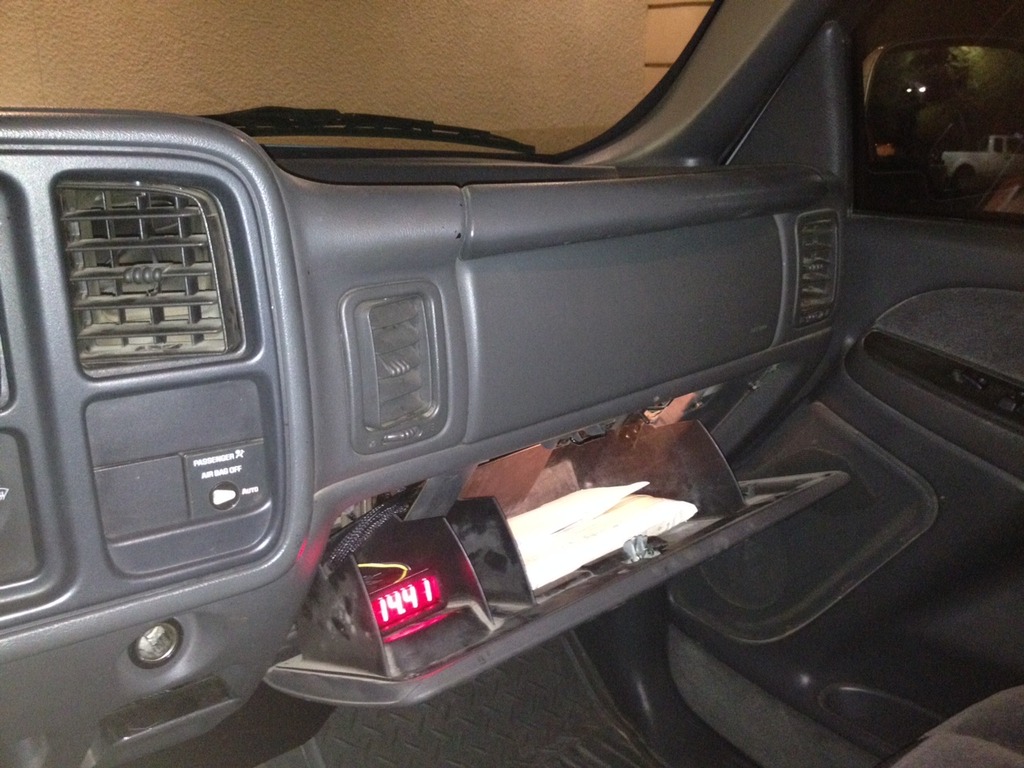
Moved my wideband controller from the hidden spot behind the parking brake to a more reasonable spot in the glovebox.
I wired up the input for HPtuners so when tuning is under way I just open up the glovebox , plug wideband into hptuner box and set the hptuner in the glove box and off I go. When not tuning the wideband is hidden out of sight and I do not have the glaring bright red text in my face ( I like to keep the interior as dark as I can - keep all cluster lights dimmed and shut off all my cd player faceplate lights so its a blank screen and appears to be off ).
So after installing the headers and having the issue with the rear bolt on the driver side , I wanted to do some sort of patch/hack to help seal up the rear of the manifold until I get new heads. My plan was just to line the one side of the manifold with some permatex ultra copper gasket maker. So last weekend I loosened up the headers and applied ( as best as i could ) a bead around the rear end of the header. Per the permatex directions I snugged up the bolts and waited an hour before torquing headers back on. Then waited 24 hours before even starting the truck to make sure they cured completely , as stated in the directions. The next day I fired up the truck and unfornuntaly my plan backfired. The exhaust leak was even worse! It was much more noticable from the engine bay. When driving it is even audible at almost any throttle position when accelerating! Before it was not audible at all from inside the cab! It bugs me so much now that I have not driven in until I am getting it fixed this weekend.
After making it worse I did some more googling and found a clamp that would have fixed my issue in the first place! I found it 2 days too late! It is a clamp that uses pre existing bolt holes in the cyinder head and pinches the header flange with a bolt.
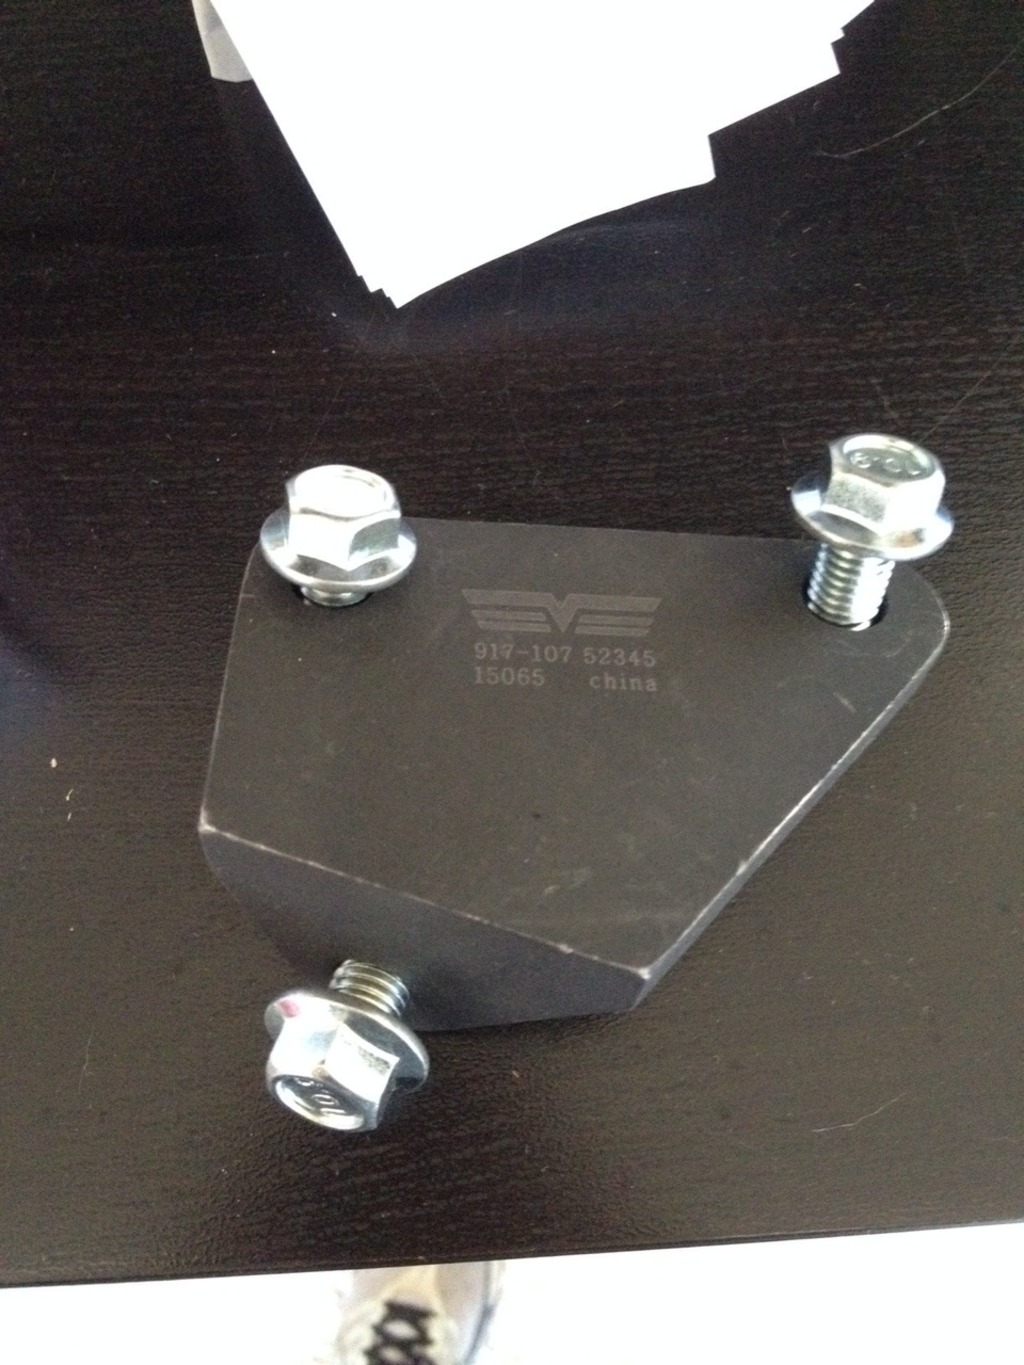
This mount works on the driver side rear and the passenger side front . They also make another piece that works on the driver side front/pass rear .
The plan is to remove the driver side header completely. clean all the ultra copper off from the headers and the heads , put new exhaust gasket on , bolt up the clean headers and install this clamp to take place of the missing rear bolt. If all works , I should be good to go with no exhaust leakage at the heads.
_Zblee
I wired up the input for HPtuners so when tuning is under way I just open up the glovebox , plug wideband into hptuner box and set the hptuner in the glove box and off I go. When not tuning the wideband is hidden out of sight and I do not have the glaring bright red text in my face ( I like to keep the interior as dark as I can - keep all cluster lights dimmed and shut off all my cd player faceplate lights so its a blank screen and appears to be off ).
So after installing the headers and having the issue with the rear bolt on the driver side , I wanted to do some sort of patch/hack to help seal up the rear of the manifold until I get new heads. My plan was just to line the one side of the manifold with some permatex ultra copper gasket maker. So last weekend I loosened up the headers and applied ( as best as i could ) a bead around the rear end of the header. Per the permatex directions I snugged up the bolts and waited an hour before torquing headers back on. Then waited 24 hours before even starting the truck to make sure they cured completely , as stated in the directions. The next day I fired up the truck and unfornuntaly my plan backfired. The exhaust leak was even worse! It was much more noticable from the engine bay. When driving it is even audible at almost any throttle position when accelerating! Before it was not audible at all from inside the cab! It bugs me so much now that I have not driven in until I am getting it fixed this weekend.
After making it worse I did some more googling and found a clamp that would have fixed my issue in the first place! I found it 2 days too late! It is a clamp that uses pre existing bolt holes in the cyinder head and pinches the header flange with a bolt.
This mount works on the driver side rear and the passenger side front . They also make another piece that works on the driver side front/pass rear .
The plan is to remove the driver side header completely. clean all the ultra copper off from the headers and the heads , put new exhaust gasket on , bolt up the clean headers and install this clamp to take place of the missing rear bolt. If all works , I should be good to go with no exhaust leakage at the heads.
_Zblee
10-16-2015, 02:19 PM
#19
A little update on this, sorry no pics but I may have some before/after header exhaust clips I can load up...
I went ahead and got transmission built locally here in Phoenix,AZ. I decided to go this route so that if something were to happen to it I would not have to ship the tranny out , I could just drive to the shop. I had several people recommend that I go see Sean @ Top Gear Motorsports. I did, and so far I am a happy customer. He had a 4l60e core sitting in his shop so he rebuilt that one instead of yanking the one out of my truck and having my truck down for an extended amount of time. He gave me a call when it was ready to install and I dropped my truck off and he got it installed 1 day earlier than he quoted me for. I had previously picked up a Edge Pro 3600 converter off of craigslist and that was installed as well. Picked up the truck last night and cant stop driving around! Completely different animal with the large torque converter! It takes a little more pedal/rpm to cruise but that was expected. What I like about it alot is that the converter muffles (can not feel it) the shifting when just cruising, if you weren't paying attention when driving around the city - you wouldn't know it was even shifting.. Now I just need to find a Denali cluster that has the trans temp so I can see how my trans cooler is doing. I picked up a cluster from the junk yard . it was advertised as a 2003 (which is the year of my truck) and I didnt pay attention until after I got home to realize it was a 99-02 version... so now i need to sell/trade that one for the correct year.
I am currently still researching and piecing together ideas for my top end swap. so next step is top end swap and after that I will get a new driveshaft and posi so that I can take the speed governer off and get some traction back
_Zblee

