New Build! RCSB Z71 bone stock to 4L80e / Trick 76mm

 06-19-2015, 04:45 PM
#22

Ok guys it has been some time since an update, I got side tracked on my Vette but decided it was truck time again. The last week I've been working on the 80E swap. Omg! Definitely a time consuming swap. There are quite a few posts on the forum about the 80E swap so I won't get into it in too much detail, but please post on this thread or PM with any questions, I've learned a lot!
Anyhow, a few pics:
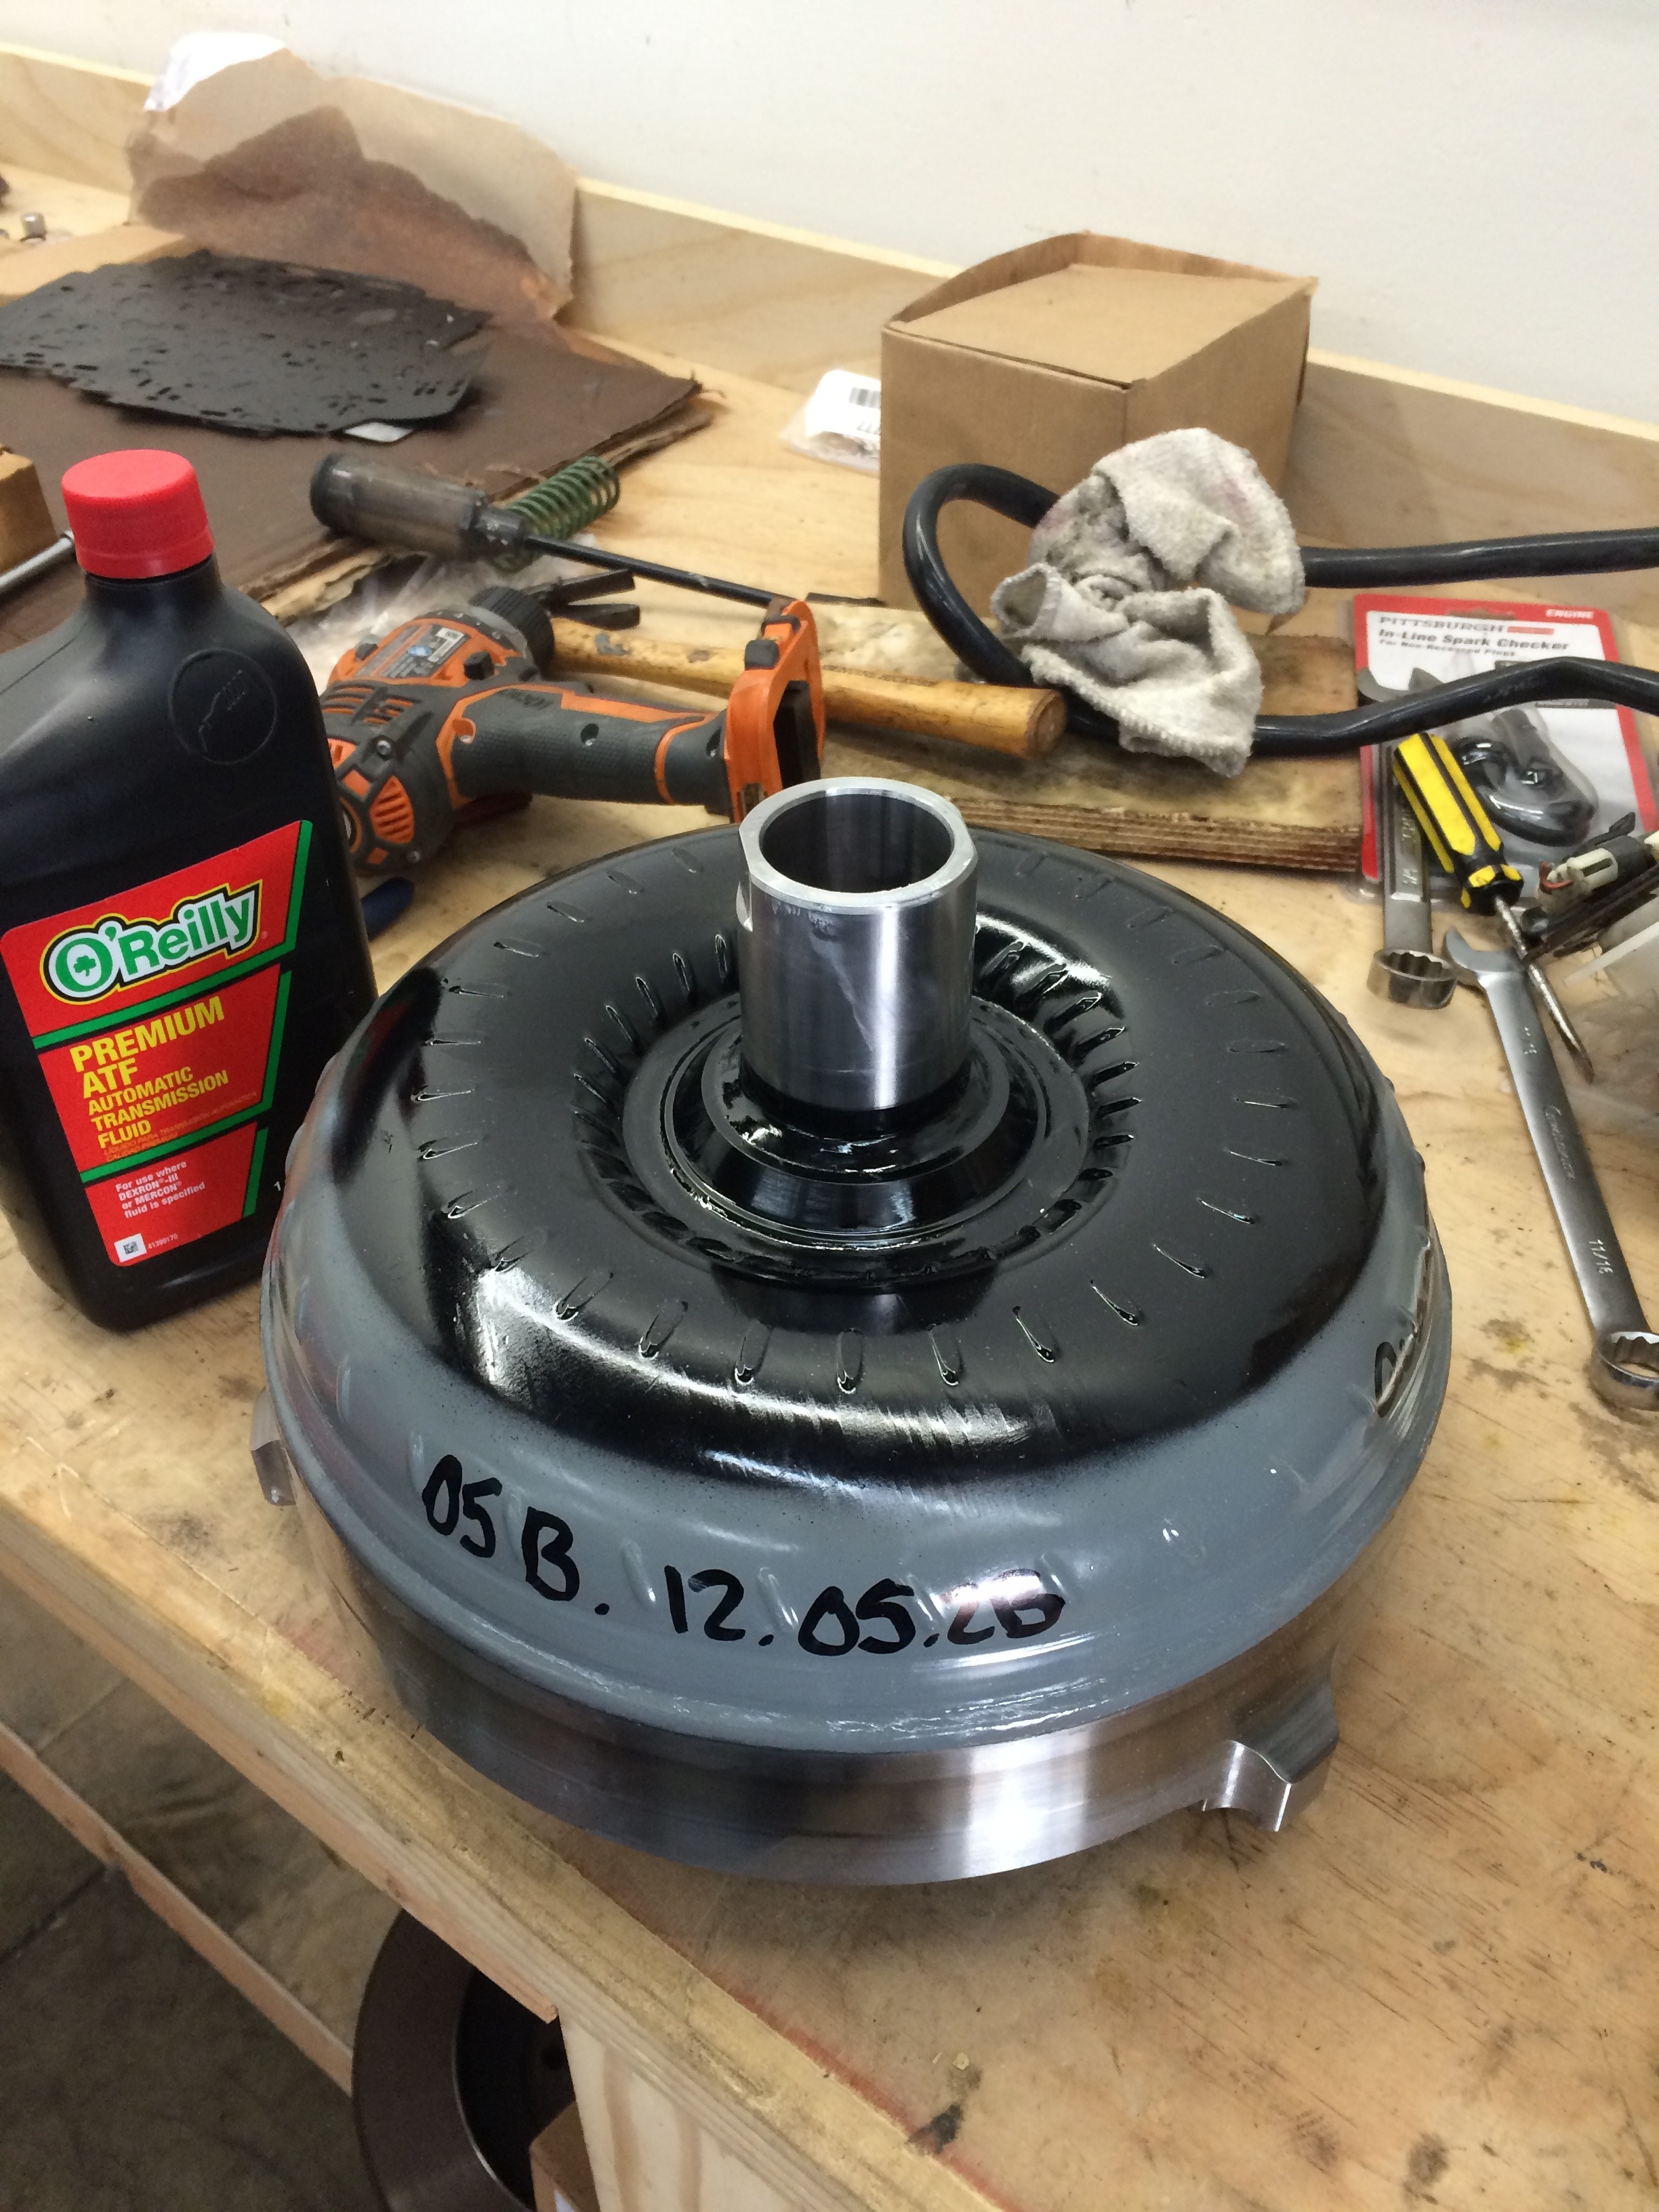
The beautiful Circle D converter on the bench getting some fluid before install:
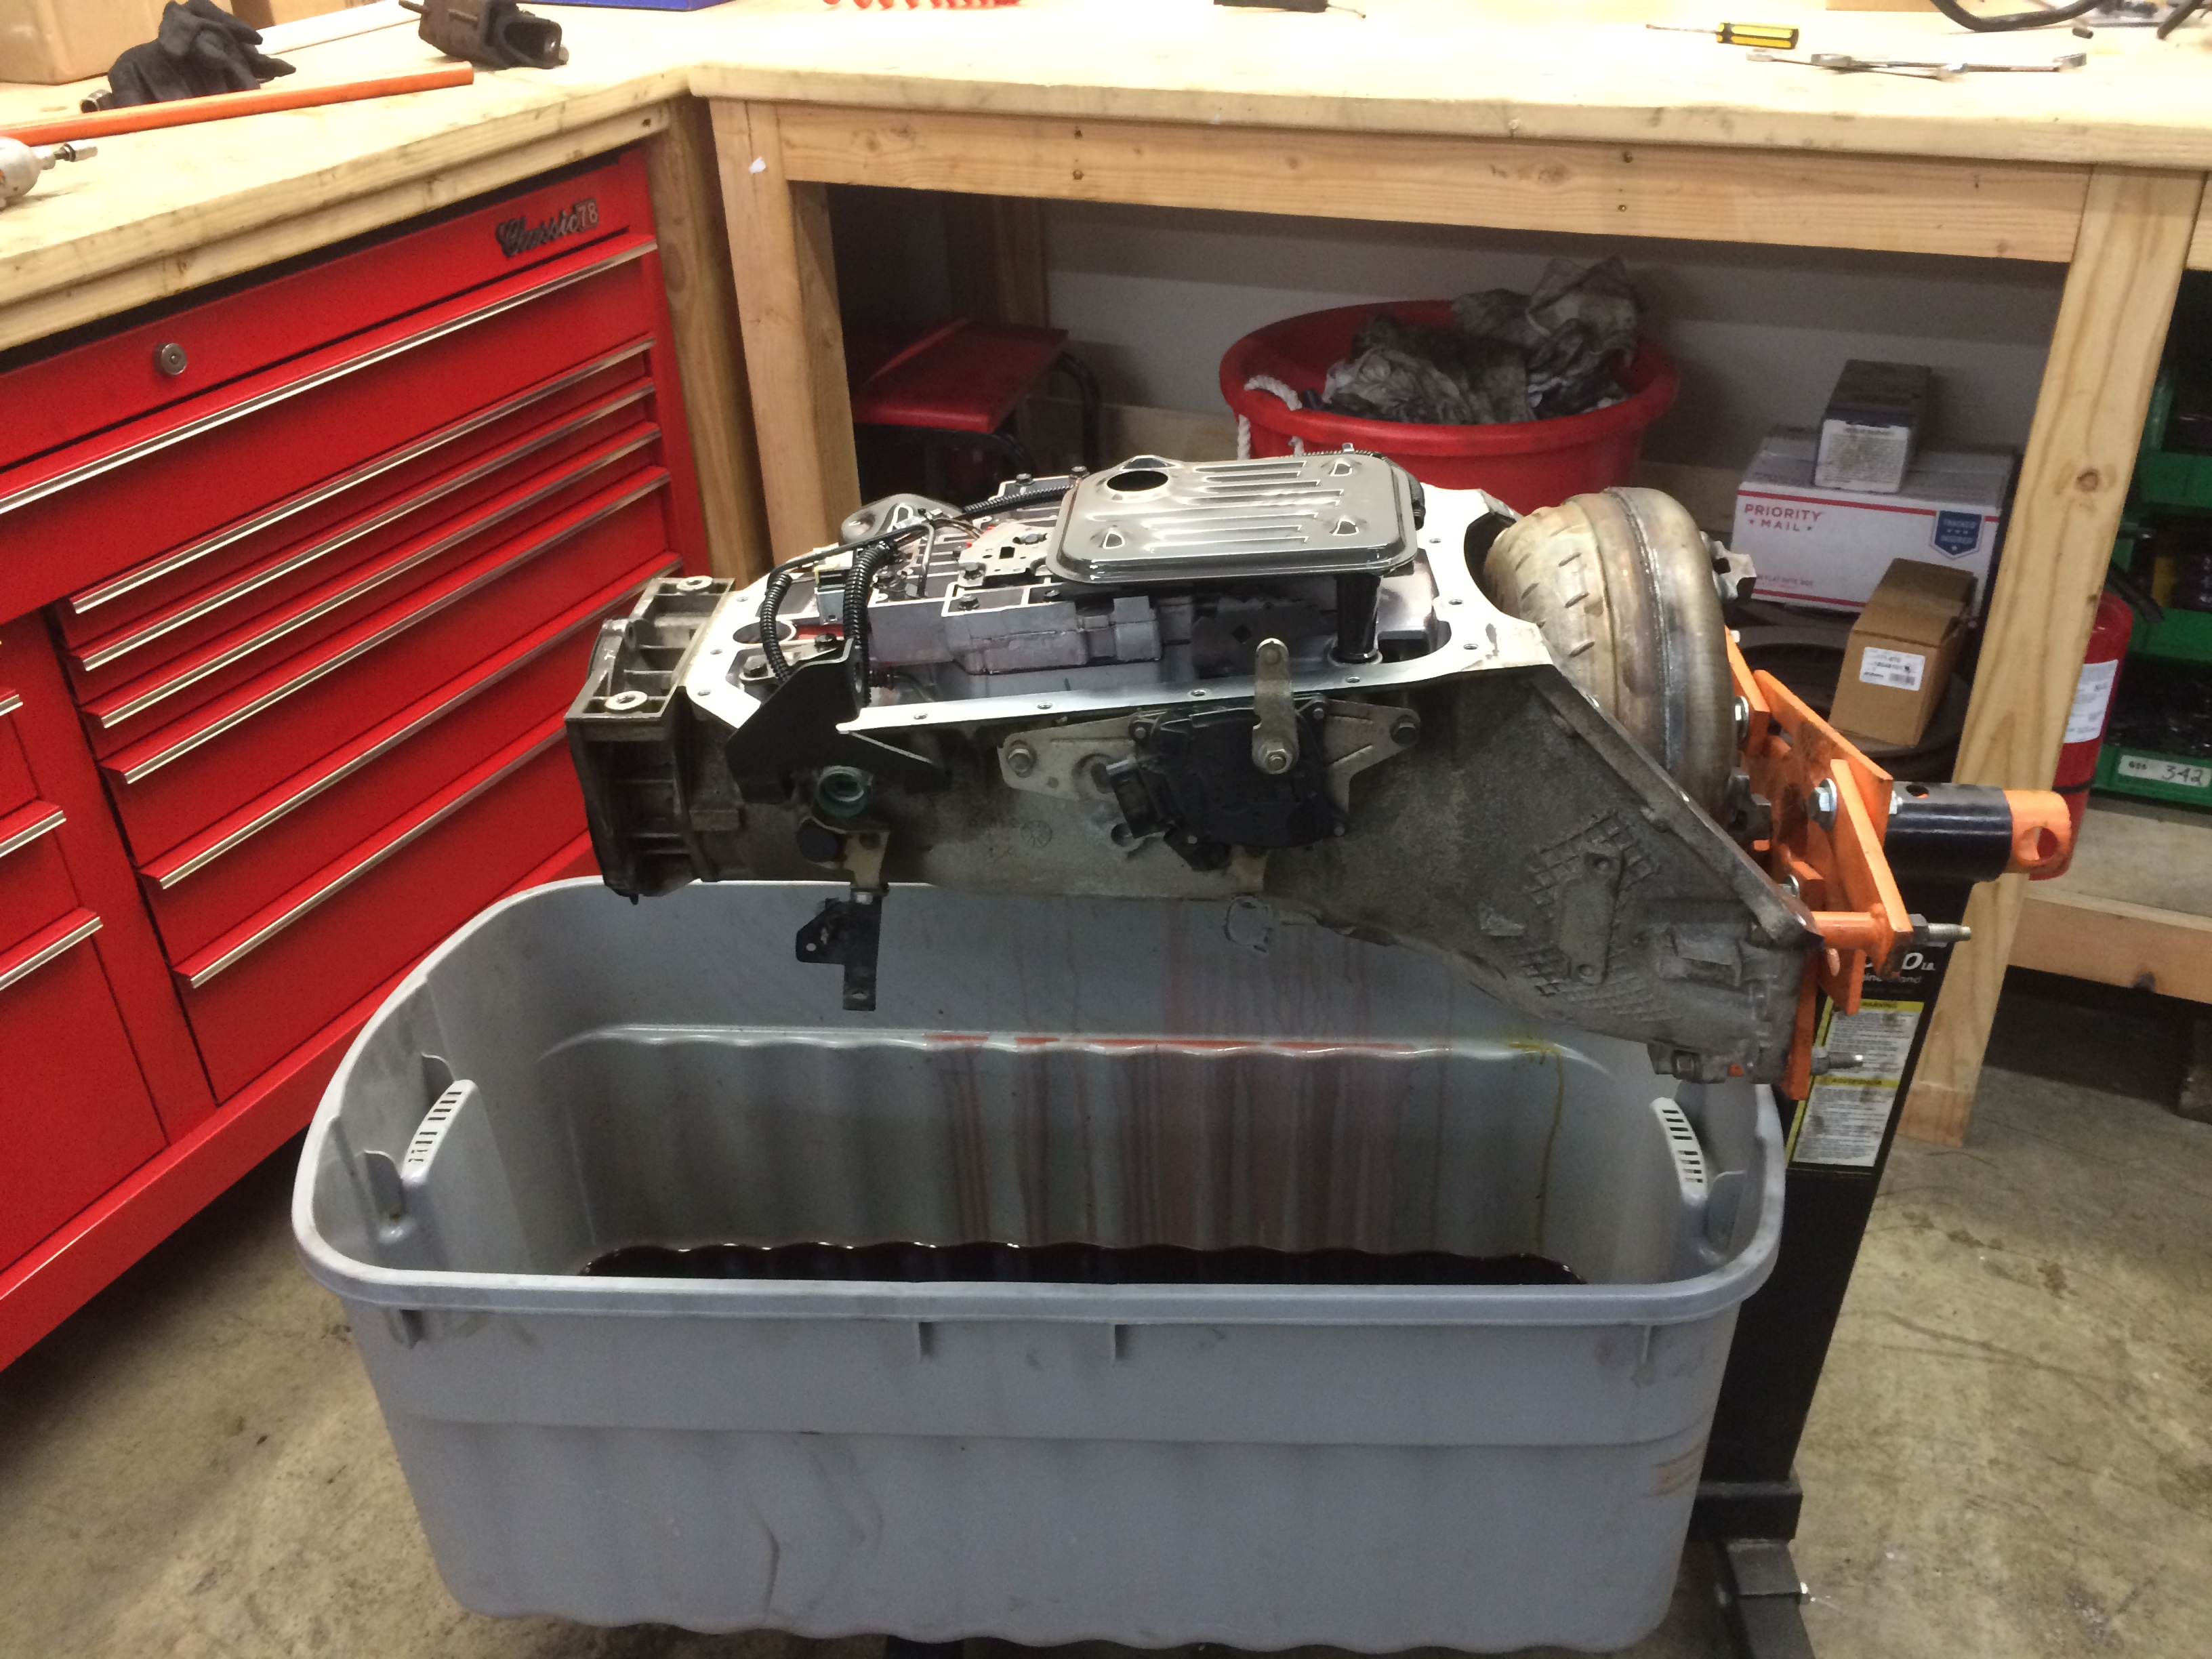
Here is the craiglist 80e mounted on the engine stand about to get the Transgo HD2 installed. Having a drip pan underneath the trans is a good idea...
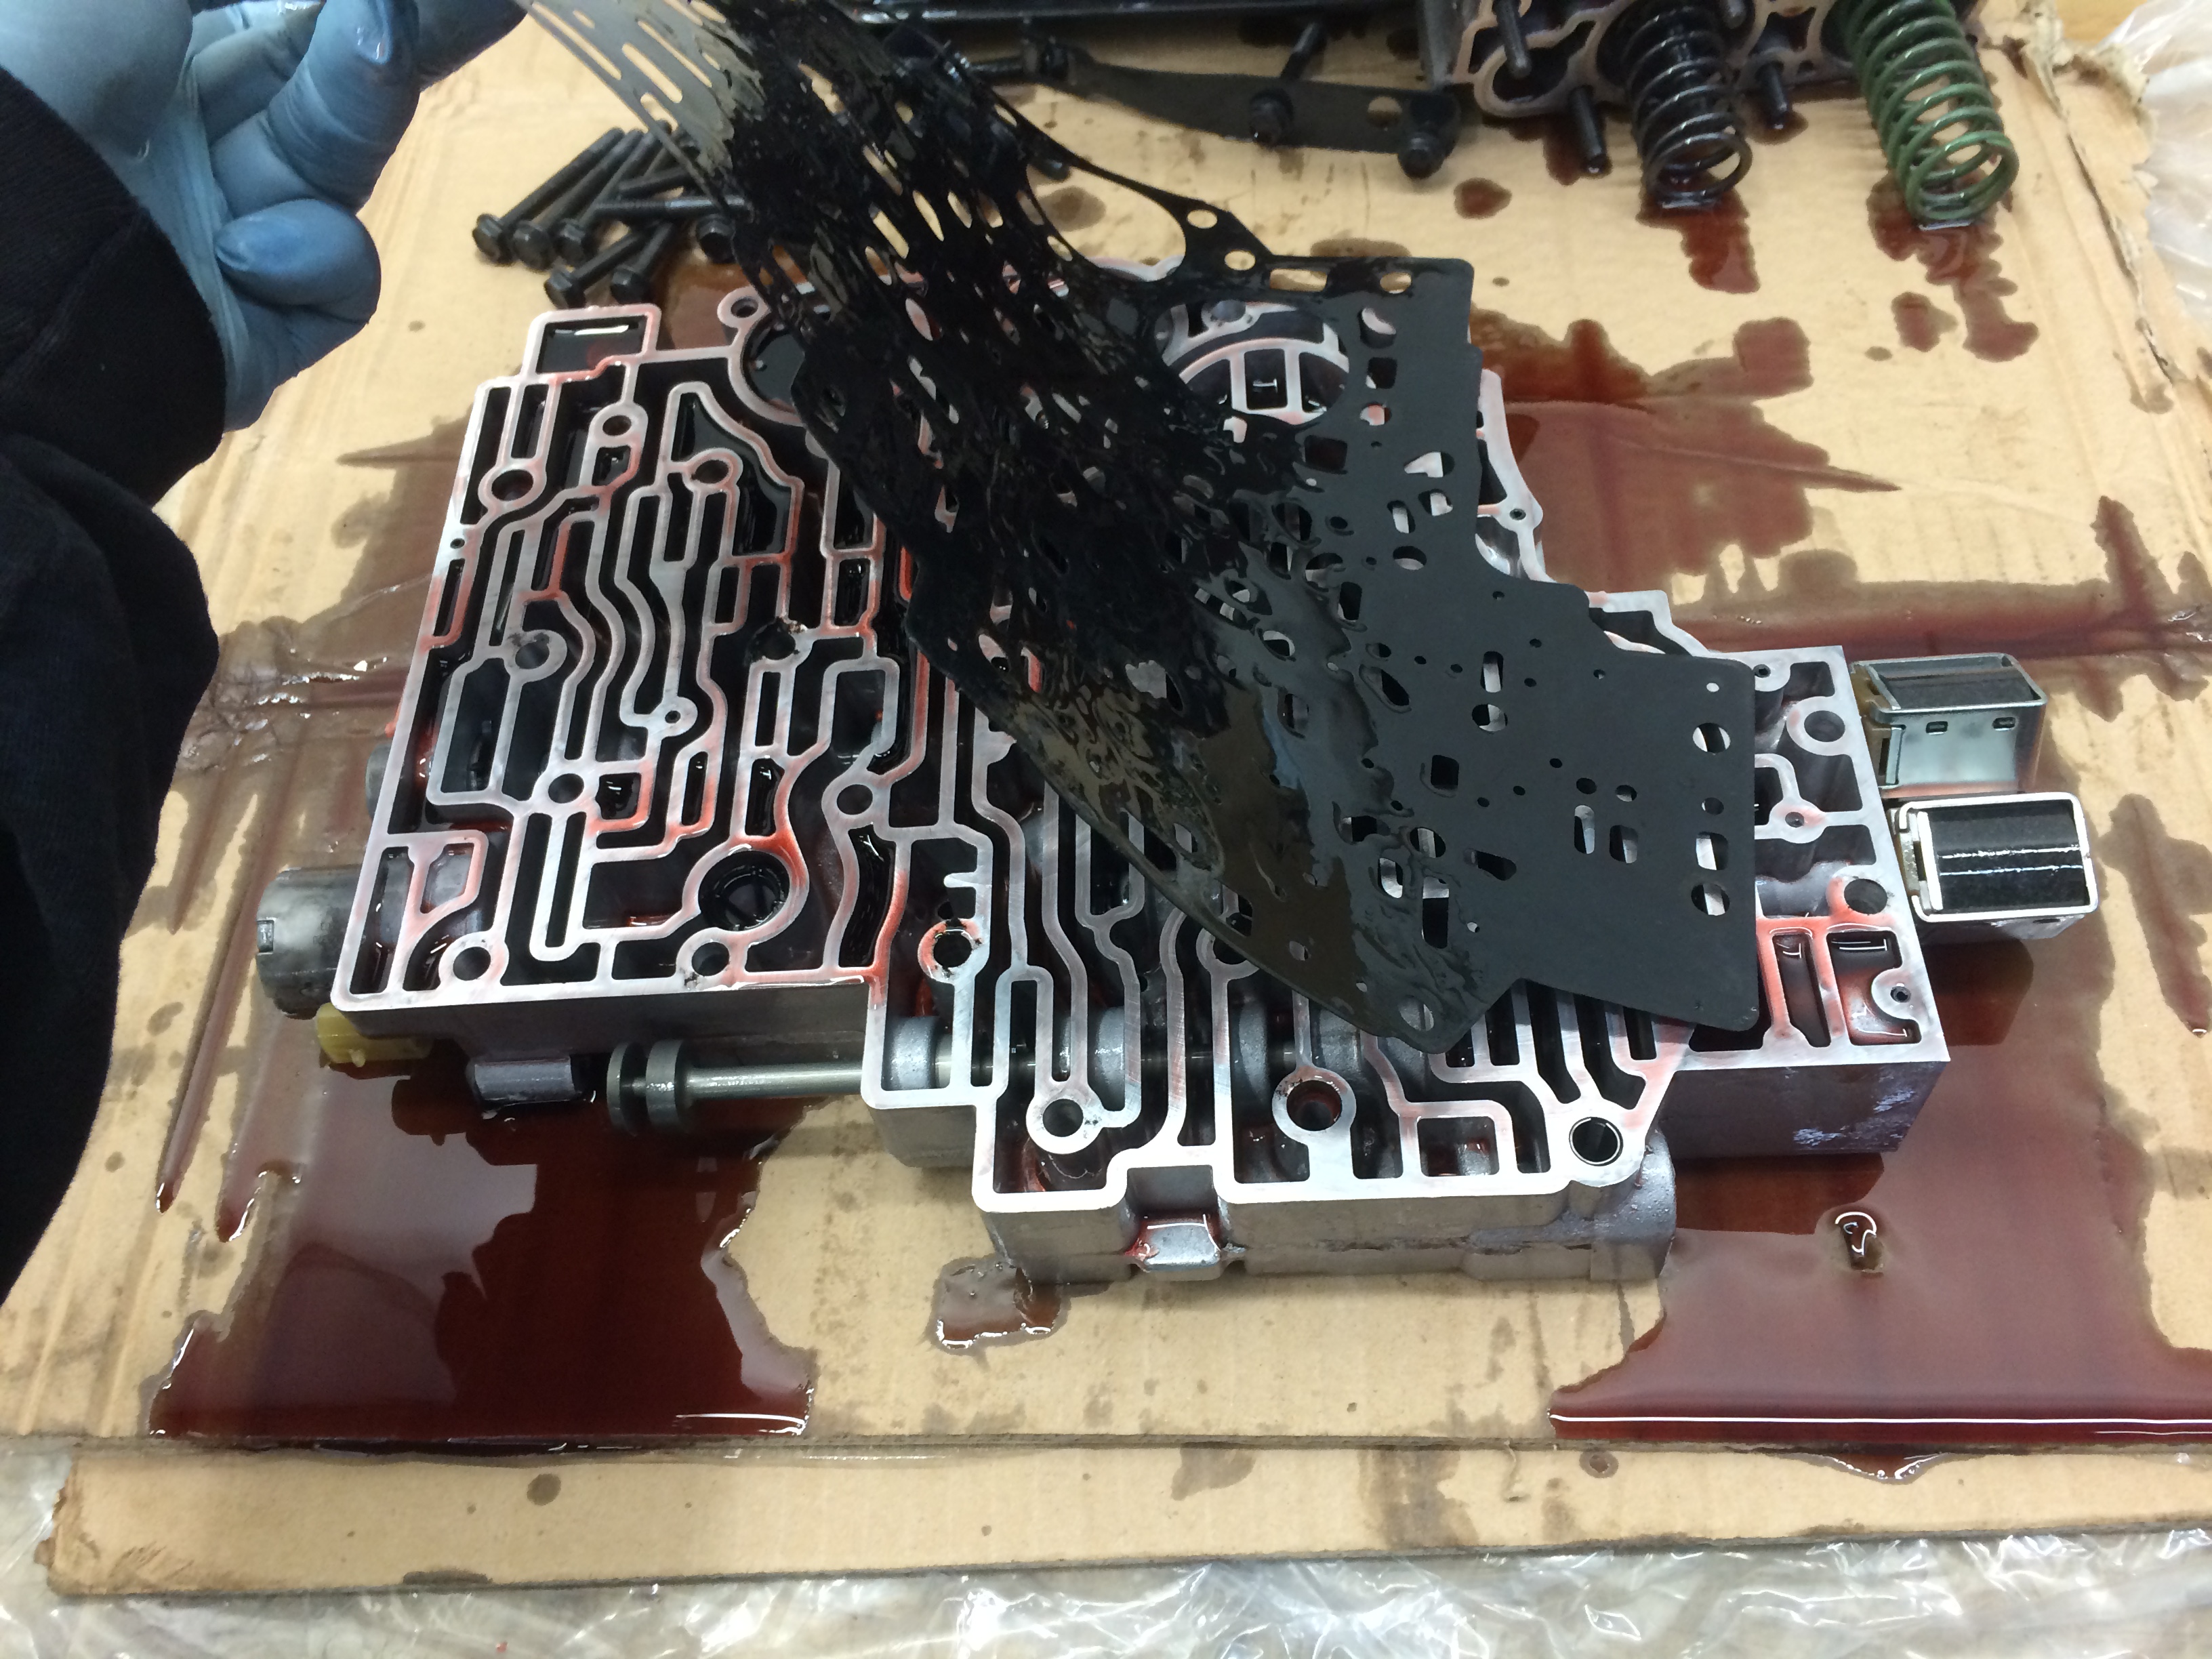
The shift kit isn't too bad of a job. No special tools needed other than a hand drill, a few picks to reach into places, and basic sockets. An electric impact driver is very useful indeed for making the job go quickly. Here is the valve body exposed with the filter removed:
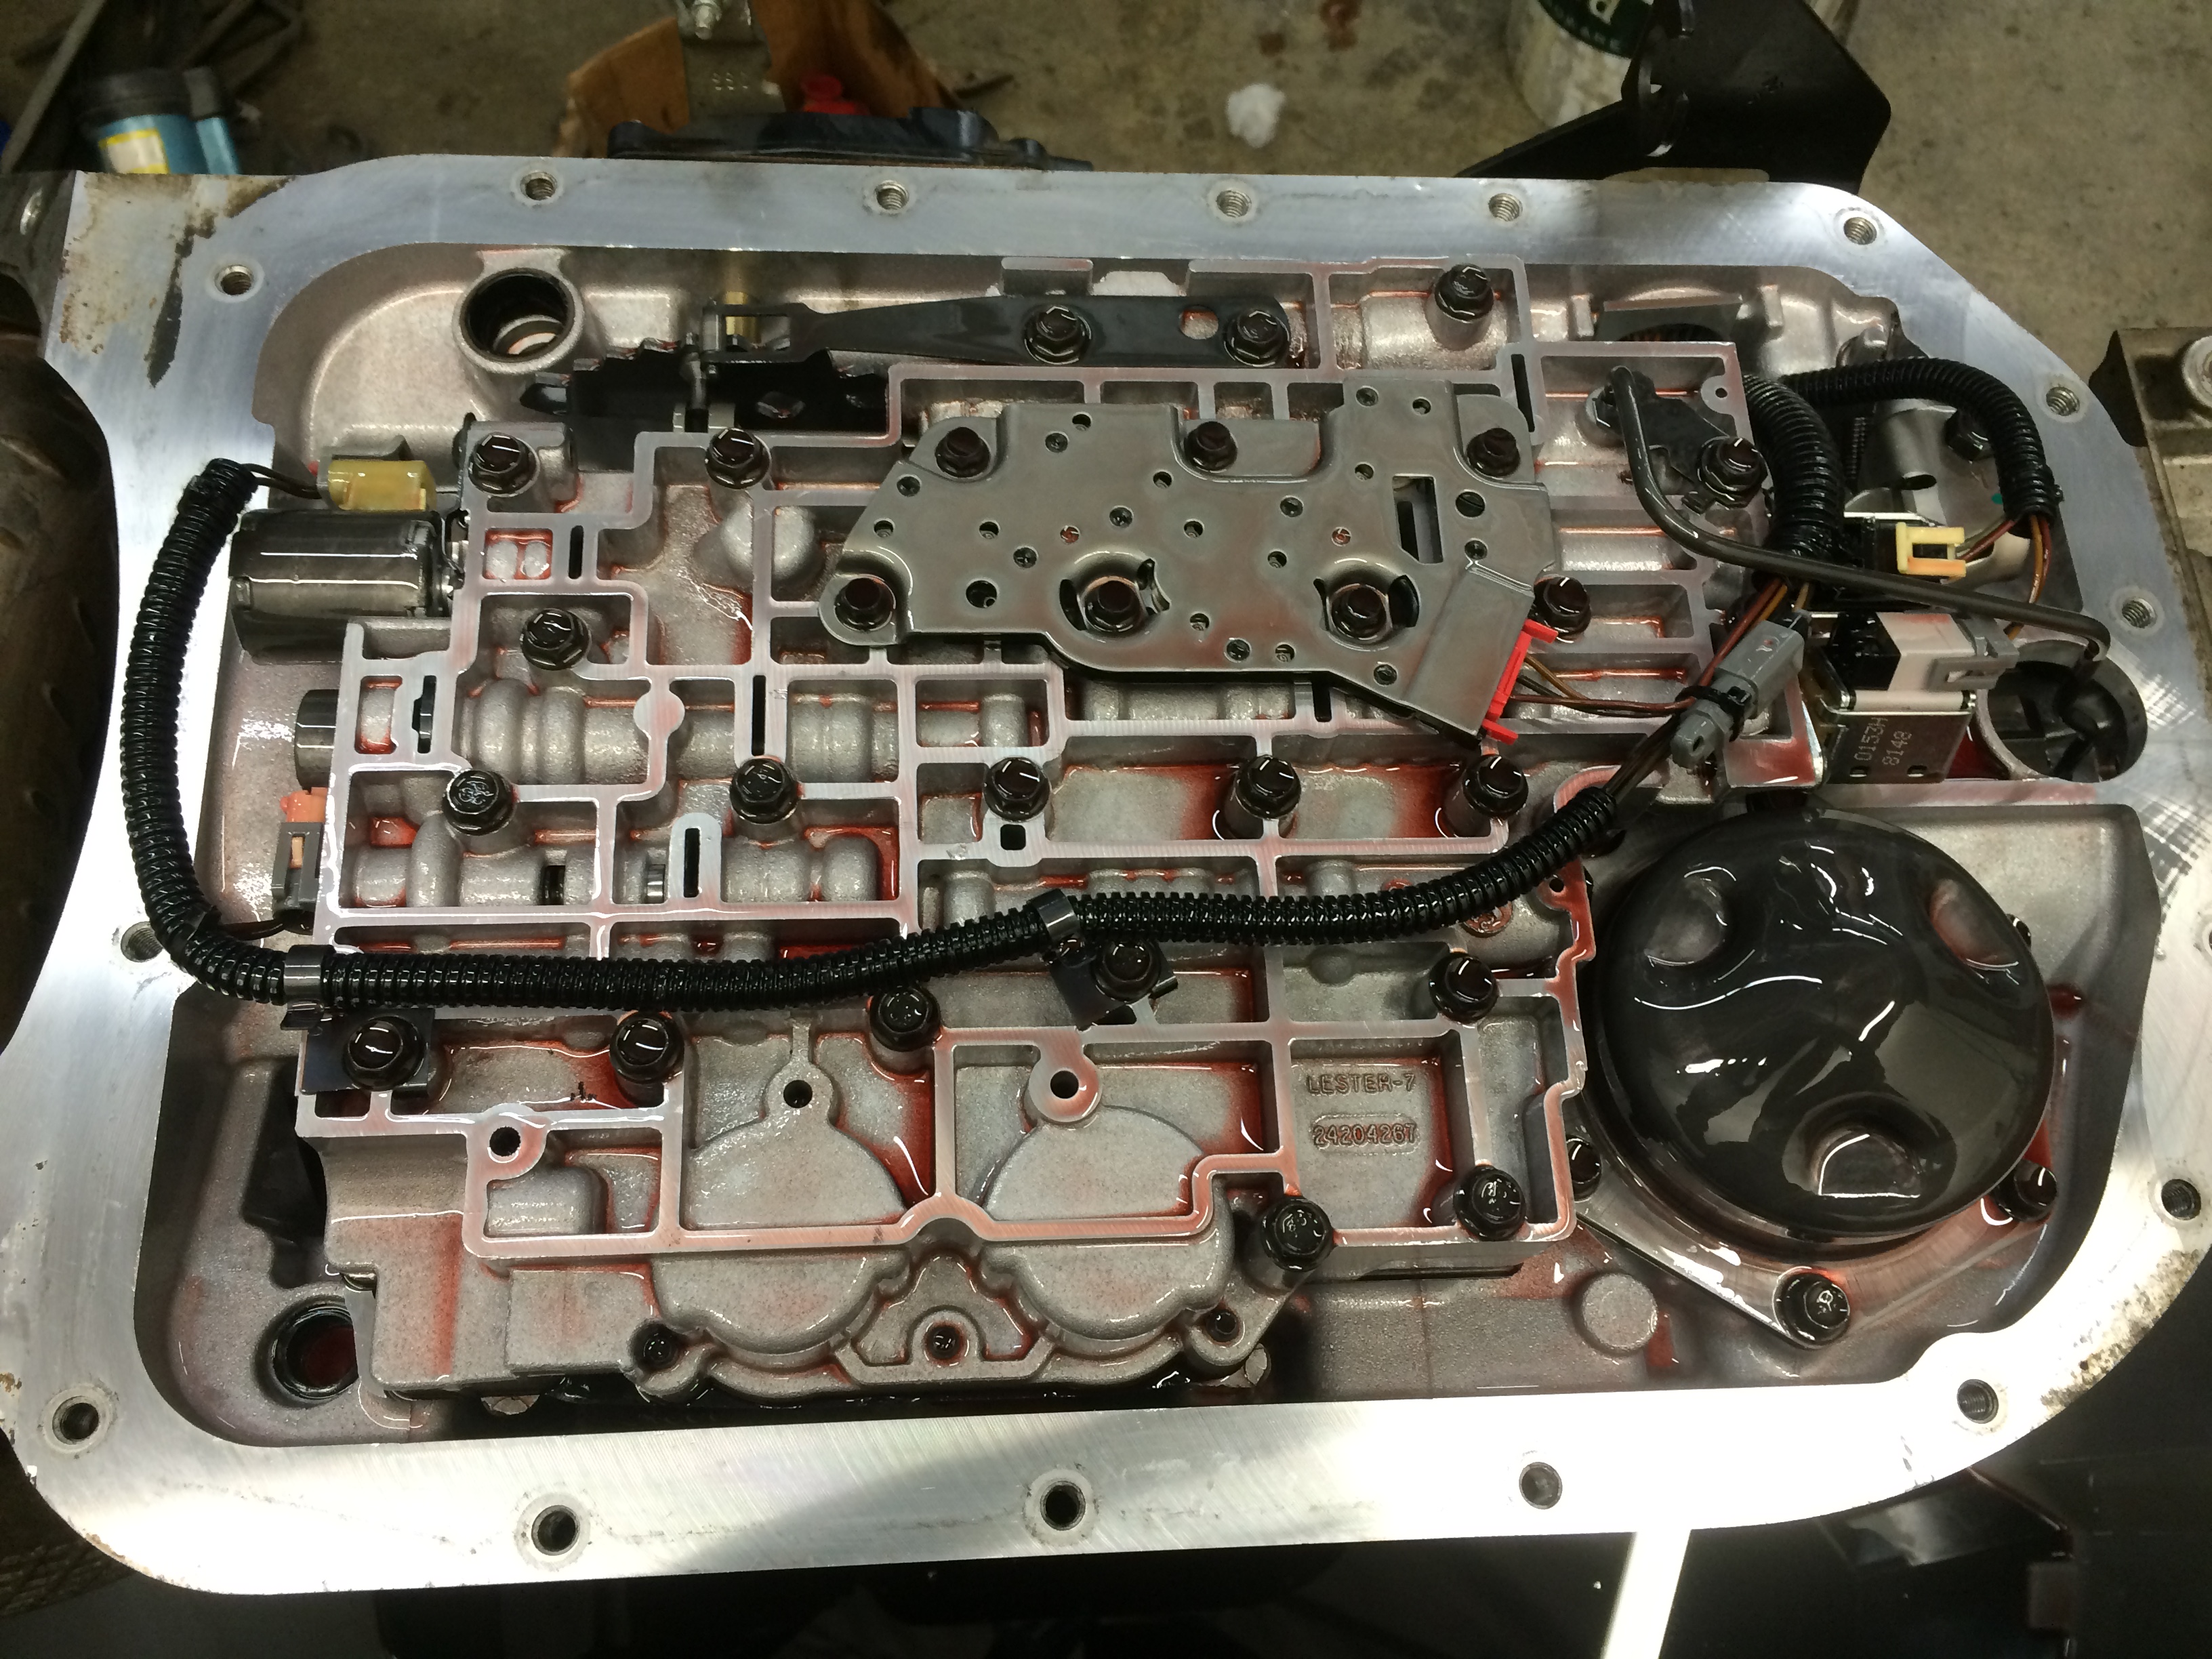
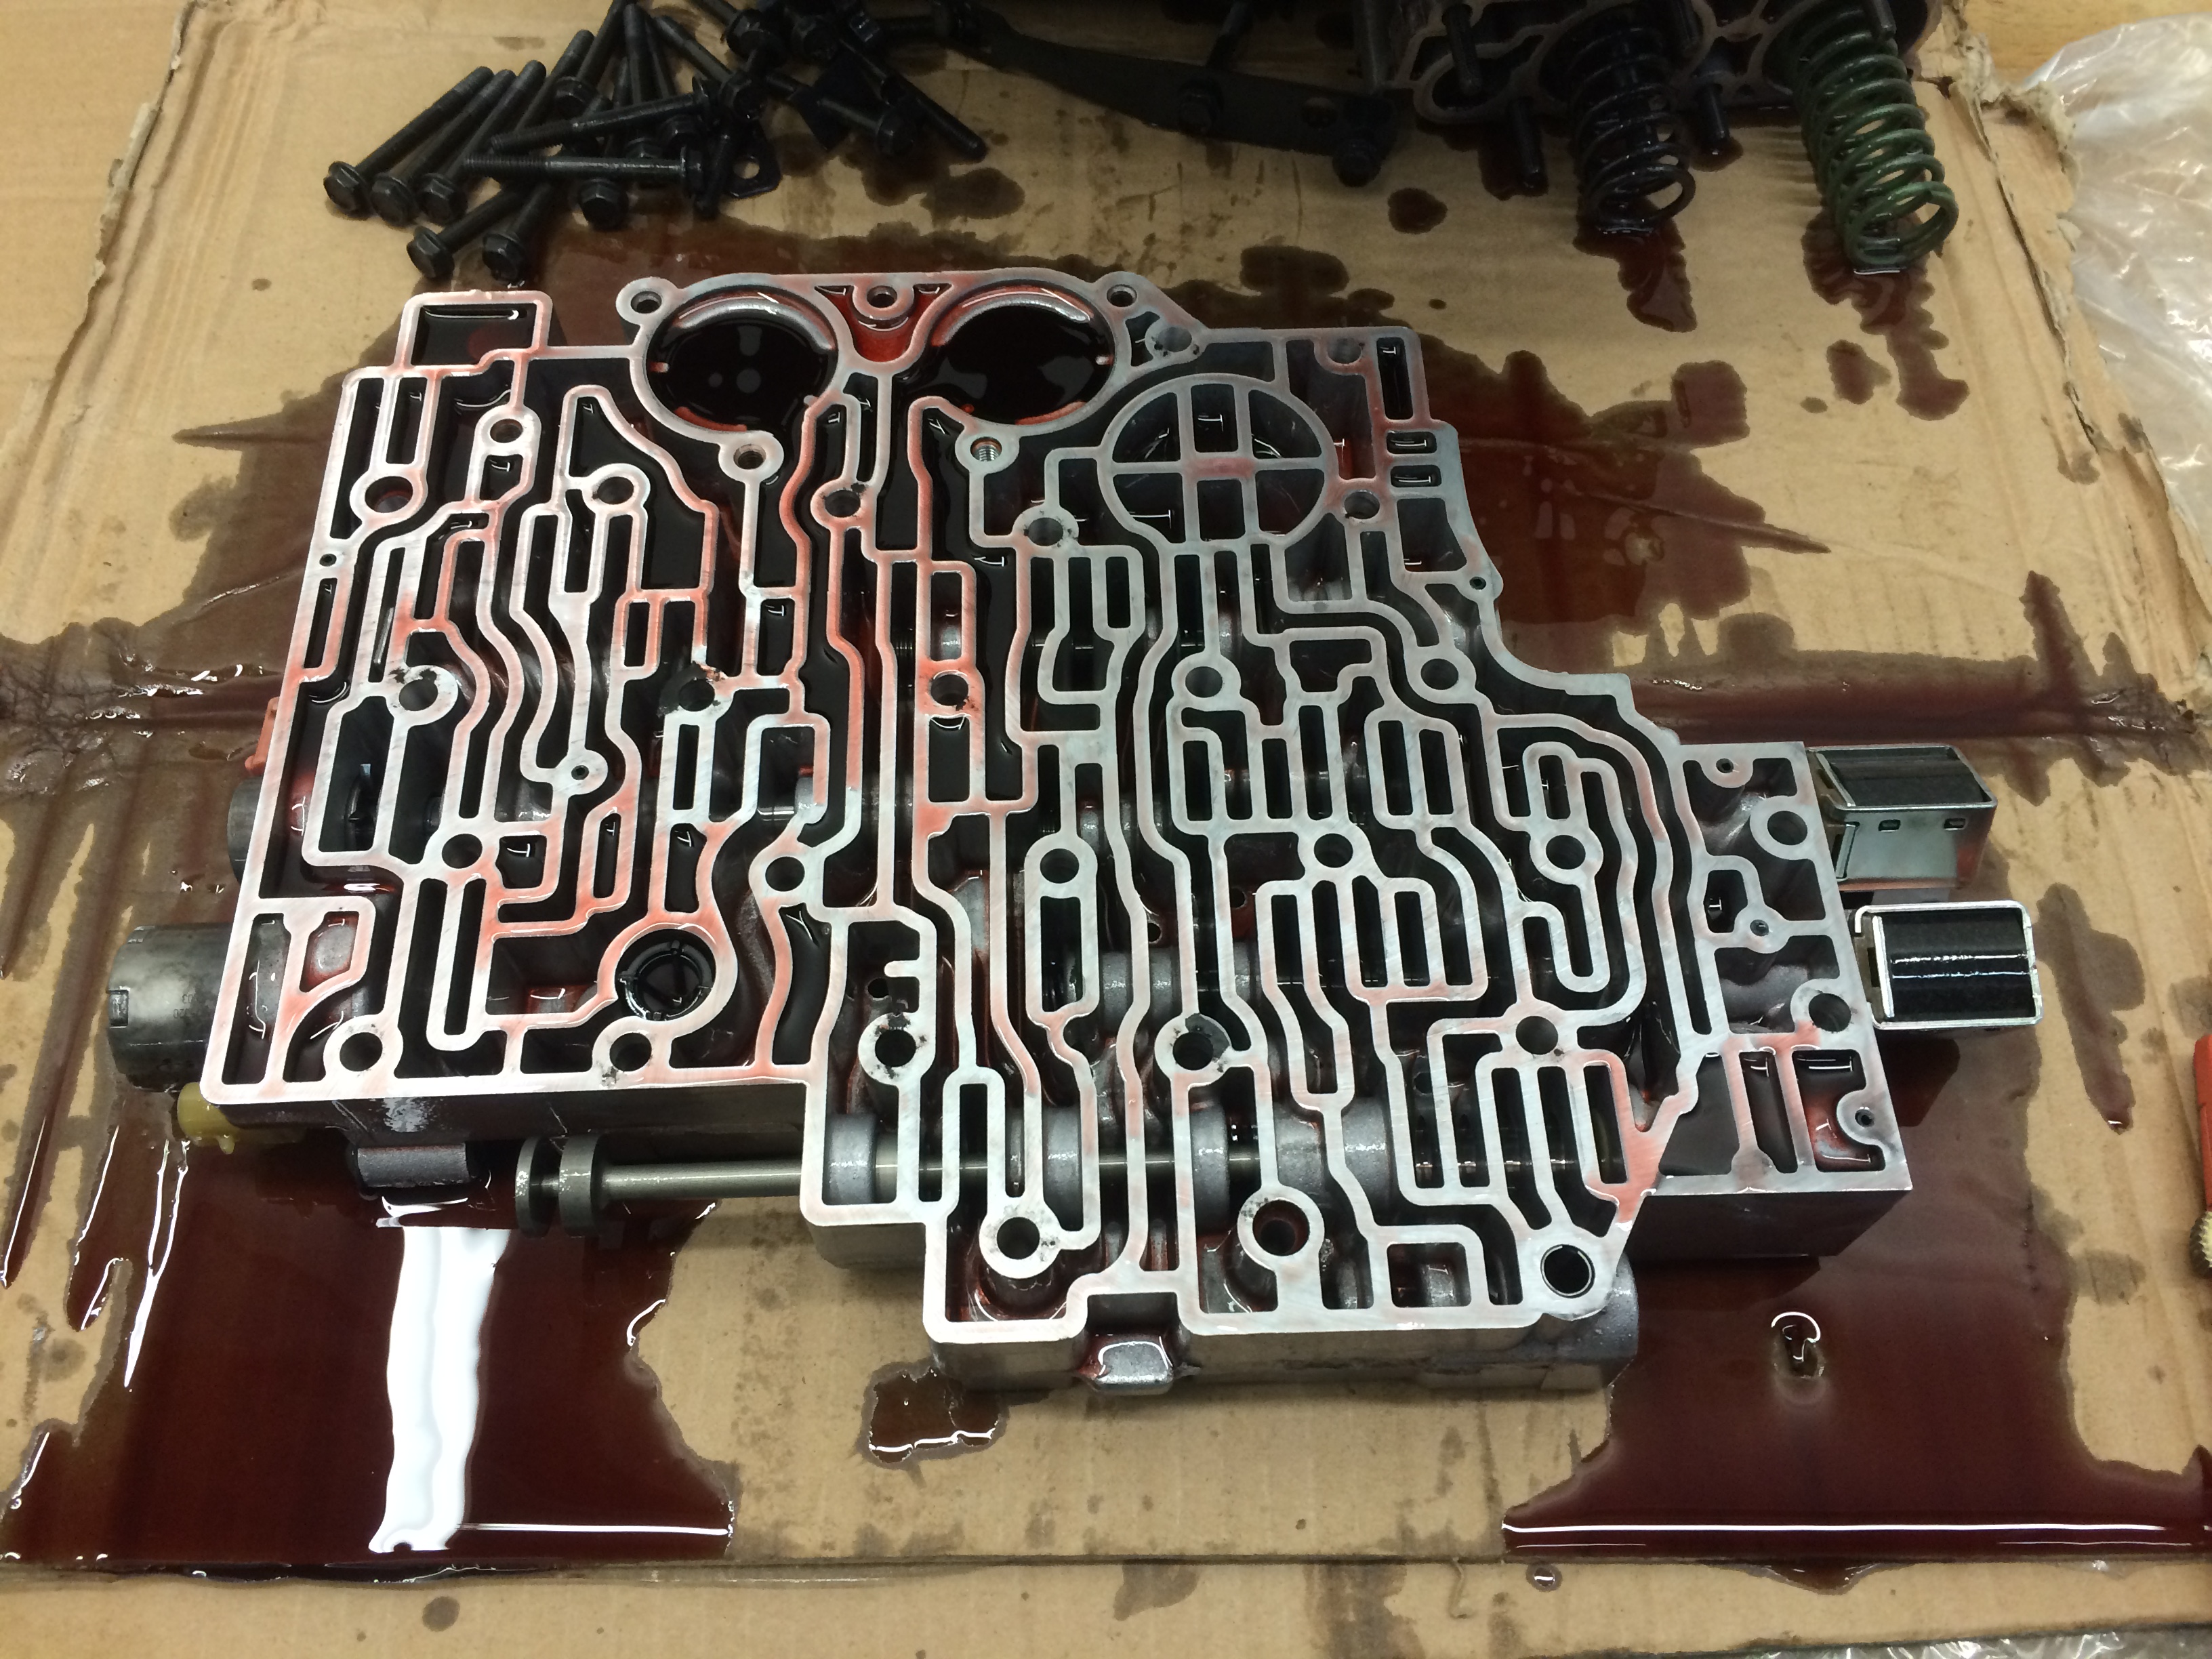
I did decide to follow Jake's advice ... I drilled 2nd to .125", 3rd was not drilled but check ball removed, and 4th .125" and I used only the small blue spring for the accumulator valve. The stall converter softens up all the shifts, so I went full firm when given the choice during the kit install.

Luckily the valve body gaskets came off completely clean, I've heard of some guys having to scrap them off...
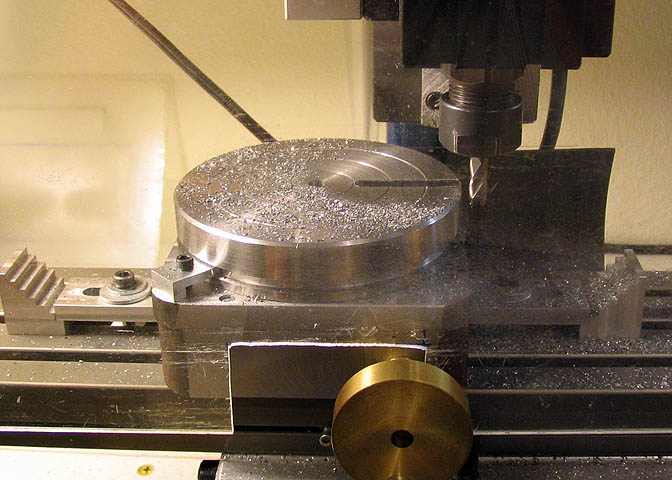
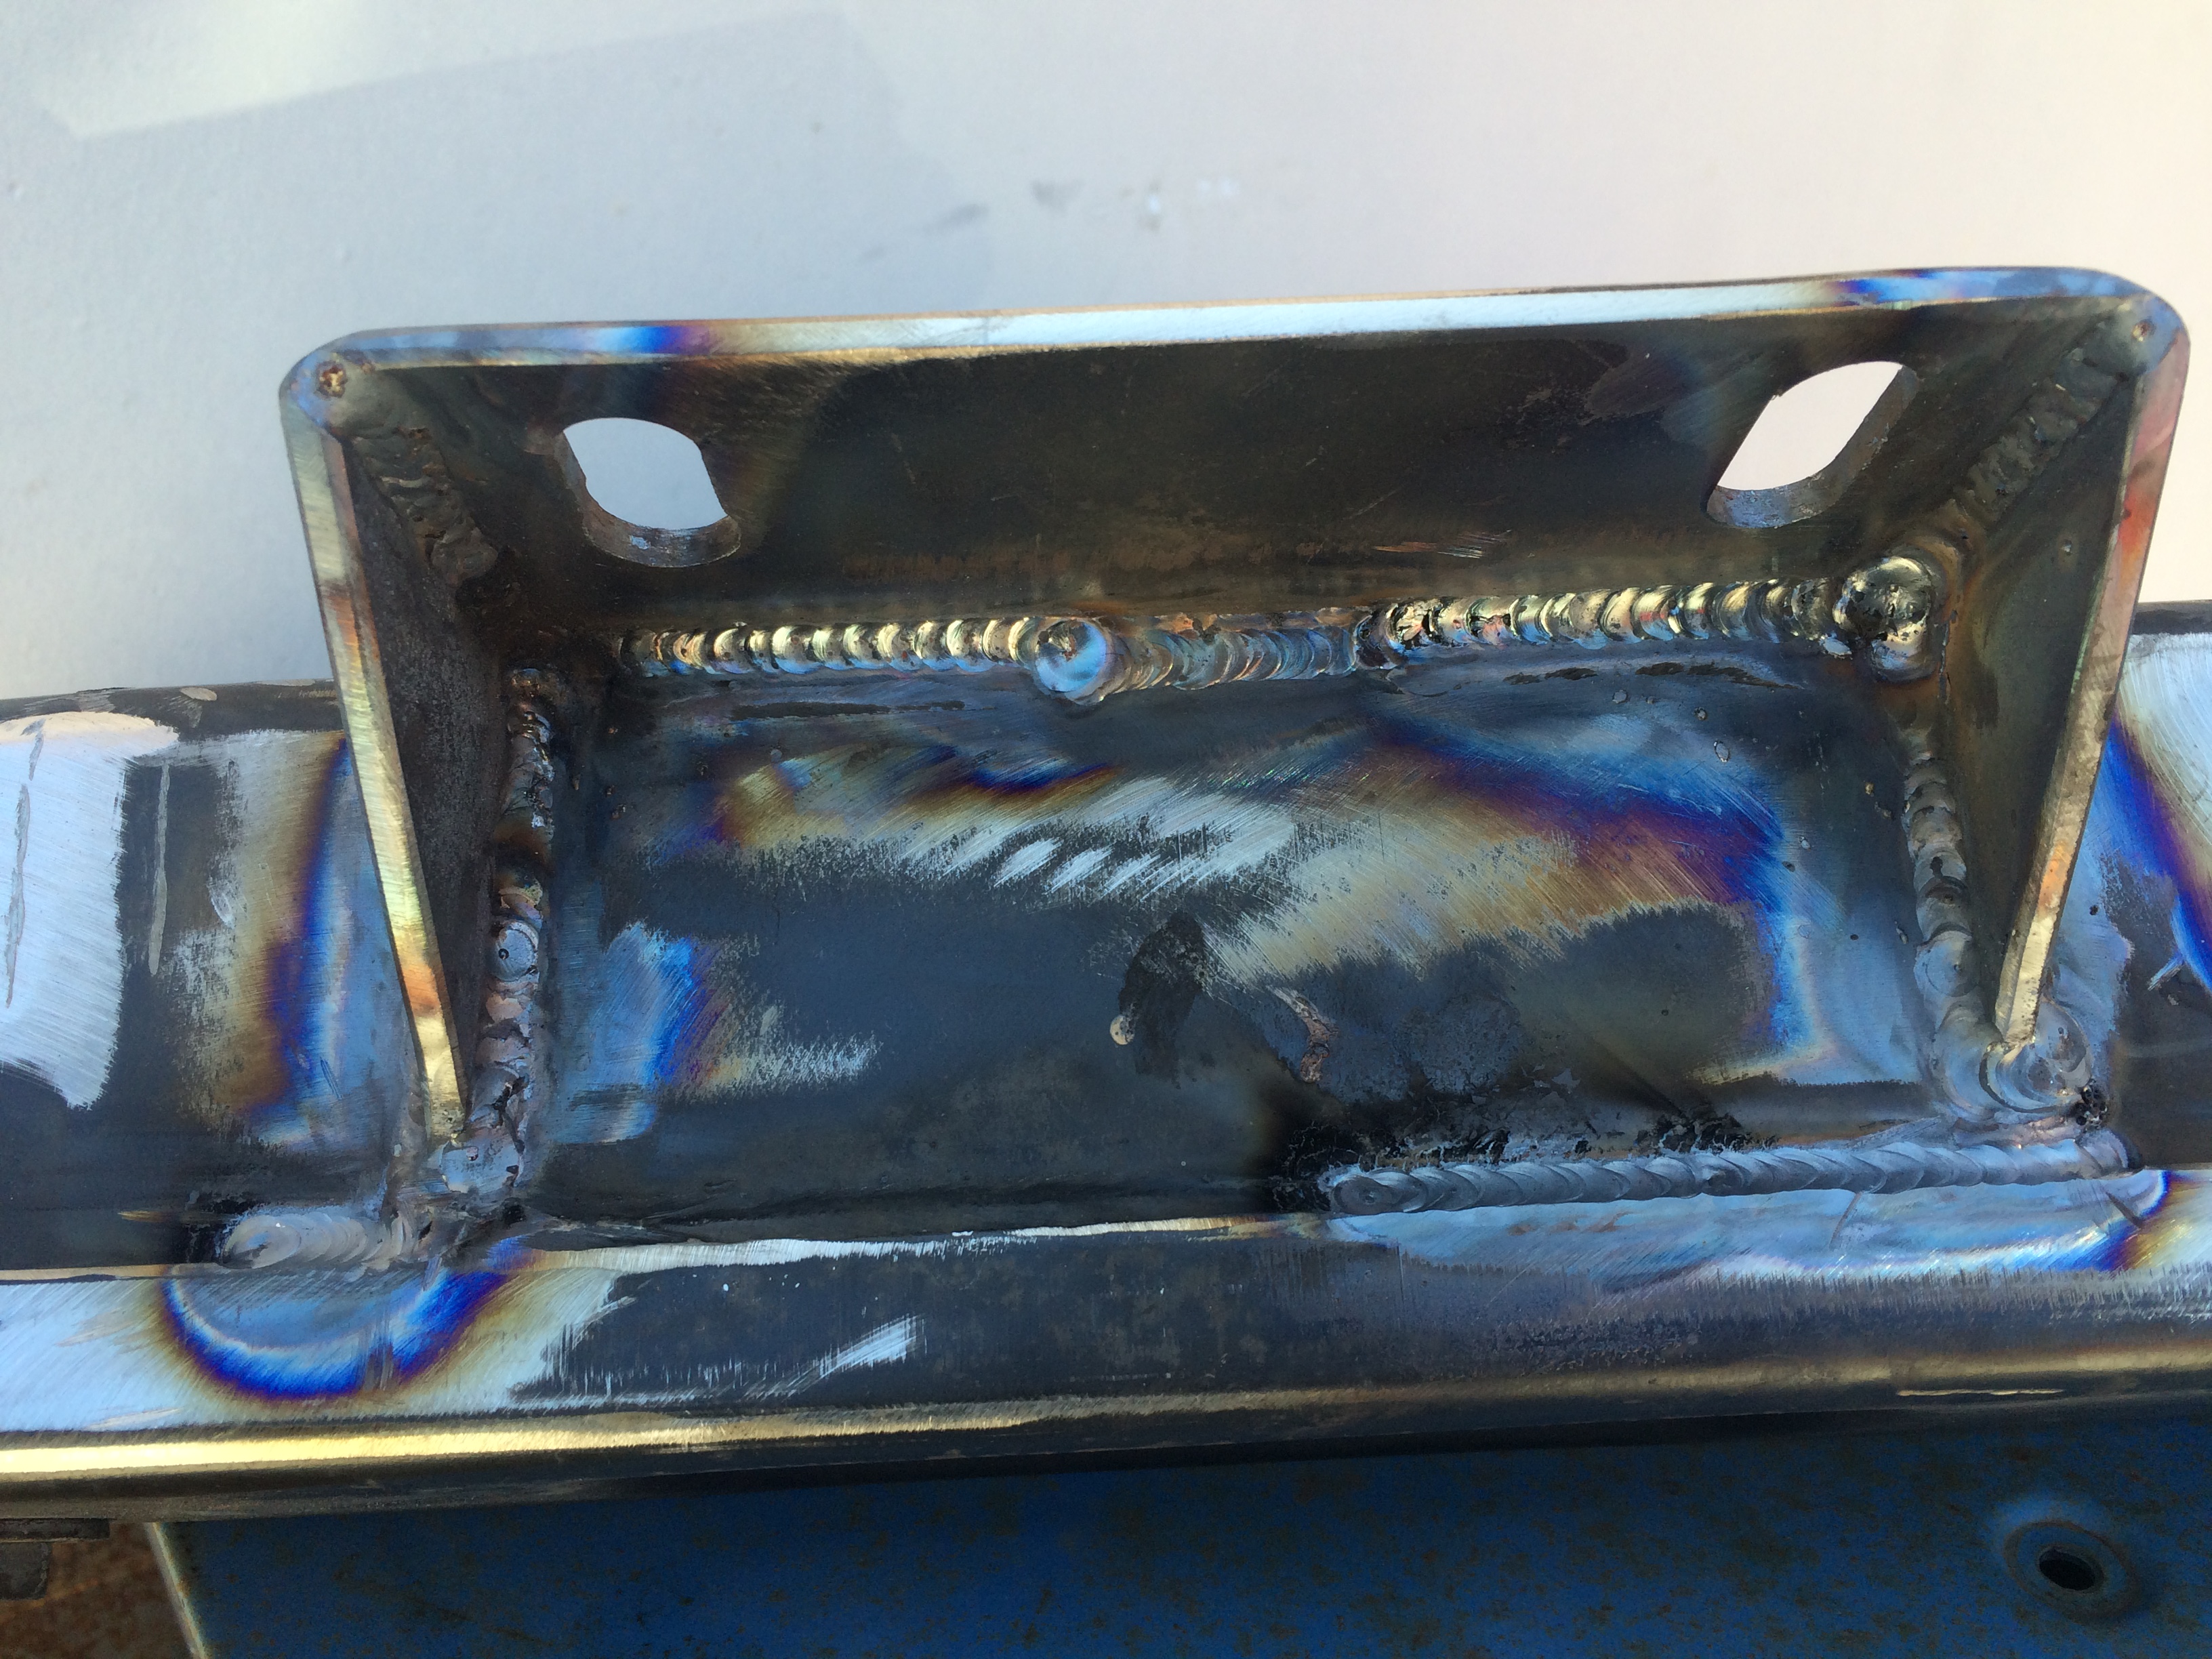
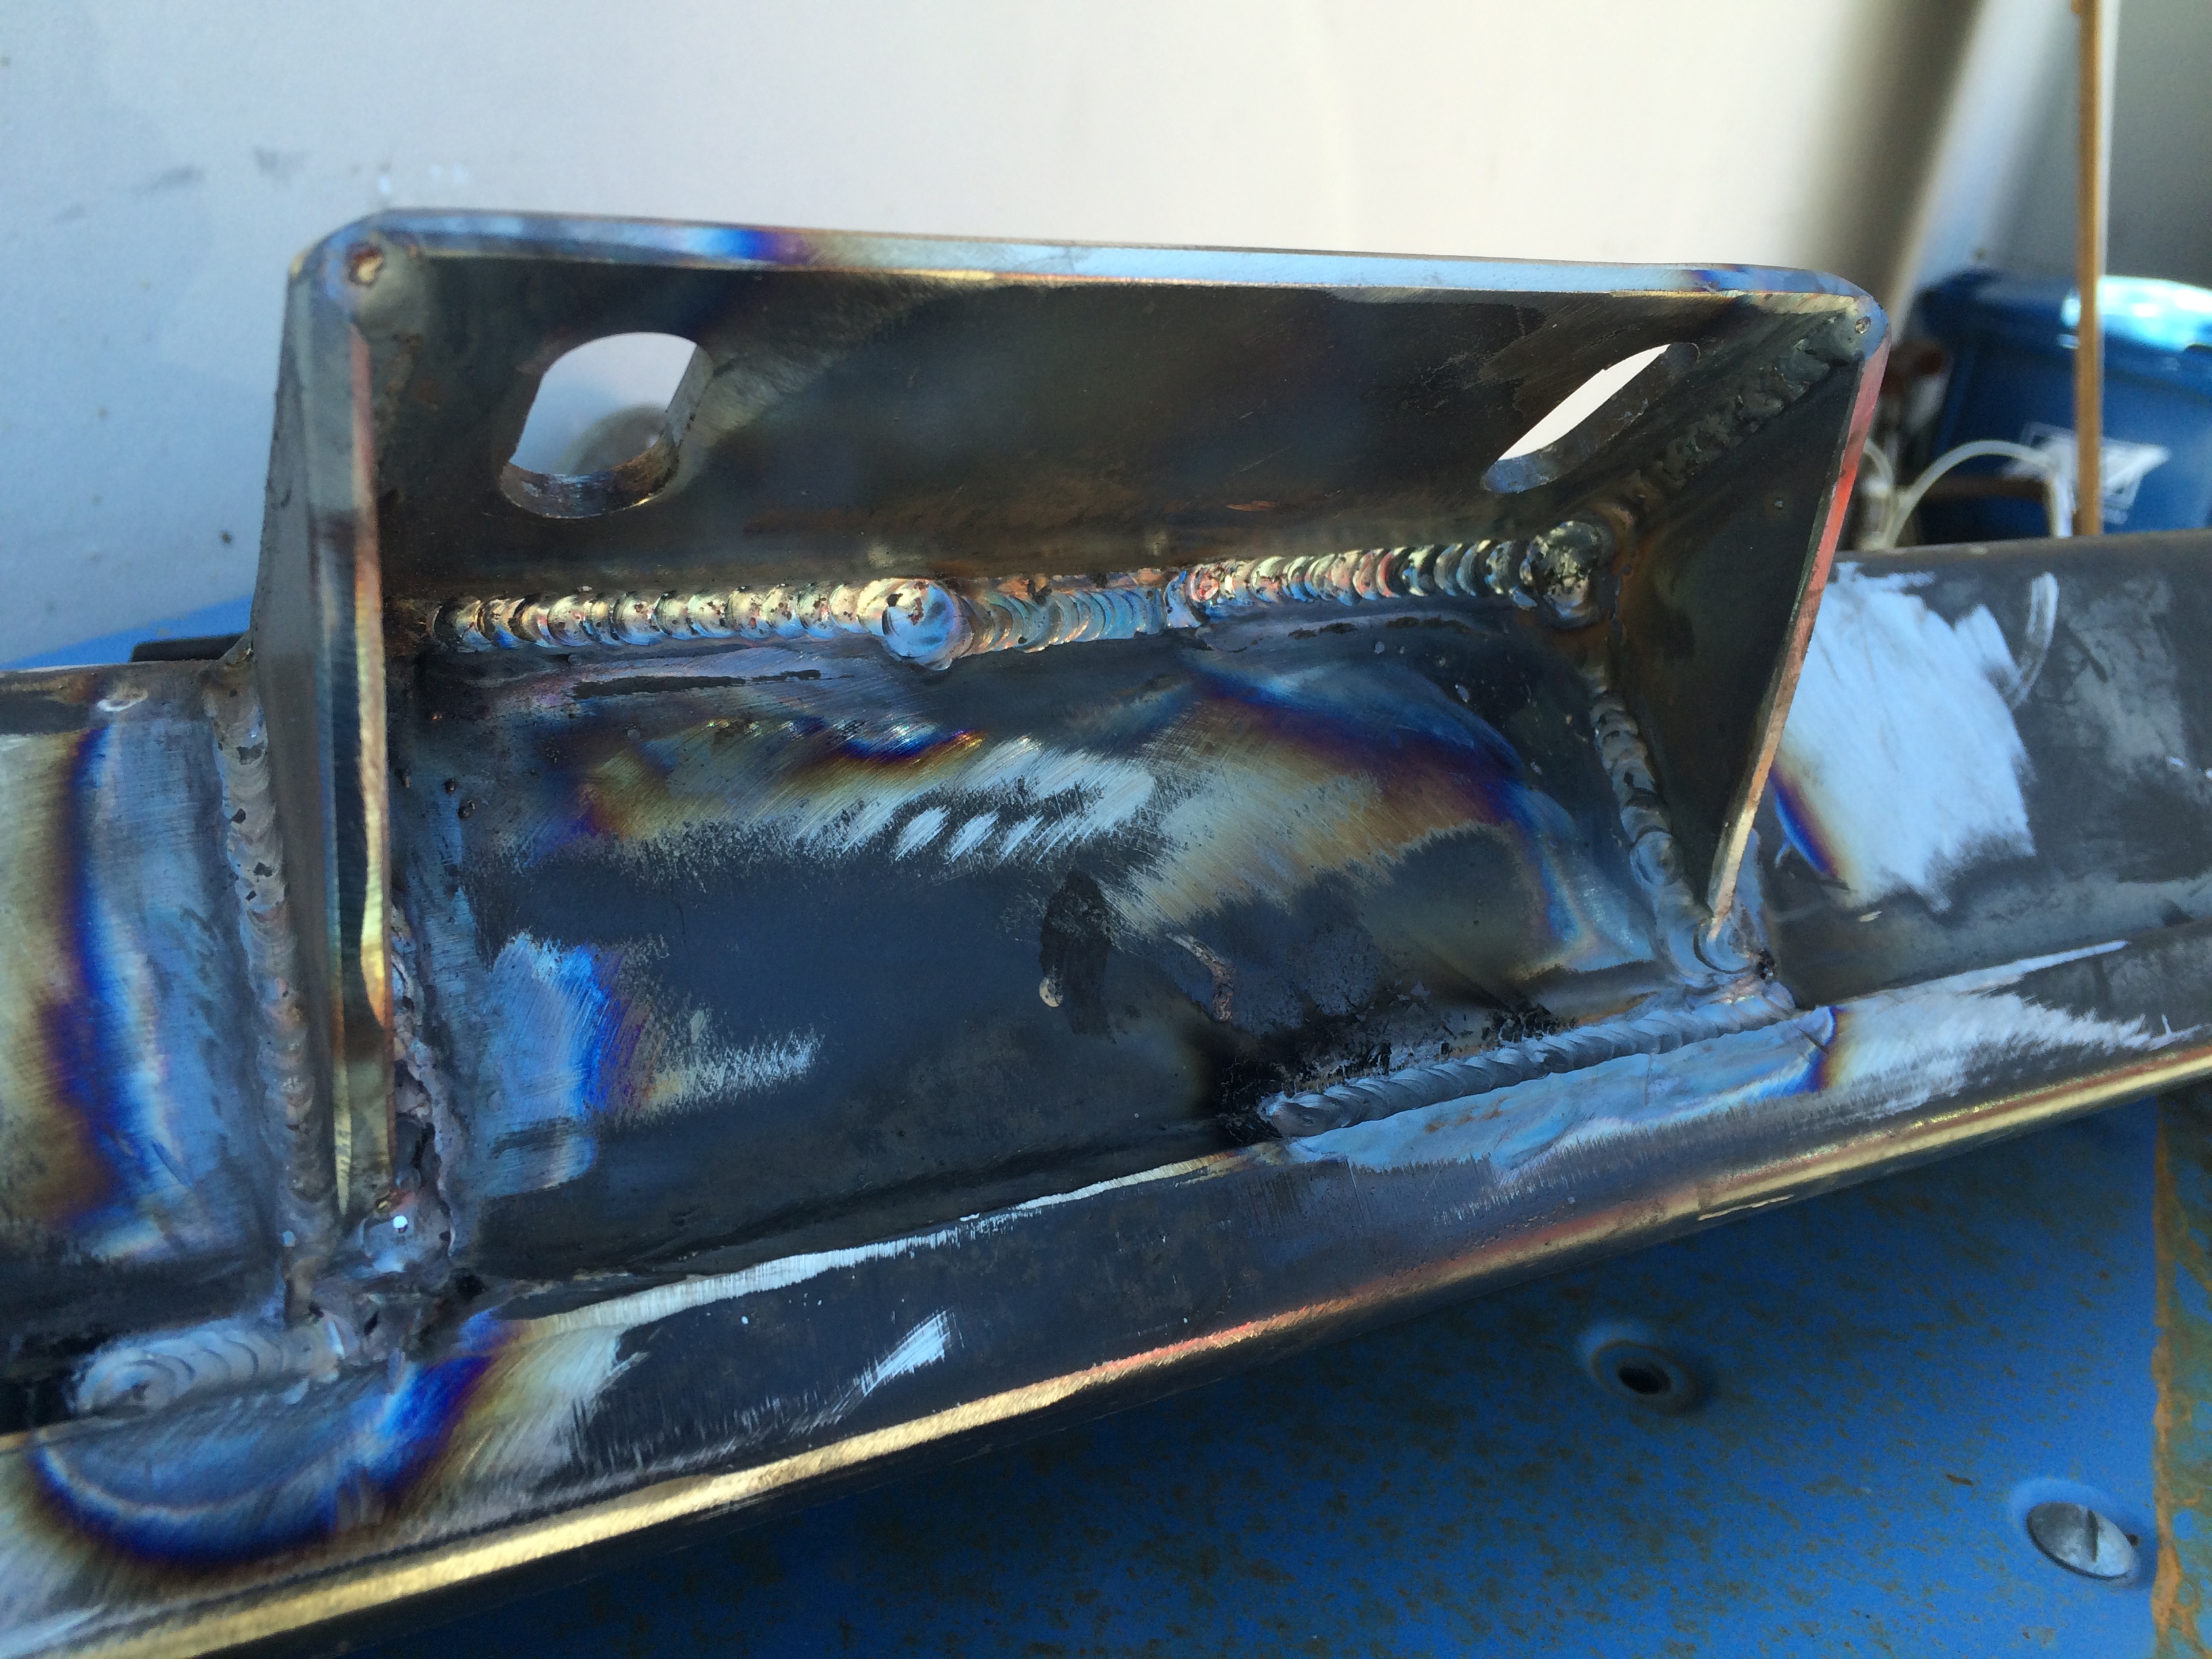
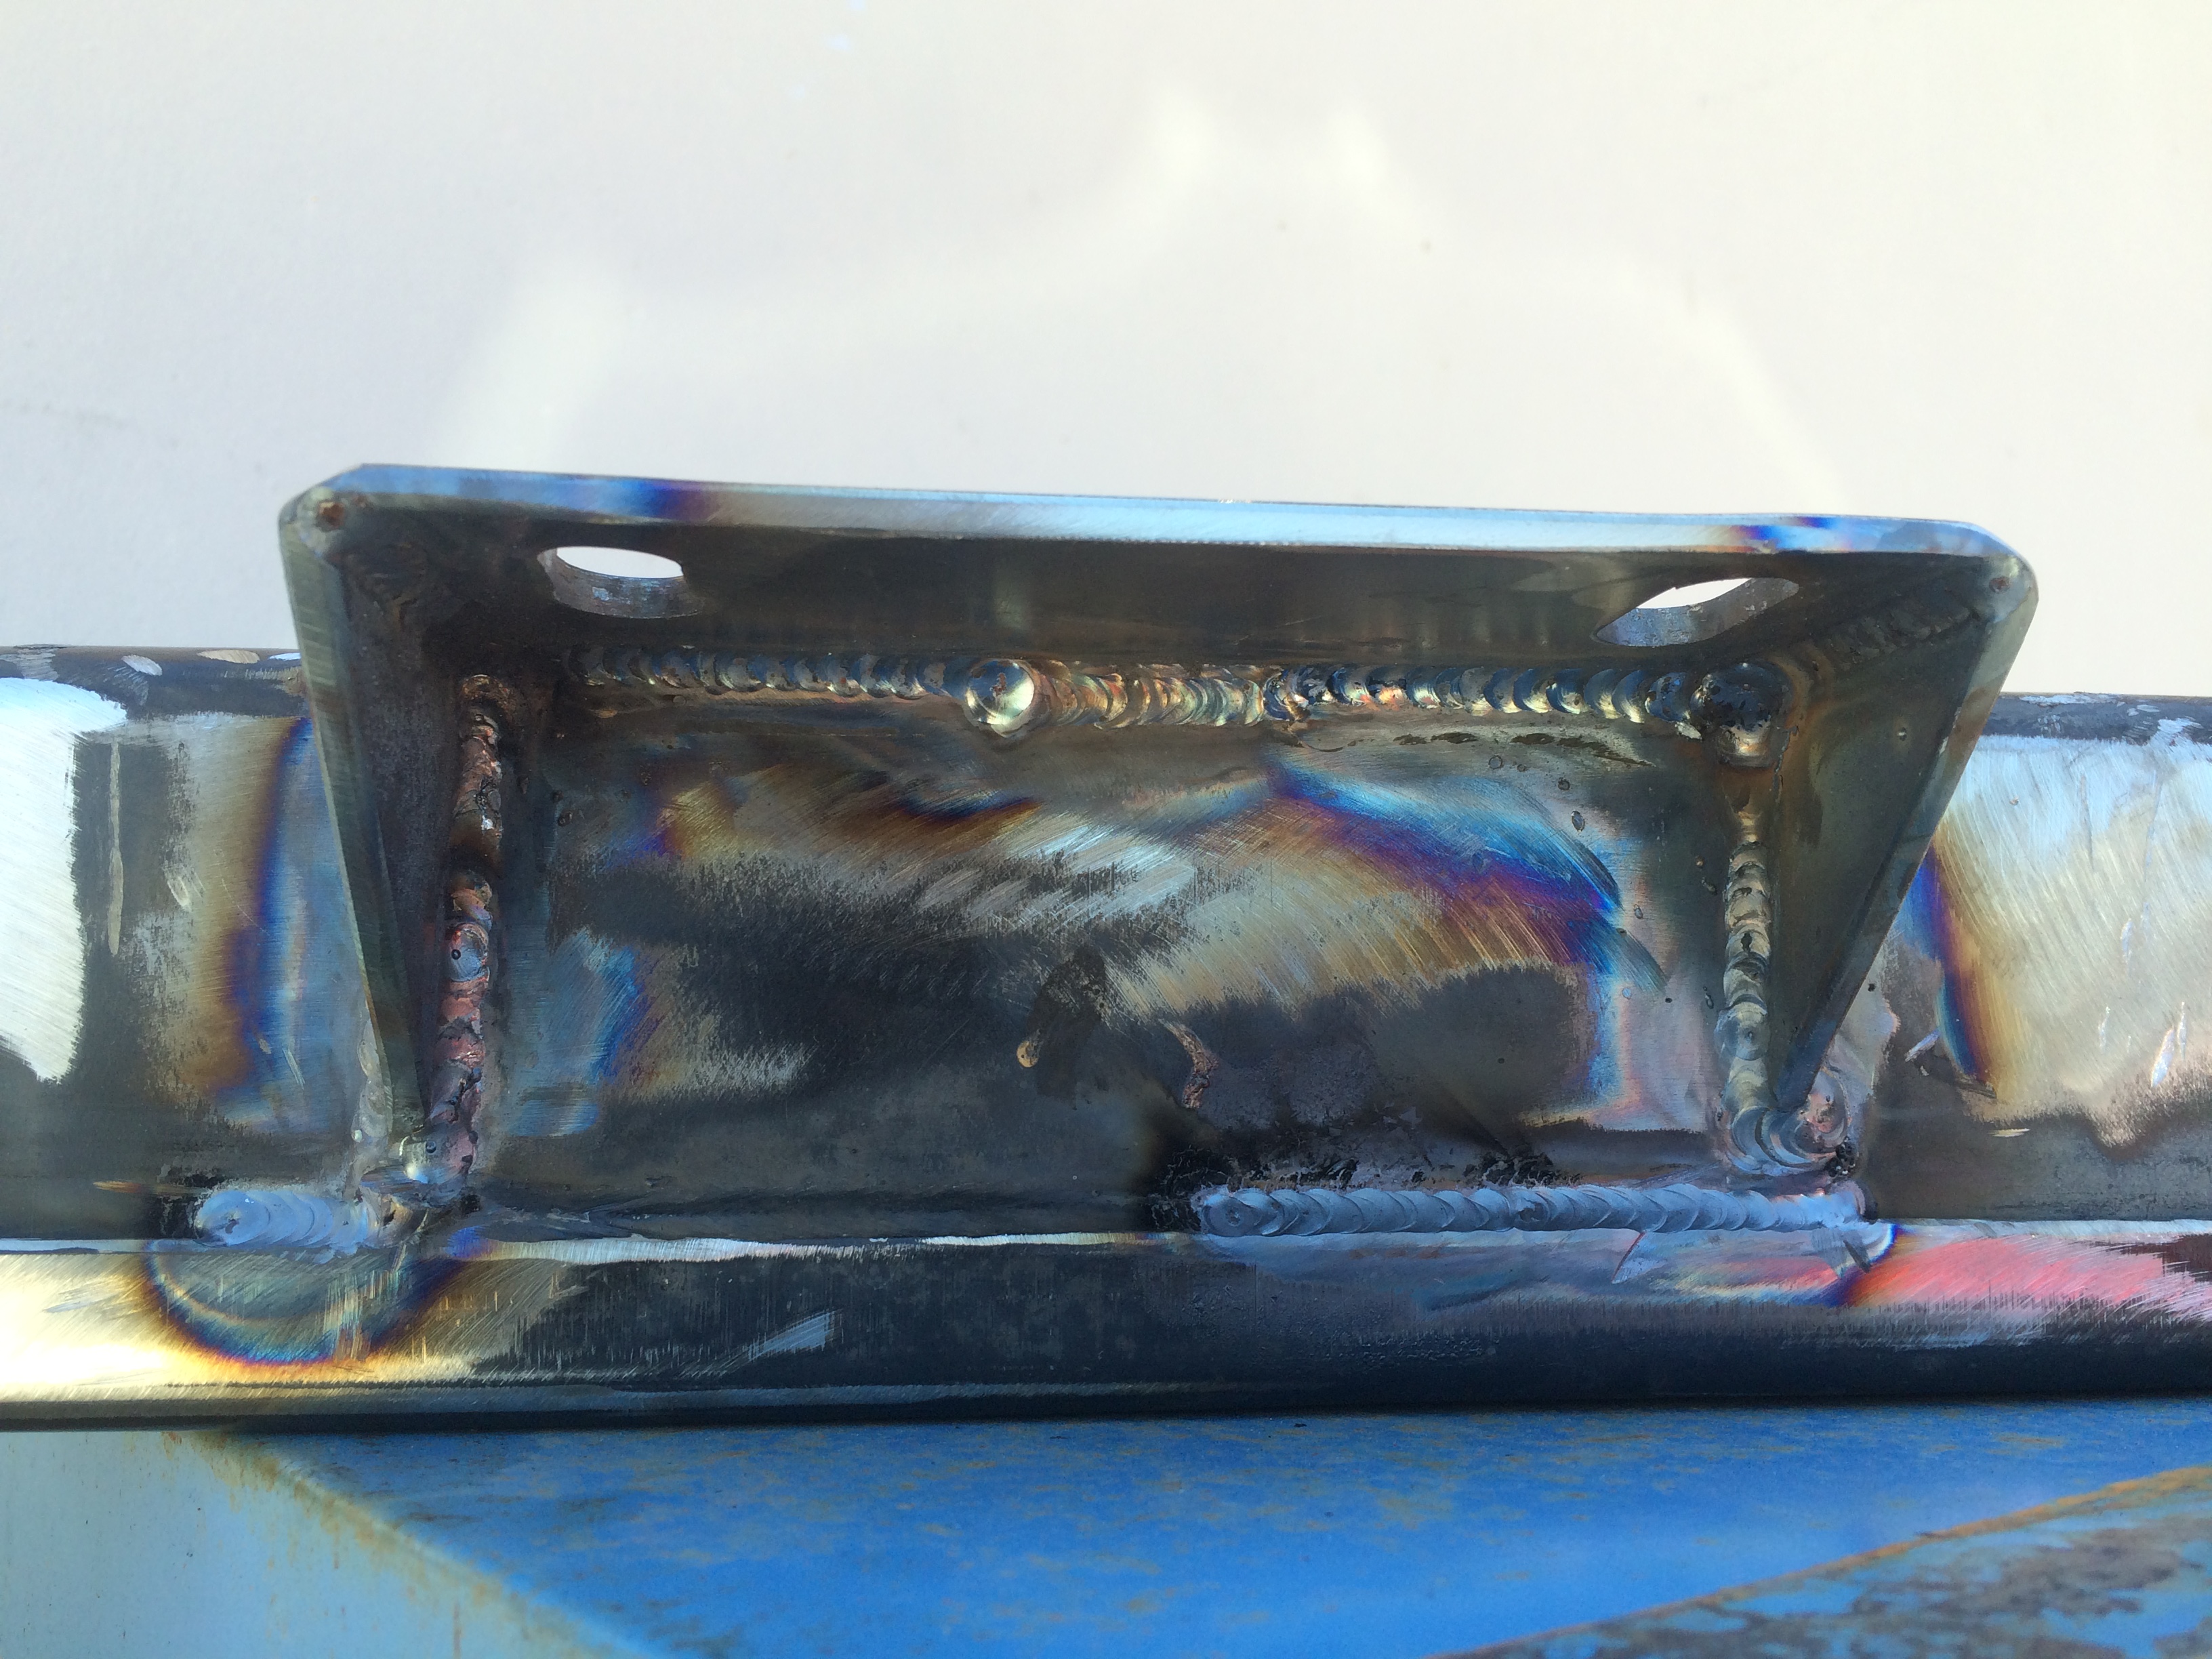
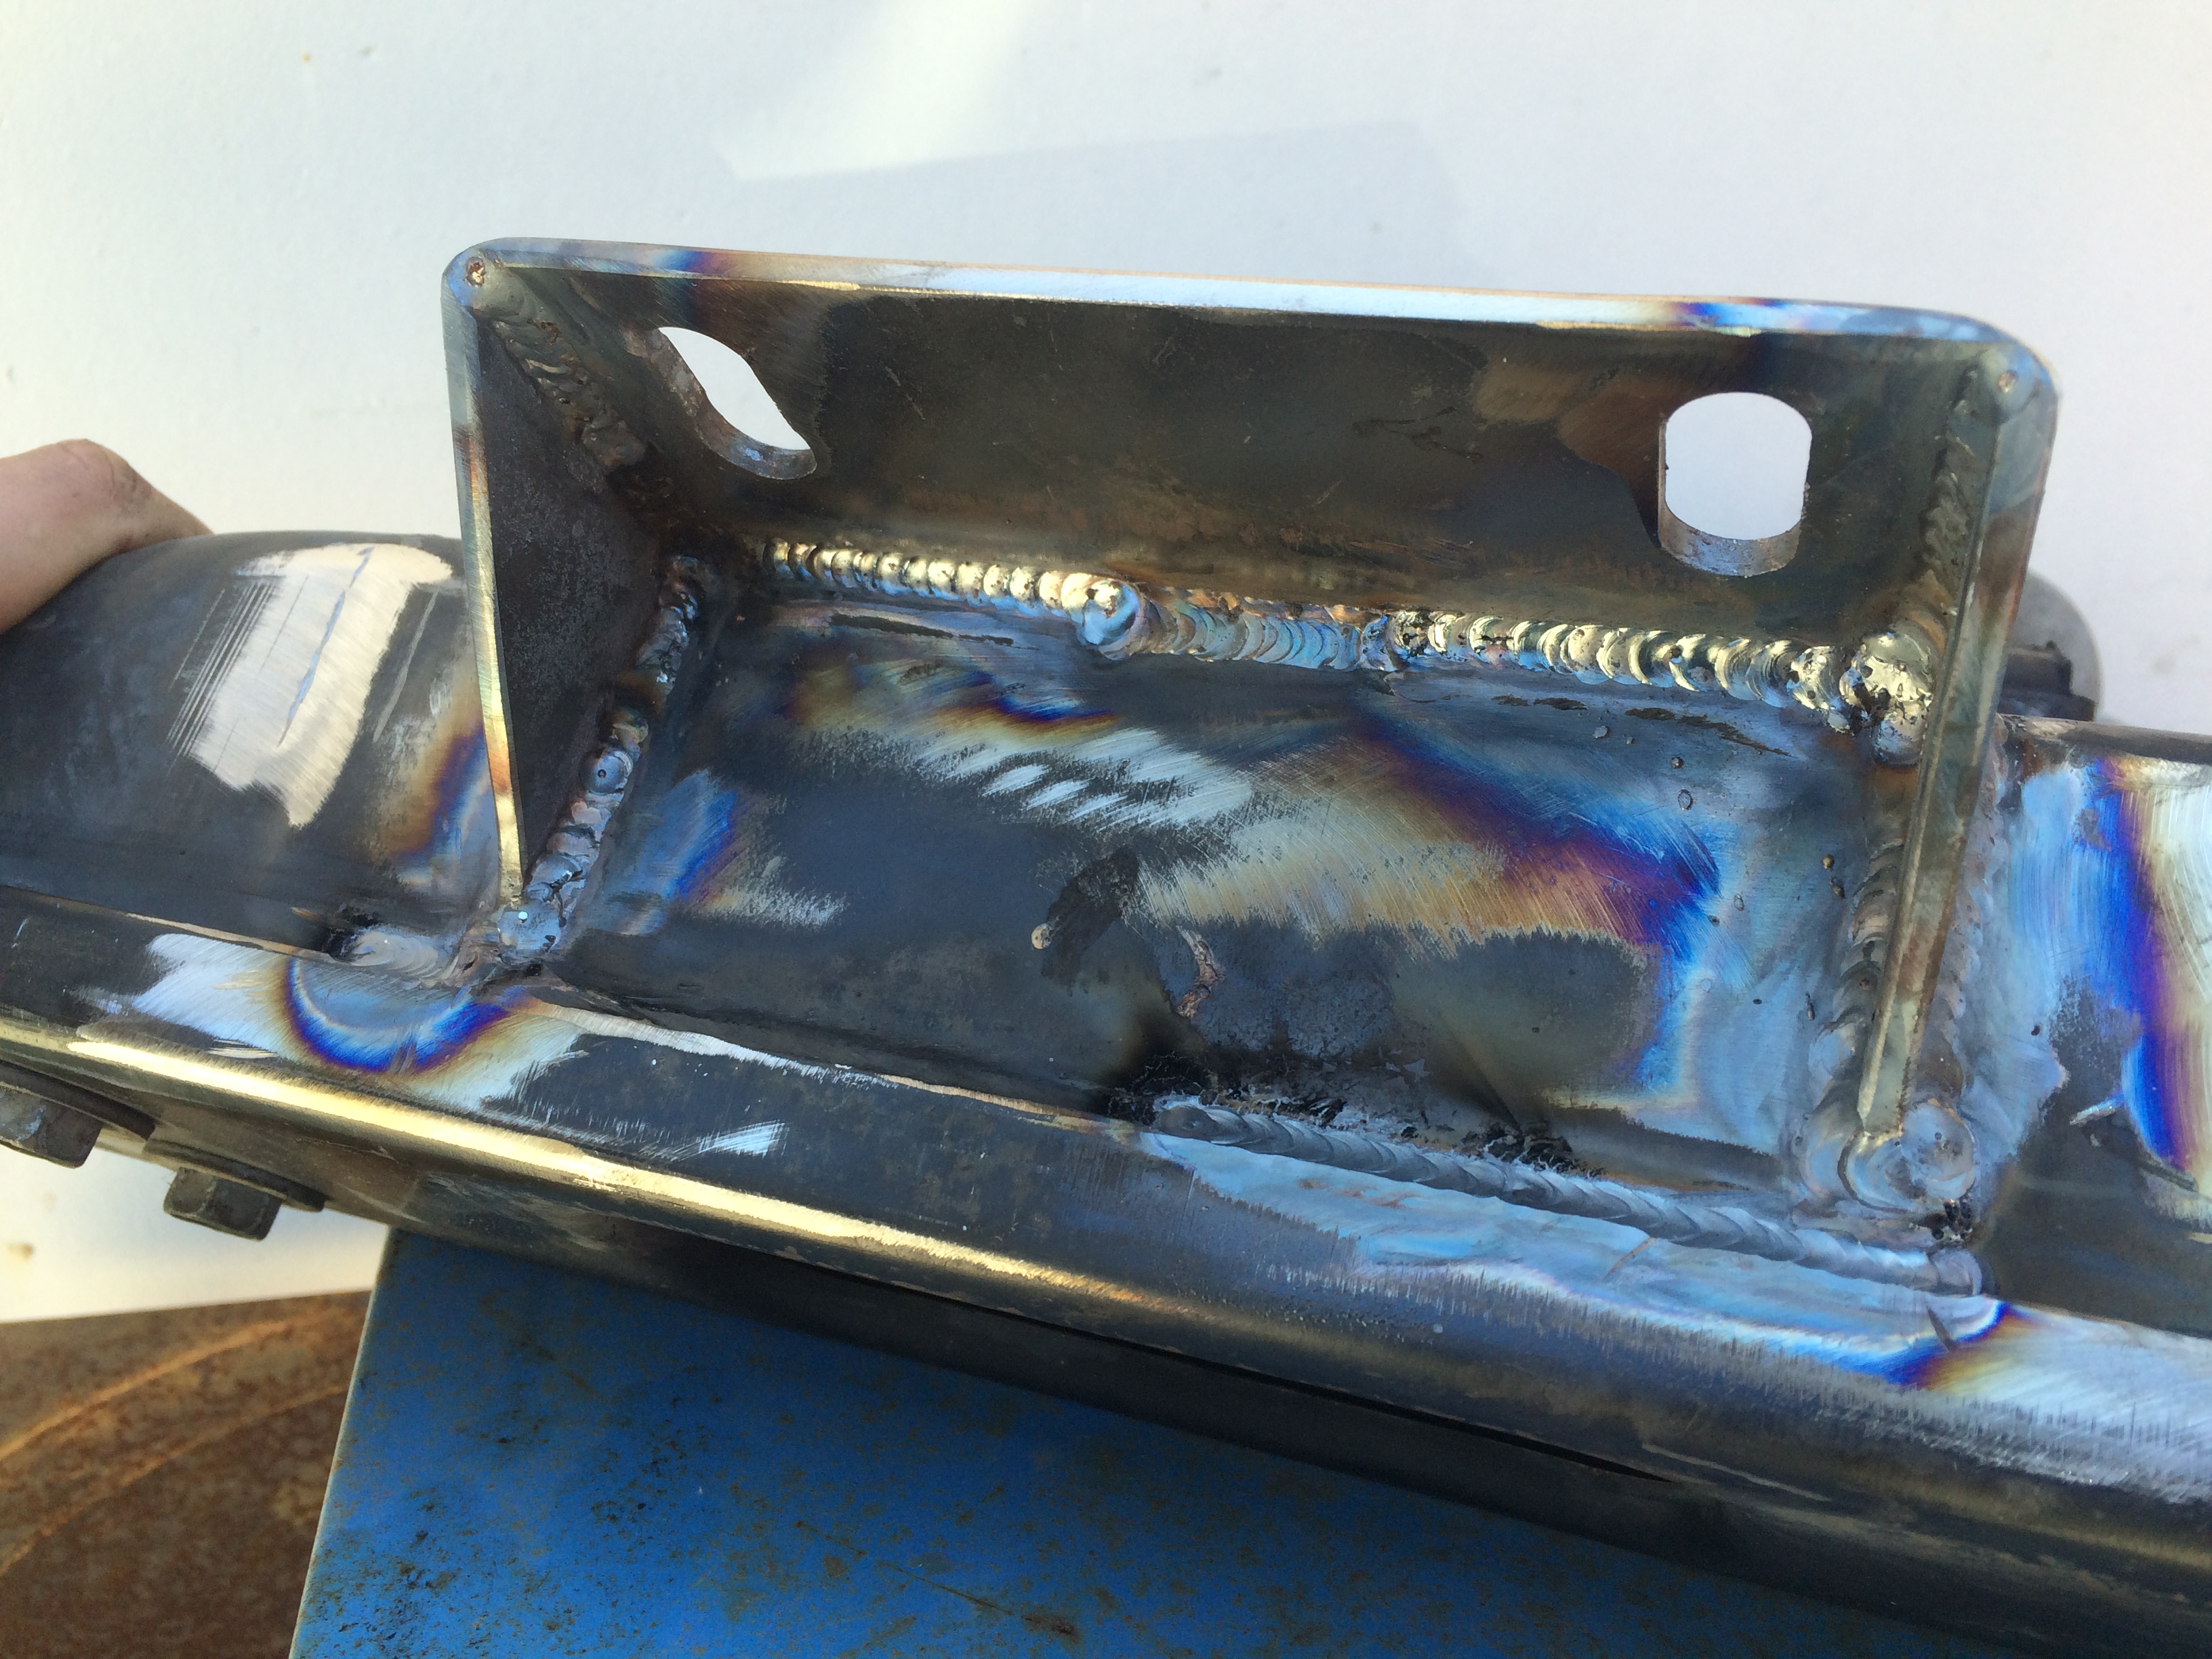
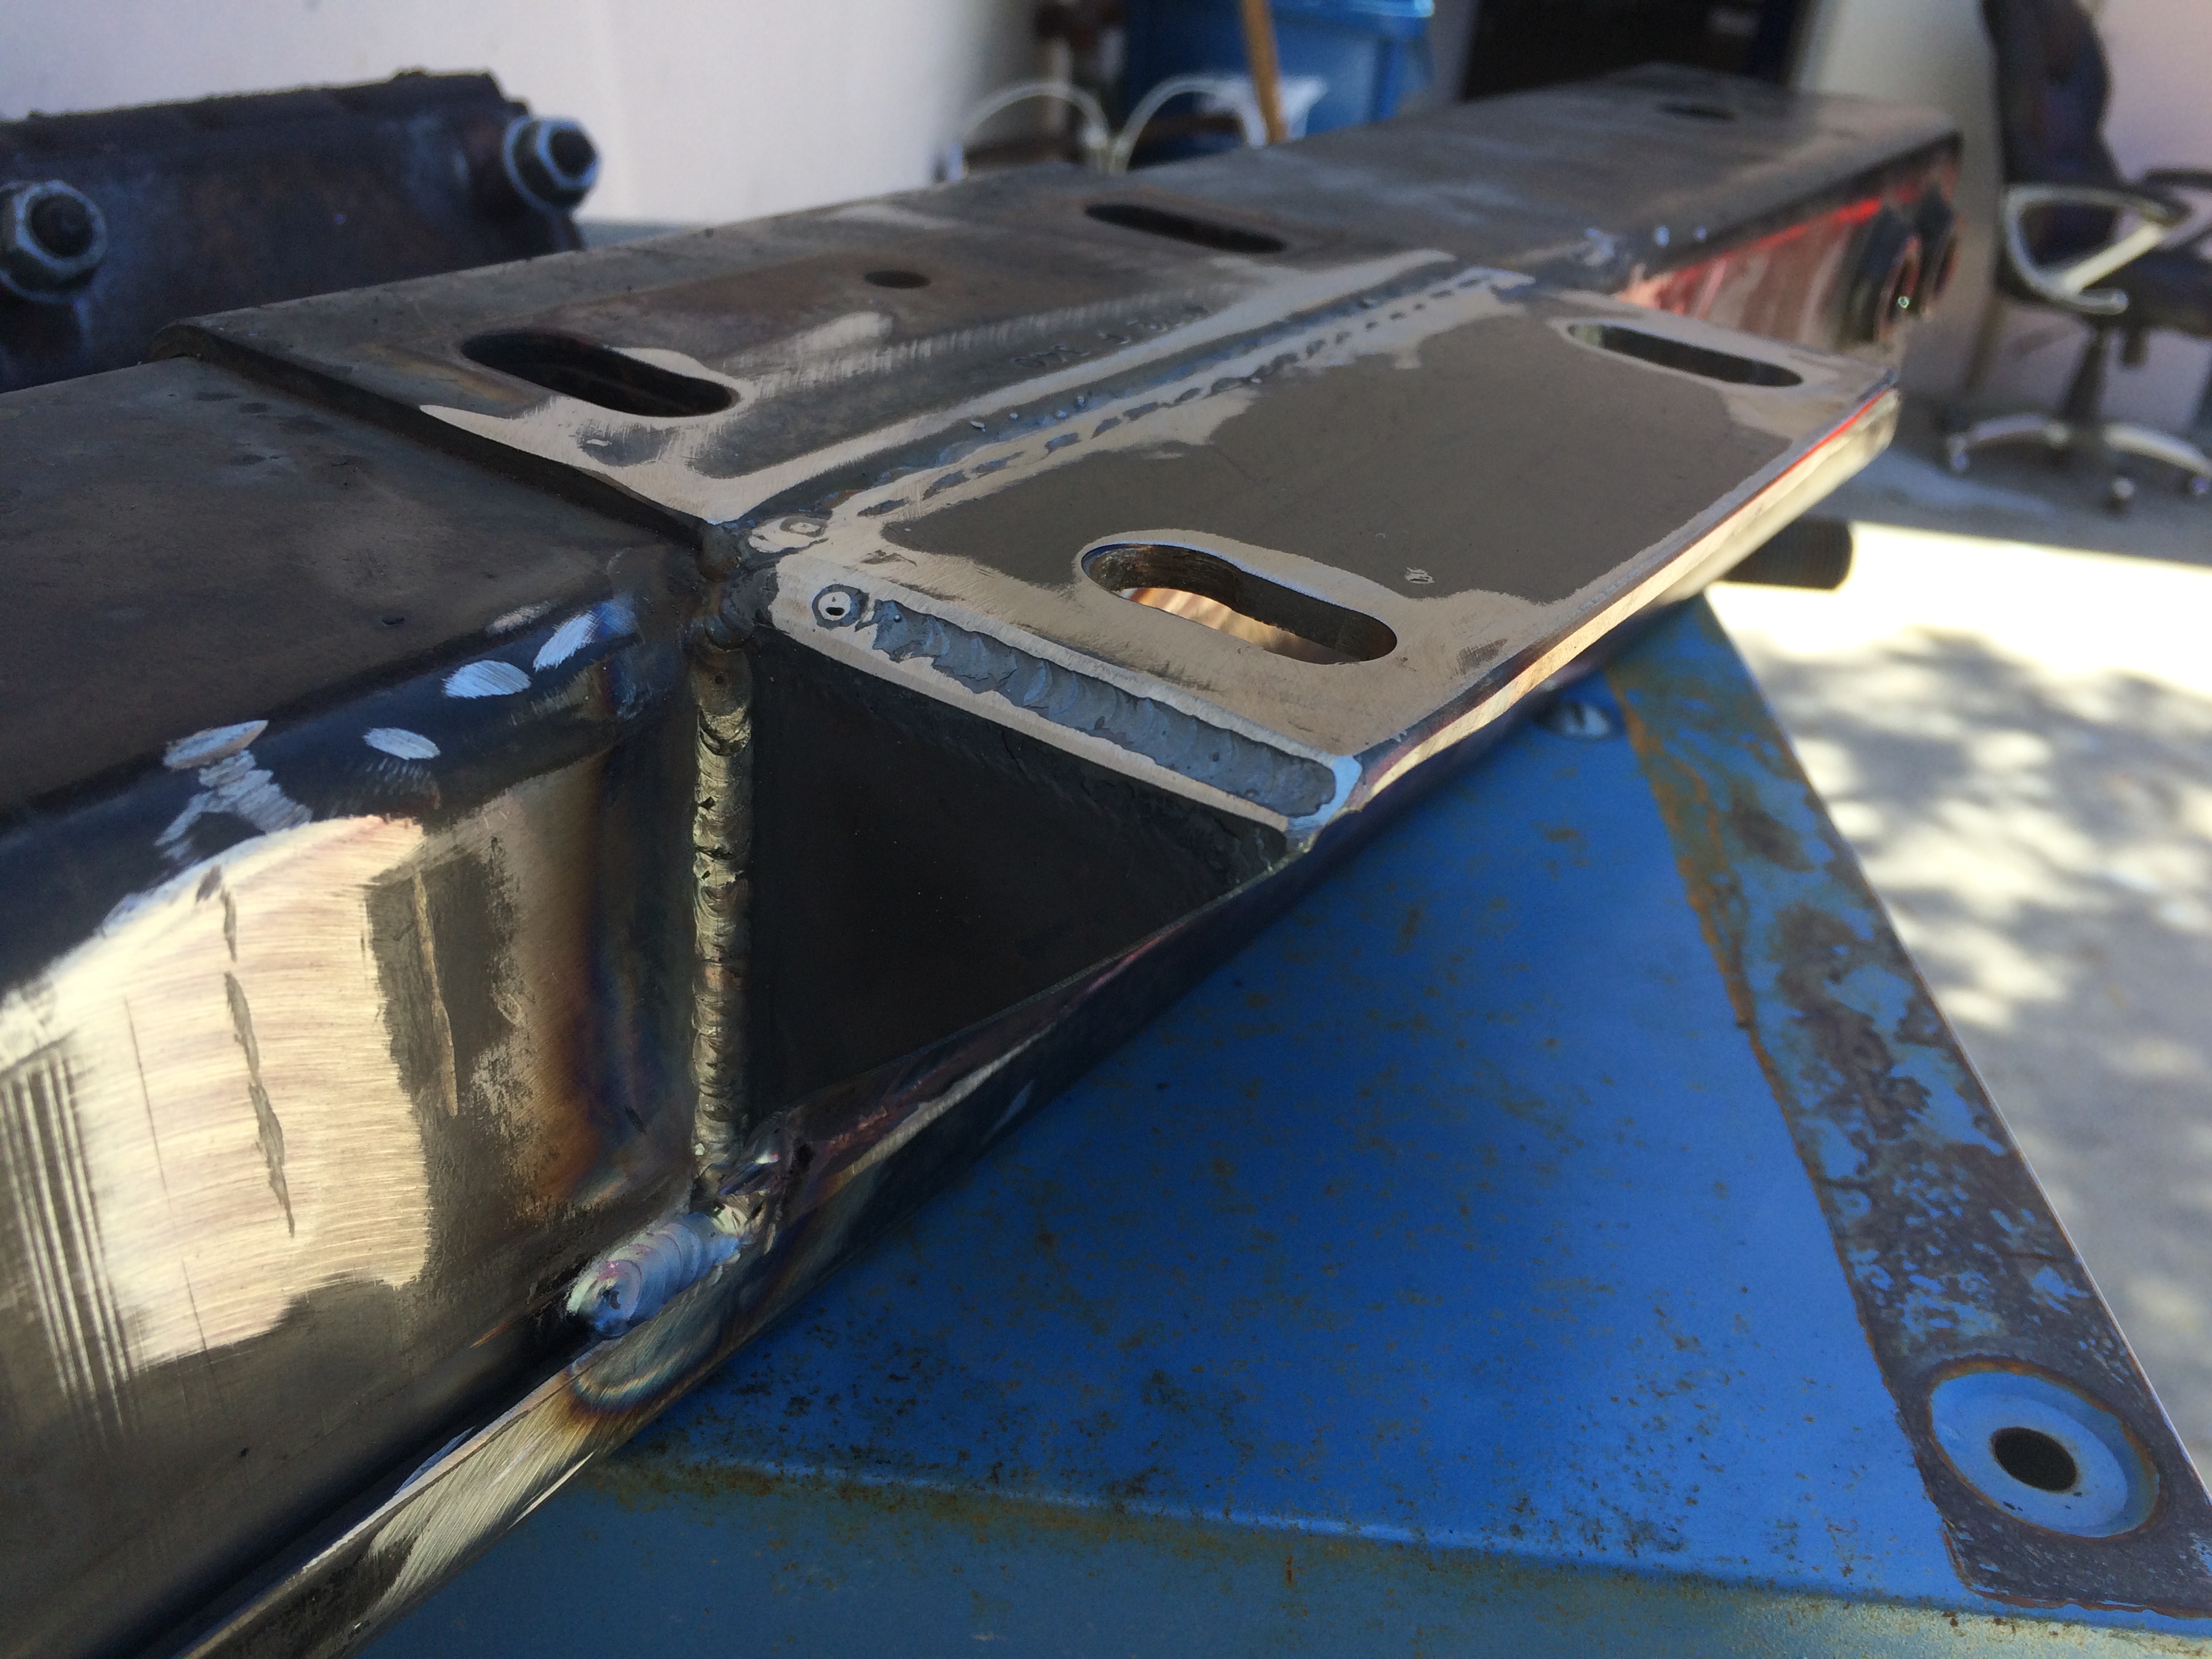
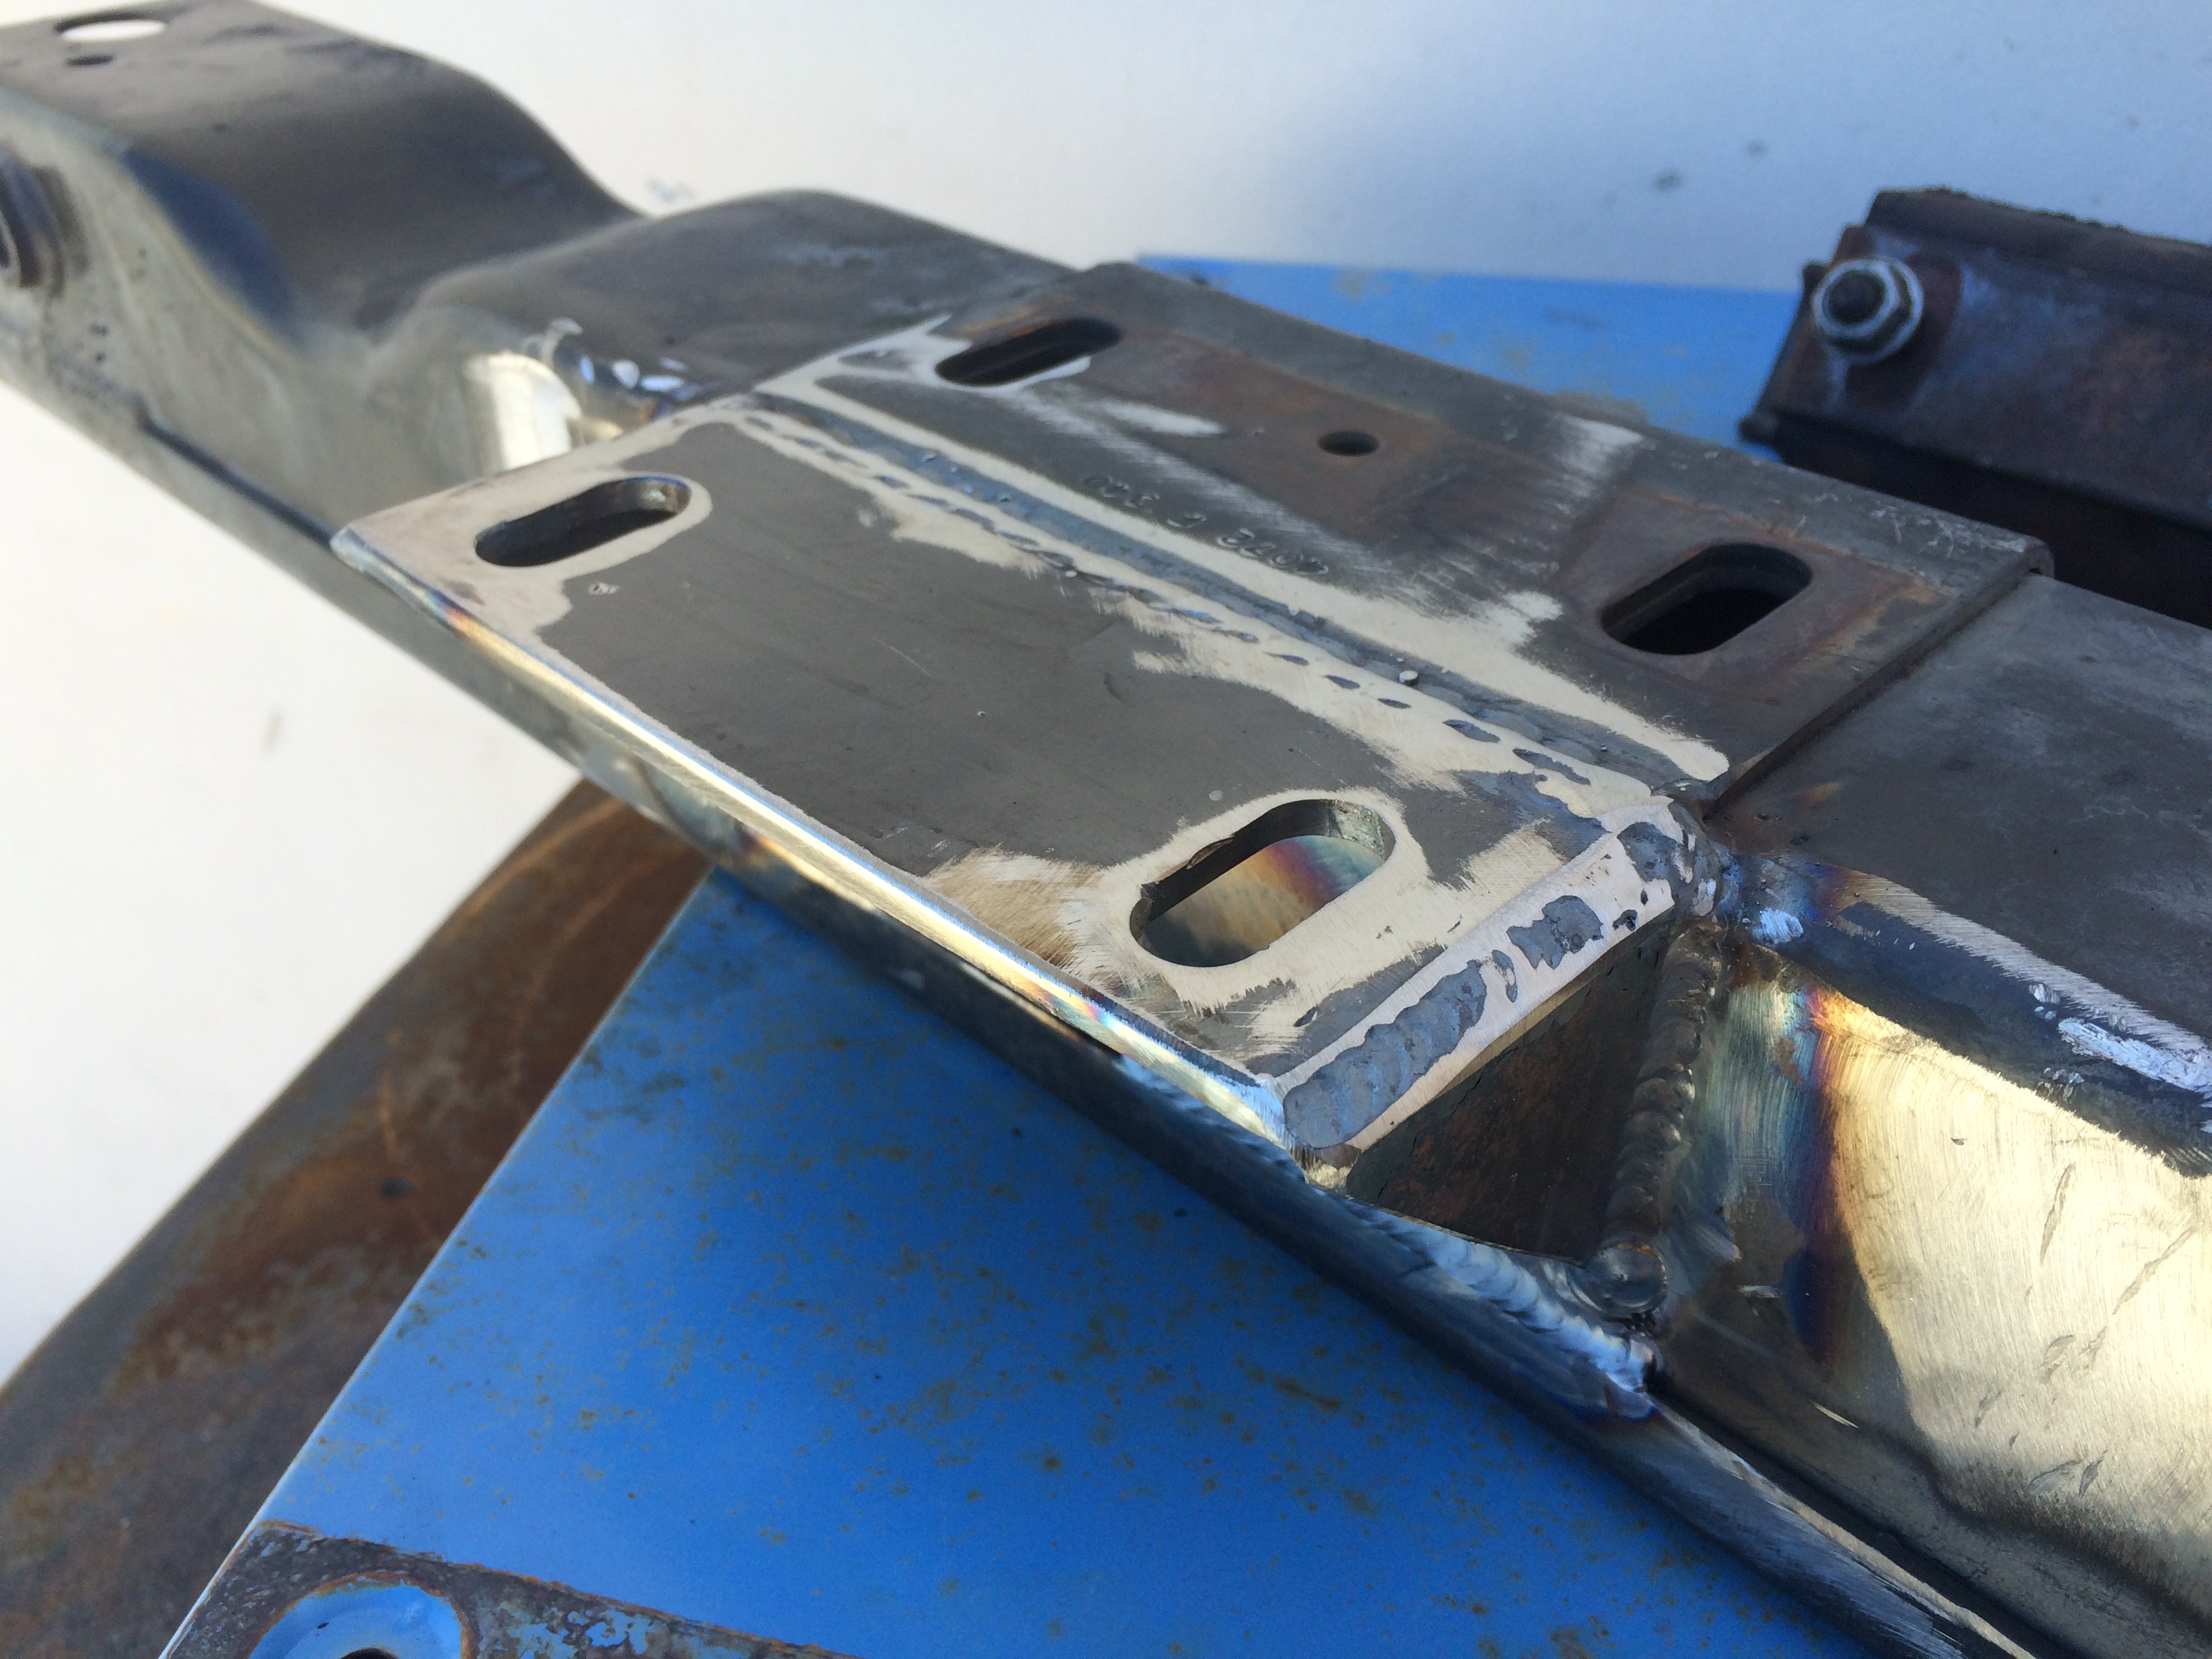
A few of the crossmember before and after paint. For those who are doing this in the future, you will want the width of the plate extending no more than 2 1/4" past the main part of the crossmember otherwise it will come in contact with the transfer case. Here is my first attempt:
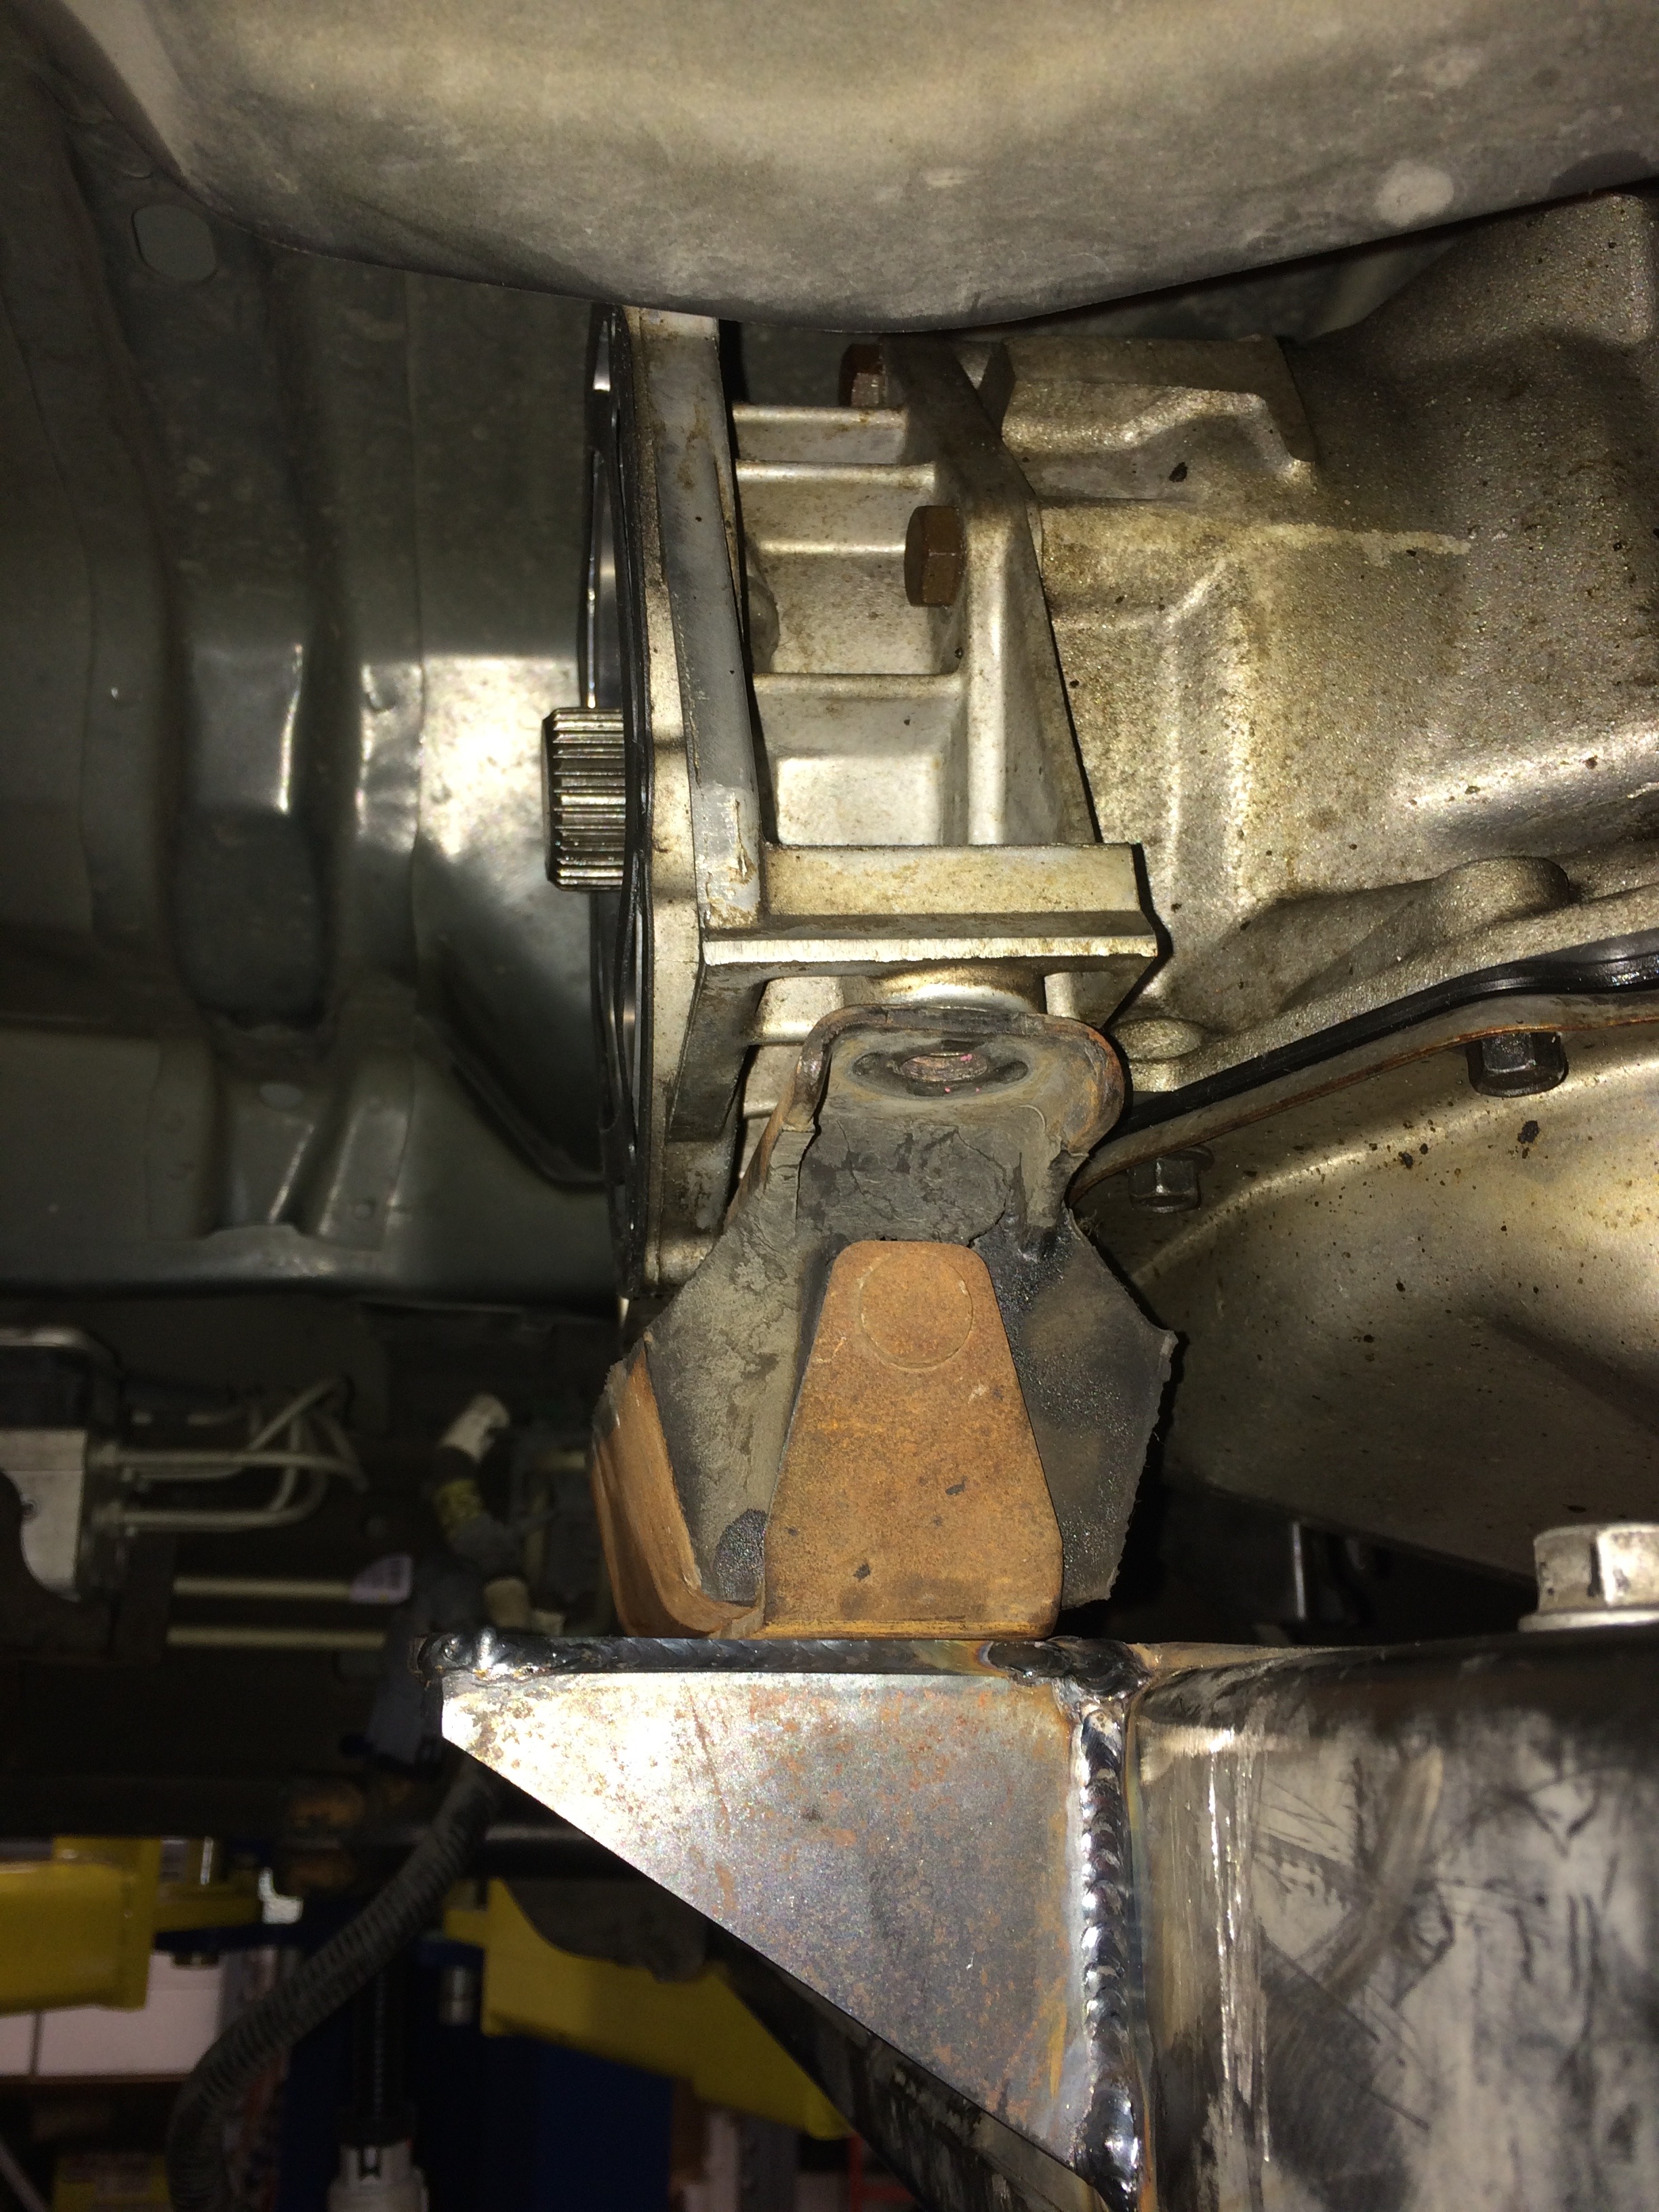
And here it is after I remade it:
The driveshafts after having the rear shortened 1 11/16" and the front lengthened 1 11/16" (front driveshaft got a new tube). They were also high speed balanced and new Spicer u-joints. The u-joints were actually fine even after 140,000 miles but I figured what the hell.

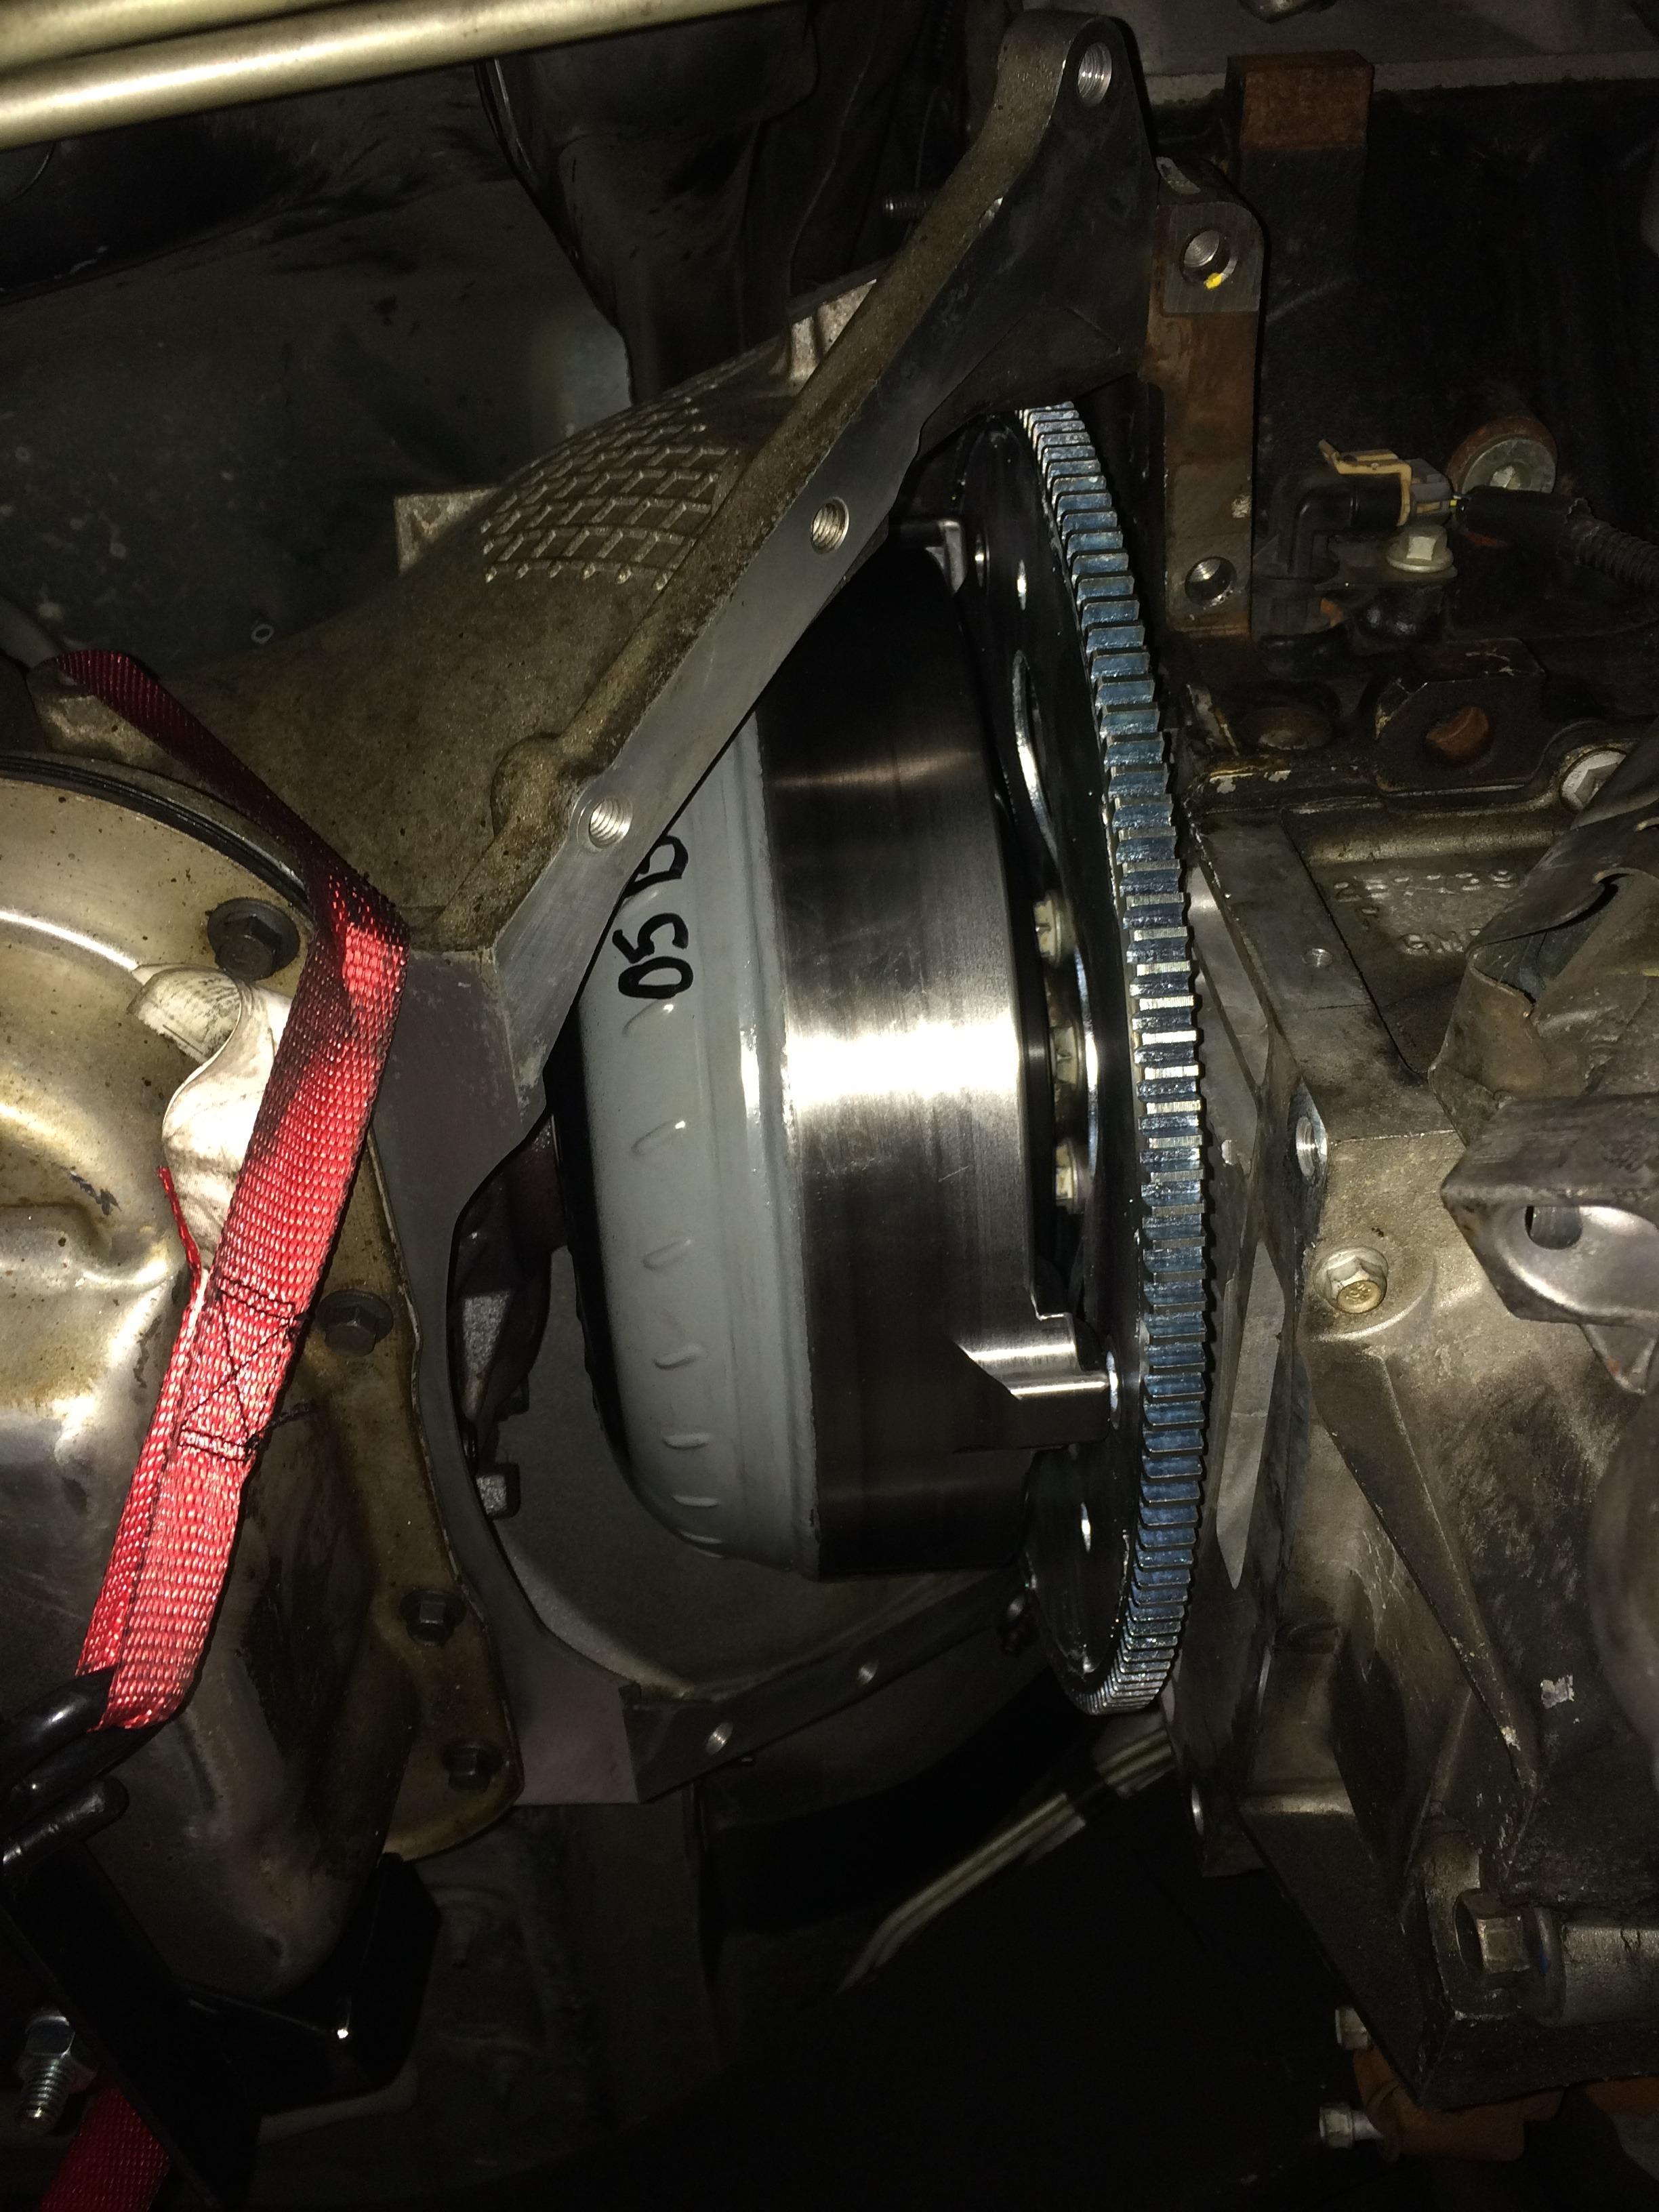
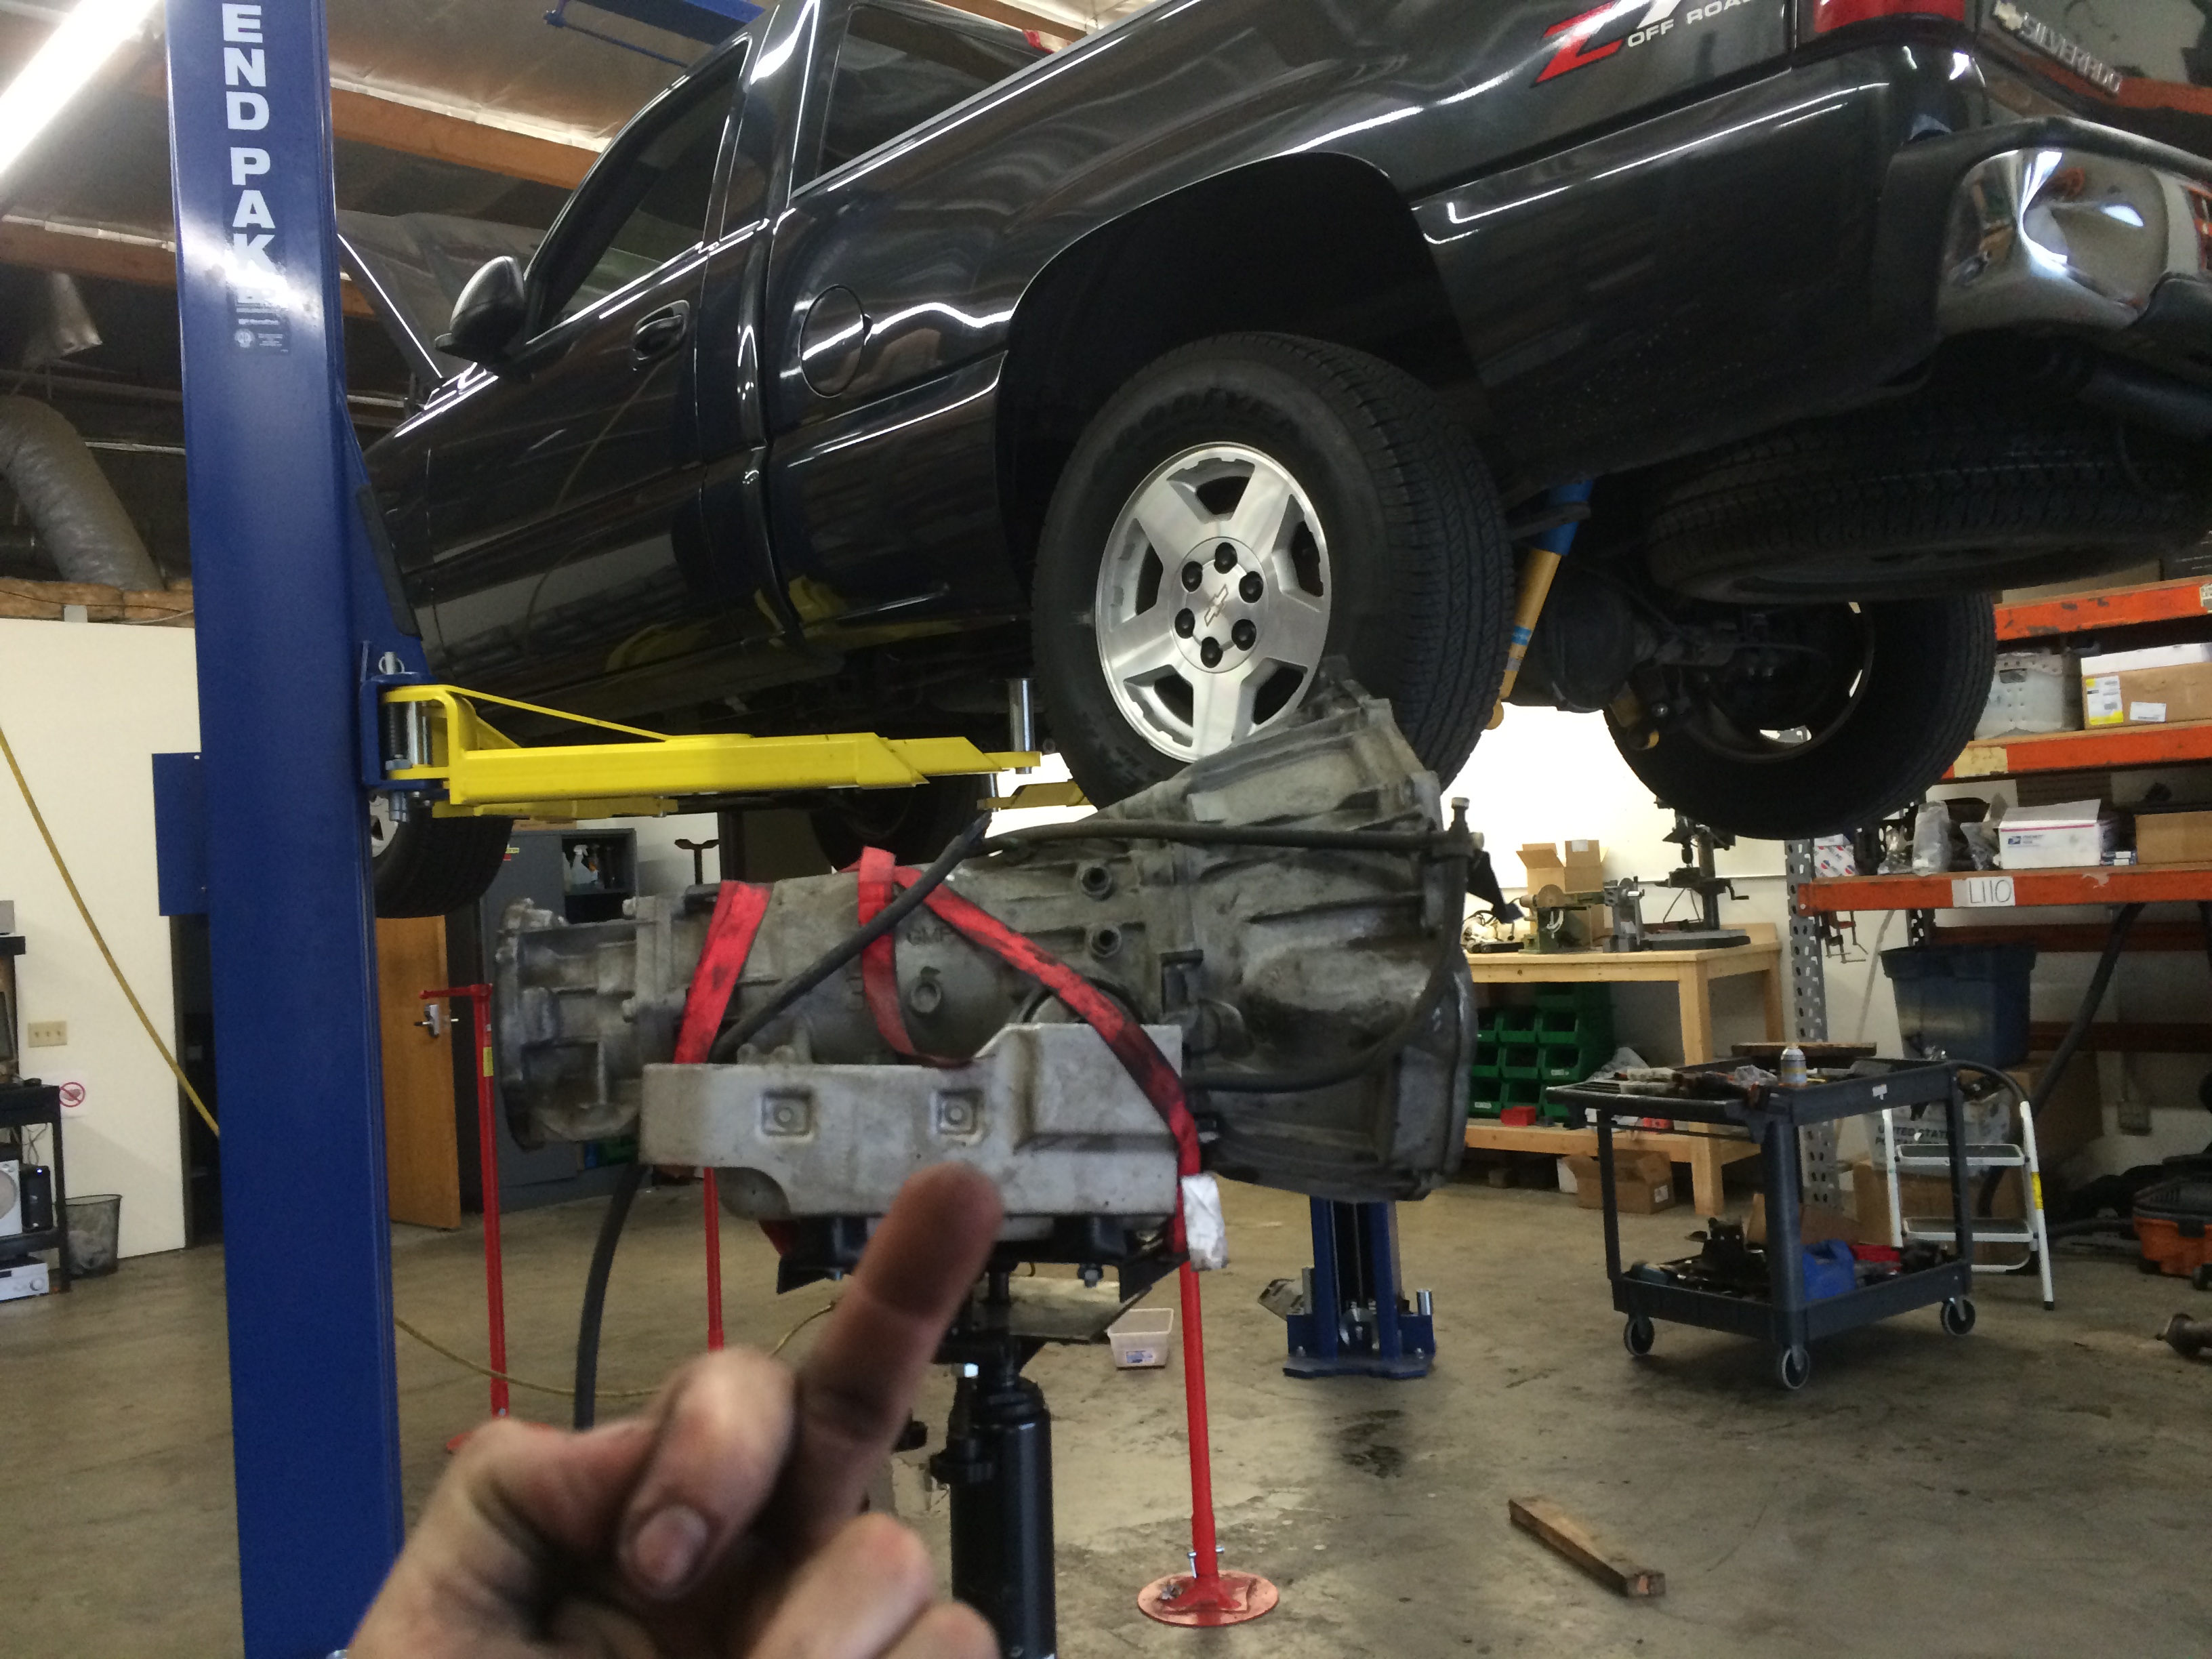
Call me cautious, but I used a piece of flat bar to hold the converter in place when wheeling the trans under the truck... nothing would ruin my day more than to have my $1000 converter bouncing around on the shop floor
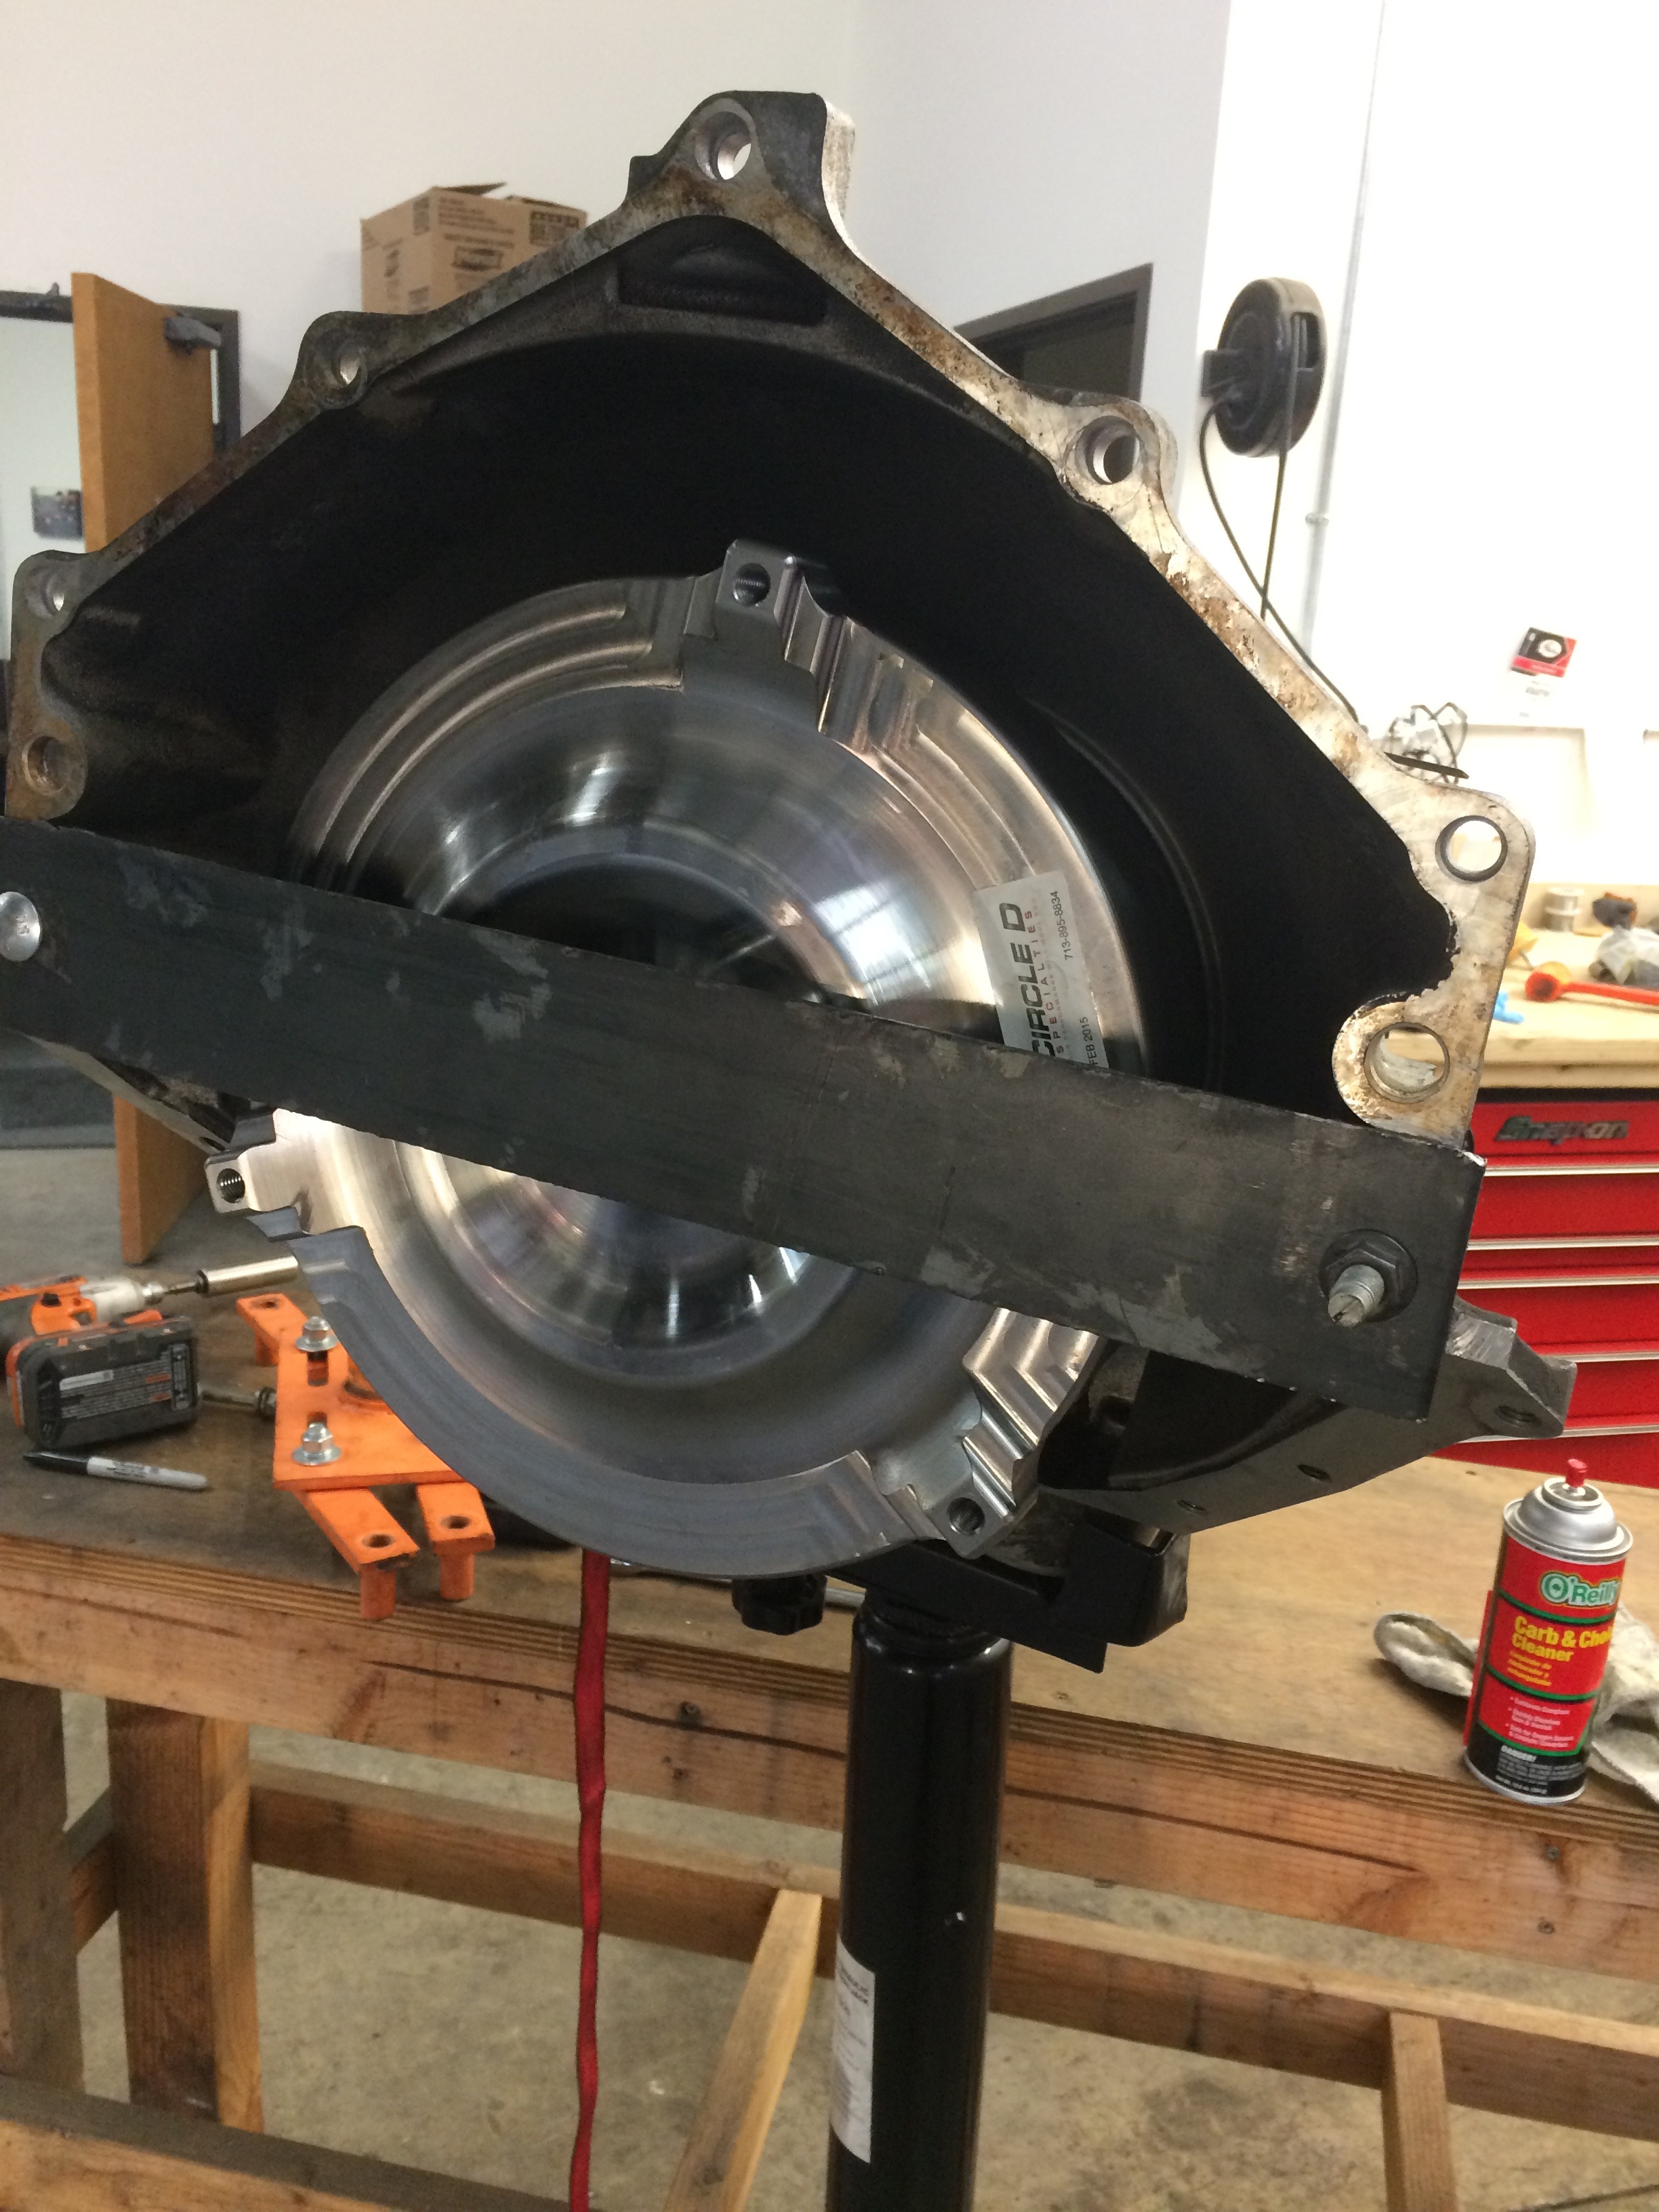
Circle D flexplate and converter. FYI I did not have to use any of the washers that Circle D shipped, I had perfect 1/8" converter spacing between the flexplate and converter mounting pads.
Anyhow, a few pics:
The beautiful Circle D converter on the bench getting some fluid before install:
Here is the craiglist 80e mounted on the engine stand about to get the Transgo HD2 installed. Having a drip pan underneath the trans is a good idea...
The shift kit isn't too bad of a job. No special tools needed other than a hand drill, a few picks to reach into places, and basic sockets. An electric impact driver is very useful indeed for making the job go quickly. Here is the valve body exposed with the filter removed:
I did decide to follow Jake's advice ... I drilled 2nd to .125", 3rd was not drilled but check ball removed, and 4th .125" and I used only the small blue spring for the accumulator valve. The stall converter softens up all the shifts, so I went full firm when given the choice during the kit install.
Luckily the valve body gaskets came off completely clean, I've heard of some guys having to scrap them off...
A few of the crossmember before and after paint. For those who are doing this in the future, you will want the width of the plate extending no more than 2 1/4" past the main part of the crossmember otherwise it will come in contact with the transfer case. Here is my first attempt:
And here it is after I remade it:
The driveshafts after having the rear shortened 1 11/16" and the front lengthened 1 11/16" (front driveshaft got a new tube). They were also high speed balanced and new Spicer u-joints. The u-joints were actually fine even after 140,000 miles but I figured what the hell.
Call me cautious, but I used a piece of flat bar to hold the converter in place when wheeling the trans under the truck... nothing would ruin my day more than to have my $1000 converter bouncing around on the shop floor
Circle D flexplate and converter. FYI I did not have to use any of the washers that Circle D shipped, I had perfect 1/8" converter spacing between the flexplate and converter mounting pads.
06-19-2015, 04:48 PM
#23
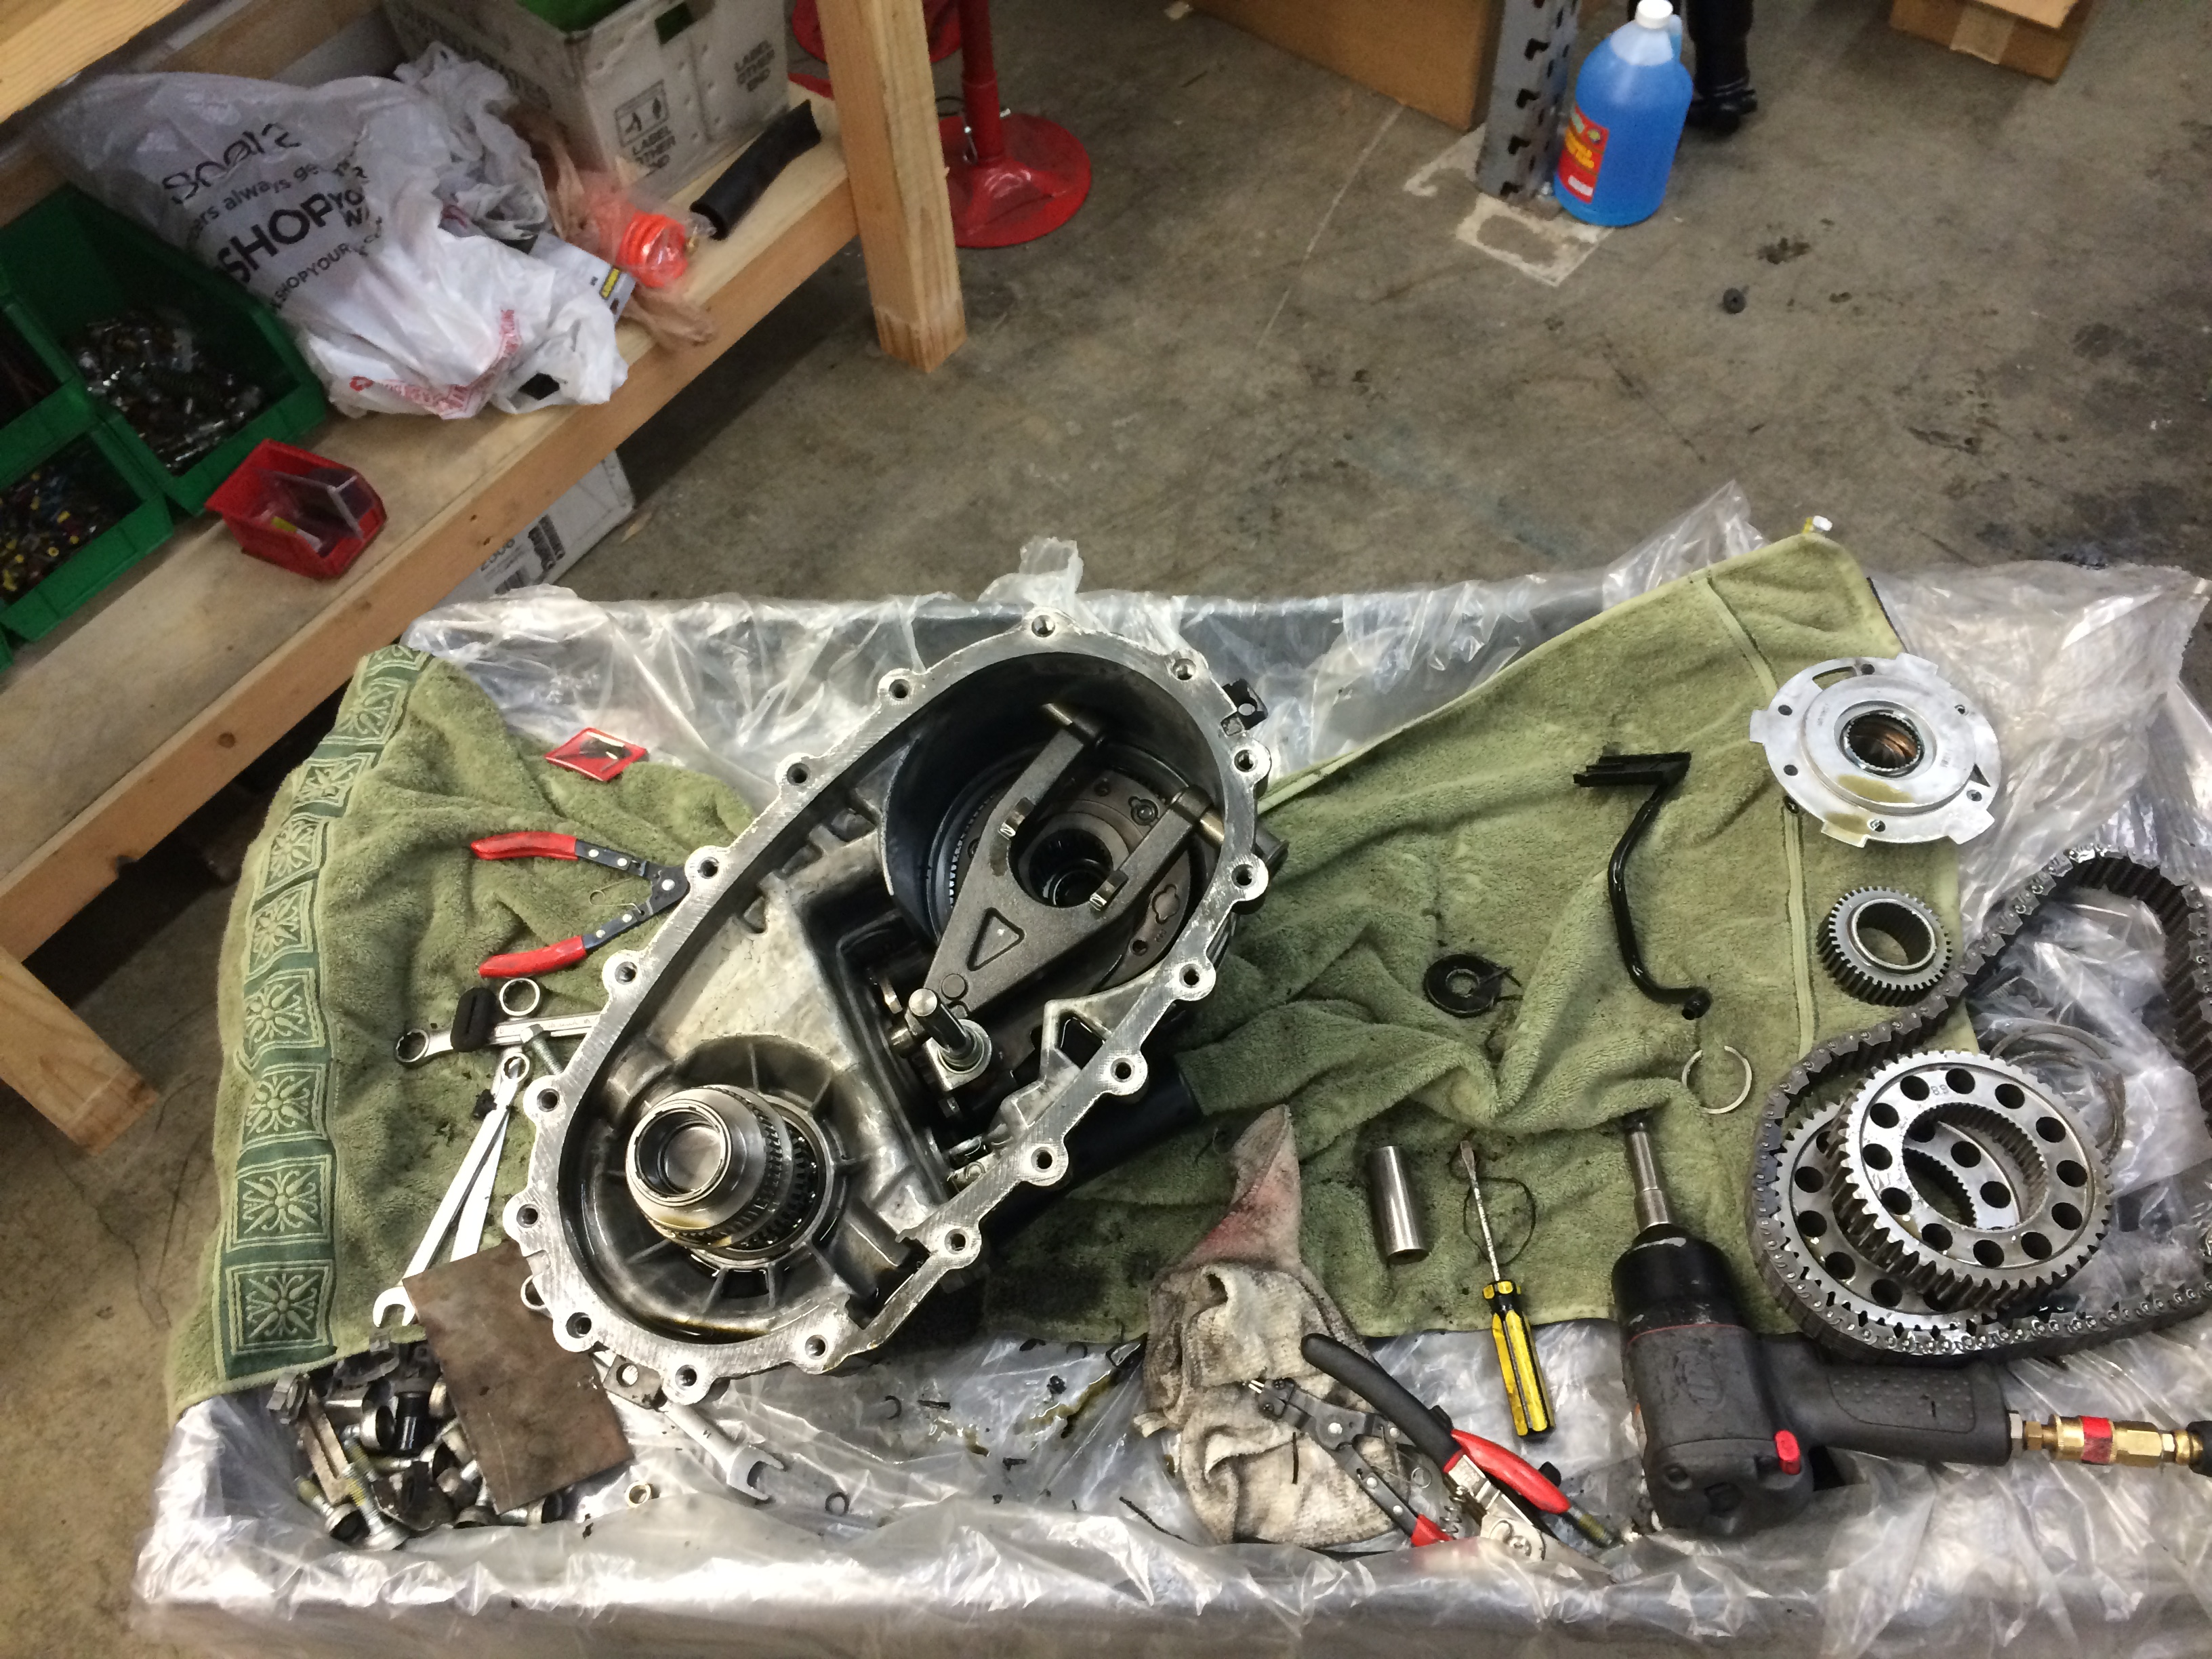
Now on to the transfer case input shaft swap...I CANNOT recommend Midwest Trans enough for the transfer case input shaft and seal kit. Make sure to let them know you also need the inner bearing for the input shaft otherwise you'll need to press out the old one and install it in the new input shaft. The guy who handles tech support really knows his sh*t and sold me exactly what I needed in addition to the input shaft: new input shaft seal, new grommet for snap ring hole on case, case saver, new tailshaft seal, and new gasket between the trans and transfer case. Initially I actually bought en eBay input shaft but returned it as I didn't like the quality. The midwest trans gear looked way better.
Midwest Trans
The transfer case swap isn't too bad, but please for the love of God get yourself a set of $15 Sears "flagstaff" snap ring pliars. I learned about these from howard quick here on the forum out in Australia. Without these the input shaft swap would have been a pita, with them it wasn't too bad.
Lessons learned for input shaft swap:
1. get proper lock ring pliars Sears.com
2. use silicone on inner input shaft bearing when you press it in, and press bearing 1/8" below bearing surface (a tip from Bud @ Midwest Trans).
3. make sure to have a 12mm allen socket to remove side plugs holding fork into case
4. be aware that the transfer case chain has more slack in it than your average timing chain, slack does not necessarily mean you need a new chain
5. when reinstalling the large shaft/ pump mechanism, make sure to orient the tab in between the fork, otherwise you won't be able to get the case halves seated during reassembly.
6. don't be scared of the input shaft swap, but it is a bit of a pita. You'll need access to a press if the input shaft does not have a new bearing inside it already.
7. torque case bolts in criss cross pattern to 27 ft/lbs
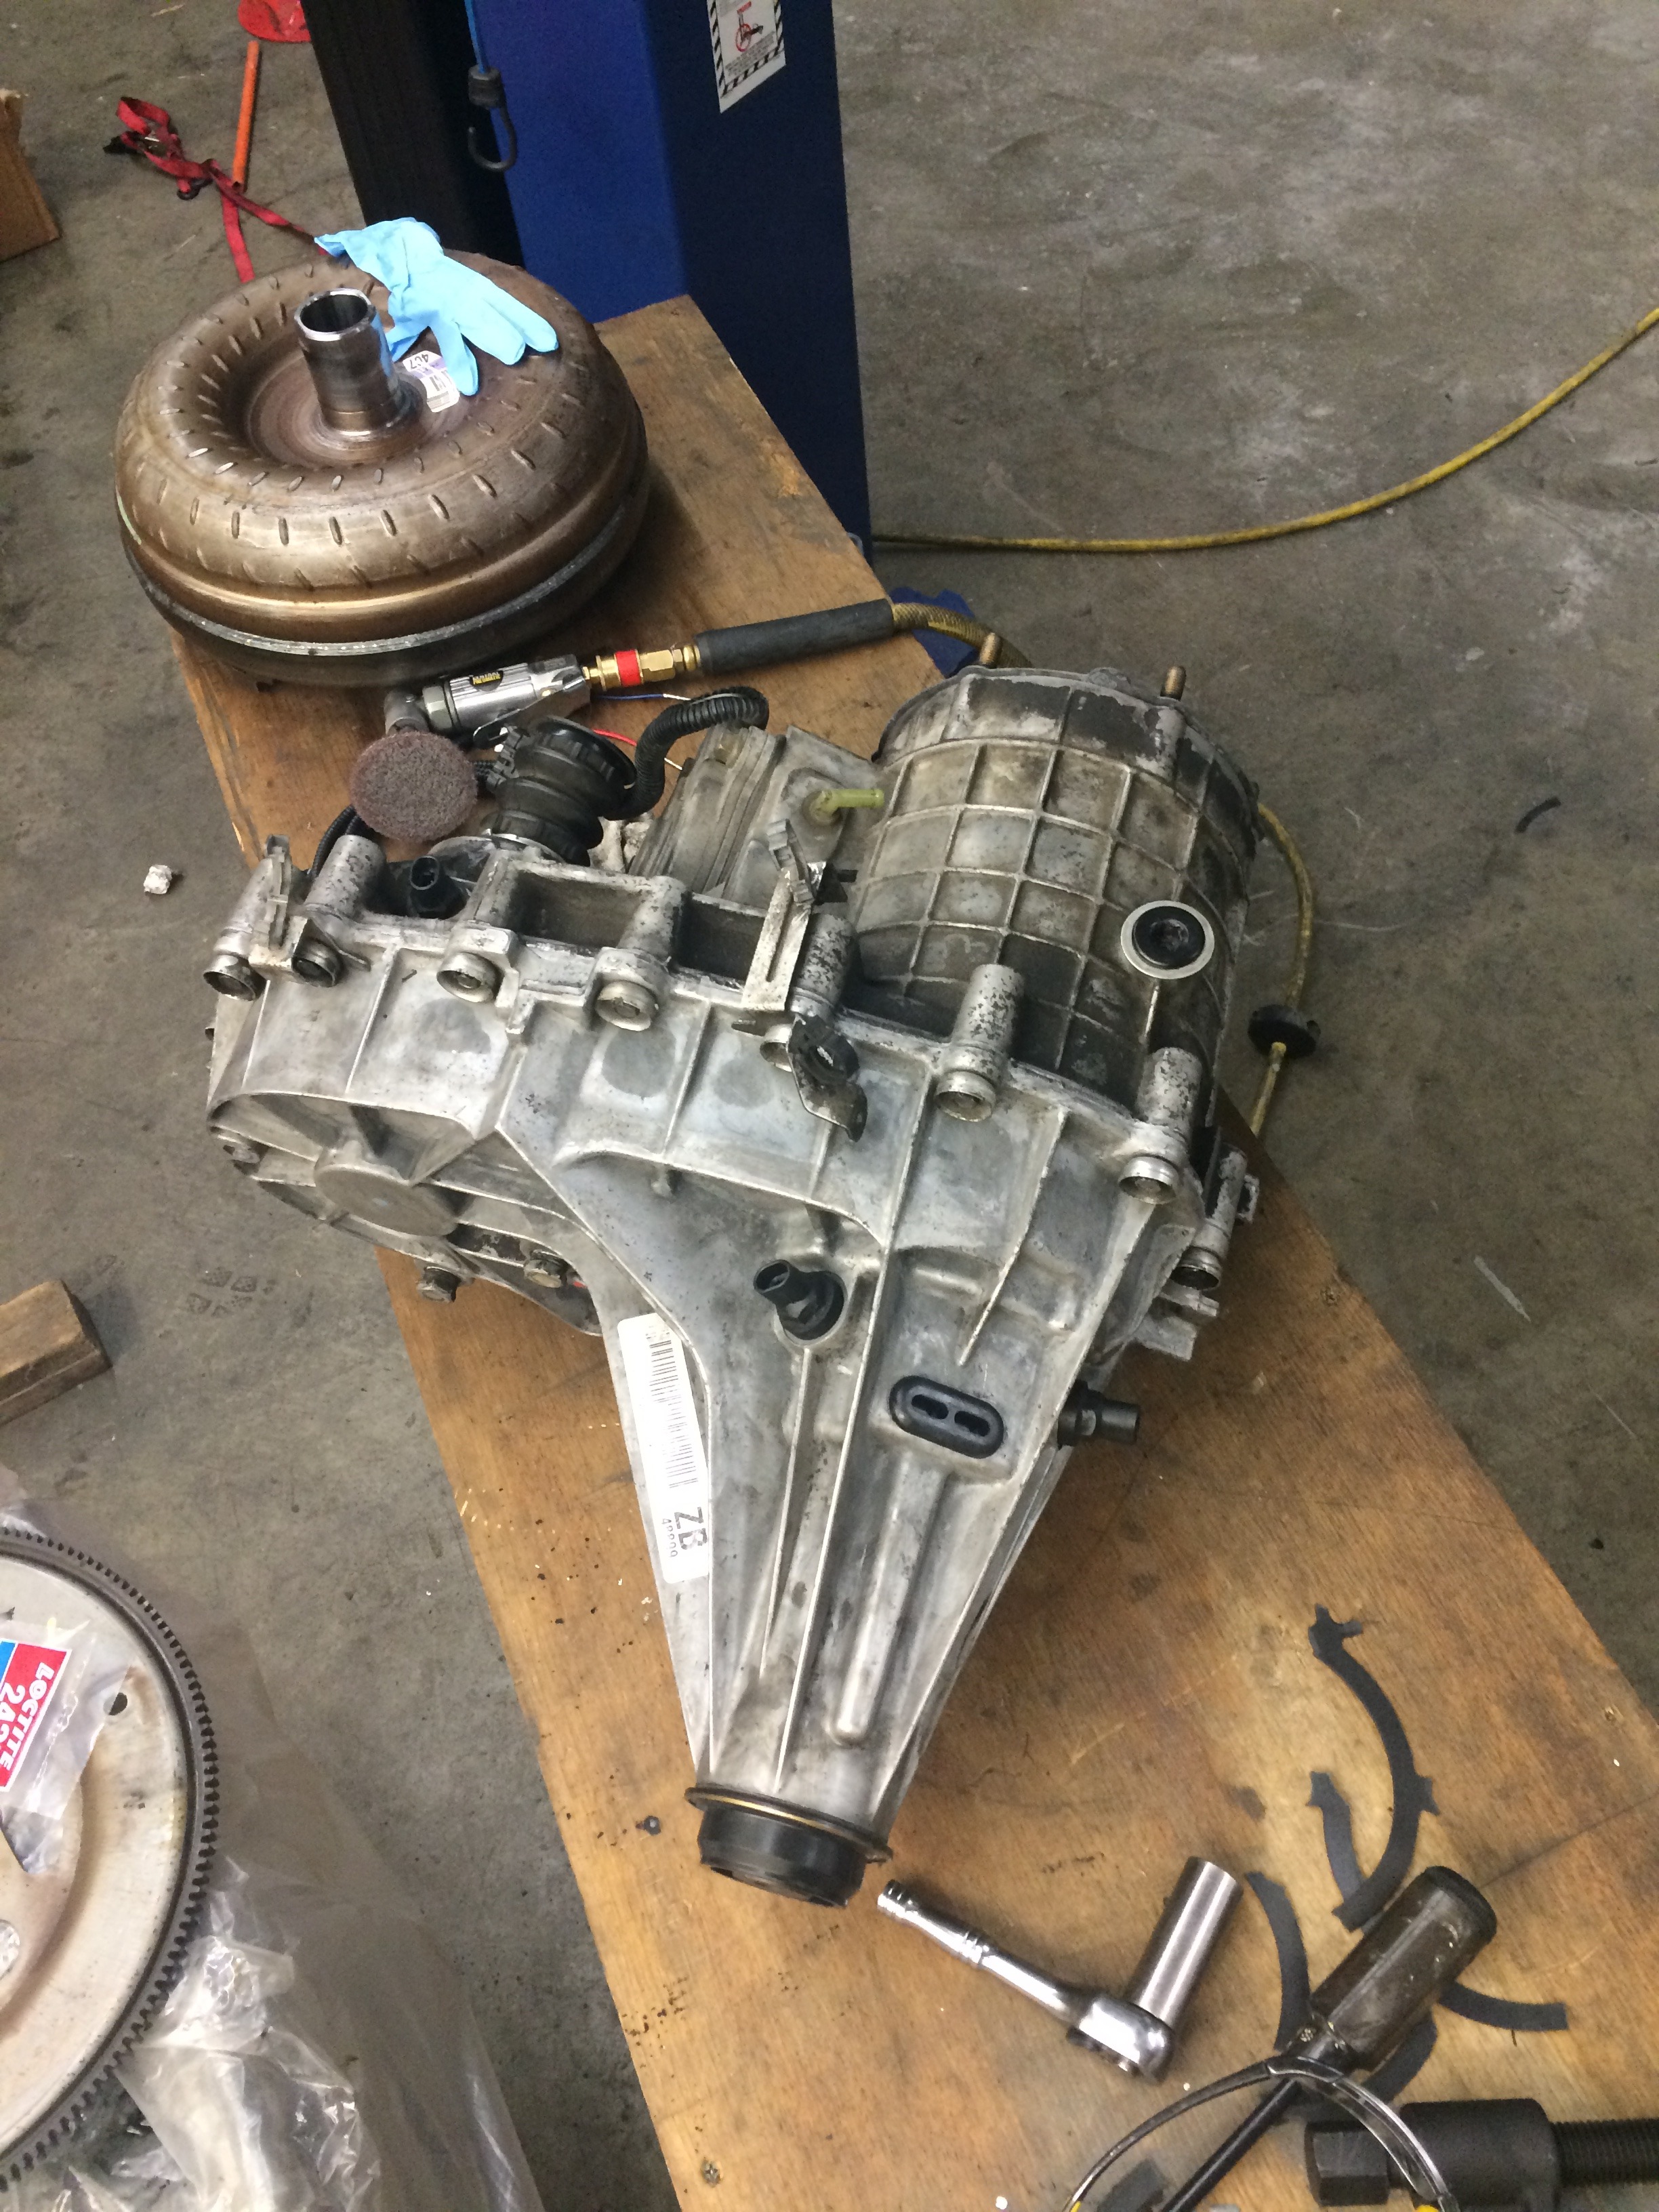
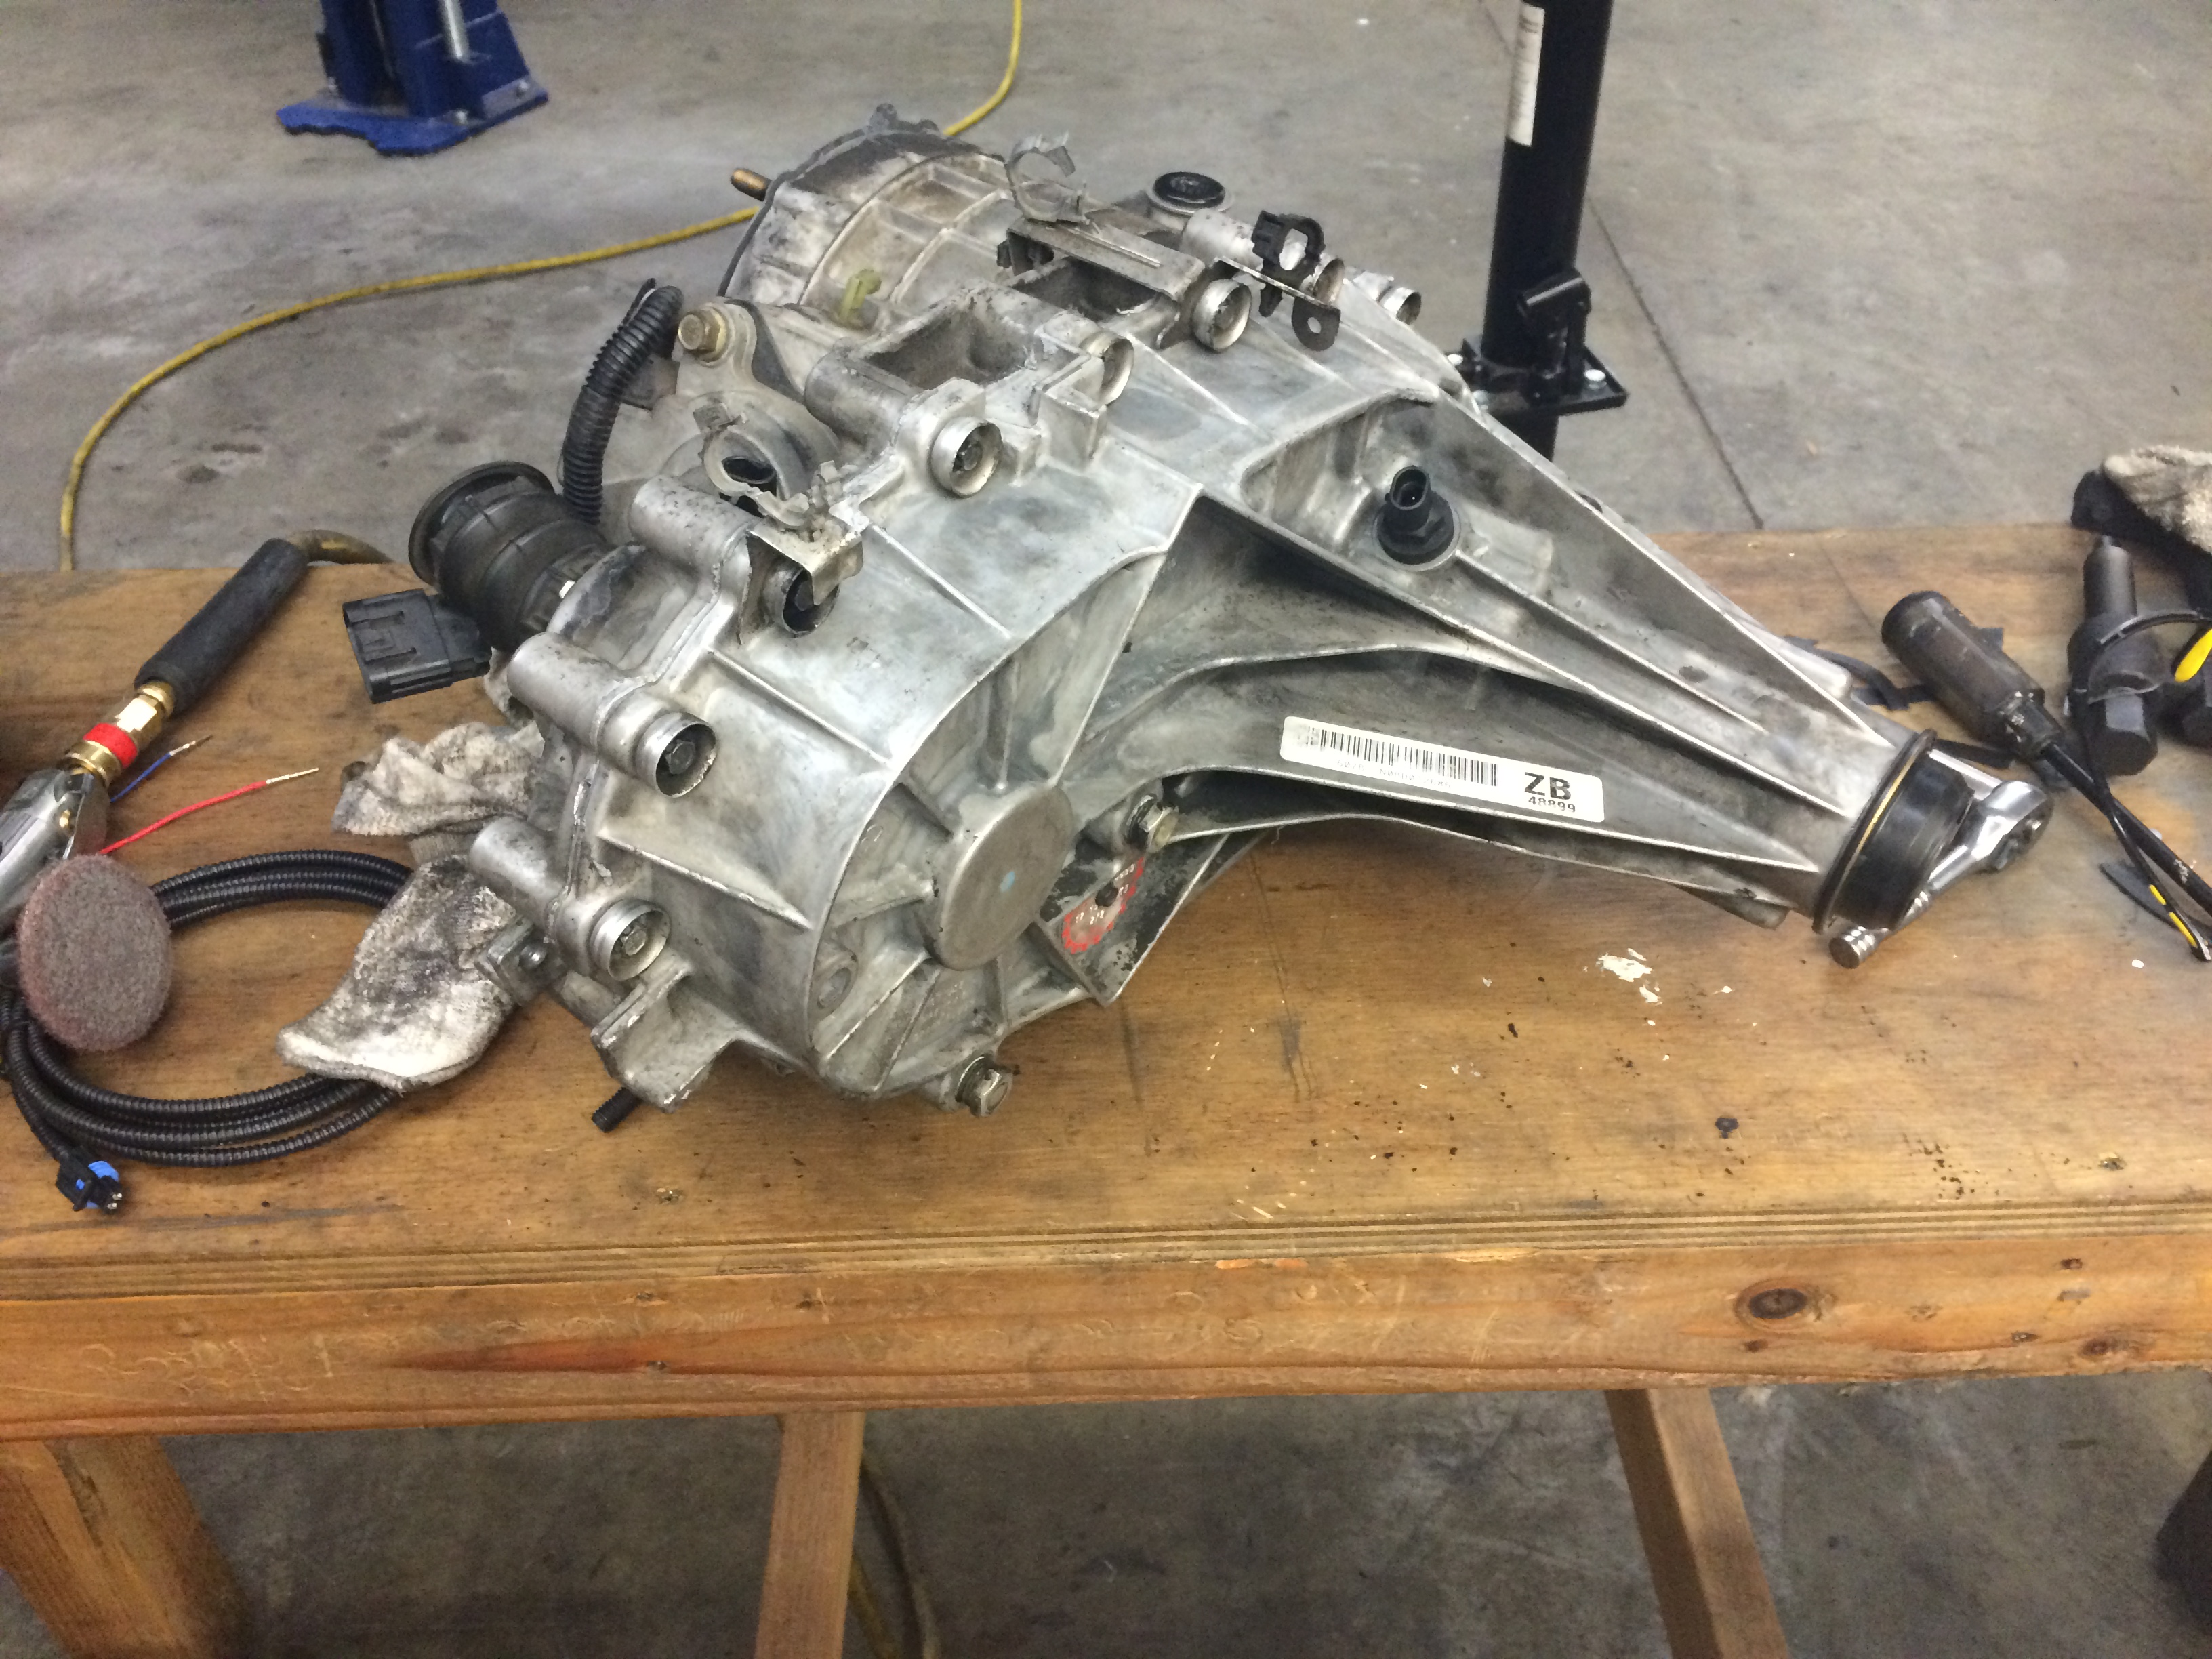
New case saver installed:
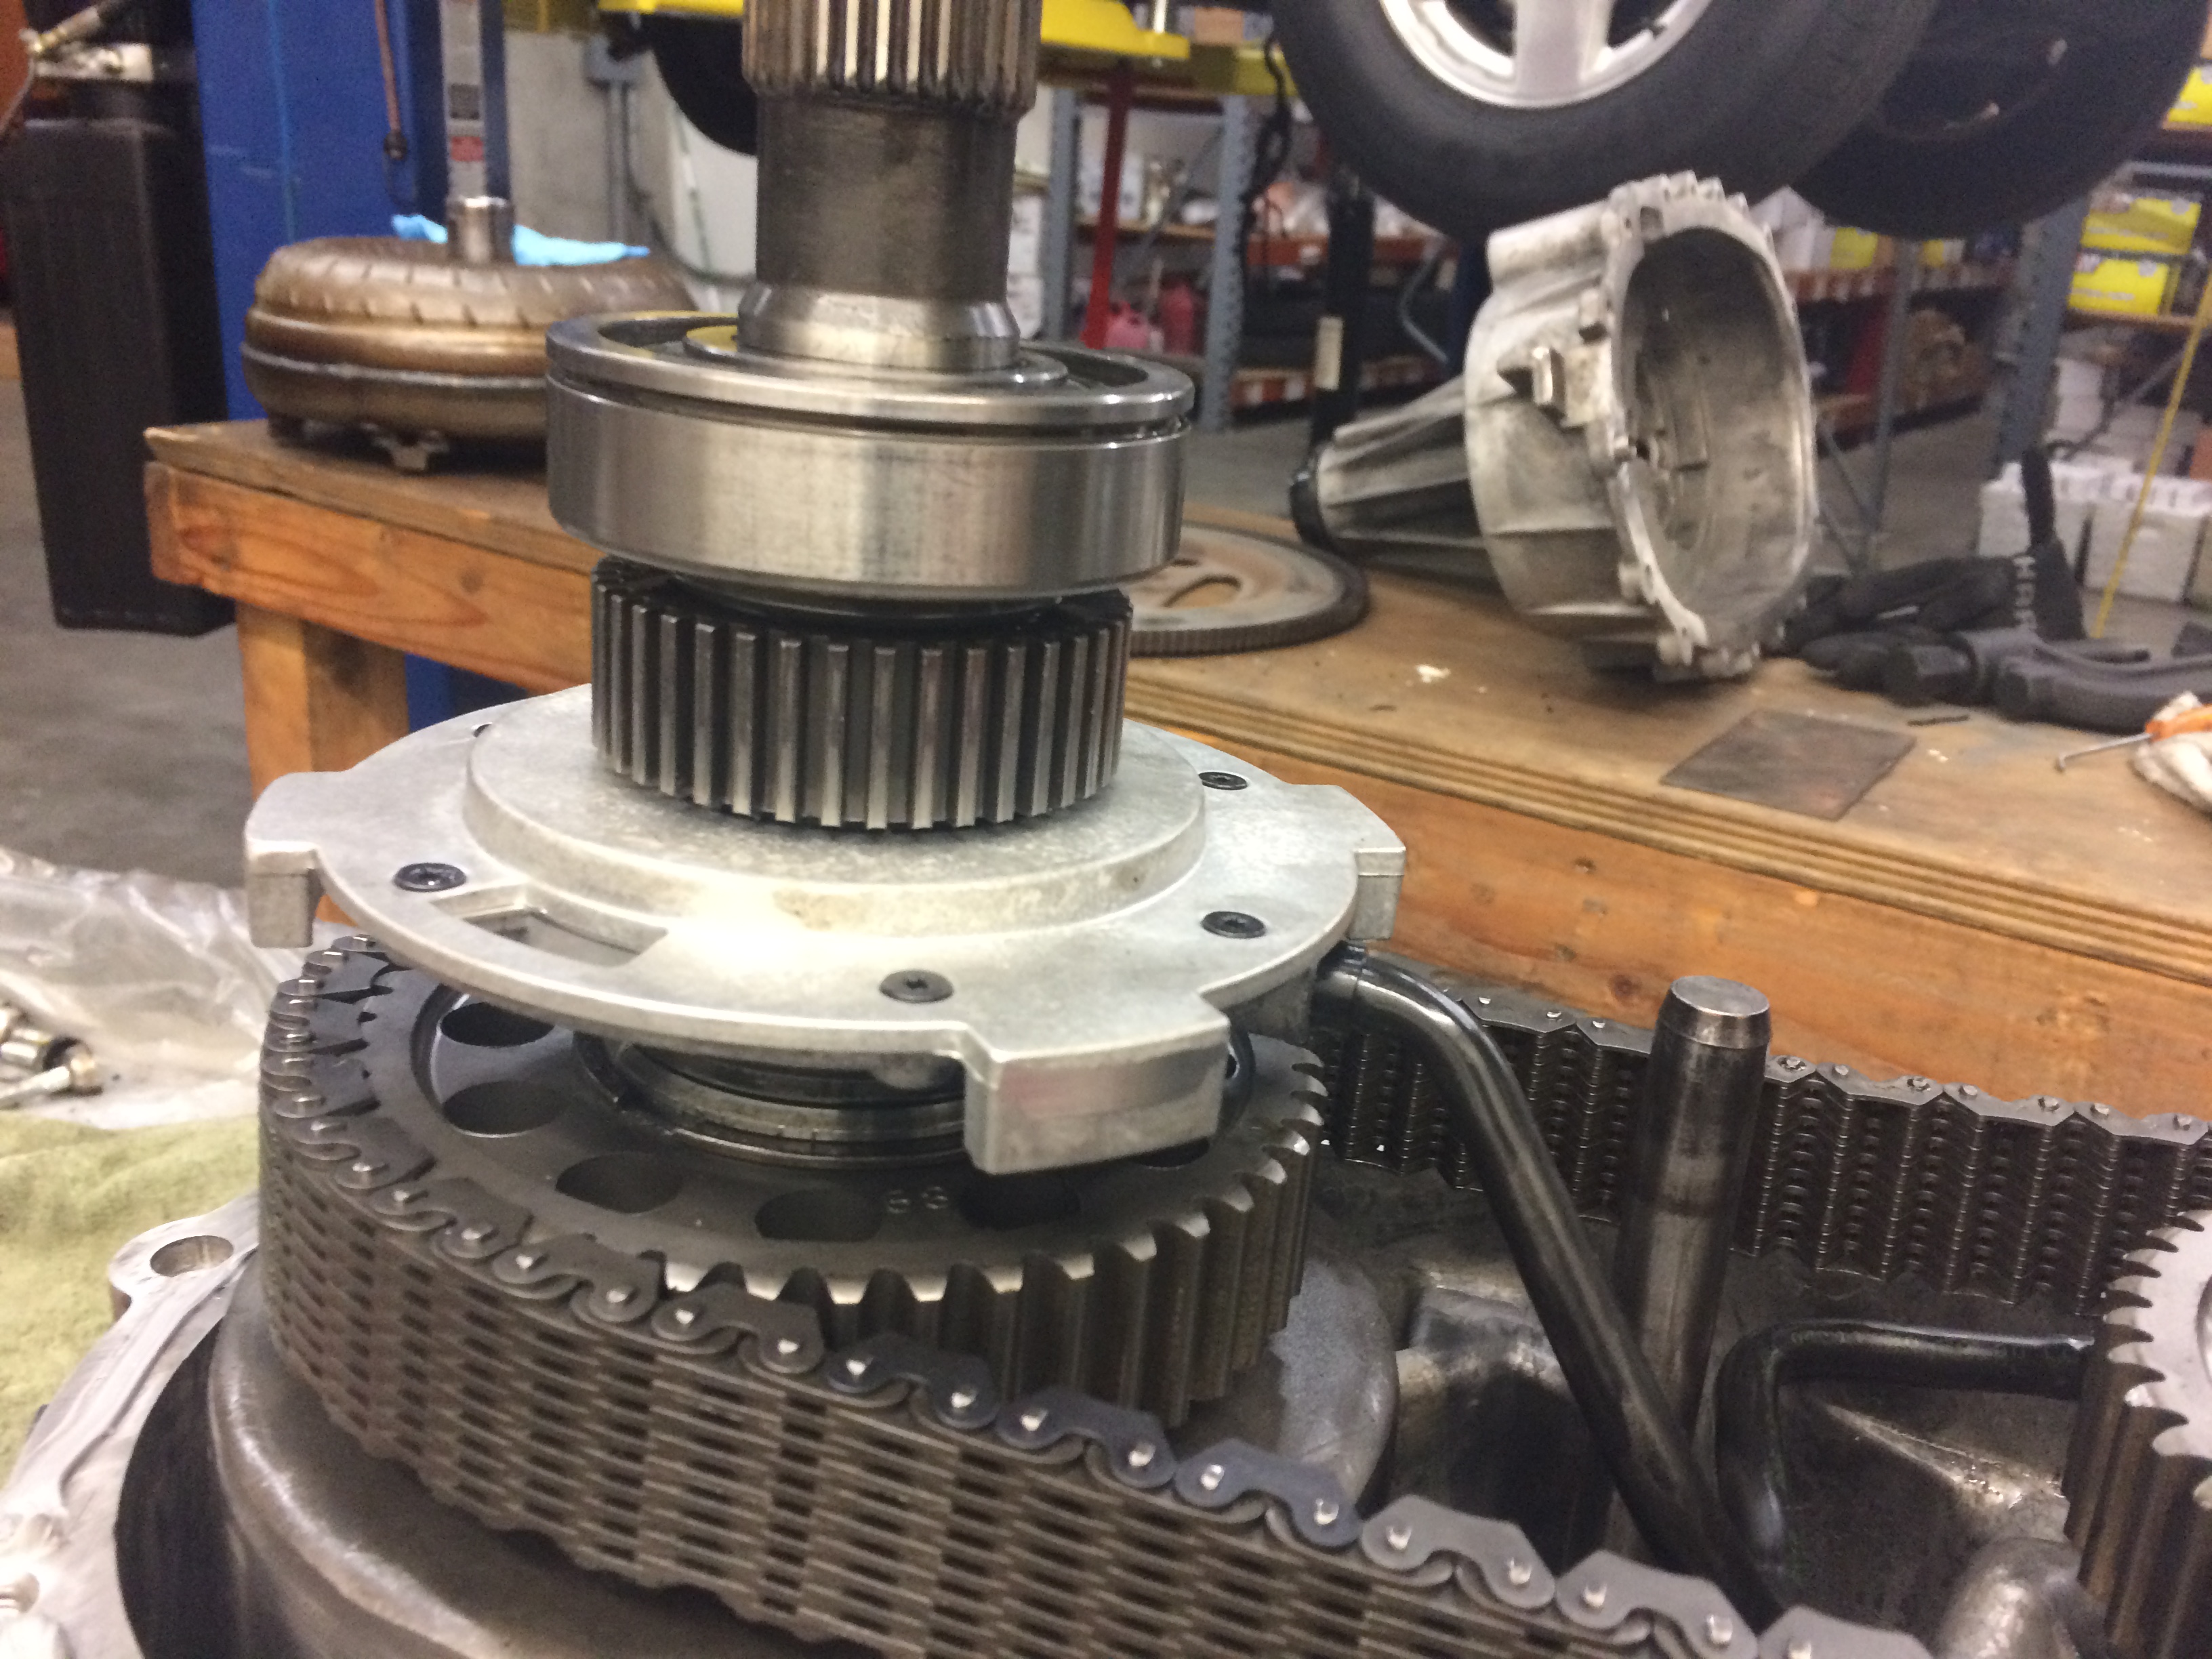
The finished transfer case (I only cleaned one half as the other half contains bearings, etc that weren't removed or replaced):
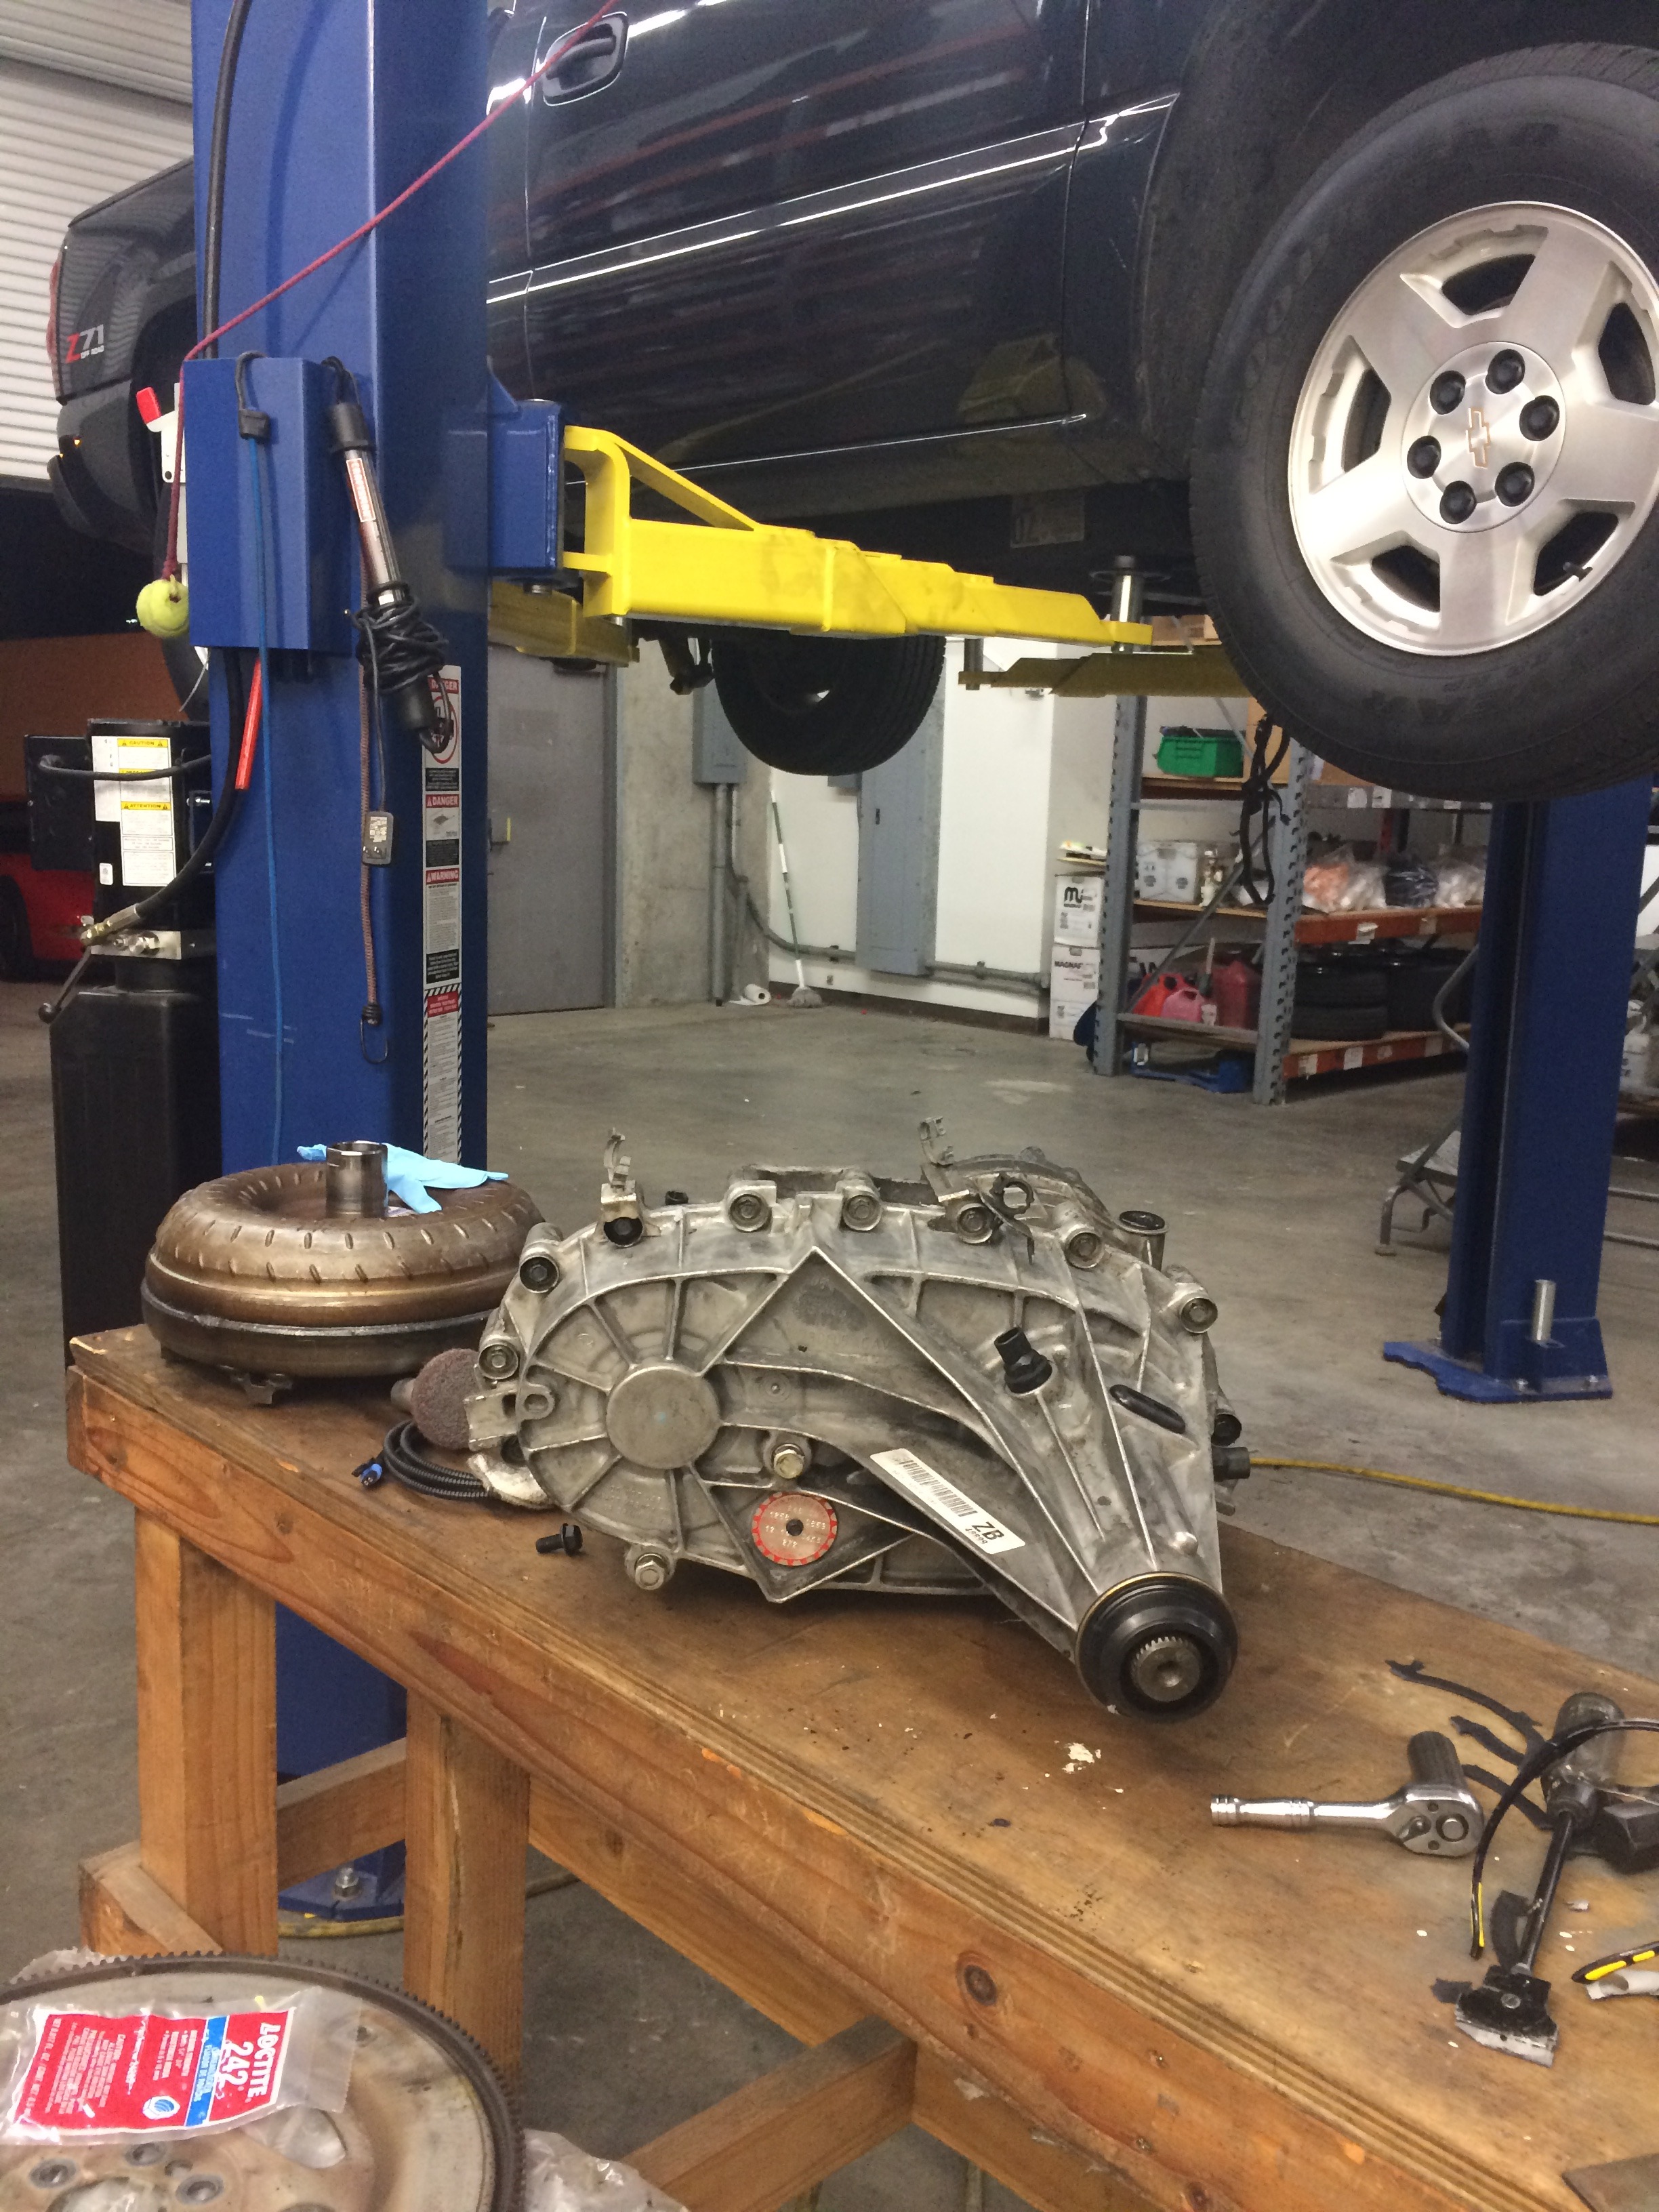
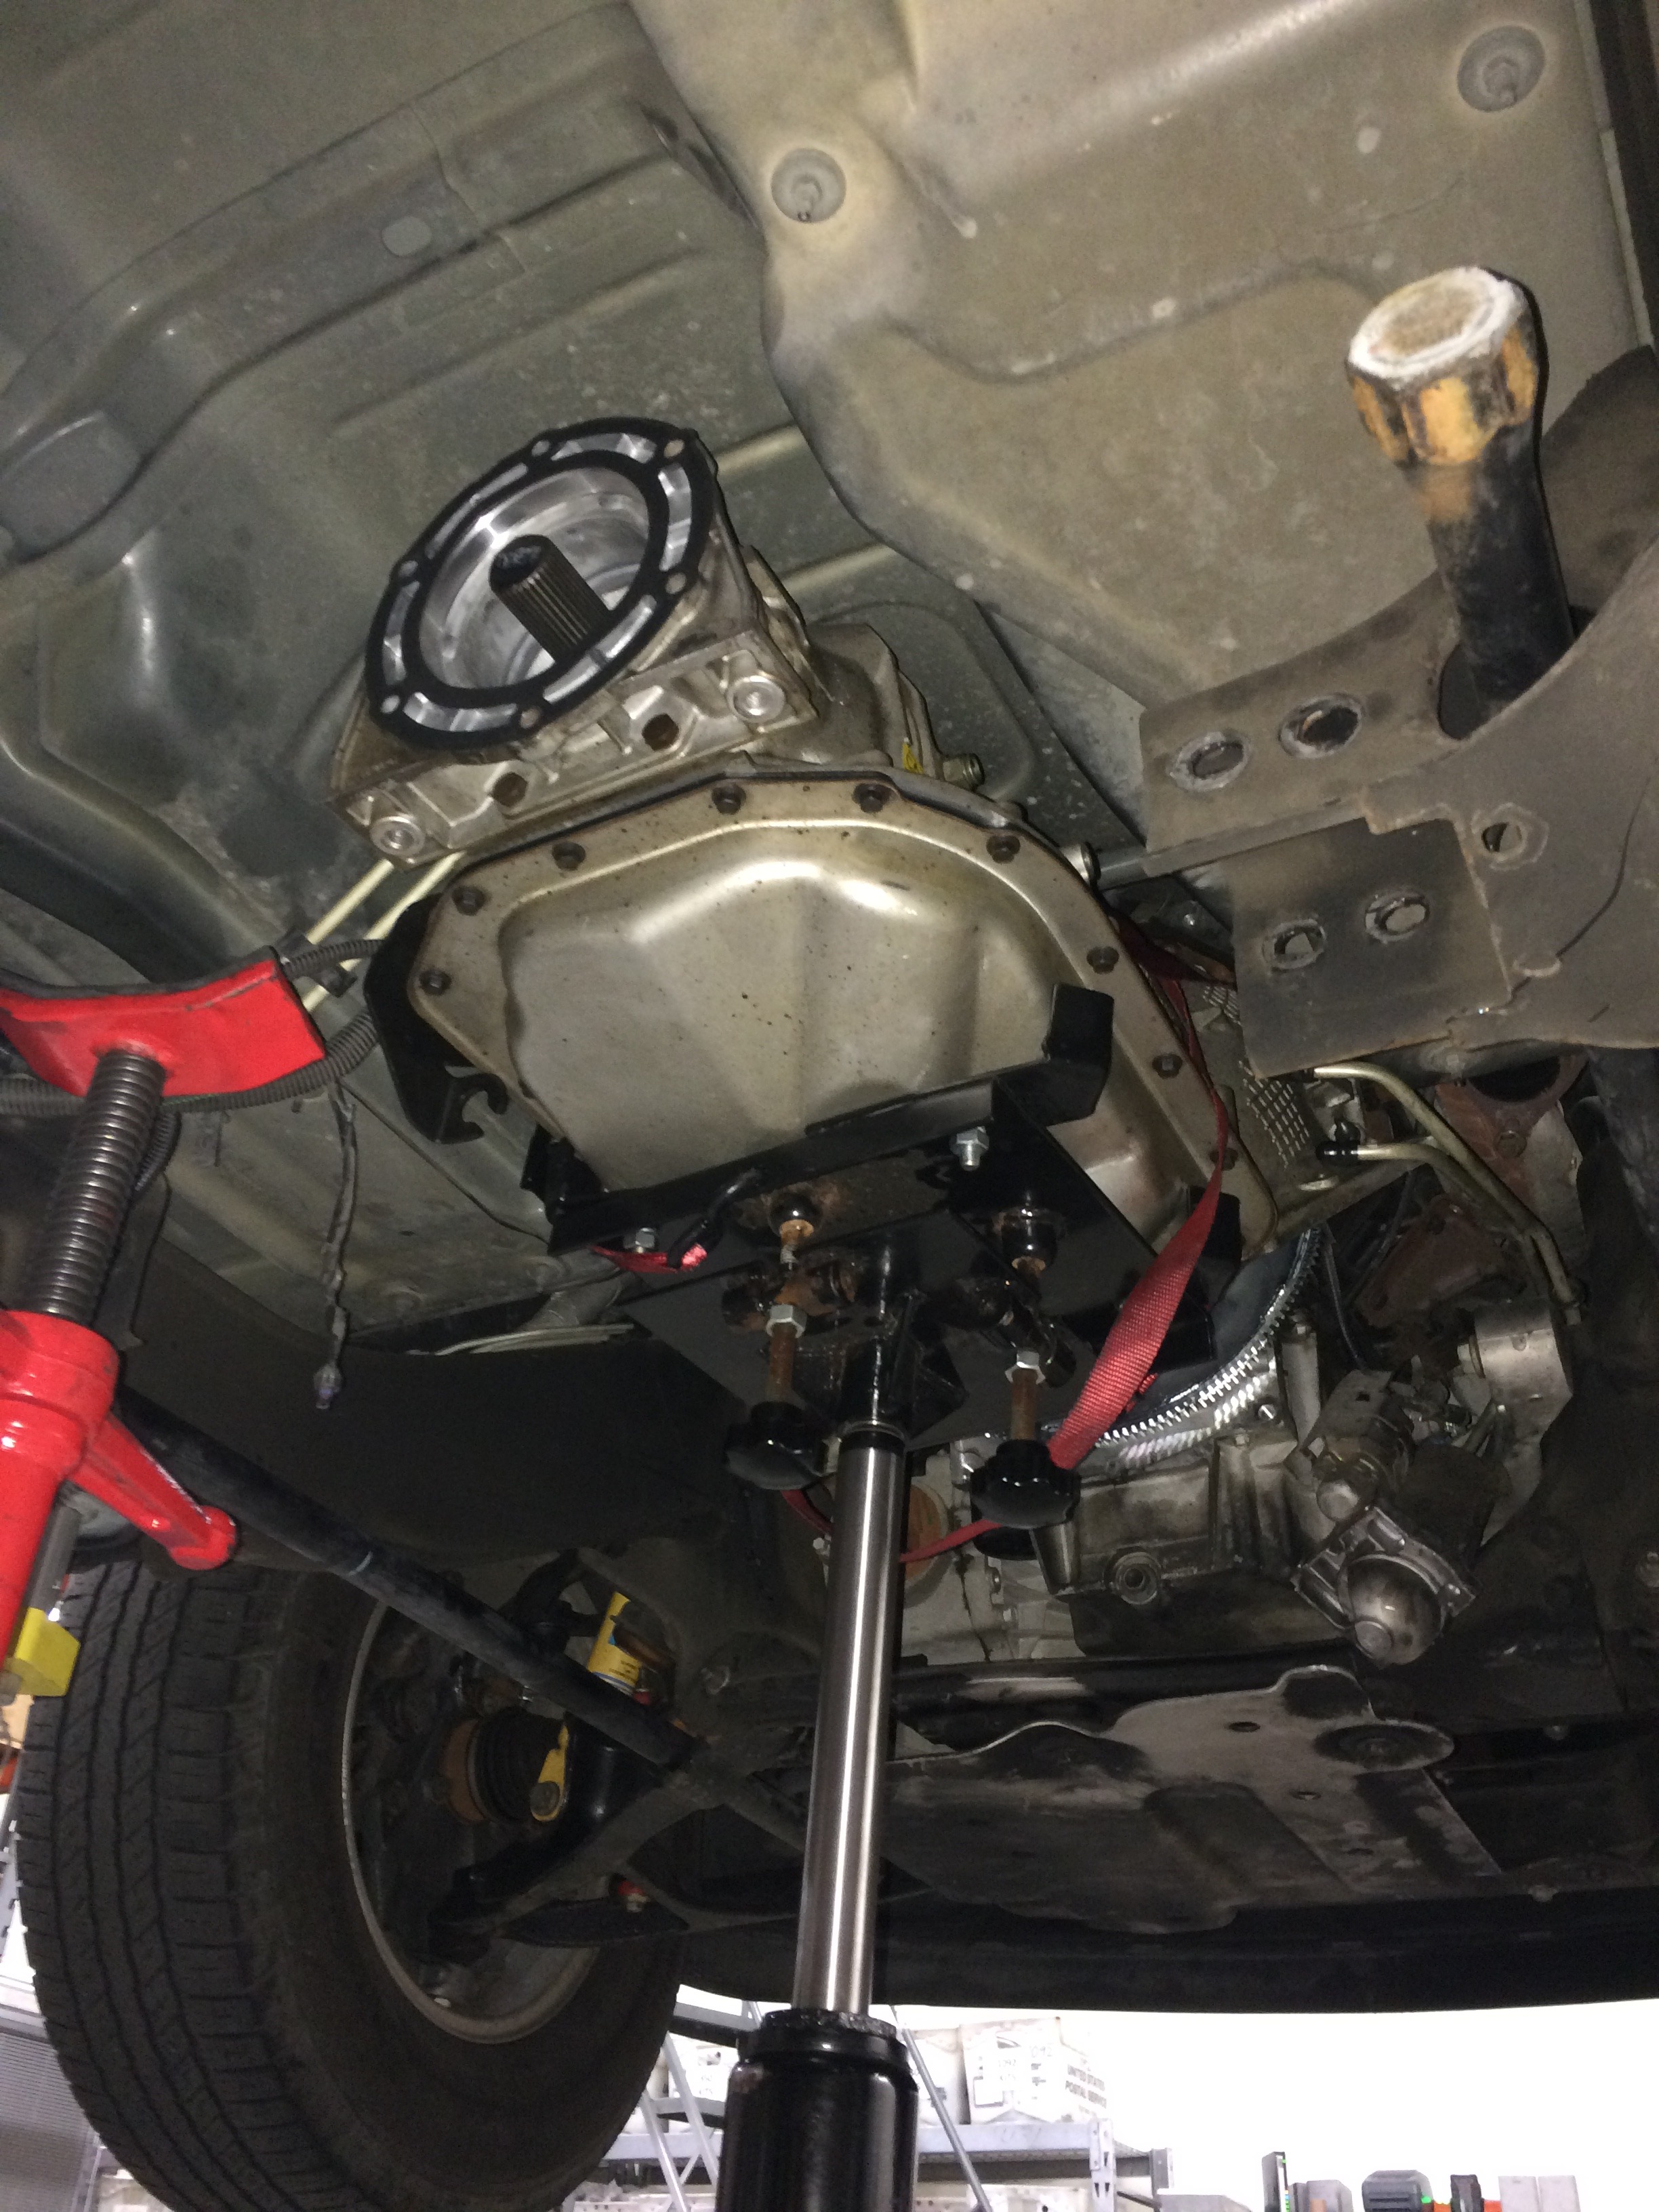
Trans back in the truck:
And a farewell to the 60E:
Midwest Trans
The transfer case swap isn't too bad, but please for the love of God get yourself a set of $15 Sears "flagstaff" snap ring pliars. I learned about these from howard quick here on the forum out in Australia. Without these the input shaft swap would have been a pita, with them it wasn't too bad.
Lessons learned for input shaft swap:
1. get proper lock ring pliars Sears.com
2. use silicone on inner input shaft bearing when you press it in, and press bearing 1/8" below bearing surface (a tip from Bud @ Midwest Trans).
3. make sure to have a 12mm allen socket to remove side plugs holding fork into case
4. be aware that the transfer case chain has more slack in it than your average timing chain, slack does not necessarily mean you need a new chain
5. when reinstalling the large shaft/ pump mechanism, make sure to orient the tab in between the fork, otherwise you won't be able to get the case halves seated during reassembly.
6. don't be scared of the input shaft swap, but it is a bit of a pita. You'll need access to a press if the input shaft does not have a new bearing inside it already.
7. torque case bolts in criss cross pattern to 27 ft/lbs
New case saver installed:
The finished transfer case (I only cleaned one half as the other half contains bearings, etc that weren't removed or replaced):
Trans back in the truck:
And a farewell to the 60E:


 06-19-2015, 11:51 PM
#27
Very cool build. I really like the look and color of your truck!
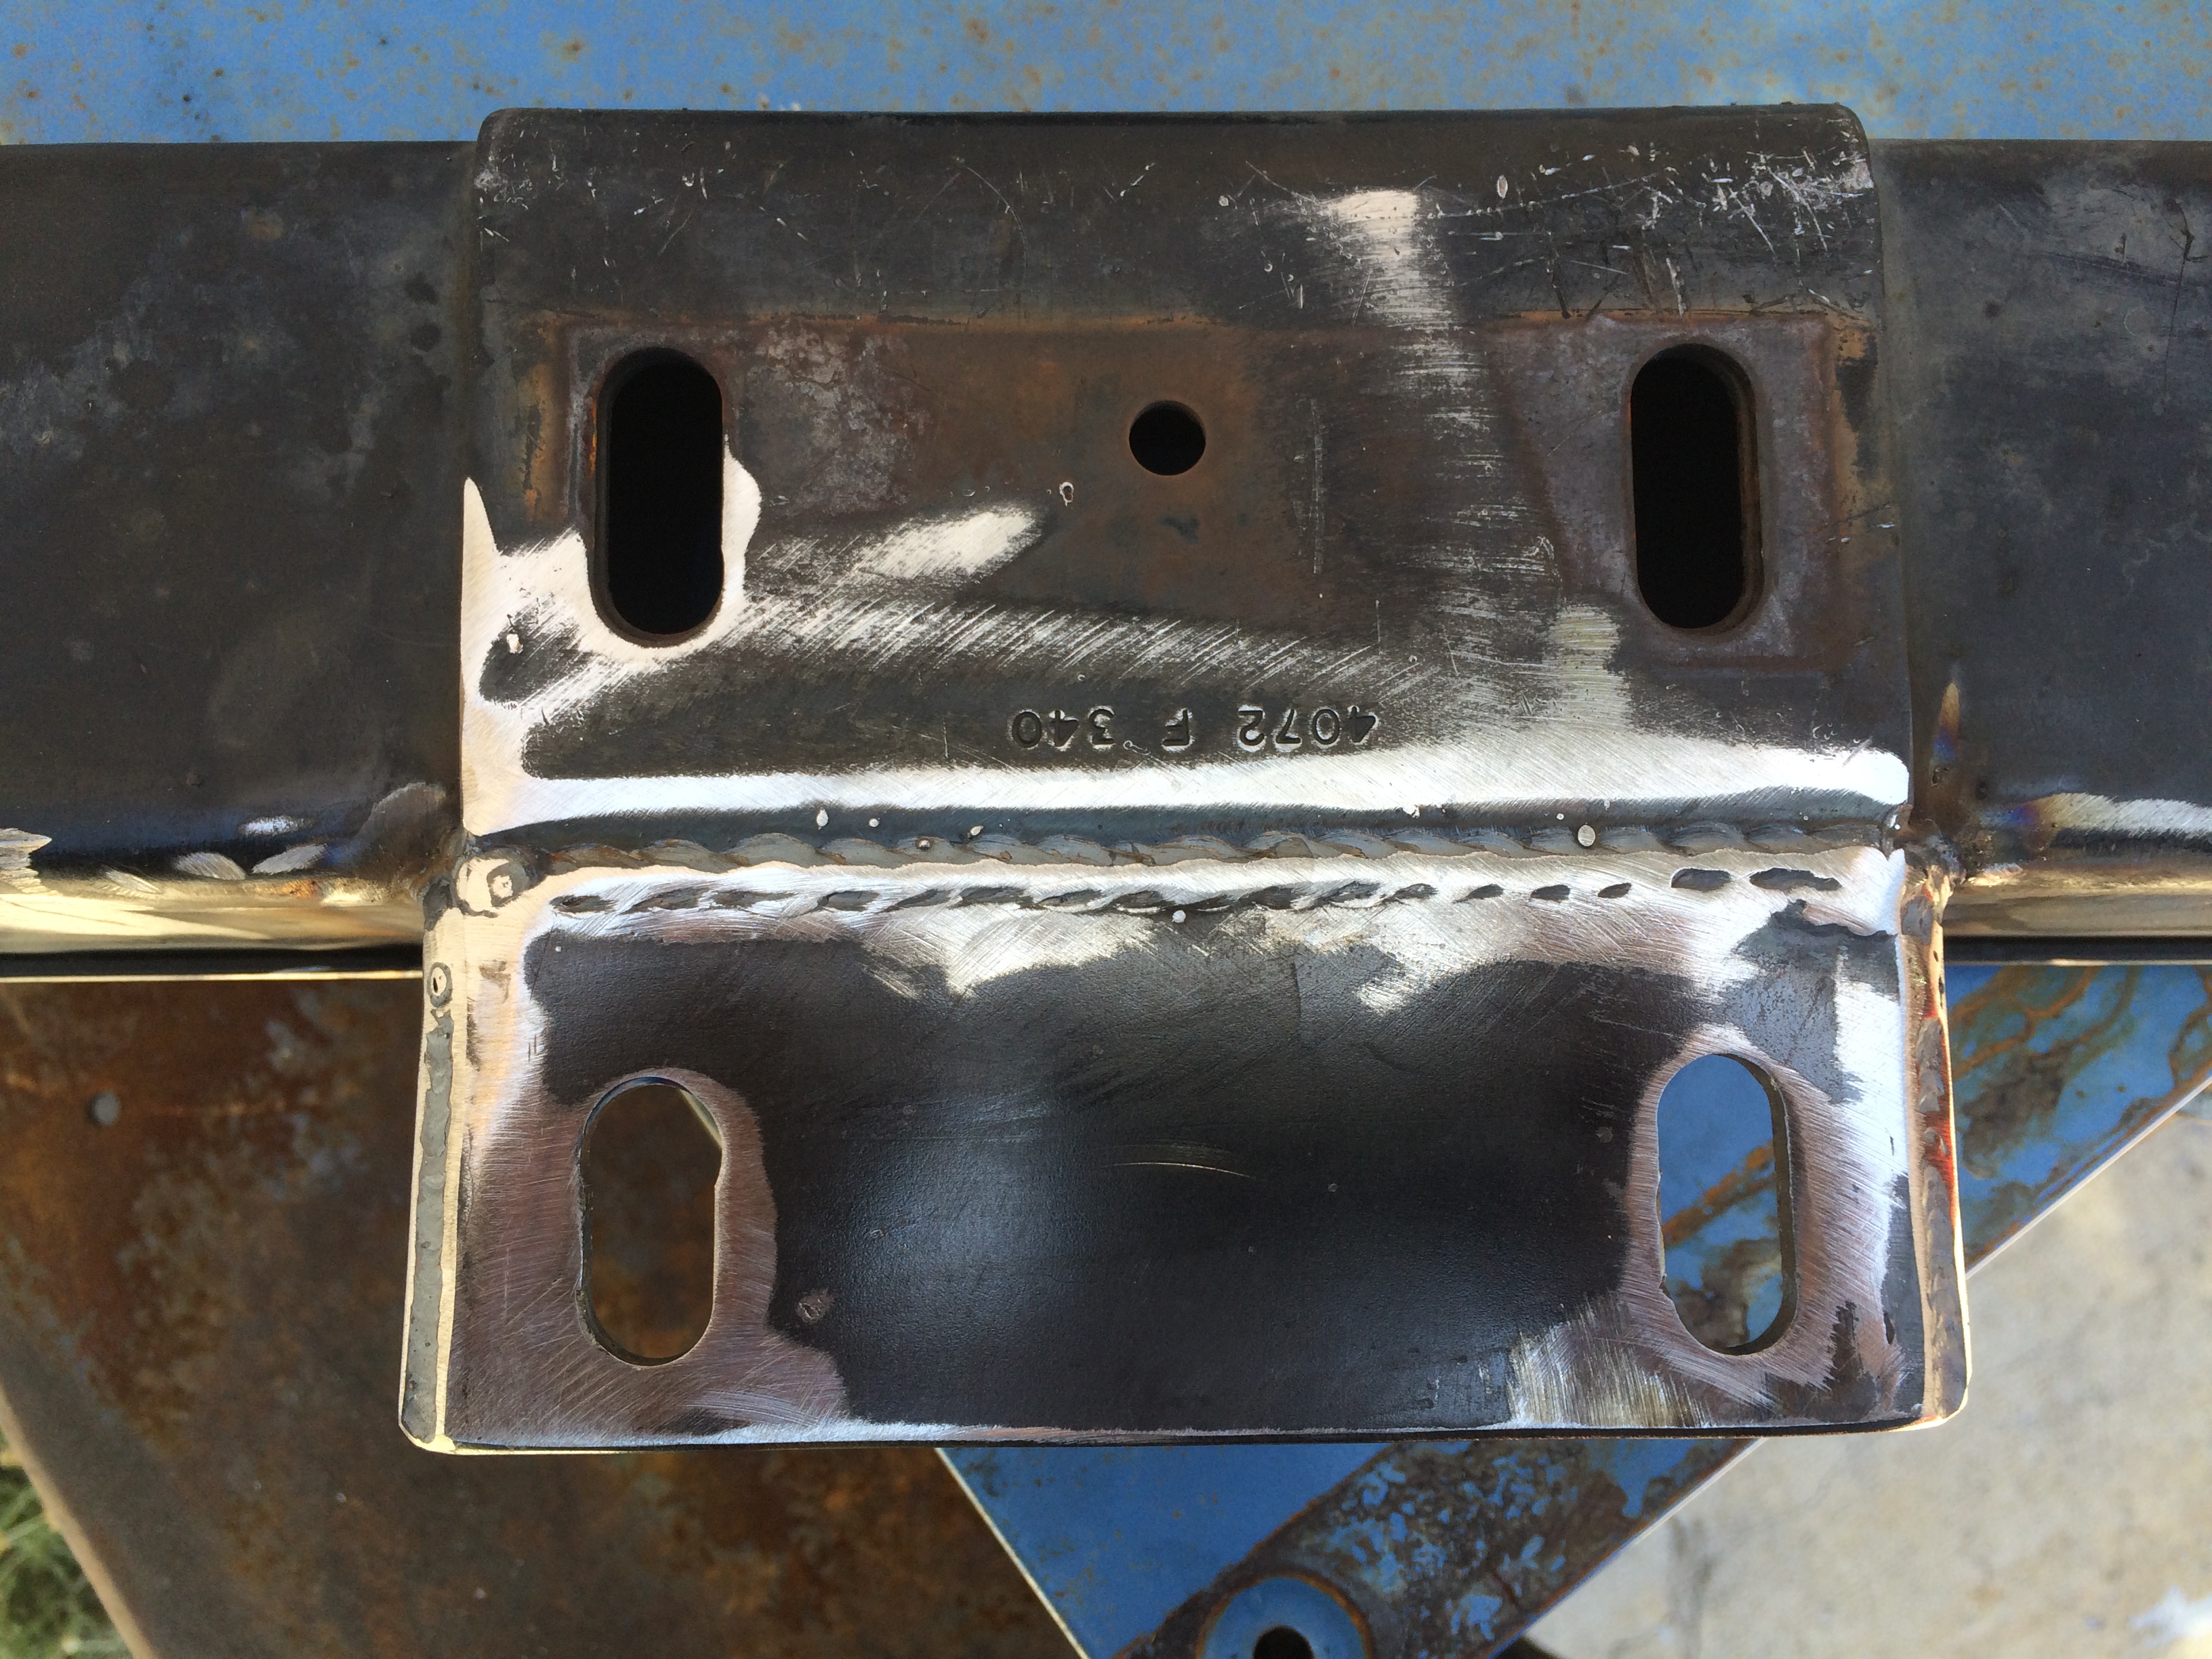
Looks really good, how did you cut the slotted transmission mount holes on your bracket like the factory ones?