Gear pattern help from experts


 01-15-2017, 02:42 PM
#12
Alright I finally got around to working on this axle again. Got the pinion shim depth at .038 and here is the pattern I got. I hope to god you guys like it because I already pressed the bearing on the pinion and it's permanent now

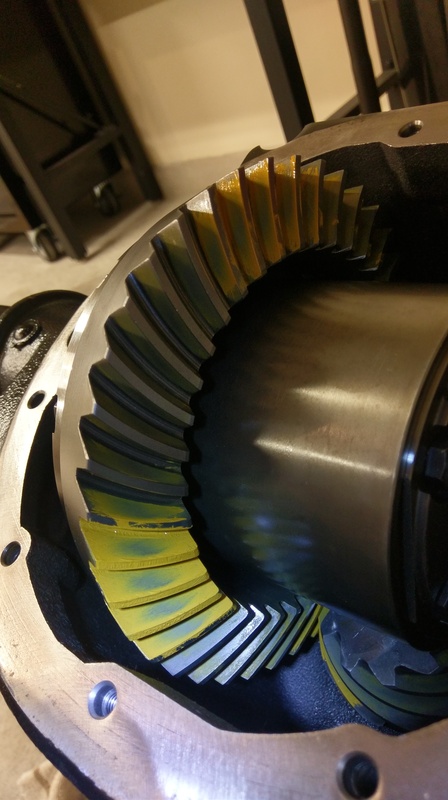
I like how centered the pattern is in all directions.
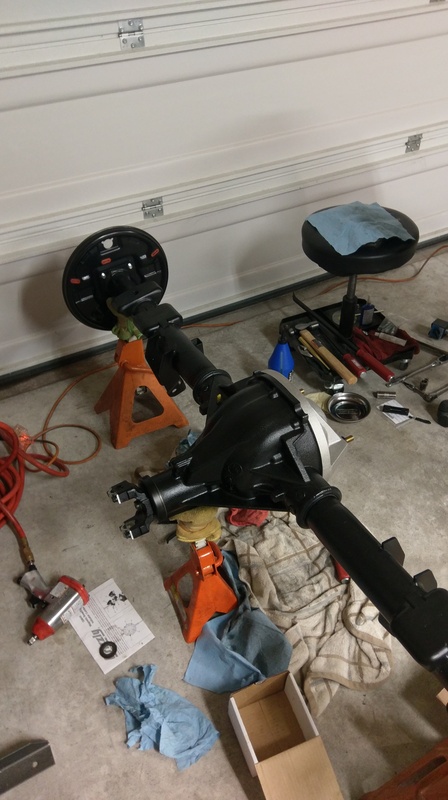
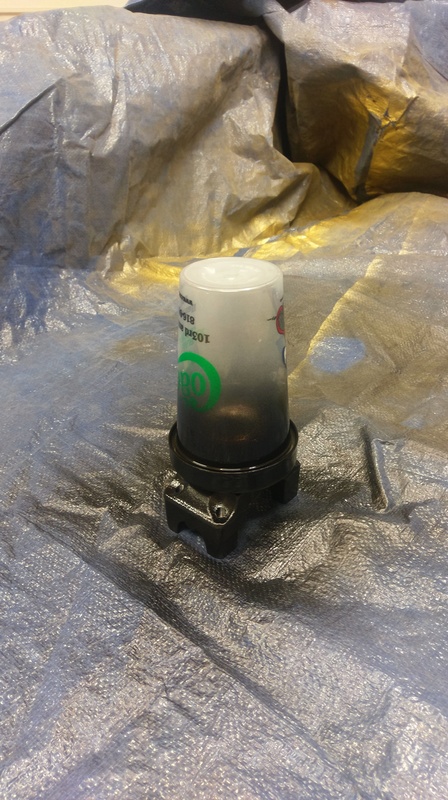
I found out this cheap husky impact I have can't even seat the bearings fully. I pounded on the thing and still have a tiny amount of in and out play. Of course the beam torque wrench I have shows 0 still because it isn't fully seated. I don't know if I should buy a nice impact or just get that earthquake from harbor freight and let it eat. I don't use air tools a ton, so I don't see the need for snap-on or matco... Anyways I cleaned up the yellow paint that manages to get everywhere and put the cover on for dust protection while I figure out the impact situation


I like how centered the pattern is in all directions.
I found out this cheap husky impact I have can't even seat the bearings fully. I pounded on the thing and still have a tiny amount of in and out play. Of course the beam torque wrench I have shows 0 still because it isn't fully seated. I don't know if I should buy a nice impact or just get that earthquake from harbor freight and let it eat. I don't use air tools a ton, so I don't see the need for snap-on or matco... Anyways I cleaned up the yellow paint that manages to get everywhere and put the cover on for dust protection while I figure out the impact situation
 01-15-2017, 07:55 PM
#13
TECH Enthusiast

You are supposed to use a breaker bar not an impact to preload the crush sleeve. But the pattern looks good. You could wait and preload it when it's under the truck setting on tires.
RT
RT
01-16-2017, 05:59 AM
#14
Staging Lane

Join Date: Dec 2011
Location: Alabama
Posts: 94
Likes: 0
Received 0 Likes
on
0 Posts
The pattern looks really good . I would run that pattern . As for the the preload on the bearing get a 1/2" breaker bar and a cheater pipe . I always use a piece of angle iron bolted to the yoke to hold it and then drive the nut . You have to sneak up on it very little at a time when the slack is gone and crush the sleeve . If you use a impact there is no way to control that fine tune and most likley will go to far even if the impact will drive it that far . Most impacts will not . If you go to far do not back the nut off and call it good . Get a new crush sleeve and start over and sneak up on it until you get the pre load you are looking for . Tedious job but necessary .
01-16-2017, 07:21 AM
#15
Ahh angle iron, that's smart. That's something I can buy myself and use. I was looking at pinion yoke holders and that's an unnecessary cost for this one time project. I'll get some angle and give it a shot. The only struggle is doing this while it's on jackstands because it wants to lift up and twist off the stands.
also, I had grease along the spring in the yoke seal, but is there any way to verify that spring stayed in place? If it popped off, wouldnt it snap down around the yoke snout?
I'll update this thread when I can get some steel and give this a shot
also, I had grease along the spring in the yoke seal, but is there any way to verify that spring stayed in place? If it popped off, wouldnt it snap down around the yoke snout?
I'll update this thread when I can get some steel and give this a shot
01-16-2017, 08:32 AM
#16
Staging Lane
Join Date: Dec 2011
Location: Alabama
Posts: 94
Likes: 0
Received 0 Likes
on
0 Posts
If your concerned about the spring go ahead and take the yoke off and inspect . Will not hurt anything at this time .
Also on the angle iron , I cut a notch in it to help clear the socket . You may also have to set it on the ground or use another jack stand to set the angle on. I try to keep the angle and the breaker bar close to parallel when tightening so it don't lift as bad . If you have a buddy close by have them set a foot on it to help . Remember when the bearing seat and no long have any movement go slow ,slow , slow . You can go past your mark very easy .It don't take much at that point .
Also on the angle iron , I cut a notch in it to help clear the socket . You may also have to set it on the ground or use another jack stand to set the angle on. I try to keep the angle and the breaker bar close to parallel when tightening so it don't lift as bad . If you have a buddy close by have them set a foot on it to help . Remember when the bearing seat and no long have any movement go slow ,slow , slow . You can go past your mark very easy .It don't take much at that point .
01-16-2017, 09:13 AM
#17
Thanks for the tips. That was my plan actually was to set the angle on another 6 ton stand and keep that breaker as close to parallel as possible. Right now I think the sleeve needs to crush a tad to take up the final bit of front to back movement in the pinion. I'll go slow slow slow as you suggested, but Yukon included two crush sleeves in case I screw it up. I'll inspect the seal tonight and hopefully get some angle today while at work.
Thanks again for all the help, this has been a great learning experience. I love doing things myself even if it costs more because I'm learning more and more
Thanks again for all the help, this has been a great learning experience. I love doing things myself even if it costs more because I'm learning more and more
01-16-2017, 07:58 PM
#18
So I decided to take off the pinion yoke and check the spring. It appears it was there by how fast the rubber bounced back when depressed compared to the extra seal I have in the box, so that's comforting.
But one thing I noticed was the threads on the pinion were shiney all the way to the bottom which makes me wonder if my pinion nut was bottoming out. This would explain why it didn't suck down any further.
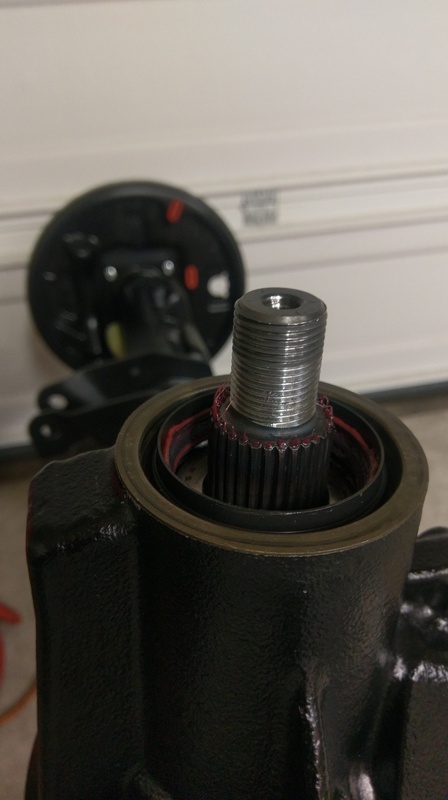
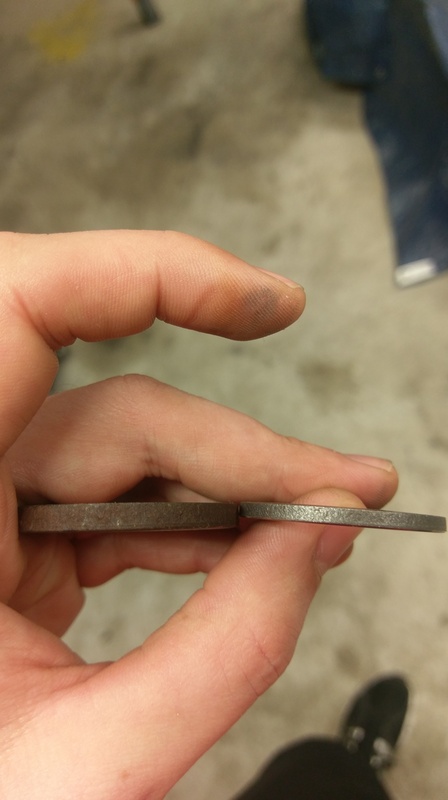
I'm think I should use the factory washer as opposed to the Yukon one since its thicker
also freshened the paint up that I missed around the dust cover
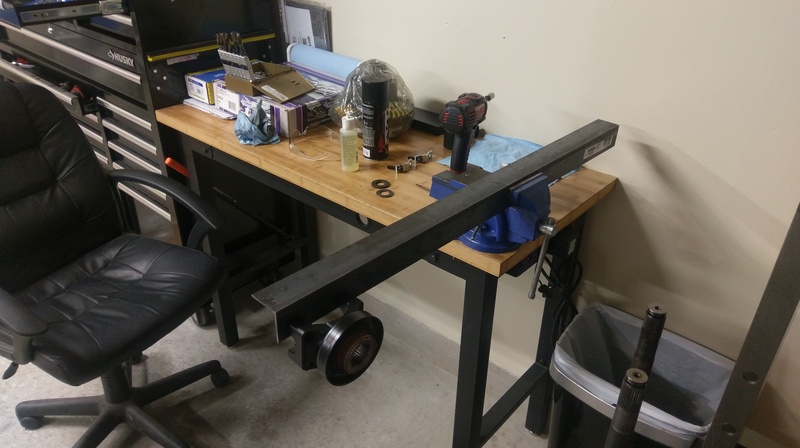
and built a pinion yoke holder
But one thing I noticed was the threads on the pinion were shiney all the way to the bottom which makes me wonder if my pinion nut was bottoming out. This would explain why it didn't suck down any further.

I'm think I should use the factory washer as opposed to the Yukon one since its thicker

also freshened the paint up that I missed around the dust cover

and built a pinion yoke holder

 01-17-2017, 12:41 AM
#19

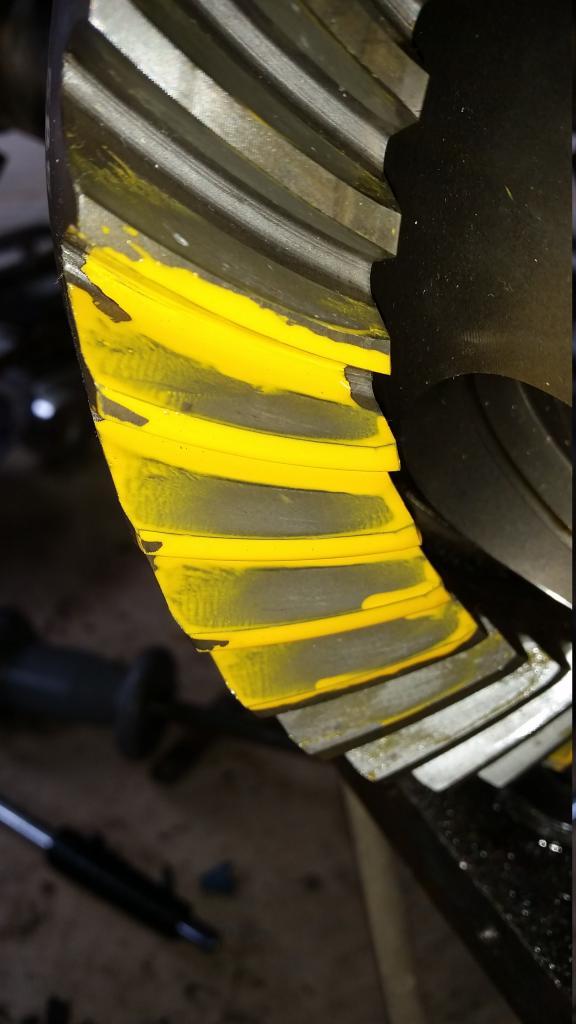
The pattern is pretty hard to read. It looks like you don't have enough oil in the gear marking compound. It should look like chocolate syrup. Something like this, maybe a tad less oil. It doesn't take much.
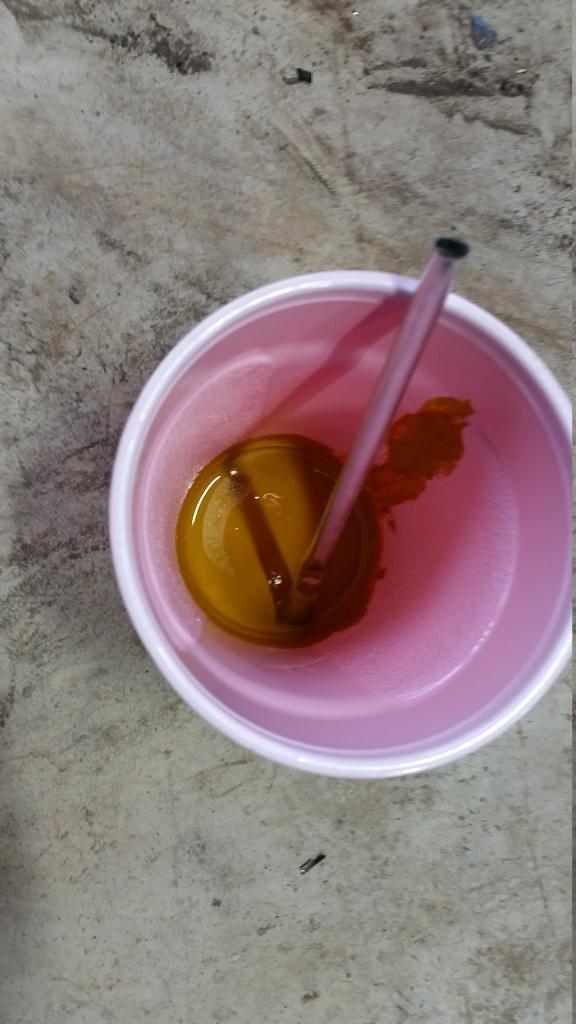
Make sure you add some drag to the gears in order to get the pattern to show through better. Something like this
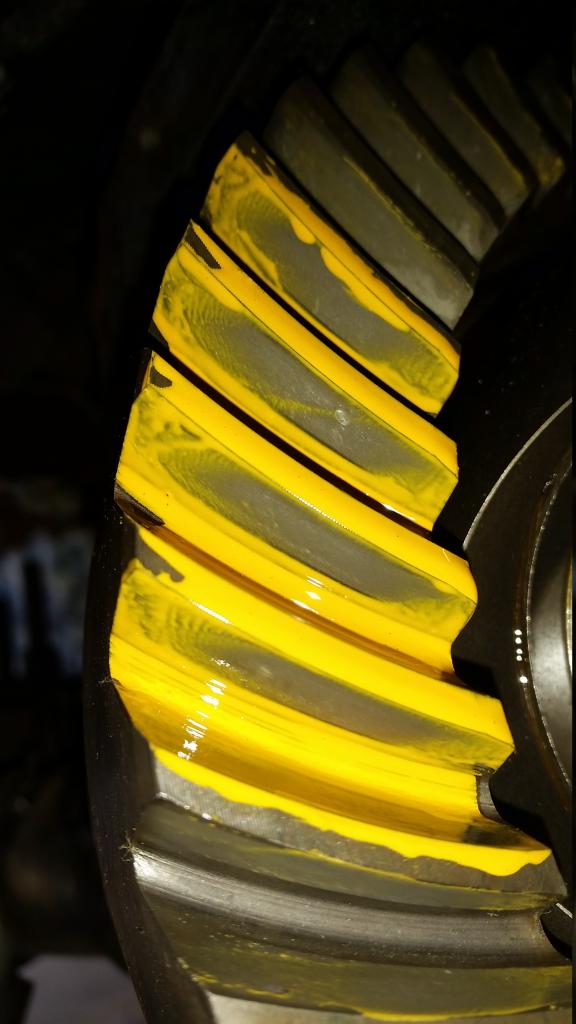
Notice that the marking compound moves out of the way and leaves a very evident pattern. It may be a bit runny in these which is why I say maybe a bit less oil. Here's the coast side.
When I did this the diffs was installed, I used a 3 foot pipe wrench to hold the yoke while I turned the nut with a 1" drive ratchet. The next time I set up gears I used a 3/4" drive dewalt corded impact wrench because my 1/2" cordless SnapOn didn't have the grunt to crush the sleeve.
Also, the new pinion seal will add about 3 in-lbs of drag to the pinion so don't be worried if you go over the spec by 1 or 2 in-lbs I wouldn't worry about it. This doesn't mean you should shoot for this though.
Hope that helps
Make sure you add some drag to the gears in order to get the pattern to show through better. Something like this
Notice that the marking compound moves out of the way and leaves a very evident pattern. It may be a bit runny in these which is why I say maybe a bit less oil. Here's the coast side.
When I did this the diffs was installed, I used a 3 foot pipe wrench to hold the yoke while I turned the nut with a 1" drive ratchet. The next time I set up gears I used a 3/4" drive dewalt corded impact wrench because my 1/2" cordless SnapOn didn't have the grunt to crush the sleeve.
Also, the new pinion seal will add about 3 in-lbs of drag to the pinion so don't be worried if you go over the spec by 1 or 2 in-lbs I wouldn't worry about it. This doesn't mean you should shoot for this though.
Hope that helps
01-17-2017, 05:42 AM
#20
Staging Lane
Join Date: Dec 2011
Location: Alabama
Posts: 94
Likes: 0
Received 0 Likes
on
0 Posts
So I decided to take off the pinion yoke and check the spring. It appears it was there by how fast the rubber bounced back when depressed compared to the extra seal I have in the box, so that's comforting.
But one thing I noticed was the threads on the pinion were shiney all the way to the bottom which makes me wonder if my pinion nut was bottoming out. This would explain why it didn't suck down any further.

I'm think I should use the factory washer as opposed to the Yukon one since its thicker

also freshened the paint up that I missed around the dust cover

and built a pinion yoke holder


But one thing I noticed was the threads on the pinion were shiney all the way to the bottom which makes me wonder if my pinion nut was bottoming out. This would explain why it didn't suck down any further.
I'm think I should use the factory washer as opposed to the Yukon one since its thicker
also freshened the paint up that I missed around the dust cover
and built a pinion yoke holder
You have the angle like I did it . But just a couple things . I drilled the holes out closer to the the edge for a couple reasons . You will find the socket will not fit in there so you will have to notch the angle . If you move the holes out to the edge you will have more meat behind the socket after notch for strength . I was afraid if I cut to much out the other vertical piece would bend in that area . But I think you have a bigger piece than I had . I would just cut a relief for the socket and give it a try .
Everything is looking good .