Finally pinned my crank - A pictorial
 04-01-2008, 05:20 PM
#1
People ask about it from time to time. Figured I'd post up my install.
I've had a crank pinning kit from Magnacharger for a long while. I've been procrastinating. Jumped into it today. I have never had any issue with spinning the pulley with my supercharger for 50K miles now but its cheap insurance.
Anybody that removes crank pullies on LSx engines with any frequency I highly recommend this Kent Moore tool to lock the flywheel. It makes removing and torquing the crank pulley bolt much easier.
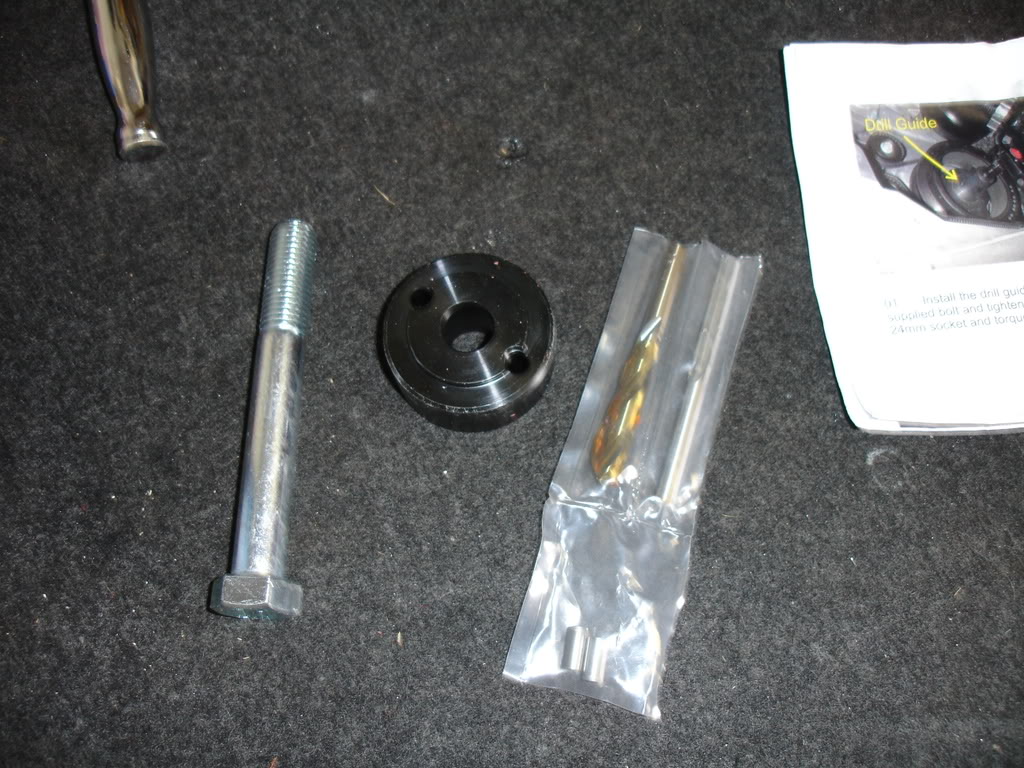
Here is the picture of the kit. Includes a jig to align the holes, bolt to hold it, a bit to drill and a reamer to size them properly after drilling. Then of course the pins to put in after all is done.
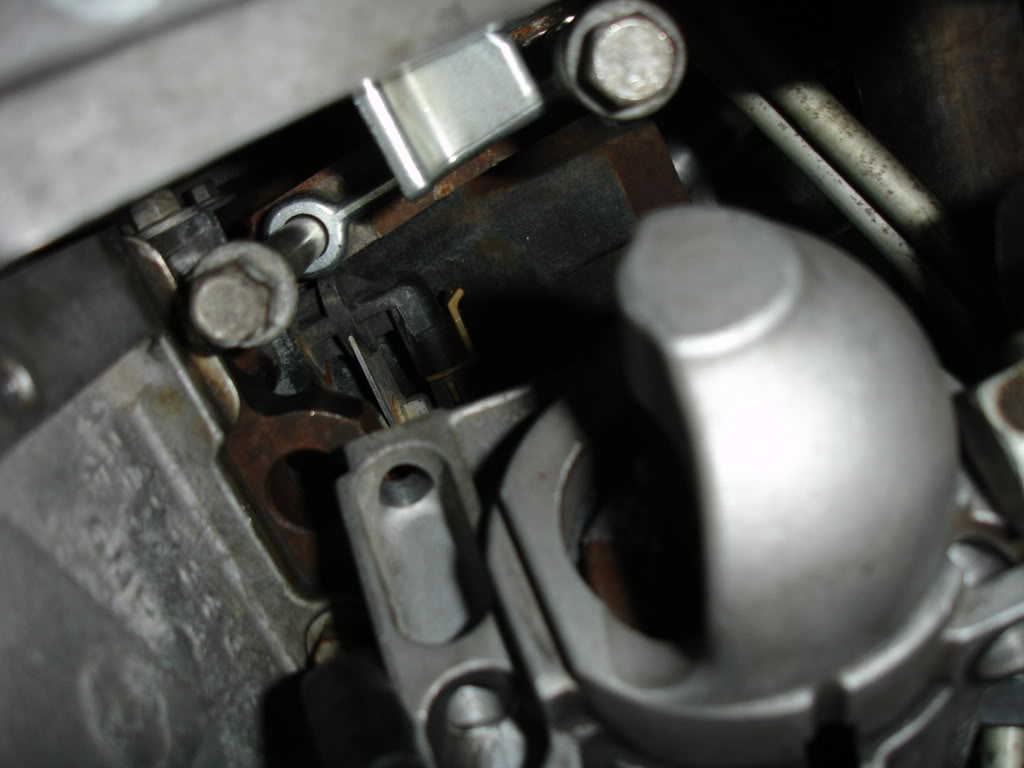
Picture of the crank and pulley before starting. Of course the pulley bolt has been removed.
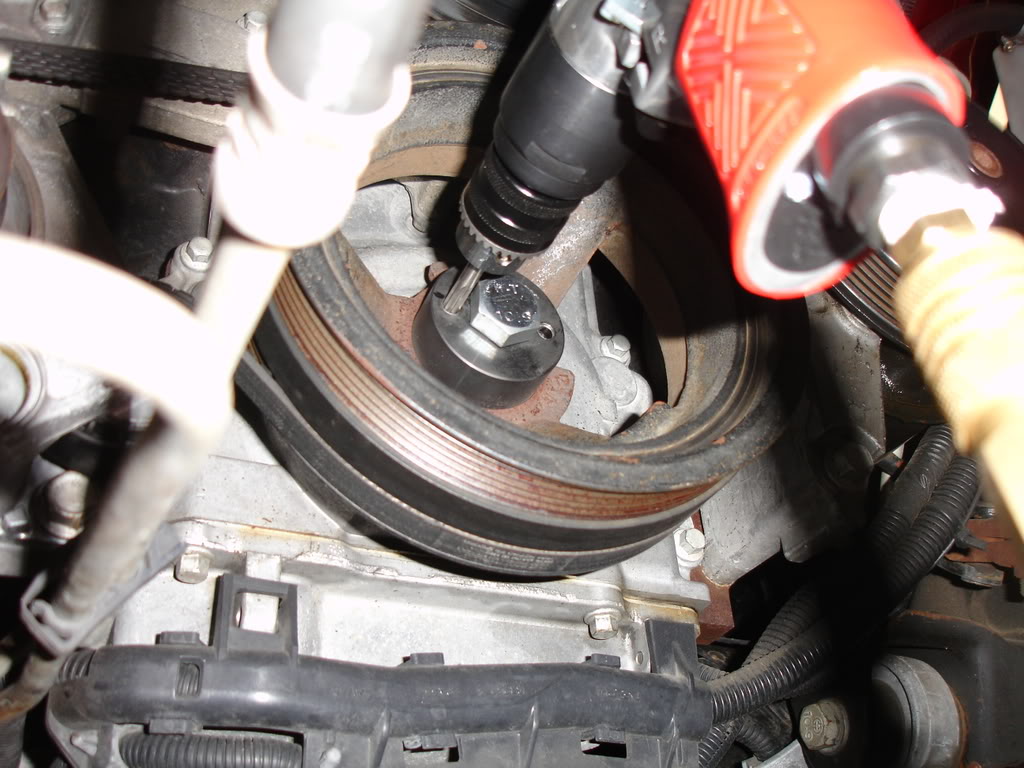
You then bolt on the jig and drill and ream the holes.
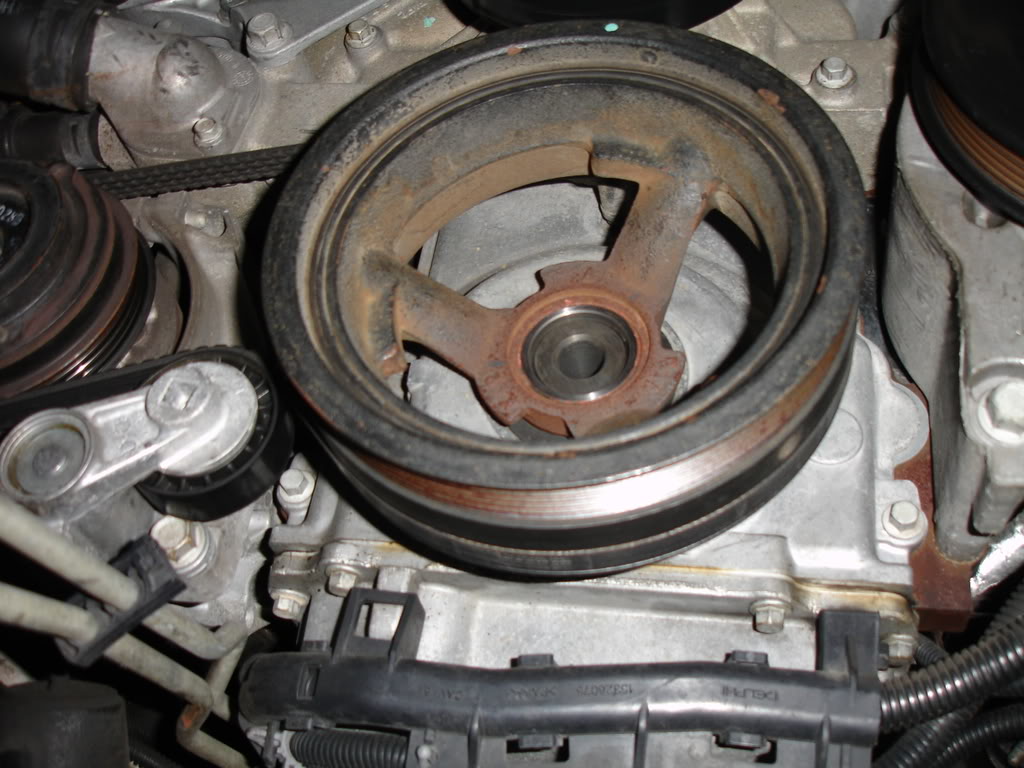
A shot of the pulley after the drill and ream job.

Then a shot after the pins have been put in.
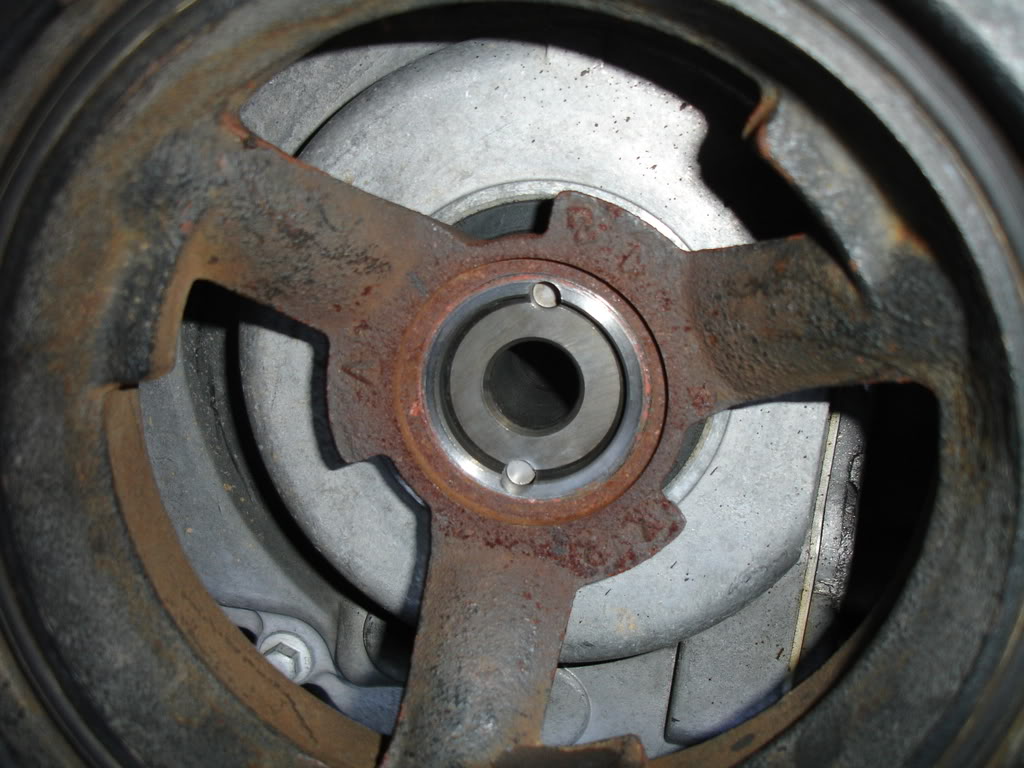
After that its just a matter of putting a new crank bolt in and torquing to spec. Torque the bolt to 37 lb/ft then another 140 degrees of rotation.
Edit: Forgot to add. You need good blasts of compressed air between drilling, reaming and bolting up to clean all the shavings out.
I've had a crank pinning kit from Magnacharger for a long while. I've been procrastinating. Jumped into it today. I have never had any issue with spinning the pulley with my supercharger for 50K miles now but its cheap insurance.
Anybody that removes crank pullies on LSx engines with any frequency I highly recommend this Kent Moore tool to lock the flywheel. It makes removing and torquing the crank pulley bolt much easier.
Here is the picture of the kit. Includes a jig to align the holes, bolt to hold it, a bit to drill and a reamer to size them properly after drilling. Then of course the pins to put in after all is done.
Picture of the crank and pulley before starting. Of course the pulley bolt has been removed.
You then bolt on the jig and drill and ream the holes.
A shot of the pulley after the drill and ream job.
Then a shot after the pins have been put in.
After that its just a matter of putting a new crank bolt in and torquing to spec. Torque the bolt to 37 lb/ft then another 140 degrees of rotation.
Edit: Forgot to add. You need good blasts of compressed air between drilling, reaming and bolting up to clean all the shavings out.
Last edited by KySilverado; 04-01-2008 at 06:08 PM.

The following users liked this post:
esoteric_ast (11-04-2019)
04-01-2008, 05:34 PM
#2
TECH Apprentice
iTrader: (2)
Join Date: Dec 2004
Location: Roch. NY.
Posts: 390
Likes: 0
Received 0 Likes
on
0 Posts
Kent Moore flywheel holding tool is nice to have. Money well spent in making bolt removal and install a lot easier. I hope to pin my crank this year too.
Nice pics and nice write up...thanks.
Nice pics and nice write up...thanks.


 04-01-2008, 06:04 PM
#6
I was a little worried about doing it to my truck. Couple weeks ago I helped a buddy do one in his GTO with a MP122. There isn't near as much room between the crank and radiator in a GTO. He had bought an angle drill but it wouldn't fit. Long story but due to time we tackled it drilling the holes with a die grinder. It took us 3-4 hours to drill them! No torque in a die grinder.
With the drill I used it literally took about 30 seconds per side to drill the holes. I was so happy!
With the drill I used it literally took about 30 seconds per side to drill the holes. I was so happy!
 04-01-2008, 07:43 PM
#10
Adkoonerstrator
iTrader: (4)

Join Date: Nov 2001
Location: Deep in the seedy underworld of Koonerville
Posts: 21,436
Likes: 0
Received 3 Likes
on
2 Posts
I am going to buy one of those Kent Moore tools. I always get worried wedging a 1/2 breaker bar handle up in the inspection hole on the bellhousing.